 |
Dynasty 148 PBP Commentary |
Undercard bout
|
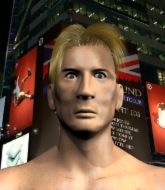
Coming up we have a light heavyweight kickboxing rules bout between Heinz Doofenshmirtz (ranked 0 p4p, 0 weight class) and Kamal Ziane (ranked 0 p4p, 0 weight class). Doofenshmirtz comes to the ring accompanied by Feuer Frei -by- Rammstein. Both these guys have solid standup skills and neither is particularly fantastic on the ground, so let's hope for a nice standup war!
 |
|
 |
| 187 cm
23
215 lbs
3 - 6 - 0 |
|
199 cm
22
223 lbs
0 - 0 - 0 |
World class MT
Cardio machine
|
|
World class MT
Good gas tank
|
|
| |
|
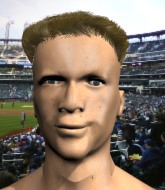
Ladies and gentlemen. This fight is 3 rounds, in the light heavyweight division.
Introducing the fighter to my left, fighting out of the red corner.
With a record of
3 - 6 - 0, fighting out of Tokyo, Heinz Doofenshmirtz!
And introducing the fighter to my right, fighting out of the blue corner.
With a record of
0 - 0 - 0, fighting out of Tokyo, Kamal Ziane!
The judges for this bout are Tatsuya Matsuyama, Shigeki Fujiwara and Yukihiro Yamamoto.

The bell rings for round one and we are underway!
Doofenshmirtz keeps his opponent at a distance with a nice jab.

It looks like Kamal Ziane has been cut.
Doofenshmirtz swats away the attempt to clinch by Ziane.
Ziane moves out of range of the body kick from Doofenshmirtz.
Ziane tries to clinch up against the ropes, rushing in the close the distance. Doofenshmirtz manages to break the clinch and circles back to the middle of the mat.
Doofenshmirtz tries a switch kick but it misses it's target.
Doofenshmirtz lands a jab to Ziane's midsection.
Doofenshmirtz misses with a head kick.
Heinz Doofenshmirtz seems to be the more aggressive standup fighter in this bout.
Doofenshmirtz scores with a jab.
Ziane will need to tighten up his combinations if he doesn't want to gas himself out, swinging at thin air.
Doofenshmirtz throws a nice looking combination but Ziane bobs and weaves to avoid any damage.
Doofenshmirtz takes a swing at Ziane's ribcage but misses.
Ziane blocks a head kick by Doofenshmirtz.
The fans in attendance giving it up for the two fighters, who have really let it all hang out in the last minute or so!
Doofenshmirtz lands a really nice looking cross but Ziane seems unphased.
Doofenshmirtz swings widly with a right hand
and Ziane counters with a straight right hand.
Doofenshmirtz connects with a slap. Keep your fist closed son.
Ziane checks a low kick from Doofenshmirtz.
Doofenshmirtz throws a looping overhand right but Ziane ducks down to avoid it.

That's one minute gone in the round.
Doofenshmirtz jabbing away but nothing is landing.
Ziane throws a head kick but Doofenshmirtz moves out of range.
Doofenshmirtz throws a lazy uppercut
and Ziane counters with a series of strikes. Doofenshmirtz will be more careful next time no doubt.
Doofenshmirtz connects with an inside leg kick.
Doofenshmirtz swings for the body but Ziane moves out of range.
Doofenshmirtz throws a hook but Ziane blocks it.
Doofenshmirtz misses with a straight left.
Doofenshmirtz avoids a punch combination nicely.
Doofenshmirtz throws an uppercut from half a mile away. Ziane sees it coming and avoids it easily.
Doofenshmirtz darts in and out, connecting with a jab.

Ziane is rocked!
Doofenshmirtz misses the jab.
Ziane is still on wobbly legs! Can Doofenshmirtz finish him?
Doofenshmirtz pulls out of a head kick attempt.
Ziane is looking to take this fight into the clinch.
Ziane seems to have recovered his senses.
Doofenshmirtz throws a wild body kick that Ziane sees coming a mile off.
Ziane tries to close the distance and clinch up against the ropes but Doofenshmirtz paws at him with a jab and circles away.

That's two minutes gone in the round.
Ziane takes a body punch but keeps moving.
The fans in attendance giving it up for the two fighters, who have really let it all hang out in the last minute or so!
A telegraphed right hand from Doofenshmirtz misses the target.
Jab, cross, leg kick. Nice combination by Ziane!
Ziane looks to score with a combo but nothing lands.
Ziane steps to the side to avoid the strikes from Doofenshmirtz.
A combination from Ziane does no damage.
Doofenshmirtz throws a couple of head shots and lands with the final one - a decent hook, which struck Ziane on the side of the head.
Doofenshmirtz misses with a body shot.
Doofenshmirtz tries to land with a swinging hook to the body but Ziane was well out of range. Poor timing from Doofenshmirtz.
Heinz Doofenshmirtz is looking to keep the fight on the feet at all costs.
Ziane slips a straight right by Doofenshmirtz.
Ziane tries to clinch but Doofenshmirtz moves out of range.
Ziane bobs and weaves and then throws a good body kick.
The crowd are going absolutely nuts as the round comes to an end - what a fantastic round of action!
Ziane keeping his hands up high there, blocking the jab from Doofenshmirtz.
Ziane tries to clinch but is not successful on this occasion.
Doofenshmirtz throws a decent looking leg kick but it doesn't land clean.
Ziane avoids the head kick by Doofenshmirtz.
And thats the end of the round the fighters go back to their corners.
Heinz Doofenshmirtz dominated that round.
The cut man is working on Kamal Ziane's cut.
OK. That's time! The bell goes and we're back to the action.

Doofenshmirtz misses with a wild body shot.
Doofenshmirtz throws out a token jab with nothing on it.
Ziane uses good head movement to avoid the hook from Doofenshmirtz.
Ziane misses with a two punch combination.
Doofenshmirtz throws a sloppy head kick and Ziane moves out of range easily.
Ziane takes a punch right to his stomach. That took the wind out of him momentarily.
Doofenshmirtz cracks Ziane with a good shot that sees him stumbling back into the ropes.
Kamal Ziane is looking to throw some combinations by the looks of things.
Ziane swinging wildly here.
Doofenshmirtz misses the shot to the body.
Doofenshmirtz misses with a body kick.
Doofenshmirtz keeps the fight on the outside.
Ziane is looking to clinch but Doofenshmirtz is avoiding it.
Doofenshmirtz misses with a wild combination.
Doofenshmirtz throws a feint and then finishes with a kick to the body.
The crowd cheering loudly, showing their appreciation for the quality fight we're seeing here.
Nice body punch from Doofenshmirtz.
That's one minute gone in the round.
Ziane ducks under an overhand right and circles away with a smile on his face.
An inside leg kick lands from Doofenshmirtz.
Doofenshmirtz misses with a straight right.
Doofenshmirtz dips down and scores with a jab to the body.
Doofenshmirtz throws a wild combination but nothing lands.
Ziane throws a series of punches but Doofenshmirtz moves out of range.

Doofenshmirtz drops a shoulder and throws a biiiig uppercut that drops Ziane onto his butt! Ziane pops straight back to his feet to convince the referee that he's OK to continue.
This is a great period of action - very entertaining stuff!
Ziane blocks a head kick by Doofenshmirtz.
Doofenshmirtz and Ziane are patiently standing in front of each other looking for an opening. Doofenshmirtz throws a head kick. It's landed, knocking Ziane into next week! Ooooh that was huge! Doofenshmirtz knows it - he's on the ropes flexing is biceps. That's a bit weird considering he won by kick but whatever.
Ladies and gentlemen, after 1:41 of round 2, we have a winner by way of KO (Head Kick). Heinz Doofenshmirtz!
Heinz Doofenshmirtz spent the whole post fight interview bigging himself up. It didn't go down that well with the fans after a while as they thought it was a bit arrogant.
|
|
|
|
|
|
|
|
|
|
|
|
|
|
|
|
|
|
|
|
|
|
|
| S |
C
A |
G |
S |
C
B |
G |
|
S |
C |
G |
|
energy
A | B |
|
hype
A | B |
|
pop
A | B |
|
mgr
A | B |
|
FIGHT
RATING
83% |
|
|
|
|
|
|
|
Undercard bout
|
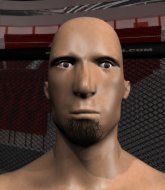
Coming up we have a super heavyweight kickboxing rules bout between Diaz Bros (ranked 0 p4p, 0 weight class) and Luke Choate (ranked 0 p4p, 0 weight class). Luke Choate is the more experienced fighter, so let's see if that makes a difference tonight.
 |
|
 |
| 210 cm
20
295 lbs
2 - 0 - 0 |
|
225 cm
22
300 lbs
1 - 4 - 0 |
World class MT
Insanely flexible
|
|
World class boxer
Good gas tank
|
|
| |
|
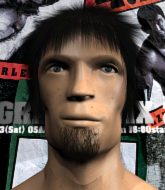
Ladies and gentlemen. This fight is 3 rounds, in the super heavyweight division.
Introducing the fighter to my left, fighting out of the red corner.
With a record of
2 - 0 - 0, fighting out of Las Vegas, Diaz Bros !
And introducing the fighter to my right, fighting out of the blue corner.
With a record of
1 - 4 - 0, fighting out of Tokyo, Luke Choate!
The judges for this bout are Hirohito Nitta, Yukihiro Shimada and Taro Takaoka.
The bell rings for round one and we are underway!
Choate goes for a spinning back kick but it misses.

Choate tries to keep at a distance but Bros has taken the fight into the clinch.
Bros creates a bit of distance and throws an elbow that only just misses.
Bros throws an elbow but it's blocked.
Bros lands an elbow just above Choate 's eye.
Bros lands an elbow just above Choate 's eye.
It looks like Luke Choate has been cut.
Choate blocks an elbow strike from Bros .
Choate can't break the clinch.
Choate is working hard here but doesn't seem to be able to control effectively, up against the ropes.
Bros throws an elbow but it misses.
Choate wants to stall.
With the two fighters working up against the ropes, Bros just misses with a elbow thrown towards Choate's brow.
That's one minute gone in the round.
Bros has Choate pressed against the ropes, preventing Choate from circling away and getting back to striking at range.
Bros avoids the elbow strike from Choate, against the ropes.
Choate is trying to work out of this bad position, with his back against the ropes.
Choate misses with a shot to the kidneys.
Choate looks like he'd prefer to be striking at range right now.
Nice elbow from Bros .
Bros lands a nice elbow.
Bros pushes off and fires off an elbow that misses, before clinching up again, against the ropes.
Choate is trying to work out of this bad position, with his back against the ropes.
Choate is trying to force a seperation but Bros has the dominant position.
Bros pushes off an throws an elbow but Choate leans to the side and avoids it. We're back to clinching against the ropes.
Bros throws an elbow that misses.
Choate misses with a hook to the ribs.
Bros lands a damaging elbow.
That has opened up Luke Choate's cut even more.
That's two minutes gone in the round.
Choate blocks an elbow strike from Bros .
Choate avoids a wild elbow strike from Bros .
Choate dodges an elbow strike from Bros .
Bros pushes off and fires off an elbow that misses, before clinching up again, against the ropes.
Choate dodges an elbow strike from Bros .
Bros lands an elbow just above Choate 's eye.
Bros looks to throw an elbow but misses.
Bros displaying some good clinch control by pressing Choate up against the ropes.
Choate tries to land a knee to the body but he is off balance and Bros avoids it.
The crowd applaud the fighters efforts here as the round comes to an end.
Bros prevents a body shot from Choate.
Nice elbow from Bros .
And thats the end of the round the fighters go back to their corners.
Diaz Bros dominated that round.
The cut man is working on Luke Choate's cut.
That's the end of the round. The referee orders the cornermen out of the ring so we can get back down to business.
That's a knee to de groin and it's over and out! Choate crumples to the ground after an illegal strike from Bros - the referee stops the clock and Choate gets 5 minutes to recover from that one. "I'm sorry" says Bros . Choate manages to get back to his feet and the fight resumes.
The cut above Luke Choate's eye is starting to cause him problems now.
Choate's jab looks to have found its range, popping Bros under the eye.
Bros lands a nice looking body kick.
The crowd cheering loudly, showing their appreciation for the quality fight we're seeing here.
Bros avoids a kick to the body.
Bros throws a head kick that connects with a bit of head and a bit of hand.
Choate throws a head kick that misses.
Bros rushes Choate and presses him up against the ropes.
Bros keeps the fight in the clinch, despite Choate's efforts to push away.
Choate blocks the elbow strike.
Bros lands a nice elbow from the clinch.
Luke Choate's cut is absolute horrible now. This looks like something out of a horror film with blood covering both fighters.
The referee calls the doctor in to look at Luke Choate's cut. Oh no, the doctor has called an end to the bout!
Ladies and gentlemen, after 0:50 of round 2, we have a winner by way of TKO (Cut). Diaz Bros !
A very excited looking Diaz Bros rambled incoherently for about 5 minutes post fight about how awesome he is. It was kinda funny for a while but then everyone got annoyed.
|
|
|
|
|
|
|
|
|
|
|
|
|
|
|
|
|
|
|
|
|
|
|
| S |
C
A |
G |
S |
C
B |
G |
|
S |
C |
G |
|
energy
A | B |
|
hype
A | B |
|
pop
A | B |
|
mgr
A | B |
|
FIGHT
RATING
63% |
|
|
|
|
|
|
|
Undercard bout
|
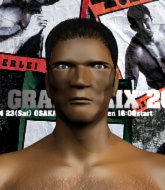
Coming up we have a middleweight kickboxing rules bout between Overeem Blackzilian (ranked 0 p4p, 0 weight class) and Tai Kiki Tangata Kohuru (ranked 0 p4p, 0 weight class). Tangata Kohuru has chosen ACID TRIP as his entrance music. Tai Kiki Tangata Kohuru has the better chin. Will he look to stand and bang today?
 |
|
 |
| 192 cm
22
200 lbs
4 - 3 - 0 |
|
188 cm
25
199 lbs
6 - 4 - 0 |
Dangerous knees
Very strong
|
|
Excellent MT
Solid chin
|
|
| |
|
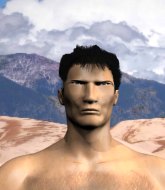
Ladies and gentlemen. This fight is 3 rounds, in the middleweight division.
Introducing the fighter to my left, fighting out of the red corner.
With a record of
4 - 3 - 0, fighting out of Hilo, Overeem Blackzilian!
And introducing the fighter to my right, fighting out of the blue corner.
With a record of
6 - 4 - 0, fighting out of Tokyo, Tai Kiki Tangata Kohuru!
The judges for this bout are Shigeki Sano, Yukihiro Yamamoto and Shirou Masuda.
The bell rings for round one and we are underway!
Tangata Kohuru scores with a leg kick.
Blackzilian takes a shot to the nose. Hopefully that hasn't broken it.
Blackzilian misses with a jab, cross combination.
Blackzilian drops his hands momentarily and Tangata Kohuru takes advantage with a crisp shot to the head.
Tangata Kohuru tries to land with a swinging hook to the body but Blackzilian was well out of range. Poor timing from Tangata Kohuru.
Blackzilian misses with an attempted mid kick.
Blackzilian misses with a body kick.
Blackzilian throws a quick head kick that skims the top of Tangata Kohuru's head.
Blackzilian throws a head kick but Tangata Kohuru moves out of range.
Tangata Kohuru fails with an attempt to clinch.
Tangata Kohuru wants to clinch
and Blackzilian counters with a nice body kick.
This is a great period of action - very entertaining stuff!
Blackzilian misses with a leg kick
and Blackzilian takes a counter punch right on the button for his troubles.
Blackzilian misses with a low kick as Tangata Kohuru jumps back.
That's one minute gone in the round.
Blackzilian tries a head kick but it misses.
Blackzilian lands with a head kick! That's gotta hurt.
Blackzilian throws a push kick but Tangata Kohuru slaps the foot to one side.
Blackzilian scoring well with a low kick there.
Tangata Kohuru swings and misses with a shot to the body
letting Blackzilian counter with a right hand.
Tangata Kohuru with a nice cross.
Tangata Kohuru blocks a head kick by Blackzilian.
Blackzilian lands with a kick to the ribs.
This has been an exciting period of action!
Tangata Kohuru throws a hook to the side of Blackzilian's head but Blackzilian sees it coming and ducks under it beautifully.
Tangata Kohuru cracks Blackzilian with a hook to the jaw. Both fighters smile at eachother and high-five before getting back down to business.
Ooooh, nice body kick lands from Blackzilian. Tangata Kohuru shrugs it off though.
Blackzilian lands a leg kick and bounces back out of range.
That's two minutes gone in the round.
Blackzilian misses with a half-hearted attempt at a head kick.
Blackzilian attempts a low kick but it misses it's target.
Tangata Kohuru tries to clinch up.
Tangata Kohuru takes a push kick to the midsection and stumbles backwards.
Tangata Kohuru slips under a jab.
Overeem Blackzilian seems to be the more aggressive standup fighter in this bout.
Tangata Kohuru takes a head kick and keeps coming.
Tangata Kohuru looks to clinch
and Blackzilian counters with a body kick that stops Tangata Kohuru in his tracks momentarily.
Blackzilian misses with a head kick.
The crowd are going absolutely nuts as the round comes to an end - what a fantastic round of action!
Blackzilian scores with a head kick. Tangata Kohuru tried to block it but didn't get his arm up in time.
Blackzilian defending well as Tangata Kohuru loads up on a big left hand.
Tangata Kohuru connects with a body shot.
And thats the end of the round the fighters go back to their corners.
Overeem Blackzilian dominated that round.
The fighters' corners scream their final instructions, as the referee calls time. Here we go, back to the action!
Tangata Kohuru takes a step back and watches a body kick go sailing past his mid section.
Blackzilian misses with an attempted mid kick.
Blackzilian fakes the leg kick and cracks Tangata Kohuru in the body.
Blackzilian takes a swing at Tangata Kohuru's ribcage but misses.
Blackzilian throws a leg kick
and Tangata Kohuru counters with a nice uppercut.
Tangata Kohuru misses with a looping left.
Blackzilian misses with a low kick.
A bone on bone clash there as Tangata Kohuru blocks the leg kick.
Blackzilian throws a nice head kick!
Tangata Kohuru darts in and out, connecting with a jab.
A head kick misses from Blackzilian.
Blackzilian ducks under a wild hook from Tangata Kohuru.
That's one minute gone in the round.
Blackzilian throws a chopping leg kick but Tangata Kohuru manages to avoid taking any serious damage.
Tangata Kohuru avoids the head kick by Blackzilian.
Tangata Kohuru blocks a leg kick.
Blackzilian misses with a half-hearted attempt at a head kick.
Blackzilian misses with a body shot.
Tangata Kohuru closes the distance looking to clinch
and Blackzilian counters with a good low kick that Tangata Kohuru was not able to check.
Tangata Kohuru throws a shot from downtown. Blackzilian moves away and avoids it.
Blackzilian closes the distance and clinches.
Tangata Kohuru takes a knee right on the jaw!
Blackzilian tries a knee to the head but Tangata Kohuru blocks it.
That's two minutes gone in the round.
Tangata Kohuru lands an uppercut.
Blackzilian using the Thai plumb to throw knees but Tangata Kohuru has his back arched nicely, preventing the strike.
Tangata Kohuru lands an elbow inside that Blackzilian shrugs off.
Tangata Kohuru lands a nice elbow.
Blackzilian trying to land knees to the body.
Tangata Kohuru blocks a knee to the body. He'll have a nicely bruised forearm in the morning.
Tangata Kohuru misses with an elbow over the top.
Tangata Kohuru has developed a nice purple lump on his ribcage, as a result of some heavy body kicks from Blackzilian.
A short right from Tangata Kohuru on the inside.
Blackzilian tries to land a knee to the head but misses.
Tangata Kohuru lands an elbow just above Blackzilian 's eye.
Tangata Kohuru throws an elbow but it misses.
Tangata Kohuru looks to throw an elbow but misses.
Tangata Kohuru throws a nice elbow but it doesn't land.
We've seen a great period of action over the last minute or so - credit to both fighters for going all out!
Tangata Kohuru scores with a nice hook to the head.
Blackzilian using the Thai plumb to throw knees but Tangata Kohuru has his back arched nicely, preventing the strike.
As the round comes to an end the crowd are showing their appreciation for a great round of action.
Blackzilian tries a knee to the head but he's missed.
Blackzilian tries a knee to the head but Tangata Kohuru blocks it.
Blackzilian tries a knee to the head but he's missed.
Both fighters are absolutely exhausted here.
Tangata Kohuru misses with a punch on the inside.
And thats the end of the round the fighters go back to their corners.
Overeem Blackzilian dominated that second round.
The fighters' corners scream their final instructions, as the referee calls time. Here we go, back to the action! This is the final round!

Tangata Kohuru moves to clinch but Blackzilian breaks away
and Blackzilian finishes the little exchange by landing a big kick to the body.
Blackzilian defending well as Tangata Kohuru loads up on a big left hand.
Tangata Kohuru throws a monster uppercut resembling something out of street fighter but it doesn't land.
Tangata Kohuru looks for the body kick but Blackzilian saw that one coming.
Tangata Kohuru is looking to clinch.
Tangata Kohuru cracks Blackzilian with a good shot that sees him stumbling back into the ropes.
Blackzilian motions for Tangata Kohuru to come forward. Blackzilian throws a leg kick but it misses it's target.
Blackzilian misses with a leg kick
letting Tangata Kohuru counter with a right hand.
Blackzilian slips under a jab from Tangata Kohuru.
Blackzilian throws a front kick aimed at Tangata Kohuru's knee but Tangata Kohuru avoids it well.
Tangata Kohuru tries to clinch but Blackzilian is having none of it.
That's one minute gone in the round.
Tangata Kohuru tries to clinch up
and Blackzilian counters with a body kick that stops Tangata Kohuru in his tracks momentarily.
Blackzilian rushes Tangata Kohuru and presses him up against the ropes.
Blackzilian misses with a knee strike.
Blackzilian tries a knee to the head but Tangata Kohuru blocks it.
Blackzilian with the Thai clinch. He's looking to land a big knee but he's not managed it this time.
Blackzilian tries to land a knee to the body but he is off balance and Tangata Kohuru avoids it.
Blackzilian using the Thai plumb to throw knees but Tangata Kohuru has his back arched nicely, preventing the strike.
Blackzilian with an attempt at a knee that misses.
Blackzilian utilising his Muay Thai to score with a knee to the body.
Tangata Kohuru throws an elbow that misses.
Tangata Kohuru throws a punch but it's blocked by Blackzilian.
Blackzilian tries to land a knee to the head but misses.
Tangata Kohuru creates a bit of distance and throws an elbow that only just misses.
That's two minutes gone in the round.
With the fighters up against the ropes, Tangata Kohuru throws an elbow but misses.
Blackzilian throws a knee to the head but misses.
Tangata Kohuru misses with a punch on the inside.
Tangata Kohuru avoiding damage as Blackzilian throws knees to the body.
A short right hand to the side of the head by Tangata Kohuru.
Blackzilian throws a vicious knee straight up the middle but Tangata Kohuru blocks it with crossed arms.
Both fighters are breathing heavily.
Fantastic stuff here - a very entertaining period of action, which has drawn cheers from the crowd.
Blackzilian tries to land a knee to the head but Tangata Kohuru blocks with his arms.
Blackzilian is looking to score with knees to the body. Maybe he'll change it up and go body then head. Tangata Kohuru is defending well for now.
Tangata Kohuru throws an elbow but it's blocked.
Blackzilian with the Thai clinch. He's looking to land a big knee but he's not managed it this time.
Tangata Kohuru throws an elbow but it misses.
Tangata Kohuru has a couple of punches blocked by Blackzilian.
Blackzilian looking to throw knees to the head but Tangata Kohuru is blocking nicely.
Blackzilian using the Thai plumb to throw knees but Tangata Kohuru has his back arched nicely, preventing the strike.
As the round comes to an end the crowd are showing their appreciation for a great round of action.
Tangata Kohuru pushes off an throws an elbow but Blackzilian leans to the side and avoids it. We're back to clinching against the ropes.
The fighters are starting to get sweaty, which will make takedowns a bit more tricky.
Still in the clinch, Tangata Kohuru scores with a nice short uppercut.
Tangata Kohuru throws a nice elbow but it doesn't land.
Tai Kiki Tangata Kohuru has stepped it up - he knows he needs a finish here!
Overeem Blackzilian is fighting for a decision here - he's started to take the cautious approach.
Blackzilian blocks an elbow strike.
Tangata Kohuru creates a bit of distance and throws an elbow that only just misses.
And that's the end of the fight!
That was a close round. You could make an argument for either fighter but I would give it to Overeem Blackzilian.
Well Blackzilian has outscored his opponent in every aspect of the fight today. Only a scarily incompetent judge or two will keep him from a well deserved win... Over to the ring announcer for the scorecards.
Ladies and gentlemen, after 3 rounds of action, we go to the scorecards for a decision.
Judge Shigeki Sano scores the fight 30:27
Judge Yukihiro Yamamoto scores the fight 30:27
Judge Shirou Masuda scores the fight 30:27
In favor of your winner, by unanimous decision... Overeem Blackzilian!
|
|
|
|
|
|
|
|
|
|
|
|
|
|
|
|
|
|
|
|
|
|
|
| S |
C
A |
G |
S |
C
B |
G |
|
S |
C |
G |
|
energy
A | B |
|
hype
A | B |
|
pop
A | B |
|
mgr
A | B |
|
FIGHT
RATING
78% |
|
|
|
|
|
|
|
Undercard bout
|
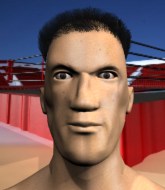
Coming up we have a welterweight kickboxing rules bout between Commodore Perry (ranked 0 p4p, 0 weight class) and Vin Sear (ranked 0 p4p, 0 weight class). Man, I cannot wait for this one!
 |
|
 |
| 185 cm
29
184 lbs
13 - 10 - 0 |
|
178 cm
28
180 lbs
18 - 8 - 0 |
World class MT
Insanely flexible
|
|
World class MT
Good gas tank
|
|
| |
|
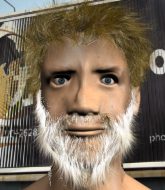
Ladies and gentlemen. This fight is 5 rounds, in the welterweight division.
Introducing the fighter to my left, fighting out of the red corner.
With a record of
13 - 10 - 0, fighting out of Tokyo, Commodore Perry!
And introducing the fighter to my right, fighting out of the blue corner.
With a record of
18 - 8 - 0, fighting out of New York, Vin Sear!
The judges for this bout are Kenichi Hosakawa, Yuuki Gou and Tatsuya Matsuyama.
The bell rings for round one and we are underway!
Sear lands a nice looking body shot.
Perry misses with a body shot. Nice footwork from Sear.
Perry drives through and clinches with Sear against the ropes.
Perry avoids the elbow strike from Sear, against the ropes.
Perry blocks an elbow strike.
Perry blocks an elbow strike.
Perry misses with a knee strike.
With the two fighters working up against the ropes, Sear just misses with a elbow thrown towards Perry's brow.
With the two fighters working up against the ropes, Sear just misses with a elbow thrown towards Perry's brow.
Sear pushes off and fires off an elbow that misses, before clinching up again, against the ropes.
Perry tries to land a shot to the body but it's blocked.
With the two fighters working up against the ropes, Perry just misses with a elbow thrown towards Sear's brow.
Sear lands an elbow inside that Perry shrugs off.

It looks like Commodore Perry has been cut.
Perry avoids a wild elbow strike from Sear.
Both fighters working to control the clinch.
Perry tries a body shot but Sear blocks it.
Perry avoids a wild elbow strike from Sear.
Still in the clinch, Perry scores with a nice short uppercut.
Sear pushes off an throws an elbow but Perry leans to the side and avoids it. We're back to clinching against the ropes.
A knee to the head by Perry.
Perry throws a vicious knee straight up the middle but Sear blocks it with crossed arms.
Sear on the defensive, avoiding the knees to the body.
That's one minute gone in the round.
Sear misses with an elbow strike.
Sear takes a knee to the side of the body.
Perry pushes Sear back against the ropes and lands a hook to the side of the head.

Perry breaks the clinch and we return to the middle of the mat.
A solid leg kick lands there for Perry.
Perry walks into a left hand.
Perry keeps the fight on the outside.
Good standup being displayed there by Perry as he connects with a hook.
Perry pushes Sear up against the ropes in a clinch.
The crowd are loving this. Great action here.
Perry scores with an uppercut up the middle.
Perry stalling against the ropes.
A real battle for position is taking place between these two warriors.
With the fighters up against the ropes, Sear throws an elbow but misses.
Perry lands with a quick shot inside that doesn't really do much damage.
Sear is rocked!
Perry with an attempt at a knee that misses.
Sear is still on wobbly legs! Can Perry finish him?
Perry misses the knee to the body. Nice hip positioning from Sear.
Sear seems to have recovered his senses.
Perry tries a shoulder strike but it doesn't do any damage.
That's two minutes gone in the round.
Sear tries to land a knee to the body but he is off balance and Perry avoids it.
Perry comes over the top with an elbow. That landed flush.
Perry lands a shoulder strike that jolts his opponent's head backwards.
Perry lands a nice knee to the body.
Perry missing with knees to the body.
Perry blocks an elbow strike from Sear.
Perry lands an elbow just above Sear 's eye.
Perry lands an elbow inside that Sear shrugs off.
Perry goes for a body shot but it's blocked.
Sear pushes off and fires off an elbow that misses, before clinching up again, against the ropes.
Perry trying to land knees to the body.
Perry lands a nice shot to the body.
With the fighters up against the ropes, Sear throws an elbow but misses.
Perry lands a right uppercut that snaps the head of Sear backwards.
Perry avoids the elbow strike from Sear, against the ropes.
The crowd are going absolutely nuts as the round comes to an end - what a fantastic round of action!
Sear prevents a body shot from Perry.
Perry on the defensive, avoiding the knees to the body.
Sear looks to throw an elbow but misses.
Perry breaks the clinch and we're back to striking at distance.
Sear misses with a looping left.
And thats the end of the round the fighters go back to their corners.
Commodore Perry dominated that round.
The cut man is working on Commodore Perry's cut.
The fighters' corners scream their final instructions, as the referee calls time. Here we go, back to the action!
Perry has Sear up against the ropes in a clinch.
Commodore Perry has scored more points in the clinch so far.
Sear pushes off and fires off an elbow that misses, before clinching up again, against the ropes.
Sear misses with an elbow over the top.
Sear with the Thai clinch. He's looking to land a big knee but he's not managed it this time.
Sear throws an elbow but it's blocked.
Perry is trying to work out of this bad position, with his back against the ropes.
Perry tries to break the clinch but Sear is controlling the position.
Perry blocks an elbow strike from Sear.
Perry avoids the elbow strike from Sear, against the ropes.
Perry blocks a knee to the body. He'll have a nicely bruised forearm in the morning.
Perry tries to land a shot to the body but it's blocked.
Perry looks to throw an elbow but misses.
Perry lands a nice elbow from the clinch.
Sear looks to throw an elbow but misses.
Perry pushes off and circles away, back to the middle of the mat.
Perry throws a nice looking combination but Sear bobs and weaves to avoid any damage.
Perry is looking to land body kicks.
Perry lands with a shot to the body.
Perry feints with a shoulder and throws a nice leg kick to Sear's calf.
That's one minute gone in the round.
Perry misses with a kick to the body.
Sear lands a powerful looking uppercut that connected with his opponent's jaw.
Perry lands with a cross to side of his opponent's head.
Perry wants to clinch up but Sear keeps it at a distance.
The fight stays on the outside here - Perry looks like he's thinking about clinching though.
Perry just misses with a punch to the body.
Perry is looking to chop away at Sear's legs.
Sear avoids the body shot from Perry.
Sear misses with a wild body shot.
Perry changes levels and scores with a jab to the body.
That's a knee to de groin and it's over and out! Perry crumples to the ground after an illegal strike from Sear - the referee stops the clock and Perry gets 5 minutes to recover from that one. "I'm sorry" says Sear. Perry manages to get back to his feet and the fight resumes.
Perry throws a head kick that misses and slips in the process. He scrambles back to his feet and the fighters circle.
Perry slips a jab from Sear.
Sear walks into a left hand.
That's two minutes gone in the round.
Perry throws a shot to the body.
This has been an exciting period of action!
Perry throws a low kick but Sear avoids it.
Sear rushes in with a sloppy looking punch
and Sear takes a counter punch right on the button for his troubles.
Good leg kick by Perry there. It's the ones that make that thud noise that hurt and that was an almighty thud.
Commodore Perry is winning the standup battle so far.
Sear throws the kick towards the body but Perry avoids it.
Perry defending well as Sear loads up on a big left hand.
Sear swings wildly with a right hand that was never going to find it's target.
Perry pulls out of a head kick attempt.
The fighters are going at a pretty good pace and they're both starting to sweat now.
Perry misses the jab.
Perry blocks a low kick nicely.
A shot to the body from Perry misses
and Sear counters with a nice uppercut.
The crowd are going absolutely nuts as the round comes to an end - what a fantastic round of action!
Sear defending well as Perry loads up on a big left hand.
Sear swings for the body but Perry moves out of range.
Perry thuds his shin into the meat of Sear's side.
Perry lands with a cross.
And thats the end of the round the fighters go back to their corners.
Commodore Perry dominated that second round.
The cut man is working on Commodore Perry's cut.
That's the end of the interval. I'm sure that seemed a lot quicker than a minute for our two fighters! Back to the action.

Sear has closed the distance and engaged Perry in a clinch.
Sear pushes off an throws an elbow but Perry leans to the side and avoids it. We're back to clinching against the ropes.
Sear misses with an elbow over the top.
Sear misses with an elbow over the top.
Perry blocks an elbow strike from Sear.
Perry misses with a knee to the head.
Perry is looking to score with knees to the body. Maybe he'll change it up and go body then head. Sear is defending well for now.
Good anti-grappling being displayed by Perry as Sear tries to tie him up.
Sear lands an elbow that stopped Perry in his tracks for a moment.
Perry throws an elbow but it's blocked.
Perry tries to work over Sear's body with a swooping hook but it only glances the target.
Sear looking to slow down the pace here.
Perry scores with an uppercut up the middle.
Perry lands a nice elbow.
Sear tries to land a knee to the body but he is off balance and Perry avoids it.
Perry escapes the clinch and we're back to striking.
Perry misses with a hook. Sear ducked under it nicely.
That's one minute gone in the round.
Sear misses the jab.
Perry moves into range and clinches up with Sear.
Perry looking to stall.
Perry lands an elbow inside.
Sear tries to land a knee to the body but he is off balance and Perry avoids it.
Sear avoids the elbow strike from Perry, against the ropes.
Perry creates a bit of distance and throws an elbow that only just misses.
Sear lands with a quick shot inside that doesn't really do much damage.
Sear throws an elbow that misses.
Perry tries to land a shot to the body but it's blocked.
Perry looks to throw an elbow but misses.
Perry lands with a short shot to the head.
Sear misses with an elbow strike.
Sear tries a knee to the head but he's missed.
Perry lands a hook to the body. It's hard to tell if that hurt Sear or not.
Perry lands an elbow inside that Sear shrugs off.
The crowd are loving this. Great action here.
Perry landing some nice looking knees to the body.
Sear takes a big intake of breath there - he's definitely tired.
Sear blocks a knee to the body. He'll have a nicely bruised forearm in the morning.
That's two minutes gone in the round.
Perry lands with a right to the head.
Perry is trying to wear down his opponent with knees to the body.
Perry lands an elbow just above Sear 's eye.
Nice body punch from Perry.
Perry connects with a nasty looking knee right to Sear's face.
A nice glancing elbow lands by Sear.
Perry blocks an elbow strike from Sear.
Perry escapes the clinch and we're back to striking.
Sear tries to clinch there but Perry circles away.
Perry fakes and then throws a beautiful body shot. Sear looks a bit winded and takes a step backwards to take a breath.
Perry bobbing and weaving, closes the distance and lands a hook to the side of Sear's head.
Perry scores with a kick to the body.
Sear moves in looking to clinch but Perry pushes him off.
The crowd are going absolutely nuts as the round comes to an end - what a fantastic round of action!
Perry lands a straight punch to the body, keeping Sear at a distance.
A cross from Perry lands.
Sear thows a body shot but no joy.
And thats the end of the round the fighters go back to their corners.
Commodore Perry clearly takes that round.
The cut man is working on Commodore Perry's cut.
The minute break is over - no more time for sponges and pep talks - back to the action!

Perry moves out of range as Sear strikes.
Perry uses good footwork to get in and out and land a nice right hand before Sear has time to react.
Sear misses with a hook. Perry ducked under it nicely.
Sear tries a head kick but it misses.
Sear chopped to the floor by a nice leg kick but he springs right back up before Perry can pounce on him.
Sear tries to clinch but Perry is having none of it.
Sear blocks a head kick by Perry.
Perry throws a sloppy head kick and Sear moves out of range easily.
Perry cracks Sear with an open hand slap.
Perry bobbing and weaving, closes the distance and lands a hook to the side of Sear's head.
Perry lands with a nice low kick. That'll leave a bruise.
Sear tries to close the distance and clinch but Perry swats him to one side with an open hand palm strike and circles away.
A slapping leg kick lands for Sear.
Perry is using his height advantage well here, landing a good percentage of his punches.
Sear digs a good hook to Perry's body.
Sear tries to land with a swinging hook to the body but Perry was well out of range. Poor timing from Sear.
That's one minute gone in the round.
Perry throws a nice looking combination but Sear bobs and weaves to avoid any damage.
Sear needs to keep his hands up - Perry had a free shot at his head there.
Sear finds nothing but air with that leg kick attempt.
Perry looks to land a right hand but Sear moved out of range.
Nice uppercut lands for Perry. That snapped Sear's head back.
Perry attempts a low kick but it misses it's target.
Donk. Perry catches Sear right on the button with a cross.
Perry fakes high and swings low for a body shot but Sear manages to avoid it.
Perry walks forward and throws out a flicking leg kick. Sear checks it nicely though, as he moves to the side.
Sear drops his hands momentarily and Perry takes advantage with a crisp shot to the head.
Sear lands with a right hand.
Sear misses the shot to the body.
Perry ducks down and throws a hook to the body but Sear moves away.
Perry throws a hook to the body but it doesn't connect.
Sear tries to clinch but is not successful on this occasion.
That's two minutes gone in the round.
Sear tries to close the distance and clinch up but Perry swats him away and circles back towards the center.
Sear gets a clinch.
Perry avoids the elbow strike from Sear, against the ropes.
Sear pushes off and fires off an elbow that misses, before clinching up again, against the ropes.
The fans in attendance giving it up for the two fighters, who have really let it all hang out in the last minute or so!
Perry creates a bit of space for himself and sneaks an elbow through Sear's defenses.
A battle for position here, against the ropes.
Perry avoids the elbow strike from Sear, against the ropes.
Perry is looking to score with knees to the body. Maybe he'll change it up and go body then head. Sear is defending well for now.
Perry blocks an elbow strike.
Nice body punch from Perry.
With the fighters up against the ropes, Sear throws an elbow but misses.
With the fighters up against the ropes, Sear throws an elbow but misses.
As the round comes to an end the crowd are showing their appreciation for a great round of action.
Perry blocks the elbow strike.
With the two fighters working up against the ropes, Sear just misses with a elbow thrown towards Perry's brow.
Perry goes for a body shot but it's blocked.
Perry lands an elbow just above Sear 's eye.
And thats the end of the round the fighters go back to their corners.
Commodore Perry had his way with Vin Sear in that round.
The cut man is working on Commodore Perry's cut.
That's the end of the interval. I'm sure that seemed a lot quicker than a minute for our two fighters! Back to the action. This is the final round!

Sloppy strikes from Perry. Those never looked like landing.
Vin Sear has stepped it up - he knows he needs a finish here!
Perry ducks down and throws a hook to the body but Sear moves away.
Sear lands the left hand.
Perry pushes Sear up against the ropes in a clinch.
Sear throws an elbow but it's blocked.
Sear creates a bit of distance and throws an elbow that only just misses.
Perry can't find room to land a body shot as Sear controls the action.
Sear on the defensive, avoiding the knees to the body.
Perry lands a shoulder strike that jolts his opponent's head backwards.
Sear comes over the top with an elbow. That landed flush.
Perry blocks an elbow strike.
Perry lands a right hand that snaps the head of Sear backwards.
Sear is looking to score with knees to the body. Maybe he'll change it up and go body then head. Perry is defending well for now.
Perry lands a body punch - he's looking to wear down Sear.
The fans in attendance giving it up for the two fighters, who have really let it all hang out in the last minute or so!
Perry avoiding damage as Sear throws knees to the body.
Sear is wobbling all over the place through exhaustion. Will he make it to the final bell?
Sear looking to throw knees to the head but Perry is blocking nicely.
Perry working Sear over with knees to the body.
Perry is leaning against Sear and scores with a nice uppercut to the body.
That's one minute gone in the round.
Perry breaks from the clinch.
Perry has taken the fight to the clinch.
Perry pushes Sear back against the ropes and lands a hook to the side of the head.
Perry lands with a good tight uppercut to the head.
Perry pushes off and circles away, back to the middle of the mat.
Perry tries to clinch there but Sear circles away.
A slapping leg kick lands for Perry.
Perry connects with a body shot that sends Sear's belly button to the back.
Sear chopped to the floor by a nice leg kick but he springs right back up before Perry can pounce on him.
Perry is looking to take this fight into the clinch.
Perry gets to the clinch - let's see what his plan is here.
Perry breaks the clinch.
Perry keeping a good distance there, avoiding the body shot.
Perry swats away the attempt to clinch by Sear.
That's two minutes gone in the round.
Perry moves into range and lands a nice leg kick.
Sear throws a looping overhand right but Perry ducks down to avoid it.
Perry lands a pitter patter jab to the forehead of his opponent.
This is a great period of action - very entertaining stuff!
Boom, another hit is landed. "You're gunna get knocked out" taunts Perry, as that shot connected.
Perry misses with a series of wild punches.
Perry lunges at Sear with a hook that half lands and is half blocked by Sear's hand.
Perry tries to clinch up.
Perry lands a kick to the ribs of his opponent. Nice work there - in and out in a flash.
Nice cross by Perry.
The crowd are going absolutely nuts as the round comes to an end - what a fantastic round of action!
Perry scores with a nice right hand.
A jab from Sear misses.
Nice defenses there by Sear.
And that's the end of the fight!
Commodore Perry showed his dominance in that final round.
Well Perry has outscored his opponent in every aspect of the fight today. Only a scarily incompetent judge or two will keep him from a well deserved win... Over to the ring announcer for the scorecards.
Ladies and gentlemen, after 5 rounds of action, we go to the scorecards for a decision.
Judge Kenichi Hosakawa scores the fight 50:45
Judge Yuuki Gou scores the fight 50:45
Judge Tatsuya Matsuyama scores the fight 50:45
In favor of your winner, by unanimous decision... Commodore Perry!
|
|
|
|
|
|
|
|
|
|
|
|
|
|
|
|
|
|
|
|
|
|
|
| S |
C
A |
G |
S |
C
B |
G |
|
S |
C |
G |
|
energy
A | B |
|
hype
A | B |
|
pop
A | B |
|
mgr
A | B |
|
FIGHT
RATING
100% |
|
|
|
|
|
|
|
Undercard bout
|
Coming up we have a bantamweight kickboxing rules bout between Rodney Ruxin (ranked 0 p4p, 0 weight class) and Sydney Bussel (ranked 0 p4p, 0 weight class). Ruxin comes to the ring accompanied by Hero. Well, I have no idea who's going to take this one!
 |
|
 |
| 178 cm
23
143 lbs
6 - 12 - 0 |
|
175 cm
25
135 lbs
16 - 9 - 2 |
World class boxer
Cardio machine
|
|
World class MT
Granite chin
|
|
| |
|
Ladies and gentlemen. This fight is 5 rounds, in the bantamweight division.
Introducing the fighter to my left, fighting out of the red corner.
With a record of
6 - 12 - 0, fighting out of Montreal, Rodney Ruxin!
And introducing the fighter to my right, fighting out of the blue corner.
With a record of
16 - 9 - 2, fighting out of Tokyo, Sydney Bussel!
The judges for this bout are Taro Takaoka, Tatsuya Matsuyama and Yuuki Gou.
The bell rings for round one and we are underway!
Ruxin will need to tighten up his combinations if he doesn't want to gas himself out, swinging at thin air.
Bussel doesn't manage to clinch there - Ruxin circles away.
Ruxin lands a jab. Then a cross. Then finally a nice hook to the body. Good work there by Ruxin.
Ruxin throws a combination. Bussel tries to block but a couple of punches get through.
Ruxin misses with a two punch combination.
Ruxin misses with an uppercut
and Bussel counters with an outside leg kick.
An inside leg kick lands from Bussel.
Bussel keeping a good distance there, avoiding the body shot.
Bussel wants to land a leg kick but Ruxin is out of range.
No joy there for Ruxin, who threw a few shots but didn't land.
Ruxin lands a jab to Bussel's midsection.
Bussel fails with an attempt to clinch.
Bussel ducks under an overhand right and circles away with a smile on his face.
A combination from Ruxin does no damage.
Ruxin looks to land a combination. Bussel sees it coming but can only parry a couple of the shots.
Ruxin looks to score with a combo but nothing lands.
Ruxin swings away with a body shot that misses
and Bussel counters with a body kick that stops Ruxin in his tracks momentarily.
That's one minute gone in the round.
Ruxin just misses with a punch to the body.
Bussel dodges the punch combination from Ruxin.
Good leg kick by Bussel there. It's the ones that make that thud noise that hurt and that was an almighty thud.
Ruxin lands a jab. Then a cross. Then finally a nice hook to the body. Good work there by Ruxin.
Bussel throws a head kick that misses and slips in the process. He scrambles back to his feet and the fighters circle.
Ruxin misses with a few strikes there.
A thudding body kick lands there by Bussel!
Bussel rushes Ruxin and presses him up against the ropes.
Ruxin is looking to break free of the clinch but Bussel has double underhooks.
Ruxin tries to throw a body punch but Bussel avoids it by throwing Ruxin back against the ropes.
Bussel putting his Muay Thai to good use. He has Ruxin in a tight clinch and is doing some damage with knees to the body.
A battle for position here, against the ropes.
Bussel scores with a knee to the head.
Ruxin wants to push off and get back to the center of the mat but Bussel has him pressed against the ropes.
Ruxin has had enough of the clinch but Bussel keeps him there for the moment.
Bussel utilising his Muay Thai to score with a knee to the body.
Ruxin is breathing heavily.
The crowd are loving this. Great action here.
Ruxin wants to strike at distance but he can't break free of the clinch.
That's two minutes gone in the round.
Ruxin avoiding damage as Bussel throws knees to the body.
Ruxin working hard to break the clinch.

Bussel escapes the clinch and we're back to striking.
Bussel fails in his attempt to clinch.
Bussel clinches.
Ruxin tries to work over Bussel's body with a swooping hook but it only glances the target.
Bussel's corner calls for him to break the clinch, which he does.
Thud! ouch! good body kick from Bussel - that will leave a mark!
Ruxin looks to land a combination but Bussel avoids it well.
Bussel takes an uppercut right on the jaw but it doesn't phase him.
Bussel connects with a leg kick. Ruxin looked like he was expecting something else and didn't defend it.
Bussel clinches.
The crowd are going absolutely nuts as the round comes to an end - what a fantastic round of action!
Ruxin being controlled against the ropes.
Ruxin takes a knee to the side of the body.
Bussel's corner calls for him to break the clinch, which he does.
And thats the end of the round the fighters go back to their corners.
Sydney Bussel dominated that round.
Well, the break between rounds is over. Let's get back to the scrappin!
Bussel fakes with an overhand right and moves in to clinch with Ruxin, pushing him back against the ropes.
Ruxin is trying to break free.
Ruxin misses with a hook from the clinch.
Bussel is a painfully thin specimen of a man. You do wonder whether a good body kick would snap him clean in two.
Bussel crunches a lovely knee into Ruxin's ribcage.
Bussel landing some nice looking knees to the body.
Ruxin looks like he'd prefer to be striking at range right now.
Bussel pushes off an throws an elbow but Ruxin leans to the side and avoids it. We're back to clinching against the ropes.
A real battle for position is taking place between these two warriors.
Knees to the body from Bussel.
Bussel breaks the clinch and we're back to striking at distance.
A solid leg kick lands there for Bussel.
Rodney Ruxin is looking to throw some combinations by the looks of things.
Bussel closes the distance and presses his opponent up against the ropes.
Bussel keeps the fight in the clinch, despite Ruxin's efforts to push away.
Sydney Bussel seems to be working more effectively in the clinch in the fight so far.
Ruxin wants to get back to striking at distance but Bussel won't allow it.
The fans in attendance giving it up for the two fighters, who have really let it all hang out in the last minute or so!
Bussel misses the knee to the body. Nice hip positioning from Ruxin.
Ruxin is trying to break the clinch but Bussel has him pressed against the ropes.
Both fighters working to control the clinch.
That's one minute gone in the round.
Ruxin takes a knee to the side of the body.
Ruxin wants to strike at distance but he can't break free of the clinch.
Bussel with a knee to the head.
A battle for position here, against the ropes.
Ruxin avoiding damage as Bussel throws knees to the body.
Ruxin stalling here - the referee won't stand for too much of that.
Bussel lands a good knee to the midsection. Ruxin won't want to take too many of those.
Both fighters are absolutely exhausted here.
Ruxin blocks a knee to the body. He'll have a nicely bruised forearm in the morning.
Ruxin is trying to break the clinch but Bussel has him pressed against the ropes.
Bussel tries a knee to the head but he's missed.
Bussel pushes off and circles away, back to the middle of the mat.
Ruxin moves into range and throws a combination. A nice jab followed by a hook to the body.
Ruxin feints a jab promting Bussel to slip. Ruxin then demonstrates his capabilities by jabbing again. Bussel slips again and ducks right into an uppercut.
The fight stays on the outside here - Bussel looks like he's thinking about clinching though.
Ruxin looks to land a combination but Bussel avoids it well.
That's two minutes gone in the round.
No joy there for Ruxin, who threw a few shots but didn't land.
Bussel lands with a two punch combination before moving back out of range.
This has been an exciting period of action!
Bussel misses with a body kick.
Ruxin throws a combination that misses
and Bussel counters by moving into the clinch. Good anticipation by Bussel.
Bussel pushes off and circles away, back to the middle of the mat.
Bussel drives through and clinches with Ruxin against the ropes.
Bussel's corner calls for him to break the clinch, which he does.
Ruxin misses with a double jab.
Bussel is looking to chop away at Ruxin's legs.
Ruxin misses with a wild combination.
Ruxin misses with a two punch combination.
The crowd are going absolutely nuts as the round comes to an end - what a fantastic round of action!
Bussel tries a head kick but it misses.
Ruxin misses with a wild combination.
Ruxin scores to the head and body with a nice combination!
And thats the end of the round the fighters go back to their corners.
Sydney Bussel showed his class in that round. I'd imagine he'll take it on all the scorecards.
That's the end of the round. The referee orders the cornermen out of the ring so we can get back down to business.
Ruxin takes a swing at Bussel's ribcage but misses.
Ruxin takes a thudding leg kick, right into the meat of the thigh.
Ruxin misses with a few strikes there.
Bussel scores with a spinning back kick!
Bussel rushes Ruxin and pushes him back against the ropes in a clinch.
Bussel landing knees to the body. They look like they could hurt.
Ruxin tries to land a shot to the body but it's blocked.
Bussel breaks the clinch and we're back to striking at distance.
Ruxin throws a wild combination but nothing lands.
Sydney Bussel seems to be getting the better of the standup.
Bussel lands a leg kick that knocks Ruxin off balance momentarily.
Ruxin tries to check the leg kick but that clearly hurt him.
The crowd cheering loudly, showing their appreciation for the quality fight we're seeing here.
Bussel clinches.
Bussel utilising his Muay Thai to score with a knee to the body.
Bussel connects with a knee to the head.
Bussel's corner calls for him to break the clinch, which he does.
Both fighters are breathing heavily.
Ruxin misses with a body shot.
Bussel clinches up with Ruxin and pushes him back against the ropes.
That's one minute gone in the round.
Bussel escapes the clinch and we're back to striking.
Ruxin misses with a few strikes there.
Ruxin avoids the clinch attempt nicely.
Bussel instigates a clinch.
Bussel manages to break the clinch.
Bussel tries to clinch but is not successful on this occasion.
Ruxin is looking to wear down Bussel with body shots, infact he's throwing more body shots than head shots at the moment.
Ruxin throws a nice looking combination but Bussel bobs and weaves to avoid any damage.
Ruxin throws a combination that misses
and Bussel counters with a lovely straight right hand!

Ruxin is rocked!
Bussel feints with a shoulder and throws a nice leg kick to Ruxin's calf.
Oh Ruxin is still all over the place! His legs are completely gone! Will he be able to recover?!!
The crowd are loving this. Great action here.
Bussel gets in close and instigates a clinch.
Bussel is controlling Ruxin's neck. Bussel unleashes a big knee up the middle! And another! Ruxin goes down! Can he beat the count? 3,4,5,6... he's not going to make it! 9,10. It's all over!
Ladies and gentlemen, after 1:45 of round 3, we have a winner by way of TKO (Knees). Sydney Bussel!
A loyal slave to those sponsorship dollars, Sydney Bussel made sure he mentioned The Nutritionists (O.R.G) »Q155 only $49!«, along with how happy he was to win his fight.
|
|
|
|
|
|
|
|
|
|
|
|
|
|
|
|
|
|
|
|
|
|
|
| S |
C
A |
G |
S |
C
B |
G |
|
S |
C |
G |
|
energy
A | B |
|
hype
A | B |
|
pop
A | B |
|
mgr
A | B |
|
FIGHT
RATING
100% |
|
|
|
|
|
|
|
Undercard bout
|
Coming up we have a lightweight kickboxing rules bout between Choi Zhanshuch (ranked 0 p4p, 0 weight class) and Hideo Koyama (ranked 0 p4p, 0 weight class). This should be a great matchup!
 |
|
 |
| 168 cm
20
165 lbs
1 - 0 - 0 |
|
174 cm
21
165 lbs
6 - 3 - 0 |
Decent elbows
Cuts easily
|
|
Decent boxing
Heavy handed
|
|
| |
|
Ladies and gentlemen. This fight is 3 rounds, in the lightweight division.
Introducing the fighter to my left, fighting out of the red corner.
With a record of
1 - 0 - 0, fighting out of Tokyo, Choi Zhanshuch!
And introducing the fighter to my right, fighting out of the blue corner.
With a record of
6 - 3 - 0, fighting out of Tokyo, Hideo Koyama!
The judges for this bout are Yukihiro Yamamoto, Yuuki Gou and Shigeki Sano.
The bell rings for round one and we are underway!
Koyama connects with a single shot there.
Koyama misses with a wild body shot.
Koyama wants to clinch.
Koyama wants to clinch.
Zhanshuch avoids a lazy jab quite easily.
Koyama throws a right and a left that both miss.
Zhanshuch misses with a series of wild punches.
Zhanshuch tries to clinch but Koyama moves away
and Koyama counters by moving into the clinch.
Koyama struggles to land a body shot inside as Zhanshuch controls his hands.
Koyama swings away with an uppercut that misses.
Koyama working aggressively here.
Koyama tries a shoulder strike but it doesn't do any damage.
Koyama lands a left hand that snaps the head of Zhanshuch backwards.
Koyama stays in close to his opponent and throws a right hand to the body.
Koyama keeps the fight in the clinch, despite Zhanshuch's efforts to push away.
Zhanshuch lands an elbow inside.
That's one minute gone in the round.
Zhanshuch wants to get back to striking at distance but Koyama won't allow it.
Both guys are working to get underhooks.
Koyama makes some space for himself and lands an uppercut.
Zhanshuch tries to circle away but Koyama has him pinned against the ropes.
A head punch blocked on the inside by Zhanshuch.
Zhanshuch takes a shot to the head.
Koyama lands a right uppercut that snaps the head of Zhanshuch backwards.
Zhanshuch can't break the clinch.
Zhanshuch is looking to control Koyama's arms but Koyama gets an underhook and turns him. Now Zhanshuch has his back to the ropes.
Koyama struggles to land a body shot inside as Zhanshuch controls his hands.
Zhanshuch has had enough of the clinch and is looking to separate.
Zhanshuch is trying to push Koyama away but Koyama has him pressed against the ropes, so he's going nowhere.
A hook to the body from Koyama.
Koyama misses with a shot to the kidneys.
Zhanshuch tries to stall but Koyama uses the opportunity to gain a better position.
Zhanshuch lands a left hand that snaps the head of Koyama backwards.
Koyama lands with a short shot to the head.
Zhanshuch is trying to break the clinch but Koyama is controlling him.
Koyama lands a left hand.
That's two minutes gone in the round.
Zhanshuch is trying to work out of this bad position, with his back against the ropes.
Koyama lands a body punch in the clinch.
Zhanshuch can't break the clinch.
Zhanshuch landing knees to the head.
Wooooo! Give it up for these two warriors! They are putting on a show!
Zhanshuch wants to break free but Koyama has control.
Koyama looks to throw an elbow but misses.
Koyama tried to land a shot to the body but connects with Zhanshuch's elbow.
Zhanshuch lands a hook that snaps the head of Koyama backwards.
Zhanshuch goes for a body shot but it's blocked.
Zhanshuch trying to control the position but instead, Koyama has worked for underhooks and has pushed Zhanshuch into the ropes.
Koyama is working Zhanshuch over against the ropes.
Zhanshuch is trying to work out of this bad position, with his back against the ropes.
Koyama lands with a short shot to the head.
Koyama lands punches inside but they're not really causing much damage.
As the round comes to an end the crowd are showing their appreciation for a great round of action.
A quick uppercut on the inside from Koyama.
Zhanshuch blocks a body shot from Koyama.
Koyama misses with a hook from the clinch.
Zhanshuch is looking to control Koyama's arms but Koyama gets an underhook and turns him. Now Zhanshuch has his back to the ropes.
Koyama lands with a short punch from the clinch.
And thats the end of the round the fighters go back to their corners.
Hideo Koyama dominated that round.
The minute break is over - no more time for sponges and pep talks - back to the action!
A nice combination there by Zhanshuch.
Zhanshuch misses with a wild body shot.
Zhanshuch walks straight into a jab right on the nose. That one stung - he's blinking and trying to clear his head.
Zhanshuch misses with a kick to the body.
Koyama takes a shot to the body in his stride.
Choi Zhanshuch seems to be the more aggressive standup fighter in this bout.
The fight stays on the outside here - Zhanshuch looks like he's thinking about clinching though.
Zhanshuch throws a series of punches but Koyama moves out of range.
Zhanshuch misses with a double jab.
Koyama with poor footwork there. He got himself in a bit of a tangle, enabling Zhanshuch to score with a decent uppercut.
Koyama tries to bum rush Zhanshuch with a series of wild strikes but Zhanshuch uses good footwork to avoid the assault.
A slow jab from Zhanshuch misses its intended target.
Zhanshuch scores with a hook.
Koyama tries to clinch but Zhanshuch is having none of it.
Sloppy strikes from Zhanshuch. Those never looked like landing.
Zhanshuch throws a sloppy body shot
letting Koyama counter with a right hand.
That's one minute gone in the round.
Koyama dodges the punch combination from Zhanshuch.
Choi Zhanshuch is looking to throw some combinations by the looks of things.
Sloppy strikes from Koyama. Those never looked like landing.
Koyama swats away the attempt to clinch by Zhanshuch.
Koyama moves out of range of the body kick from Zhanshuch.
Koyama rushes Zhanshuch and pushes him back against the ropes in a clinch.
Koyama lands a hook that snaps the head of Zhanshuch backwards.
A right hook to the body lands for Koyama.
Koyama tries to work over Zhanshuch's body with a swooping hook but it only glances the target.
Koyama tries to work over Zhanshuch's body with a swooping hook but it only glances the target.
Koyama lands with a light punch inside.
Koyama has Zhanshuch pressed against the ropes, preventing Zhanshuch from circling away and getting back to striking at range.
Zhanshuch tries to land a knee to the body but he is off balance and Koyama avoids it.
Koyama misses with a shot to the kidneys.
Koyama working on landing some head shots here - that one got through nicely.
Nice body punch from Koyama.
Hideo Koyama seems to be working more effectively in the clinch in the fight so far.
That's two minutes gone in the round.
Koyama throws a head punch that misses.
A quick uppercut on the inside from Koyama.
Zhanshuch throws a head punch that misses.
Zhanshuch wants to break free but Koyama has control.
The crowd cheering loudly, showing their appreciation for the quality fight we're seeing here.
Koyama lands with a short punch from the clinch.
Koyama stays in close to his opponent and throws a right hand to the body.
Zhanshuch lands with a right to the head.
Koyama makes some space for himself and lands an uppercut.
Knees in the clinch landing for Zhanshuch.
Koyama lands a short shot on the inside that snaps the head of Zhanshuch backwards.
Koyama scores with a shoulder strike.
Koyama lands a shoulder strike.
Koyama keeps control of Zhanshuch as he tries to wriggle out of the double underhooks.
Koyama misses with a hook to the ribs.
Zhanshuch misses with a body punch.
The crowd are going absolutely nuts as the round comes to an end - what a fantastic round of action!
Both guys are working to get underhooks.
A short right from Koyama.
Good body shot from Koyama.
Zhanshuch tries to break the clinch but Koyama is controlling the position.
Koyama avoiding damage as Zhanshuch throws knees to the body.
And thats the end of the round the fighters go back to their corners.
A close second round but Hideo Koyama will probably get the nod - 10:9.
That's time! Zhanshuch's corner gives him a slap on the ass as he gets ready to fight. This is the final round!
Zhanshuch lands a really nice looking cross but Koyama seems unphased.
Koyama connects with a body shot.
Koyama moves into range and clinches up with Zhanshuch.
With the two fighters working up against the ropes, Koyama just misses with a elbow thrown towards Zhanshuch's brow.
A short right from Zhanshuch on the inside.
Zhanshuch wants to stall.
Zhanshuch takes a shot to the head.
Koyama misses with a shot to the kidneys.
Koyama doesn't land with the attempted body shot.
With the fighters clinched against the ropes, Koyama creates a bit of distance for himself and scores with a nice uppercut.
Koyama lands with a short punch from the clinch.
Koyama has a couple of punches blocked by Zhanshuch.
Zhanshuch blocking some punches.
Koyama misses with a punch to the body.
Koyama scores with an uppercut up the middle.
Koyama swings wildly with an uppercut but Zhanshuch uses good head movement to avoid it.
Zhanshuch lands a right hand.
That's one minute gone in the round.
Koyama lands a body shot.
Koyama with the Thai clinch. He's looking to land a big knee but he's not managed it this time.
Zhanshuch lands an uppercut.
Koyama swings wildly with an uppercut but Zhanshuch uses good head movement to avoid it.
Zhanshuch has had enough of the clinch and is looking to separate.
Zhanshuch takes an elbow to the temple.
It looks like Choi Zhanshuch has been cut.
Zhanshuch tries to throw a body punch but Koyama avoids it by throwing Zhanshuch back against the ropes.
Zhanshuch scores with a nice hook to the head.
Zhanshuch misses with some punches.
Zhanshuch struggles to land a body shot inside as Koyama controls his hands.
Koyama lands with a short head shot on the inside.
An uppercut on the inside fails to land for Koyama.
Koyama unloads a knee to the mid-section. Zhanshuch lets out a prehistoric sounding urrrrgh.
Koyama lands with a left to the head.
This is a great period of action - very entertaining stuff!
Koyama misses with a hook to the ribs.
Koyama misses with a body punch.
Koyama swings wildly with an uppercut but Zhanshuch uses good head movement to avoid it.
Choi Zhanshuch has stepped it up - he knows he needs a finish here!
Zhanshuch blocks a couple of punches on the inside.
That's two minutes gone in the round.
Zhanshuch wants to break free but Koyama has control.
Zhanshuch can't break the clinch.
Koyama tries to land a knee to the body but he is off balance and Zhanshuch avoids it.
Koyama misses with a knee strike.
Koyama lands a left hand.
A short right hand to the side of the head by Koyama.
A short body shot lands from Koyama as the two fighters clinch.
A short right from Koyama on the inside.
Koyama's head jolts backwards as he takes an uppercut right on the button!
Zhanshuch's head jolts backwards as he takes an uppercut right on the button!
Koyama lands with a left to the head.
Koyama lands a left hand.
A frustrated look appears on Zhanshuch's face as he tries to break the clinch.
Zhanshuch managing to block the knees to the body from Koyama.
Hideo Koyama is fighting for a decision - hopefully he's judged it right and he's actually winning the fight.
The crowd are going absolutely nuts as the round comes to an end - what a fantastic round of action!
Zhanshuch trying to land knees to the body.
Koyama working on landing some head shots here - that one got through nicely.
A frustrated look appears on Zhanshuch's face as he tries to break the clinch.
Zhanshuch looks to throw an elbow but misses.
And that's the end of the fight!
Hideo Koyama comfortably won the final round on my scorecard.
I've got Koyama winning every round here. Surely the decision will go his way and he'll pick up a well deserved decision victory. Over to the ring announcer for the scorecards.
Ladies and gentlemen, after 3 rounds of action, we go to the scorecards for a decision.
Judge Yukihiro Yamamoto scores the fight 27:30
Judge Yuuki Gou scores the fight 27:30
Judge Shigeki Sano scores the fight 27:30
In favor of your winner, by unanimous decision... Hideo Koyama!
A relieved looking Hideo Koyama thanked the fans for their support and gave the usual line about them being amazing. They seemed to believe that he actually meant it.
|
|
|
|
|
|
|
|
|
|
|
|
|
|
|
|
|
|
|
|
|
|
|
| S |
C
A |
G |
S |
C
B |
G |
|
S |
C |
G |
|
energy
A | B |
|
hype
A | B |
|
pop
A | B |
|
mgr
A | B |
|
FIGHT
RATING
100% |
|
|
|
|
|
|
|
Undercard bout
|
Coming up we have a welterweight kickboxing rules bout between Pai Mei (ranked 0 p4p, 0 weight class) and Buck Naked (ranked 0 p4p, 0 weight class). Naked is bouncing up and down as he enters the arena, backed by Da ya think I'm Sexy. Both fighters look fresh as a daisy as they make their way towards the ring.
 |
|
 |
| 172 cm
24
178 lbs
2 - 0 - 0 |
|
184 cm
34
177 lbs
30 - 12 - 1 |
World class MT
Insanely flexible
|
|
World class MT
Granite chin
|
|
| |
|
Ladies and gentlemen. This fight is 5 rounds, in the welterweight division.
Introducing the fighter to my left, fighting out of the red corner.
With a record of
2 - 0 - 0, fighting out of Rio de Janeiro, Pai Mei!
And introducing the fighter to my right, fighting out of the blue corner.
With a record of
30 - 12 - 1, fighting out of Sydney, Buck Naked!
The judges for this bout are Ren Mimura, Kenichi Hosakawa and Shigeki Fujiwara.
The bell rings for round one and we are underway!
Mei scores with a leg kick.
Mei throws a head kick that half lands.
Mei misses with a kick to the body
enabling Naked to counter with a crisp jab.
A thudding body kick lands there by Mei!
Mei throws a head kick that misses
and Naked counters with a good right hand that lands right on the jaw.
Mei is looking to land body kicks.
Mei bobs and weaves and then throws a good body kick.
Mei looks to clinch
letting Naked counter with a right hand.
Mei pushing out the jab but it's not landing.
Mei tries to clinch
and Naked counters with a good right hand that lands right on the jaw.
Naked keeps the fight on the outside.
Mei throws a leg kick
and Naked counters with a leg kick.
The crowd cheering loudly, showing their appreciation for the quality fight we're seeing here.
Mei cracks the inside of Naked's front leg.
That's one minute gone in the round.
Mei throws a body kick that misses.
Mei will need to tighten up his combinations if he doesn't want to gas himself out, swinging at thin air.
Naked steps to the side to avoid the strikes from Mei.
Naked keeping a good distance there, avoiding the body shot.
Mei throws a looping overhand right but Naked ducks down to avoid it.
Mei tries to clinch but Naked moves away
and Naked counters with a three punch combination, finished off with a leg kick. Nice work.
Mei is looking to clinch but Naked is avoiding it.
Naked blocks a head kick by Mei.
Mei tries a head kick but it misses.
Mei throws a jab, cross combination which is slipped
letting Naked counter with a right hand.
That's two minutes gone in the round.
Naked is pinned up against the ropes taking some big shots here. The referee is looking closely deciding whether he should stop the fight.
Mei moves into range and lands a nice leg kick.
Mei throws a leg kick that is checked
and Naked counters with a crisp hook to the side of the head.
Mei scores with a nice right hand.
Mei throws a head kick but Naked moves out of range.
Naked moves away from the strike by Mei.
Mei throws a body kick but he was well out of range there.
Fantastic stuff here - a very entertaining period of action, which has drawn cheers from the crowd.
Naked throws a good cross that connects.
As the round comes to an end the crowd are showing their appreciation for a great round of action.
Mei misses with a telegraphed body shot
and Naked counters with an inside leg kick.
Mei throws a lazy body kick
and Naked counters with a lovely straight right hand!
And thats the end of the round the fighters go back to their corners.
Pai Mei dominated that round.
The referee calls time. The cornermen exit stage left and we're back to business.
Naked pivots, looking for a leg kick but Mei is out of range and Naked settles back down.
Mei swings widly with a right hand
and Naked counters with a leg kick.
Naked blocks a head kick by Mei.
Naked lands a leg kick and bounces back out of range.
Mei misses with a hook to the body
and Naked counters with a straight right hand.
Mei forces Naked back against the ropes and clinches.
Naked prevents a body shot from Mei.
A short uppercut from Naked.
Naked manages to break the clinch.
Mei tries to clinch but fails miserably
and Naked takes advantage, countering with a massive head kick that sends Mei sprawling across the canvas! That's completely screwed up his equilibrium and I'm not sure he's going to beat the count! The referee's already at 6 and Mei is flopping around all over the place - the referee has seen enough and has called an end to the fight!
Ladies and gentlemen, after 0:47 of round 2, we have a winner by way of TKO (Head Kick). Buck Naked!
A determined Buck Naked didn't want to dwell on this fight in his post fight interview. Instead he was more keen to state he wants a title shot. Let's see if he gets it!
|
|
|
|
|
|
|
|
|
|
|
|
|
|
|
|
|
|
|
|
|
|
|
| S |
C
A |
G |
S |
C
B |
G |
|
S |
C |
G |
|
energy
A | B |
|
hype
A | B |
|
pop
A | B |
|
mgr
A | B |
|
FIGHT
RATING
90% |
|
|
|
|
|
|
|
Undercard bout
|
Coming up we have a light heavyweight kickboxing rules bout between Rock Random (ranked 0 p4p, 0 weight class) and Ugly Kid Joe (ranked 0 p4p, 0 weight class). Random comes to the ring accompanied by Nas - Made you look. Both fighters look fresh as a daisy as they make their way towards the ring.
 |
|
|
| 184 cm
34
210 lbs
19 - 18 - 0 |
|
198 cm
29
217 lbs
17 - 8 - 0 |
World class boxer
Cardio machine
|
|
Excellent MT
Powerful
|
|
| |
|
Ladies and gentlemen. This fight is 5 rounds, in the light heavyweight division.
Introducing the fighter to my left, fighting out of the red corner.
With a record of
19 - 18 - 0, fighting out of Tokyo, Rock Random!
And introducing the fighter to my right, fighting out of the blue corner.
With a record of
17 - 8 - 0, fighting out of Tokyo, Ugly Kid Joe!
The judges for this bout are Shirou Masuda, Tatsuya Matsuyama and Shigeki Sano.
The bell rings for round one and we are underway!
Joe slips a jab and a cross from Random.
Joe lunges in with swinging rights and lefts but Random circles away quickly and effectively.
Random throws a jab to the body, straight down the pipe. Boom. That sent Joe stumbling backwards but he manages to regain his composure quickly.
Joe tries to clinch
and Random connects with a straight left hand counter down the middle.
It looks like Ugly Kid Joe has been cut.
Joe fails with an attempt to clinch.
Random misses the jab.
Joe instigates a clinch.
With the two fighters working up against the ropes, Random just misses with a elbow thrown towards Joe's brow.
Random is looking to score with knees to the body. Maybe he'll change it up and go body then head. Joe is defending well for now.
Joe misses with a hook to the ribs.
Random makes some space for himself and lands an uppercut.
Random takes a shot to the head.
With the two fighters working up against the ropes, Random just misses with a elbow thrown towards Joe's brow.
Joe tries to land a shot to the body but it's blocked.
Random working some nice short punches in the clinch.
The crowd cheering loudly, showing their appreciation for the quality fight we're seeing here.
Random doesn't land with the attempted body shot.
A right hook to the body lands for Random.
Random's head jolts backwards as he takes an uppercut right on the button!
A shot in the inside from Joe.
That's one minute gone in the round.
Random misses the knee to the body. Nice hip positioning from Joe.
Random gets an overhook and lands an elbow to the side of the head.
Random has had enough of the clinch but Joe keeps him there for the moment.
Random tries a body shot but Joe blocks it.
Random blocks an elbow strike from Joe.
Joe tries to land a shot to the body but it's blocked.
Joe throws a head punch that misses.
Joe lands a right uppercut that snaps the head of Random backwards.
Random throws an elbow but it's blocked.
Random creates a bit of distance and throws an elbow that only just misses.
Random lands a short shot on the inside that snaps the head of Joe backwards.
Joe avoids a wild elbow strike from Random.
Random breaks from the clinch.
Random swings and misses with a shot to the body
and Joe counters by moving into the clinch. Good anticipation by Joe.
Random missing with knees to the body.
A head punch on the inside from Joe fails to land.
Joe misses with a knee to the head.
Joe is trying to force a seperation but Random has the dominant position.
The crowd are loving this. Great action here.
Joe takes an elbow to the forehead.
That's two minutes gone in the round.
Joe misses with a shot to the kidneys.
Random lands an elbow inside.
Random misses with an elbow over the top.
Random gets an overhook and lands an elbow to the side of the head.
That has opened up Ugly Kid Joe's cut even more.
Random can't find room to land a body shot as Joe controls the action.
Random blocks an uppercut.
Joe is trying to break the clinch but Random has him pressed against the ropes.
Joe working some nice short punches in the clinch.
Joe working aggressively here.
Random tries to land a shot to the body but it's blocked.
Joe breaks the clinch and we're back to striking at distance.
Random uses decent footwork to sidestep a right hand from Joe.
Random tries to clinch but Joe is having none of it.
Random scores with a head kick. Joe tried to block it but didn't get his arm up in time.
The crowd are going absolutely nuts as the round comes to an end - what a fantastic round of action!
Joe lands with a nice body punch.
Joe moves out of range of the body kick from Random.
Random tries a head kick but it misses.
And thats the end of the round the fighters go back to their corners.
Rock Random dominated that round.
The cut man is working on Ugly Kid Joe's cut.
The fighters get back to their feet, the hooter sounds and we're back to the action!
Random goes for a spinning back kick but it misses.
A head kick misses from Random.
Joe ducks under an overhand right and circles away with a smile on his face.
Nice uppercut lands for Joe. That snapped Random's head back.
Joe fails in his attempt to clinch.
Random misses with a body shot.
Joe lands with an overhand left.
Random works the jab nicely.
Joe is rocked!
Joe tries to get into range but Random steps to the side and lands a beautiful hook that drops Joe! He's faceplanted into the mat, ass in the air... he's out cold! That's an image he won't want to show his grandkids when he gets older! Random scores the big KO victory!
Ladies and gentlemen, after 0:42 of round 2, we have a winner by way of KO (Punch). Rock Random!
|
|
|
|
|
|
|
|
|
|
|
|
|
|
|
|
|
|
|
|
|
|
|
| S |
C
A |
G |
S |
C
B |
G |
|
S |
C |
G |
|
energy
A | B |
|
hype
A | B |
|
pop
A | B |
|
mgr
A | B |
|
FIGHT
RATING
100% |
|
|
|
|
|
|
|
Co-main event
|
Coming up we have a light heavyweight kickboxing rules bout between Tim Capone (ranked 0 p4p, 0 weight class) and Shamus McDermid (ranked 0 p4p, 0 weight class). McDermid has chosen The Drunken Scotsman - The Irish Rovers as his entrance music. Both these guys have solid standup skills and neither is particularly fantastic on the ground, so let's hope for a nice standup war!
 |
|
 |
| 187 cm
29
215 lbs
9 - 8 - 0 |
|
195 cm
28
222 lbs
13 - 5 - 0 |
World class boxer
Very quick
|
|
Great elbows
Good gas tank
|
|
| |
|
Ladies and gentlemen. This fight is 5 rounds, in the light heavyweight division.
Introducing the fighter to my left, fighting out of the red corner.
With a record of
9 - 8 - 0, fighting out of Tokyo, Tim Capone!
And introducing the fighter to my right, fighting out of the blue corner.
With a record of
13 - 5 - 0, fighting out of Tokyo, Shamus McDermid!
The judges for this bout are Shirou Masuda, Shigeki Fujiwara and Taro Takaoka.
The bell rings for round one and we are underway!
McDermid misses with a body shot. Nice footwork from Capone.
McDermid is on the wrong end of a nice combination from Capone.
It looks like Shamus McDermid has been cut.
McDermid chopping away at his opponent's legs.
Capone throws a right and a left that McDermid avoids nicely.
Capone pulls out of a head kick attempt.
Capone blocks a jab.

McDermid looks low and kicks high, catching Capone right on the side of the head, sending him crashing to the canvas! Will he be able to beat the count? 3,4,5 - he's already back to his feet and ready to go! Let's see if he's still with it!
It looks like Tim Capone has been cut.
We've seen a great period of action over the last minute or so - credit to both fighters for going all out!
Capone goes to the watering hole and comes back with a big thumbs up from the judges as he scores a three punch combo.
McDermid closes the distance and clinches.
McDermid missing with knees to the body.
With the two fighters working up against the ropes, McDermid just misses with a elbow thrown towards Capone's brow.
McDermid lands an elbow inside that Capone shrugs off.
McDermid lands an elbow inside that Capone shrugs off.
Capone is trying to break free.
Capone tries to break the clinch but McDermid is controlling the position.
McDermid misses with an elbow over the top.
McDermid gets an overhook and lands an elbow to the side of the head.
McDermid lands a nice elbow.
McDermid prevents Capone from breaking the clinch.
McDermid lands punches inside but they're not really causing much damage.
Tim Capone's cut is getting worse.
McDermid prevents Capone from breaking the clinch.
That's one minute gone in the round.
Capone breaks the clinch and we return to the middle of the mat.
Tim Capone seems to be the more aggressive standup fighter in this bout.
McDermid is pinned up against the ropes taking some big shots here. The referee is looking closely deciding whether he should stop the fight.
McDermid forces Capone back against the ropes and clinches.
McDermid creates a bit of space for himself and sneaks an elbow through Capone's defenses.
McDermid tries a knee to the head but he's missed.
McDermid lands a glancing elbow in the clinch.
McDermid lands an elbow inside.
McDermid gets an overhook and lands an elbow to the side of the head.
Nice elbow from McDermid.
Capone blocks a knee to the body. He'll have a nicely bruised forearm in the morning.
McDermid unloads a knee to the mid-section. Capone lets out a prehistoric sounding urrrrgh.
McDermid lands a nice elbow from the clinch.
We've seen a great period of action over the last minute or so - credit to both fighters for going all out!
Capone blocks a knee to the body. He'll have a nicely bruised forearm in the morning.
Capone is trying to break free.
McDermid lands an elbow inside.
McDermid with the Thai clinch. He's looking to land a big knee but he's not managed it this time.
Capone tries to throw a body punch but McDermid avoids it by throwing Capone back against the ropes.
Capone wants to push off and get back to the center of the mat but McDermid has him pressed against the ropes.
That's two minutes gone in the round.
Capone dodges an elbow strike from McDermid.
McDermid lands an elbow inside that Capone shrugs off.
McDermid lands a nice knee to the body.
McDermid creates a bit of space for himself and sneaks an elbow through Capone's defenses.
Tim Capone's cut is bleeding quite badly. He's got to try and protect it.
McDermid trying to land knees to the body.
McDermid lands an elbow just above Capone 's eye.
Capone tries to circle away but McDermid has him pinned against the ropes.
Capone takes an elbow to the forehead.
McDermid landing some nice looking knees to the body.
Capone is breathing heavily.
McDermid landing knees to the body.
Nice elbow from McDermid.
Jeez, Tim Capone's cut is really nasty now. The referee must be thinking about getting that checked.
McDermid lands an elbow that stopped Capone in his tracks for a moment.
The referee calls the doctor in to look at Tim Capone's cut. Oh no, the doctor has called an end to the bout!
Ladies and gentlemen, after 2:51 of round 1, we have a winner by way of TKO (Cut). Shamus McDermid!
In his post fight interview, Shamus McDermid gave a big smile as he said 'Just call me Jack the Ripper because anyone that gets in this ring with me is leaving cut up!'.
|
|
|
|
|
|
|
|
|
|
|
|
|
|
|
|
|
|
|
|
|
|
|
| S |
C
A |
G |
S |
C
B |
G |
|
S |
C |
G |
|
energy
A | B |
|
hype
A | B |
|
pop
A | B |
|
mgr
A | B |
|
FIGHT
RATING
100% |
|
|
|
|
|
|
|
Main event
|
Coming up we have a light heavyweight kickboxing rules bout between Jon Lewis St Clair (ranked 0 p4p, 0 weight class) and Xavier Armstrong (ranked 0 p4p, 0 weight class). St Clair comes to the ring accompanied by Ready to Die. Buckle up people - heeeeeeeeeere we go!
 |
|
 |
| 193 cm
23
216 lbs
5 - 0 - 0 |
|
191 cm
30
223 lbs
21 - 8 - 2 |
World class boxer
Insanely flexible
|
|
World class MT
Good gas tank
|
|
| |
|
Ladies and gentlemen. This fight is 5 rounds, in the light heavyweight division.
Introducing the fighter to my left, fighting out of the red corner.
With a record of
5 - 0 - 0, fighting out of Helsinki, Jon Lewis St Clair!
And introducing the fighter to my right, fighting out of the blue corner.
With a record of
21 - 8 - 2, fighting out of Tokyo, Xavier Armstrong!
The judges for this bout are Ren Mimura, Shigeki Sano and Tatsuya Matsuyama.
The bell rings for round one and we are underway!
St Clair pulls out of a head kick attempt.
St Clair throws a head kick that misses and slips in the process. He scrambles back to his feet and the fighters circle.
A left lands for St Clair.
St Clair connects with a leg kick. Armstrong looked like he was expecting something else and didn't defend it.
St Clair tries to score with an inside leg kick but telegraphs it and Armstrong is able to avoid easily.
Armstrong lands a leg kick that knocks St Clair off balance momentarily.
St Clair tries a switch kick but it misses it's target.
St Clair pulls out of a head kick attempt.
Armstrong closes the distance but St Clair moves to the side
and St Clair counters with a leg kick that reverborates around the arena.
Armstrong swinging wildly here.
Nice uppercut lands for St Clair. That snapped Armstrong's head back.
St Clair misses with a body shot. Nice footwork from Armstrong.
Armstrong swats away the attempt to clinch by St Clair.
That's one minute gone in the round.
St Clair slips in close and lands a nice hook before moving back out of range.
Armstrong gets cracked with a nice right hand there by St Clair.
Armstrong misses with a body shot
and St Clair connects with a straight left hand counter down the middle.
Armstrong throws a couple of head shots and lands with the final one - a decent hook, which struck St Clair on the side of the head.
It looks like Jon Lewis St Clair has been cut.
Armstrong misses with a body kick.
Armstrong thuds a left hand into St Clair's body.
St Clair throws the kick towards the body but Armstrong avoids it.
Wooooo! Give it up for these two warriors! They are putting on a show!
St Clair pulls out of a head kick attempt.
St Clair rushes forward with a series of wild hooks but Armstrong moves out of range and avoids them all easily.
St Clair looks to land a combination but Armstrong avoids it well.
Armstrong throws a nice looking combination but St Clair bobs and weaves to avoid any damage.
Armstrong closes the distance and clinches.
That's two minutes gone in the round.
St Clair can't find room to land a body shot as Armstrong controls the action.
Armstrong tries to land a knee to the body but he is off balance and St Clair avoids it.
Armstrong has St Clair pushed against the ropes.
St Clair lands a body punch.
Armstrong prevents St Clair from breaking the clinch.
Armstrong tries to work over St Clair's body with a swooping hook but it only glances the target.
Armstrong tried to land a shot to the body but connects with St Clair's elbow.
Armstrong is trying to slow down the pace in the clinch, to catch his breath.
An uppercut on the inside fails to land for St Clair.
Armstrong working aggressively here.
St Clair manages to break the clinch.
St Clair misses with a double jab.
St Clair throws a head kick that misses.
St Clair tries a switch kick but it misses it's target.
Armstrong closes the distance and clinches.

That's three minutes gone in the round.
An uppercut on the inside fails to land for Armstrong.
Armstrong connects with a knee to the head.
Armstrong misses with a knee to the head.
Armstrong tries a body shot but St Clair blocks it.
St Clair scores with a nice hook to the head.
Armstrong lands a hook to the body. It's hard to tell if that hurt St Clair or not.
Armstrong lands a hook to the side of the head.
St Clair misses with a hook from the clinch.
St Clair tries to land a shot to the body but it's blocked.
Armstrong fails to land with a short punch on the inside.
Armstrong digs a right hand underneath St Clair's ribcage. St Clair let out a lung full of air as it connected.
The crowd are loving this. Great action here.
A head punch on the inside from St Clair fails to land.
St Clair throws a punch but it's blocked by Armstrong.
St Clair fails to land with a short punch on the inside.
St Clair on the defensive, avoiding the knees to the body.
St Clair throws a head punch that misses.
Armstrong can't find room to land a body shot as St Clair controls the action.
St Clair lands an uppercut.
Armstrong can't find room to land a body shot as St Clair controls the action.
Armstrong content to slow the pace in the clinch.

That's four minutes gone in the round.
St Clair manages to break the clinch.
St Clair paws at his opponent with the jab and then lunges in with a straight, right on the button.
St Clair tries to keep at a distance but Armstrong has taken the fight into the clinch.
Armstrong has St Clair pressed against the ropes, preventing St Clair from circling away and getting back to striking at range.
Armstrong tried to land a shot to the body but connects with St Clair's elbow.
Armstrong landing knees to the body. They look like they could hurt.
St Clair is trying to stall.
Armstrong lands a right uppercut that snaps the head of St Clair backwards.
A body shot lands from Armstrong.
St Clair is breathing heavily.
Armstrong tries to land a shot to the body but it's blocked.
St Clair goes for a body shot but it's blocked.
The crowd are going absolutely nuts as the round comes to an end - what a fantastic round of action!
St Clair throws a punch but it's blocked by Armstrong.
Armstrong lands with a light punch inside.
St Clair tries to break the clinch but Armstrong is controlling the position.
St Clair is trying to slow down the pace of the fight but Armstrong is keeping busy.
Armstrong stays in close to his opponent and throws a right hand to the body.
And thats the end of the round the fighters go back to their corners.
Xavier Armstrong dominated that round.
The cut man is working on Jon Lewis St Clair's cut.
OK. That's time! The bell goes and we're back to the action.
Armstrong dances in quickly and lands a nice inside leg kick on St Clair. That did some damage!
St Clair steps to his left, right into the path of a big body kick from Armstrong. That one must have hurt.
St Clair misses with a jab to the body
and Armstrong counters with a low kick, right behind St Clair 's knee.
Armstrong bobs and weaves and then throws a good body kick.
The crowd are loving this. Great action here.
Armstrong gets to the clinch - let's see what his plan is here.
St Clair goes for a body shot but it's blocked.
A left hand lands to the body for Armstrong.
St Clair swings wildly with an uppercut but Armstrong uses good head movement to avoid it.
Xavier Armstrong seems to be working more effectively in the clinch in the fight so far.
Still in the clinch, Armstrong scores with a nice short uppercut.
St Clair throws a punch but it's blocked by Armstrong.
Armstrong throws a vicious knee straight up the middle but St Clair blocks it with crossed arms.
Armstrong will no doubt start fighting again in a minute but for now he's just having a little rest, leaning St Clair up against the ropes.
Armstrong continues to stall. The referee tells him to work or he's going to break them up.
Both fighters are absolutely exhausted here.
St Clair wants to push off and get back to the center of the mat but Armstrong has him pressed against the ropes.
That's one minute gone in the round.
Armstrong lands a body punch - he's looking to wear down St Clair.
Armstrong lands a right uppercut that snaps the head of St Clair backwards.
Armstrong tries a body shot but St Clair blocks it.
St Clair taking a breather.
Armstrong lands with a short punch from the clinch.
Armstrong misses the knee to the body. Nice hip positioning from St Clair.
Armstrong presses St Clair against the ropes and delivers a mid-strength body shot.
A short body shot lands from Armstrong as the two fighters clinch.
Armstrong tries to land knees in the clinch but St Clair avoids the damage to the body.
Armstrong looking to slow down the pace here.
Armstrong lands a body punch - he's looking to wear down St Clair.
This is a great period of action - very entertaining stuff!
A short body shot lands from Armstrong as the two fighters clinch.
An uppercut to the body lands inside from Armstrong.
Armstrong scores with a knee to the head.
Armstrong works on St Clair's body with a couple of short punches.
St Clair blocks a body shot from Armstrong.
Armstrong working on landing some head shots here - that one got through nicely.
That's two minutes gone in the round.
Armstrong lands a right hand.
A right hand to the body from Armstrong.
St Clair on the defensive, avoiding the knees to the body.
Armstrong misses with a punch to the body.
Armstrong putting his Muay Thai to good use. He has St Clair in a tight clinch and is doing some damage with knees to the body.
Armstrong lands a hook to the body. It's hard to tell if that hurt St Clair or not.
Armstrong cracks St Clair with a nice body shot.
Armstrong misses with a hook to the ribs.
Armstrong struggles to land a body shot inside as St Clair controls his hands.
Armstrong is stalling here.
Armstrong lands a nice uppercut.
Armstrong dictating the pace here, as the fighters clinch against the ropes.
St Clair managing to block the knees to the body from Armstrong.
Armstrong lands a hook to the body. It's hard to tell if that hurt St Clair or not.
Armstrong works for underhooks and lands a body shot in the process.
St Clair blocks a body shot from Armstrong.
Armstrong lands a hook to the body. It's hard to tell if that hurt St Clair or not.
That's three minutes gone in the round.
Armstrong works for underhooks and lands a body shot in the process.
Armstrong lands a knee to the head.
Jon Lewis St Clair's cut is getting worse.
Armstrong working on landing some head shots here - that one got through nicely.
Armstrong lands a nice elbow.
Armstrong lands a nice shot to the body.
A knee to the head by Armstrong.
St Clair is rocked!
Armstrong digs a right hand underneath St Clair's ribcage. St Clair let out a lung full of air as it connected.
Oh St Clair is still all over the place! His legs are completely gone! Will he be able to recover?!!
Armstrong pushes St Clair back against the ropes and unloads with a body punch.
St Clair seems to have got his legs back now.
Armstrong lands with a short punch from the clinch.
The crowd are loving this. Great action here.
Armstrong working St Clair over with knees to the body.
Armstrong struggles to land a body shot inside as St Clair controls his hands.
Armstrong lands with a left to the head.
A short uppercut from Armstrong.
Armstrong scores with a hook to the body.
A right hand to the body from Armstrong.
A nice left hand lands by Armstrong.
An uppercut to the body lands inside from Armstrong.
Armstrong drops St Clair on his ass with a big knee up the middle! St Clair bounces straight back to his feet before the referee can even start a count. We'll have to wait a moment to see if that actually hurt him or not, as he takes the standing 8 count.
That's four minutes gone in the round.
Armstrong tries to clinch up against the ropes, rushing in the close the distance. St Clair manages to break the clinch and circles back to the middle of the mat.
Armstrong is looking to clinch.
St Clair swats away the attempt to clinch by Armstrong.
Armstrong tries to score with an inside leg kick but telegraphs it and St Clair is able to avoid easily.
Armstrong throws a half hearted mid kick.
Armstrong takes a jab right on the kisser.
Armstrong clips St Clair with a right and a left that makes him do the chicken dance for a couple of seconds. He touched his left hand down on the canvas so the referee steps between the fighters to give St Clair a standing 8 count before we can continue the bout.
Jon Lewis St Clair's cut is bleeding quite badly. He's got to try and protect it.
St Clair throws a leg kick that misses.
The crowd are going absolutely nuts as the round comes to an end - what a fantastic round of action!
Armstrong has taken the fight to the clinch.
St Clair wants to break free but Armstrong has control.
St Clair misses with a punch on the inside.
Armstrong lands with a quick shot inside that doesn't really do much damage.
And thats the end of the round the fighters go back to their corners.
Xavier Armstrong will take that one after putting his opponent down more than once in the round.
The cut man is working on Jon Lewis St Clair's cut.
The fighters' corners scream their final instructions, as the referee calls time. Here we go, back to the action!
Armstrong thuds his shin into the meat of St Clair's side.
Xavier Armstrong seems to be getting the better of the standup.
St Clair stumbles momentarily as he takes a strong leg kick from Armstrong.
Armstrong looking to throw a kick but he's pulled out of it.
Armstrong moves into the clinch successfully.
Armstrong lands a body shot in the clinch.
Armstrong is working hard here but doesn't seem to be able to control effectively, up against the ropes.
We've seen a great period of action over the last minute or so - credit to both fighters for going all out!
St Clair blocks a body shot from Armstrong.
St Clair misses with a hook from the clinch.
Armstrong trying to land knees to the body.
St Clair misses with a shot to the kidneys.
Armstrong unloads a knee to the mid-section. St Clair lets out a prehistoric sounding urrrrgh.
Armstrong can't find room to land a body shot as St Clair controls the action.
Armstrong digs a right hand into St Clair's ribs. Those have got to be taking their toll on St Clair's gas tank.
Both fighters are breathing heavily.
Armstrong landing knees to the head.
Armstrong presses St Clair against the ropes and delivers a mid-strength body shot.
Armstrong is leaning against St Clair and scores with a nice uppercut to the body.
That's one minute gone in the round.
St Clair takes a knee to the side of the body.
A short right from Armstrong on the inside.
St Clair blocks a body shot from Armstrong.
Armstrong trying to land knees to the body.
Armstrong tries to work over St Clair's body with a swooping hook but it only glances the target.
St Clair managing to block the knees to the body from Armstrong.
Armstrong has been the more effective fighter overall so far.
St Clair tries a body shot but Armstrong blocks it.
Armstrong digs a right hand into St Clair's ribs. Those have got to be taking their toll on St Clair's gas tank.
Armstrong lands a good knee to the midsection. St Clair won't want to take too many of those.
The crowd are loving this. Great action here.
Armstrong gets an overhook and lands an elbow to the side of the head.
Armstrong scores with a hook to the body.
Nice body punch from Armstrong - that landed with a thud.
Armstrong lands a short shot on the inside that snaps the head of St Clair backwards.
St Clair doesn't land with the attempted body shot.
Armstrong goes for a body shot but it's blocked.
St Clair tries to work over Armstrong's body with a swooping hook but it only glances the target.
St Clair wants to break free but Armstrong has control.
Armstrong tries a body shot but St Clair blocks it.
That's two minutes gone in the round.
St Clair tries to throw a body punch but Armstrong avoids it by throwing St Clair back against the ropes.
Armstrong tries a body shot but St Clair blocks it.
Good body shot from Armstrong.
Nice body punch from Armstrong.
Kneeeeees! The crowd are calling for knees to the body. Armstrong obliges.
Armstrong lands a shoulder strike.
St Clair takes an elbow to the temple.
Armstrong lands a right hand.
Armstrong lands a nice uppercut.
Jeez, Jon Lewis St Clair's cut is really nasty now. The referee must be thinking about getting that checked.
A right hand to the body from Armstrong.
Armstrong lands with a short head shot on the inside.
The referee calls the doctor in to look at Jon Lewis St Clair's cut. Oh no, the doctor has called an end to the bout!
Ladies and gentlemen, after 2:45 of round 3, we have a winner by way of TKO (Cut). Xavier Armstrong!
Xavier Armstrong seemed lost for words in his post fight interview but he remembered to thank his fans and directed everyone to his website.
|
|
|
|
|
|
|
|
|
|
|
|
|
|
|
|
|
|
|
|
|
|
|
| S |
C
A |
G |
S |
C
B |
G |
|
S |
C |
G |
|
energy
A | B |
|
hype
A | B |
|
pop
A | B |
|
mgr
A | B |
|
FIGHT
RATING
100% |
|
|
|
|
|
|
|
|
|
|
