 |
Impact 15 PBP Commentary |
Undercard bout
|
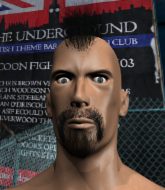
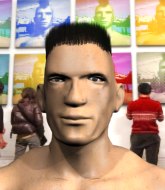
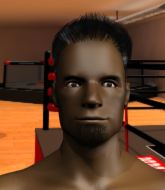
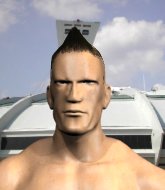
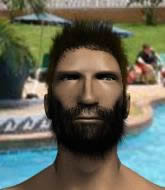
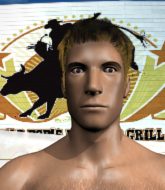
Coming up we have a welterweight MMA rules bout between Matt Walker (ranked 0 p4p, 0 weight class) and Brad West (ranked 0 p4p, 0 weight class). Matt Walker had a look across the cage there at his opponent. He definitely means business
 |
|
 |
| 185 cm
19
178 lbs
5 - 2 - 0 |
|
180 cm
21
183 lbs
2 - 2 - 0 |
BJJ Blue Belt
Counter fighter
Very strong |
|
BJJ White Belt
Excellent MT
Prefers standup |
|
| |
|
Ladies and gentlemen. This fight is 3 rounds, in the welterweight division.
Introducing the fighter to my left, fighting out of the red corner.
With a record of
5 - 2 - 0, fighting out of London, Matt Walker!
And introducing the fighter to my right, fighting out of the blue corner.
With a record of
2 - 2 - 0, fighting out of London, Brad West!
The judges for this bout are Chris Edwards, Paul Tew and Colin Fotheringham.

The bell rings for round one and we are underway!
West misses with a hook.
Walker has been working on his boxing with his coaches at Soul Supremacy - UK in the buildup to the fight.
A head kick from West lands but Walker takes it in his stride.
A chopping leg kick lands by West.
The fighters circling - Walker throws out the jab but it was never going to land.
West looking to land some kicks to the body here.
West scores with a head kick.
Ouch! a nice leg kick from West, right into the meat.
West misses with a head kick.
West keeps Walker at a distance using the push kick.
Walker steps to his left, right into the path of a big body kick from West. That one must have hurt.
West fails to land with the punch combination there - jab, cross, hook, miss, miss, miss.
West has done a lot of speed work in the buildup to this fight.
West connects with a high kick.
A punch combination from Walker misses.
West delivers a nice body kick.

That's one minute gone in the round.
West dances in quickly and lands a nice inside leg kick on Walker. That did some damage!
West dances in quickly and lands a nice inside leg kick on Walker. That did some damage!
West looks to score with a combo but nothing lands.
West throws a sloppy head kick and Walker moves out of range easily.
Walker lands a jab-cross combination.
West dodges the punch combination from Walker.
West throws a series of punches but Walker avoids them all with ease.
West throws a head kick that connects with a bit of head and a bit of hand.
West fakes a jab and scores with a low kick.
Walker throws an overhand right that lands on West's shoulder, as West tries to avoid the shot.

That's two minutes gone in the round.
Walker swings and misses with a hook to the body.
West scores with a head kick. Walker tried to block it but didn't get his arm up in time.
West scores with a head kick.
Wooooo! Give it up for these two warriors! They are putting on a show!
Walker moves out of range as West throws a body kick.
Walker avoids a kick to the body.
West keeps Walker at a distance using the push kick.
Walker throws a series of punches but West moves out of range.
West throws a wild body kick that Walker sees coming a mile off.
West misses with a few strikes there.
West tries a switch kick but it misses it's target.
West takes a shot to the body in his stride.
West uses some good footwork to avoid the body shot by Walker.

That's three minutes gone in the round.
West connects with a solid leg kick.
West misses with a few strikes there.
Walker swings wildly with a right hand that was never going to find it's target.
Walker throws a jab but it's blocked by West.
West feints and then cracks Walker's leading leg with a nice low kick. He's obviously looking to slow Walker down.
West showing good head movement there, avoiding the strikes from Walker.
West throws a head kick that half lands.
West dodges the punch combination from Walker.
Like a baseball bat into the meat of his leg there - nice leg kick by West.

That's four minutes gone in the round.
West lands a leg kick that knocks Walker off balance momentarily.
Like a baseball bat into the meat of his leg there - nice leg kick by West.
West lands a leg kick. The shin dug right into the meat of the thigh.
Brad West seems to be the more aggressive standup fighter in this bout.
Walker scores with a jab. West acknowledges it with a nod of the head.
West slips a jab from Walker.
A head kick misses from West.
Walker blocks a head kick by West.
West throws a sloppy head kick and Walker moves out of range easily.
This is a great period of action - very entertaining stuff!
As the round comes to an end the crowd are showing their appreciation for a great round of action.
West misses with a series of wild punches.
West throws a head kick that misses and slips in the process. He scrambles back to his feet and the fighters circle.
And thats the end of the round the fighters go back to their corners.
Brad West dominated that round.
That's the end of the interval. I'm sure that seemed a lot quicker than a minute for our two fighters! Back to the action.

West cracks the inside of Walker's front leg.
Walker is hobbling a little on that front leg after taking quite a few leg kicks so far in this fight.
West throws a mid kick that lands with a slap.
Walker swings for the body but West moves out of range.
West pulls out of a head kick attempt.
A head kick misses from West.
Walker swings away with a body shot that misses
and West counters with a good, hard body kick but Walker shrugs it off.
West lands a leg kick that knocks Walker off balance momentarily.
West misses with a half-hearted attempt at a head kick.
Walker will be looking to protect his midsection after taking some solid kicks to the body.
West throws a right hand that Walker ducks under and follows up with a left that Walker also avoids with ease.
Walker just misses with a punch to the body.
Walker takes a head kick and shrugs it off.
West tries to land a front kick but Walker steps back. That was a bit too telegraphed.
That's one minute gone in the round.
West lands a kick to the ribs of his opponent. Nice work there - in and out in a flash.
Matt Walker is looking to throw some combinations by the looks of things.
Walker lands with a nice body punch.
West takes a body punch but keeps moving.
Walker lunges in with an uppercut that skims his opponent's chin.
Walker connects with a body shot.
West misses with a hook. Walker ducked under it nicely.
Walker has not gone for a single takedown so far in this fight, which seems like a very strange tactic when you consider that he has the superior wrestling and BJJ.
Both fighters circling a little - West finishes the exchange with a kick to the body.
West misses with a leg kick.
West scores with a head kick. Walker tried to block it but didn't get his arm up in time.
Walker connects with a good right hand that stumbles West. West circles away out of range and recomposes himself.
West lands a head kick. Walker smiles back at him and beckons him forward.
That's two minutes gone in the round.
This is a great period of action - very entertaining stuff!
West fails to land with a series of punches.
West avoids a punch combination nicely.
Walker avoids the head kick by West.
West throws a head kick but Walker moves out of range.
Walker misses with a few strikes there.
Sloppy strikes from West. Those never looked like landing.
West throws a head kick but Walker moves out of range.
Walker is looking to wear down West with body shots, infact he's throwing more body shots than head shots at the moment.
West misses with a series of wild punches.
Walker digs a good body shot into West's ribs.
West is breathing heavily.
That's three minutes gone in the round.
Walker blocks a head kick by West.
West misses with a combination
and Walker counters with a series of strikes. West will be more careful next time no doubt.
Walker fails to land with a series of punches.
West fakes a jab and scores with a low kick.
West misses with a hook.
Walker just misses with a punch to the body.
West fails to land with a series of punches.
West tries a switch kick but it misses it's target.
West misses with a kick to the body.
A looping hook to the body misses from Walker. West does a little dance to reset his feet.
That's four minutes gone in the round.
Walker lands a vicious shot with the stealth of a sniper and the strength of a viper. Are vipers that strong? I can think of lots of things that are stronger than a viper - not many rhyme with sniper though.
Walker misses with a few strikes there.
Walker throws a right hand that West ducks under and follows up with a left that West also avoids with ease.
A head kick misses from West.
Danga de danga de dang - West scores with a four punch combination!
West throws a body kick but he was well out of range there.
West throws a quick inside leg kick.
No joy there for West, who threw a few shots but didn't land.
This has been an exciting period of action!
As the round comes to an end the crowd are showing their appreciation for a great round of action.
A head kick misses from West.
A head kick misses from West.
Brad West seems to be getting the better of the standup.
West throws a head kick that misses.
And thats the end of the round the fighters go back to their corners.
A close second round but Brad West will probably get the nod - 10:9.
That's time! Back to the action! This is the final round!

Walker misses with the combination.
West throws a right high kick that is partially blocked by Walker.
West throws a nice looking combination but Walker bobs and weaves to avoid any damage.
West tries a switch kick but it misses it's target.
West bobs and weaves well there to avoid the strikes.
Walker slips a jab and a cross from West.
Walker lands a nice looking body shot.
West scoring well with a low kick there.
West throws a low kick but his opponent is out of range.
West throws a head kick that misses.
West takes a big intake of breath there - he's definitely tired.
Walker throws a jab to the body, straight down the pipe. Boom. That sent West stumbling backwards but he manages to regain his composure quickly.
That's one minute gone in the round.
Walker will need to tighten up his combinations if he doesn't want to gas himself out, swinging at thin air.
West thuds his right hand into Walker's forehead from close range. That could be painful for both fighters.
Walker dodges the punch combination from West.
West blocks a jab.
Walker uses good footwork to get in and out and land a nice right hand before West has time to react.
West slips a jab from Walker.
Some wild striking there from Walker.
Crunch! West slams his shin into Walker's torso.
That's two minutes gone in the round.
West throws a right and a left that Walker avoids nicely.
West misses with a half-hearted attempt at a head kick.
Walker takes a body kick right on the floating rib. Ouchie.
A head kick misses from West.
Walker throws a hard body shot but it just misses.
Walker looks to score with a jab to the body but West is just out of range.
A slapping leg kick lands for West.
Walker lands a nice looking body shot.
Walker misses with a double jab.
The fans in attendance giving it up for the two fighters, who have really let it all hang out in the last minute or so!
West slips under a jab.
That's three minutes gone in the round.

Walker drops West with a beautiful combination! West stares up at his opponent, who ushers him back to his feet - Walker is looking for the KO!

West is rocked!

It looks like Brad West has been cut.
We've seen a great period of action over the last minute or so - credit to both fighters for going all out!
Walker cracks West with a hook to the jaw. Both fighters smile at eachother and high-five before getting back down to business.
West is still on wobbly legs! Can Walker finish him?
Walker moves out of range of the body kick.
West leaves his chin hanging out and Walker seizes the opportunity with an uppercut! West crumbles to the floor in a heap! The referee steps in and tends to the downed fighter! What a knockout!
Ladies and gentlemen, after 3:20 of round 3, we have a winner by way of KO (Punch). Matt Walker!
An out of breath Matt Walker thanked his loyal fans in his post fight interview, giving them credit for his success over the course of his career.
|
|
|
|
|
|
|
|
|
|
|
|
|
|
|
|
|
|
|
|
|
|
|
| S |
C
A |
G |
S |
C
B |
G |
|
S |
C |
G |
|
energy
A | B |
|
hype
A | B |
|
pop
A | B |
|
mgr
A | B |
|
FIGHT
RATING
77% |
|
|
|
|
|
|
|
Undercard bout
|
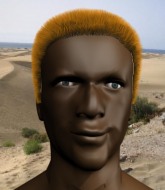
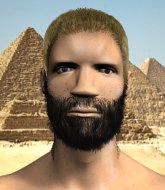
Coming up we have a lightweight MMA rules bout between Tabarik Maisumov (ranked 0 p4p, 0 weight class) and Theodore Ruxpin (ranked 0 p4p, 0 weight class). Both fighters look fresh as a daisy as they make their way towards the cage.
 |
|
 |
| 172 cm
26
155 lbs
5 - 3 - 0 |
|
180 cm
19
164 lbs
0 - 2 - 0 |
Good wrestling
Brawler
Experienced |
|
BJJ Blue Belt
Decent boxing
Determined |
|
| |
|
Ladies and gentlemen. This fight is 3 rounds, in the lightweight division.
Introducing the fighter to my left, fighting out of the red corner.
With a record of
5 - 3 - 0, fighting out of St Petersburg, Tabarik Maisumov!
And introducing the fighter to my right, fighting out of the blue corner.
With a record of
0 - 2 - 0, fighting out of Amsterdam, Theodore Ruxpin!
The judges for this bout are James Ackerman, Donald Grub and Steven Brown.
The bell rings for round one and we are underway!
Ruxpin digs a good body shot into Maisumov's ribs.
Ruxpin lands the left hand.
Maisumov throws a head kick that misses and slips in the process. He scrambles back to his feet and the fighters circle.
Maisumov misses with a half-hearted attempt at a head kick.
Ruxpin lands a nice hook to Maisumov's body. Maisumov takes it in his stride and looks to land his own strikes.
Maisumov shakes his hands off, looking to compose himself, but takes a jab to the jaw whilst he does it.
Wooooo! Give it up for these two warriors! They are putting on a show!
Maisumov gets caught by a big overhand right and goes down! Ruxpin gets on top of him and starts throwing some serious punches until the ref intervenes and stops the fight!
Ladies and gentlemen, after 0:21 of round 1, we have a winner by way of TKO (Strikes). Theodore Ruxpin!
After winning the bout, Theodore Ruxpin thanked all his fans and promised he'd do even better in his next fight. The crowd seemed to love his humility.
|
|
|
|
|
|
|
|
|
|
|
|
|
|
|
|
|
|
|
|
|
|
|
| S |
C
A |
G |
S |
C
B |
G |
|
S |
C |
G |
|
energy
A | B |
|
hype
A | B |
|
pop
A | B |
|
mgr
A | B |
|
FIGHT
RATING
100% |
|
|
|
|
|
|
|
Undercard bout
|
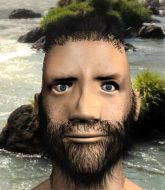
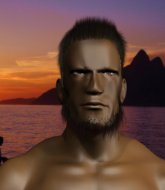
Coming up we have a light heavyweight MMA rules bout between Matt Lauzon (ranked 0 p4p, 0 weight class) and Tommy Traddles (ranked 0 p4p, 0 weight class). Traddles has chosen David Copperfield Audio Book as his entrance music. Over to our ring announcer for the fighter introductions!
 |
|
 |
| 177 cm
19
215 lbs
0 - 0 - 0 |
|
185 cm
23
211 lbs
2 - 2 - 0 |
BJJ Purple Belt
Excellent boxer
Good chin |
|
BJJ Brown Belt
Basic striking
Enjoys gardening |
|
| |
|
Ladies and gentlemen. This fight is 3 rounds, in the light heavyweight division.
Introducing the fighter to my left, fighting out of the red corner.
With a record of
0 - 0 - 0, fighting out of St Petersburg, Matt Lauzon!
And introducing the fighter to my right, fighting out of the blue corner.
With a record of
2 - 2 - 0, fighting out of London, Tommy Traddles!
The judges for this bout are Chris Edwards, Steven Brown and Richard Clark.
The bell rings for round one and we are underway!
Traddles doesn't react quick enough there as he takes a shot to the body.
Boom, another hit is landed. "You're gunna get knocked out" taunts Lauzon, as that shot connected.
Lauzon lands a jab. Then a cross. Then finally a nice hook to the body. Good work there by Lauzon.
Lauzon lands a body shot.

Traddles looking to shoot here. He's gone for it and he's landed a takedown into side control! Oh, that's bad for Lauzon!
This has been an exciting period of action!
If this pace continues, the referee will definitely step in and force a standup.
Lauzon is trying to get back to his feet.

Traddles decides to take the fight back to the feet.
Traddles with a lazy takedown attempt
and Lauzon counters with a good right hand that lands right on the jaw.
Lauzon lands three nice shots there - that looked like it hurt!
Traddles is rocked!
Traddles motions for Lauzon to come forward. Traddles throws a leg kick but it misses it's target.
Traddles is still on wobbly legs! Can Lauzon finish him?
Lauzon lands with a big right hook that stumbles Traddles - he's out on his feet here! Lauzon follows up with another monster hook that separates Traddles from consciousness! Traddles falls, almost in slow motion to the canvas! Lauzon stands and admires his work as the crowd go wild.
Ladies and gentlemen, after 0:38 of round 1, we have a winner by way of KO (Punches). Matt Lauzon!
|
|
|
|
|
|
|
|
|
|
|
|
|
|
|
|
|
|
|
|
|
|
|
| S |
C
A |
G |
S |
C
B |
G |
|
S |
C |
G |
|
energy
A | B |
|
hype
A | B |
|
pop
A | B |
|
mgr
A | B |
|
FIGHT
RATING
100% |
|
|
|
|
|
|
|
Undercard bout
|
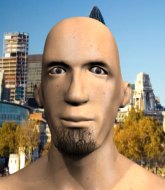
Coming up we have a lightweight MMA rules bout between Nate Lamb (ranked 0 p4p, 0 weight class) and Ricardo Dias (ranked 0 p4p, 0 weight class). Lamb kept the crowd waiting but all that was forgotten when his ring entrance music started. The incomparable musical genius that is I'll be glad when you're dead - Hanni El Khalib. Dias has chosen Hawthorne Heights - Light Sleeper as his entrance music, which hasn't gone down very well with the crowd. Ricardo Dias told me before the fight that he's been watching a lot of DVDs so let's see if that helps him in this one! I can't wait to find out!
 |
|
 |
| 170 cm
21
149 lbs
2 - 2 - 0 |
|
170 cm
18
149 lbs
2 - 0 - 0 |
BJJ Purple Belt
Basic striking
Good chin |
|
BJJ White Belt
Decent boxing
Heavy handed |
|
| |
|
Ladies and gentlemen. This fight is 3 rounds, in the lightweight division.
Introducing the fighter to my left, fighting out of the red corner.
With a record of
2 - 2 - 0, fighting out of London, Nate Lamb!
And introducing the fighter to my right, fighting out of the blue corner.
With a record of
2 - 0 - 0, fighting out of London, Ricardo Dias!
The judges for this bout are Steven Brown, Paul Tew and Richard Clark.
The bell rings for round one and we are underway!
Lamb is on the wrong end of a nice combination from Dias.
Lamb misses with a half-hearted attempt at a head kick.
Dias has been working on his striking defense in training and it's paying off as Lamb is landing a low percentage of strikes.
Dias fails to land with a series of punches.
Dias fakes and then throws a beautiful body shot. Lamb looks a bit winded and takes a step backwards to take a breath.
Dias stuffs the takedown.
Dias lands a hook that stumbles Lamb back into the cage. Dias follows up with a straight and another hook that land right on the button, dropping Lamb to the canvas! Dias pounces and lands several unanswered shots - Lamb has had enough and taps out! This one is all over!
Ladies and gentlemen, after 0:19 of round 1, we have a winner by way of Submission (Strikes). Ricardo Dias!
During a confident post fight interview, Ricardo Dias thanked all his fans. He seemed very genuine when describing how motivated his fans keep him.
|
|
|
|
|
|
|
|
|
|
|
|
|
|
|
|
|
|
|
|
|
|
|
| S |
C
A |
G |
S |
C
B |
G |
|
S |
C |
G |
|
energy
A | B |
|
hype
A | B |
|
pop
A | B |
|
mgr
A | B |
|
FIGHT
RATING
100% |
|
|
|
|
|
|
|
Undercard bout
|
Coming up we have a lightweight MMA rules bout between Jakinek Ii Jakinek (ranked 0 p4p, 0 weight class) and Donald Duckke (ranked 0 p4p, 0 weight class). Donald Duckke is staring across the cage at his opponent, tweaking his nipples.
 |
|
 |
| 225 cm
19
143 lbs
2 - 1 - 0 |
|
176 cm
25
168 lbs
0 - 0 - 0 |
BJJ White Belt
Excellent boxer
Granite chin |
|
BJJ White Belt
Excellent boxer
Determined |
|
| |
|
Ladies and gentlemen. This fight is 3 rounds, in the lightweight division.
Introducing the fighter to my left, fighting out of the red corner.
With a record of
2 - 1 - 0, fighting out of London, Jakinek Ii Jakinek!
And introducing the fighter to my right, fighting out of the blue corner.
With a record of
0 - 0 - 0, fighting out of London, Donald Duckke!
The judges for this bout are James Ackerman, Paul Tew and James Glass.
The bell rings for round one and we are underway!
Duckke uses some good footwork to avoid the body shot by Jakinek.
Jakinek lands with a cross to side of his opponent's head.
Jakinek really does look like a pencil wearing a pair of gloves. Let's hope he has a gameplan to suit that ridiculous body shape.
Jakinek lands a body shot.
Duckke has his head slapped from side to side by a 3 punch combination. That must have hurt him.
Jakinek throws a quick head kick that skims the top of Duckke's head.
Ouch! a nice leg kick from Jakinek, right into the meat.
Duckke throws a decent looking leg kick but it doesn't land clean.
Oooooooooooh, not good. A low kick from Duckke lands where it shouldn't have, right in the... well, you know what he did? He kicked him in the penis. He's injured, injured bad. The referee sends both fighters to their corners and Jakinek has 5 minutes to recover. He's OK now though... a thumbs up from Jakinek and we're back underway with a touch of gloves.
Jakinek throws a wild combination but nothing lands.
Jakinek ducks down and throws a hook to the body but Duckke moves away.
Duckke is on the wrong end of a nice combination from Jakinek.
Jakinek with a body punch. A glancing blow.
Duckke takes a head kick and shrugs it off.
This has been an exciting period of action!
Jakinek misses with a body shot.
Jakinek lands with a shot to the body.
Jakinek explodes with a nice body kick and back out of range. Nice work.
That's one minute gone in the round.
Jakinek misses with a jab and misses with a cross straight after too.
Jakinek Ii Jakinek seems to be the more aggressive standup fighter in this bout.
Jakinek lands a jab followed by a nice looking cross.
Jakinek throws a good cross that connects.
Jakinek works over Duckke's head and body with a nice combination.
A decent looking body kick lands there for Jakinek.
Jakinek is looking to wear down Duckke with body shots, infact he's throwing more body shots than head shots at the moment.
A thudding body kick lands there by Jakinek!
Jakinek throws a mid kick that lands with a slap.
Jakinek throws a right and a left that Duckke avoids nicely.
Jakinek misses with a few strikes there.
Duckke avoids a punch combination nicely.
We've been hearing reports that Jakinek has been drilling takedowns in recent sessions so let's see if that has an impact on the result of this fight.
Jakinek thows a body kick. Duckke tries to catch it but that hurt him.
Jakinek throws a series of punches but Duckke avoids them all with ease.
That's two minutes gone in the round.
Jakinek misses with a jab, cross combination.
Duckke throws a wild body kick that Jakinek sees coming a mile off.
Jakinek stuns Duckke with a nice body shot, before stepping back out of range.
This is a great period of action - very entertaining stuff!
Duckke takes a shot to the body in his stride.
Jakinek lets the fists fly and connects with a left straight followed by a right hook.
Jakinek rushes forward with a series of wild hooks but Duckke moves out of range and avoids them all easily.
Duckke uses some good footwork to avoid the body shot by Jakinek.
Jakinek is moving around nicely and scores here with a single head shot.
Jakinek shuffles to his left behind two crisp jabs. Duckke eats them both and turns towards Jakinek to reposition himself and eats a stinging right hand-left hook combo.
Jakinek misses with a jab, cross combination.
Jakinek swings and misses with a hook to the body.
Jakinek lands with an overhand left.
Some wild striking there from Duckke.
Duckke misses with a two punch combination.
That's three minutes gone in the round.
Jakinek swings wildly with a hook that is half blocked by Duckke.
Jakinek misses with a double jab.
Duckke throws a body kick that misses
and Jakinek makes the exchange count by landing a cracking kick to the body. Duckke really felt that one!
Duckke shoots in for a takedown but Jakinek shows good takedown defense.
Jakinek punishes Duckke's body with a nice straight punch.
Duckke steps to his left, right into the path of a big body kick from Jakinek. That one must have hurt.
Jakinek scores to the head and body with a nice combination!
Duckke throws a nice looking combination but Jakinek bobs and weaves to avoid any damage.
Jakinek throws a nice looking combination but Duckke bobs and weaves to avoid any damage.
Jakinek throws a head kick that looked like it stung.
Jakinek misses with a body shot. Nice footwork from Duckke.
Some wild striking there from Jakinek.
That's four minutes gone in the round.
Jakinek misses with the combination.
Duckke throws a hook to the body but it doesn't connect.
Jakinek throws a combination but it was largely blocked by Duckke.
Jakinek lands with a shot to the body.
Some wild striking there from Duckke.
Jakinek throws a jab to the body, straight down the pipe. Boom. That sent Duckke stumbling backwards but he manages to regain his composure quickly.
The crowd cheering loudly, showing their appreciation for the quality fight we're seeing here.
As the round comes to an end the crowd are showing their appreciation for a great round of action.
Duckke has his head slapped from side to side by a 3 punch combination. That must have hurt him.
Jakinek lunges in with swinging rights and lefts but Duckke circles away quickly and effectively.
Duckke throws a head kick but Jakinek moves out of range.
And thats the end of the round the fighters go back to their corners.
Jakinek Ii Jakinek dominated that round.
That's the end of the interval. I'm sure that seemed a lot quicker than a minute for our two fighters! Back to the action.
Jakinek scores with a nice body kick.
Duckke misses with a head kick.
Jakinek lands a jab followed by a nice looking cross.
Duckke misses with a wild combination.
Jakinek with a body punch. A glancing blow.
Duckke moves forwards but Jakinek connects with a nice, crisp jab.
Jakinek throws a jab, cross combination which is slipped
and Duckke makes him pay by landing a thudding low kick.
Duckke throws a head kick that misses and slips in the process. He scrambles back to his feet and the fighters circle.
Duckke has developed a nice purple lump on his ribcage, as a result of some heavy body kicks from Jakinek.
Jakinek misses with a double jab.
Jakinek digs a good hook to Duckke's body.
Duckke misses with a leg kick.
Jakinek lunges in with swinging rights and lefts but Duckke circles away quickly and effectively.
Jakinek digs a good body shot into Duckke's ribs.
That's one minute gone in the round.
Jakinek scores with a jab to the body.
Jakinek fails to land with a series of punches.
Duckke showing good head movement there, avoiding the strikes from Jakinek.
Sloppy strikes from Jakinek. Those never looked like landing.
Duckke misses with a jab, cross combination.
Jakinek Ii Jakinek is winning the standup battle so far.
A nice combination there by Jakinek.
Duckke tries to bum rush Jakinek with a series of wild strikes but Jakinek uses good footwork to avoid the assault.
Duckke tries a switch kick but it misses it's target.
Jakinek thows a body shot but no joy.
Sloppy strikes from Jakinek. Those never looked like landing.
Jakinek throws a combination but it was largely blocked by Duckke.
That's two minutes gone in the round.
Duckke tries a head kick but it misses.
Jakinek throws a head kick that half lands.
Duckke tries a switch kick but it misses it's target.
Jakinek works over Duckke's head and body with a nice combination.
Jakinek lands a jab followed by a nice looking cross.
Jakinek scores with a head kick.
It really doesn't seem like the step up in weight is hurting Jakinek here at all. He's more than holding his own against the bigger man.
Duckke has a nice red mark on his side after a thudding body kick by Jakinek.
The crowd cheering loudly, showing their appreciation for the quality fight we're seeing here.
A decent looking body kick lands there for Jakinek.
Jakinek swings for the body but Duckke moves out of range.
Duckke fails to land with the punch combination there - jab, cross, hook, miss, miss, miss.
Jakinek lands a jab to Duckke's midsection.
Jakinek is using his height advantage well here, landing a good percentage of his punches.
Jakinek paws at his opponent with the jab and then lunges in with a straight, right on the button.
Duckke throws a leg kick but Jakinek checks it.
That's three minutes gone in the round.
Jakinek misses with the combination.
Jakinek keeps Duckke at a distance using the push kick.
A decent looking cross lands there for Jakinek.
Duckke uses some good footwork to avoid the body shot by Jakinek.
A looping hook to the body misses from Jakinek. Duckke does a little dance to reset his feet.
Jakinek is using his reach advantage well here, landing the more effective single shots from range.
Duckke shoots in but Jakinek avoids the takedown attempt easily.
Jakinek stuffs a takedown. It's all about dictating where the fight takes place and Jakinek wants it to stay on the feet.
Jakinek Ii Jakinek is looking to keep the fight on the feet at all costs.
Jakinek jabs Duckke to the body, keeping him at a distance.
Duckke sees a low kick coming and goes to check it, but it's actually a body kick and it thuds into his unprotected ribs.
Duckke is on the wrong end of a nice combination from Jakinek.
That's four minutes gone in the round.
Jakinek thuds his shin into the meat of Duckke's side.
Jakinek throws a body kick that sends a sickening thudding noise reverberating around the arena.
Jakinek throws a mid kick that lands with a slap.
Left hook, right uppercut from Jakinek.
Jakinek throws a combination but comes up with nothing but fresh air.
The fans in attendance giving it up for the two fighters, who have really let it all hang out in the last minute or so!
Jakinek checks a low kick from Duckke.
Duckke dodges the punch combination from Jakinek.
Duckke has a pretty nasty looking mouse under his right eye.
Jakinek lands a jab, followed by a cross and another cross, as Duckke backs up against the cage.
As the round comes to an end the crowd are showing their appreciation for a great round of action.
A left and a right from Jakinek both land. Nice combination.
Jakinek scores with a nice head shot.
Duckke on the wrong end of a kick to the body.
And thats the end of the round the fighters go back to their corners.
Jakinek Ii Jakinek dominated that second round.
The minute break is over - no more time for sponges and pep talks - back to the action! Let's get this one finished - here comes the final round!
Jakinek throws a mid kick that lands with a slap.
Jakinek displays good takedown defense there as he swats away a double leg from Duckke.
Jakinek scores with a body shot.
Jakinek throws a right hand that Duckke ducks under and follows up with a left that Duckke also avoids with ease.
Jakinek thows a body kick. Duckke tries to catch it but that hurt him.
Jakinek moves into range and throws a lovely three punch combination.
A solid body kick from Jakinek.
Oooooooooooh, not good. A low kick from Duckke lands where it shouldn't have, right in the... well, you know what he did? He kicked him in the penis. He's injured, injured bad. The referee sends both fighters to their corners and Jakinek has 5 minutes to recover. He's OK now though... a thumbs up from Jakinek and we're back underway with a touch of gloves.
Jakinek goes for a high kick. It partially lands.
Duckke throws a combination but it was largely blocked by Jakinek.
Jakinek lands a jab-cross combination.
That's one minute gone in the round.
Jakinek throws a head kick that looked like it stung.
Jakinek is working the combinations to good effect here.
Jakinek lands a nice looking body shot.
Jakinek goes to the watering hole and comes back with a big thumbs up from the judges as he scores a three punch combo.
Duckke throws the kick towards the body but Jakinek avoids it.
Duckke misses with a body kick.
Duckke tries to check the leg kick but that clearly hurt him.
Jakinek feints and then cracks Duckke's leading leg with a nice low kick. He's obviously looking to slow Duckke down.
Jakinek lands a kick to the ribs of his opponent. Nice work there - in and out in a flash.
Jakinek scores with a nice looking left hook and follows it up with an uppercut!
Nice body kick from Jakinek.
Duckke showing good head movement there, avoiding the strikes from Jakinek.
Jakinek looks to score with a jab to the body but Duckke is just out of range.
That's two minutes gone in the round.
Jakinek thumps Duckke with a low kick.
Duckke tries to shoot in for a takedown. He's got hold of a leg but Jakinek swivels and escapes.
Jakinek scores with a one two! Duckke had his feet all tangled up there and couldn't avoid the strikes.
This has been an exciting period of action!
Duckke misses with an attempted mid kick.
Duckke pulls out of a head kick attempt.
Duckke takes a big intake of breath there - he's definitely tired.
Jakinek lands a jab.
Jakinek fails to land with a series of punches.
Duckke stumbles momentarily as he takes a strong leg kick from Jakinek.
Jakinek tries to bum rush Duckke with a series of wild strikes but Duckke uses good footwork to avoid the assault.
Jakinek misses with a series of wild punches.
That's three minutes gone in the round.
Duckke showing good head movement there, avoiding the strikes from Jakinek.
Jakinek will need to tighten up his combinations if he doesn't want to gas himself out, swinging at thin air.
Duckke misses with a wild combination.
Duckke avoids a punch combination nicely.
Jakinek avoids a punch combination nicely.
Jakinek thuds his shin into the meat of Duckke's side.
Donald Duckke has stepped it up - he knows he needs a finish here!
That's four minutes gone in the round.
Jakinek throws a combination but comes up with nothing but fresh air.
Jakinek throws a right and a left that Duckke avoids nicely.
That's a knee to de groin and it's over and out! Duckke crumples to the ground after an illegal strike from Jakinek - the referee stops the clock and Duckke gets 5 minutes to recover from that one. "I'm sorry" says Jakinek. Duckke manages to get back to his feet and the fight resumes.
Jakinek swings away but doesn't land with a series of punches.
Duckke takes a nice looking leg kick right on the meat of his thigh there.
Jakinek misses with a two punch combination.
Duckke steps to his left, right into the path of a big body kick from Jakinek. That one must have hurt.
Jakinek throws a nice looking combination but Duckke bobs and weaves to avoid any damage.
Jakinek stuffs a takedown. It's all about dictating where the fight takes place and Jakinek wants it to stay on the feet.
Jakinek Ii Jakinek has stuffed three takedown attempts in the round now. That's going to take a lot out of Donald Duckke.
As the round comes to an end the crowd are showing their appreciation for a great round of action.
Jakinek with a body punch. A glancing blow.
Duckke misses with a body shot.
Jakinek Ii Jakinek is fighting for a decision here - he's started to take the cautious approach.
Duckke throws a right and a left that both miss.
And that's the end of the fight!
Jakinek Ii Jakinek showed his dominance in that final round.
Well Jakinek has outscored his opponent in every aspect of the fight today. Only a scarily incompetent judge or two will keep him from a well deserved win... Over to the ring announcer for the scorecards.
Ladies and gentlemen, after 3 rounds of action, we go to the scorecards for a decision.
Judge James Ackerman scores the fight 30:27
Judge Paul Tew scores the fight 30:27
Judge James Glass scores the fight 30:27
In favor of your winner, by unanimous decision... Jakinek Ii Jakinek!
A victorious Jakinek Ii Jakinek thanked his army of followers in his post fight interview, telling people to make sure they follow him on Twitter.
|
|
|
|
|
|
|
|
|
|
|
|
|
|
|
|
|
|
|
|
|
|
|
| S |
C
A |
G |
S |
C
B |
G |
|
S |
C |
G |
|
energy
A | B |
|
hype
A | B |
|
pop
A | B |
|
mgr
A | B |
|
FIGHT
RATING
53% |
|
|
|
|
|
|
|
Undercard bout
|
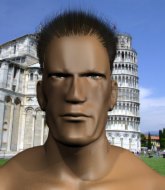
Coming up we have a welterweight MMA rules bout between Janusz Smuda (ranked 0 p4p, 0 weight class) and Danny Brown (ranked 0 p4p, 0 weight class). Janusz Smuda has the edge in experience - let's see if he can make that count tonight.
 |
|
 |
| 183 cm
26
175 lbs
2 - 2 - 0 |
|
169 cm
19
177 lbs
1 - 1 - 0 |
Good wrestling
Counter fighter
Very strong |
|
Good wrestler
Basic striking
Powerful |
|
| |
|
Ladies and gentlemen. This fight is 3 rounds, in the welterweight division.
Introducing the fighter to my left, fighting out of the red corner.
With a record of
2 - 2 - 0, fighting out of London, Janusz Smuda!
And introducing the fighter to my right, fighting out of the blue corner.
With a record of
1 - 1 - 0, fighting out of Sydney, Danny Brown!
The judges for this bout are Sam Margolis, Richard Clark and Phil Schofield.
The bell rings for round one and we are underway!
Brown connects with a right hand. Smuda shakes it off.
Brown throws a hook but Smuda avoids it easily.
Brown thows a left - swing and a miss!
Brown has been working on his striking defense in training and it's paying off as Smuda is landing a low percentage of strikes.
Brown shoots in for a takedown but Smuda shows good takedown defense there and keeps this one on the feet.
Smuda walks into a straight right hand from Brown.
Brown misses the shot to the body.
Brown lands with a cross to side of his opponent's head.
Smuda moves out of range of the strikes.
Brown drives through with a takedown into Smuda's guard. Let's see what he can do from the top position.
Smuda on his back here. We all know that wrestlers don't like being on their back so let's see if Smuda tries to get out of the position.
Smuda working a defensive guard here.
Brown lands a couple of elbows.
That's one minute gone in the round.
Brown in full guard, throwing the ground and pound. No damage this time.
Brown loading up with the ground and pound but he's missing more than he's landing in this flurry.
Brown is working Smuda over from the guard. He should look to pass the guard and do a little more damage with these strikes.
Brown showing good wrestling skills to control the position.
Brown with a couple of shots to the head there. Not particularly brutal.
Brown seems content to control from guard here. He's going to have to remain active though if he doesn't want to get stood back up.
Smuda has momentary wrist control but Brown slips an elbow through the middle.
That's two minutes gone in the round.
Brown connects with a couple of short punches.
Brown trying to control but Smuda is working from the bottom.
The fighters are pressed up against the cage, both looking to find a bit of space to work.
Brown is sitting in guard, working some ground and pound.
Brown throws an elbow that misses. Smuda uses the momentum to reverse the position. He's now in Brown's guard. Nice move by Smuda!
Smuda working some ground and pound from guard but it's not doing any damage.
Wooooo! Give it up for these two warriors! They are putting on a show!
Brown is pulling down on Smuda's head. It's preventing any offense from Smuda, at least for the moment.
There's a bit of a scramble here and now Brown is on top in guard.
Brown trying to control but Smuda is working from the bottom.
That's three minutes gone in the round.
Brown lands a nice shot whilst sitting in his opponent's guard.
Brown trying to control the position from guard on top but Smuda is wriggling around, looking for whatever he can.
Brown keeps in close for a moment and lands a decent shot to the side of Smuda's head.
Brown lands a couple of decent looking shots.
Brown in full guard, throwing the ground and pound. No damage this time.
Smuda is breathing heavily.
Brown loading up with the ground and pound but he's missing more than he's landing in this flurry.
Brown connects with a couple of short punches.
Brown is sitting in guard, working some ground and pound.
Brown throwing strikes from guard but Smuda blocks nicely.
That's four minutes gone in the round.
Smuda has momentary wrist control but Brown slips an elbow through the middle.
Brown stays in close to Smuda's body and controls the position.
We've seen a great period of action over the last minute or so - credit to both fighters for going all out!
Brown in full guard, throwing the ground and pound. No damage this time.
Smuda will need to keep those long limbs tucked in whilst he's on the ground, to prevent any submissions.
Brown stopping the sweep attempt from Smuda.
Brown scoring with some ground and pound.
As the round comes to an end the crowd are showing their appreciation for a great round of action.
Brown throwing strikes but missing.
Brown has the superior BJJ but he's also working some ground strikes into his gameplan.
Brown chips away with some ground and pound.
And thats the end of the round the fighters go back to their corners.
Danny Brown dominated that round.
The corners get their ten second warning. Both fighters stand from their stools and stare eachother down, ready to get back to the action.
Brown looks for a takedown but Smuda sprawls well.
Smuda walks into a straight right hand from Brown.
Brown dips down and scores with a jab to the body.
Brown throws a jab when Smuda was well out of range.
Brown throws a shot from downtown. Smuda moves away and avoids it.
A big right from Brown misses.
Brown misses with a straight left.
Brown might want to mix his strikes up a bit more. He's just going for head shots at the moment and that can become a bit predictable.
Nice defenses there by Smuda.
That's one minute gone in the round.
Smuda uses good footwork to avoid the strikes from Brown.
Brown shoots in for a takedown! He's got it and he's managed to land in side control! That's better than Brown was expecting from the takedown attempt, I'm sure!
Brown lands a nice forearm strike.
Brown landing with strikes to the head and body from side control.
Brown has been the more effective fighter overall so far.
Brown is moving around in side control but his primary objective seems to be to maintain the position.
Smuda regains half guard, as Brown was trying to land strikes.
Both fighters are absolutely exhausted here.
Brown wants to free his trapped foot but Smuda is holding on for dear life with his legs.
That's two minutes gone in the round.
Smuda avoiding damage under a succession of punches from Brown.
Brown missing with some ground and pound from the half guard.
Brown frees up his trapped foot and advances to mount.
This has been an exciting period of action!
Brown looking to ground and pound his opponent to a finish here.
Brown unloading with bombs!
Brown putting on the heat here with some good ground and pound!
Smuda in a bad spot here, taking shots to the head.

Smuda is rocked!
Brown unloading with bombs!
Oh Smuda is still in real trouble! Will he be able to recover?!!
Smuda is bucking up trying to escape but Brown cracks him with another couple of good strikes.
That's three minutes gone in the round.
Brown lands a big elbow.
Smuda in a bad spot here, taking shots to the head.
Oooooh, big shot lands for Brown! Smuda is hurt baaadly! Brown is firing away with more strikes - Smuda is covering up... the ref is warning him to do something. He's just covering up though still and the ref has to step in to end the fight! This one is all over!
Ladies and gentlemen, after 3:29 of round 2, we have a winner by way of TKO (Strikes). Danny Brown!
A determined Danny Brown didn't want to dwell on this fight in his post fight interview. Instead he was more keen to state he wants a title shot. Let's see if he gets it!
Janusz Smuda was interviewed post fight and said 'He was lucky!'.
|
|
|
|
|
|
|
|
|
|
|
|
|
|
|
|
|
|
|
|
|
|
|
| S |
C
A |
G |
S |
C
B |
G |
|
S |
C |
G |
|
energy
A | B |
|
hype
A | B |
|
pop
A | B |
|
mgr
A | B |
|
FIGHT
RATING
50% |
|
|
|
|
|
|
|
Undercard bout
|
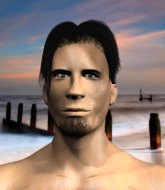
Coming up we have a welterweight MMA rules bout between Samir Ait Yafelman (ranked 0 p4p, 0 weight class) and Badi Gnesh (ranked 0 p4p, 0 weight class). Ait Yafelman comes to the cage accompanied by Morocco Song. The crowd giving both fighters a great reception on their way into the arena. That's good to see.
 |
|
 |
| 177 cm
19
171 lbs
2 - 1 - 0 |
|
161 cm
19
164 lbs
1 - 1 - 0 |
BJJ Blue Belt
Excellent MT
KO power |
|
Good wrestler
Brawler
Determined |
|
| |
|
Ladies and gentlemen. This fight is 3 rounds, in the welterweight division.
Introducing the fighter to my left, fighting out of the red corner.
With a record of
2 - 1 - 0, fighting out of London, Samir Ait Yafelman!
And introducing the fighter to my right, fighting out of the blue corner.
With a record of
1 - 1 - 0, fighting out of Sydney, Badi Gnesh!
The judges for this bout are Donald Grub, Richard Clark and William Gold.
The bell rings for round one and we are underway!
Ait Yafelman lands a nice hook to Gnesh's body. Gnesh takes it in his stride and looks to land his own strikes.
Ait Yafelman lands a nice leg kick that just misses Gnesh's sensitive parts.
Gnesh looks for a takedown but Ait Yafelman sprawls well.
Ait Yafelman digs a good body shot into Gnesh's ribs.
Ait Yafelman stuffs the takedown attempt from Gnesh. Gnesh gets slowly back to his feet.
Gnesh shoots in for a takedown. He's persisting with it as Ait Yafelman sprawls well. Ait Yafelman wins this battle and keeps the fight standing. Gnesh gets slowly back to his feet.
Samir Ait Yafelman has stuffed three takedown attempts in the round now. That's going to take a lot out of Badi Gnesh.
Gnesh closes the distance and clinches up with Ait Yafelman, looking for a takedown. Gnesh pushes Ait Yafelman against the cage but Ait Yafelman circles to the side and manages to break the clinch.
Gnesh shoots in for a takedown but Ait Yafelman shows good takedown defense.
Gnesh fakes high and swings low for a body shot but Ait Yafelman manages to avoid it.
Ait Yafelman changes levels and scores with a jab to the body.
Gnesh looks winded!
The fans in attendance giving it up for the two fighters, who have really let it all hang out in the last minute or so!
Gnesh shoots in but no luck this time.
Ait Yafelman throws a nice hook to the body that draws an oooh from the crowd.
That's one minute gone in the round.
Ait Yafelman lands a big head kick that sends Gnesh tumbling to the mat! Ait Yafelman takes a step backwards and waves Gnesh back to his feet - he wants the finish!
Gnesh is rocked!
It looks like Badi Gnesh has been cut.
Fantastic stuff here - a very entertaining period of action, which has drawn cheers from the crowd.
Ait Yafelman lands with a massive overhand right! Stick a fork in Gnesh - he's out cold! Ermm... I think I just mixed my metaphors but yeah... That was a nice KO! Big win for Ait Yafelman!
Ladies and gentlemen, after 1:14 of round 1, we have a winner by way of KO (Punch). Samir Ait Yafelman!
A very excited looking Samir Ait Yafelman made sure he remembered to thank all the fans both in the arena and on the internet. He said all the coolest people spend all day on MMA websites, which got a big reaction.
|
|
|
|
|
|
|
|
|
|
|
|
|
|
|
|
|
|
|
|
|
|
|
| S |
C
A |
G |
S |
C
B |
G |
|
S |
C |
G |
|
energy
A | B |
|
hype
A | B |
|
pop
A | B |
|
mgr
A | B |
|
FIGHT
RATING
96% |
|
|
|
|
|
|
|
Undercard bout
|
Coming up we have a lightweight MMA rules bout between Chan Sung Aoki (ranked 0 p4p, 0 weight class) and Boros Monet (ranked 0 p4p, 0 weight class). Monet has chosen Downstait - Open Your Eyes as his entrance music. Both fighter's entrance songs getting the crowd jumping here.
 |
|
 |
| 181 cm
19
160 lbs
2 - 1 - 0 |
|
170 cm
24
135 lbs
2 - 0 - 0 |
Good wrestling
Great low kicks
Cardio machine |
|
BJJ White Belt
Excellent boxer
Granite chin |
|
| |
|
Ladies and gentlemen. This fight is 3 rounds, in the lightweight division.
Introducing the fighter to my left, fighting out of the red corner.
With a record of
2 - 1 - 0, fighting out of London, Chan Sung Aoki!
And introducing the fighter to my right, fighting out of the blue corner.
With a record of
2 - 0 - 0, fighting out of London, Boros Monet!
The judges for this bout are Phil Schofield, James Ackerman and Paul Tew.
The bell rings for round one and we are underway!
A leg kick checked by Aoki.
Monet misses with a head kick.
Monet tries to grapple but his opponent circles
and he gets countered with a snapping leg kick.
Monet misses with a head kick.
A head kick misses from Monet.

Aoki moves into range and clinches up with Monet.
Aoki lands with a good tight uppercut to the head.

Aoki has hold of one of Monet's legs. Monet is fighting the takedown attempt but Aoki gets the trip and lands the takedown into guard.
Aoki throwing strikes from guard but Monet blocks nicely.
Hammerfist, elbow! yells Aoki's corner. There ya go! There ya go!
Aoki throwing elbows and punches but not connecting, as Monet works some decent striking defense from the bottom.
The crowd cheering loudly, showing their appreciation for the quality fight we're seeing here.
Monet has momentary wrist control but Aoki slips an elbow through the middle.
Aoki throwing elbows and punches but not connecting, as Monet works some decent striking defense from the bottom.
Aoki keeps in close for a moment and lands a decent shot to the side of Monet's head.
That's one minute gone in the round.
Aoki keeps in close for a moment and lands a decent shot to the side of Monet's head.
Aoki with a flurry of punches that miss.
Aoki chips away with some ground and pound.
Aoki is working Monet over from the guard. He should look to pass the guard and do a little more damage with these strikes.
Aoki landing with the ground and pound.
Aoki lands a couple of decent looking shots.
Aoki in full guard, throwing the ground and pound. No damage this time.
Aoki throws a big elbow that misses.
Monet is trying to stand up but he's not managed so far.
The crowd cheering loudly, showing their appreciation for the quality fight we're seeing here.
Aoki working in close now, lands a nice elbow to the side of Monet's head.
Aoki working some strikes from top position.
That's two minutes gone in the round.
Aoki distracts Monet with his right hand and drops a big elbow with his other arm.
Aoki scores with a decent looking elbow strike.
Monet utilising some decent striking defenses from the guard, preventing the ground and pound.
Aoki will need to keep those long limbs tucked in whilst he's on the ground, to prevent any submissions.
Monet utilising some decent striking defenses from the guard, preventing the ground and pound.
Aoki landing some decent shots from guard.
Aoki postures up in Monet's guard and throws a big left but Monet blocks it.
Aoki lands a couple of decent looking shots.
Hammerfist, elbow! yells Aoki's corner. There ya go! There ya go!
Aoki throwing shots from guard but he's hitting more mat than opponent.
Aoki throwing strikes but missing.
Aoki lands a couple of elbows.
That's three minutes gone in the round.
Aoki working from the guard for now, landing some ground and pound.
Aoki works over Monet with some ground and pound from guard.
Aoki working some strikes from top position.
Monet really doesn't want to stay on the ground with Aoki. If he can't get it back to his feet, it's only a matter of time before he'll be tapping out.
Aoki lands a couple of digs.
Aoki is working Monet over from the guard. He should look to pass the guard and do a little more damage with these strikes.
Aoki is looking to work some ground and pound but Monet has wrist control.
We've been informed that Monet has been working hard on his conditioning in the buildup to the fight.
Aoki postures up and scores with a shot to the body and a follow up elbow to the head.
Wooooo! Give it up for these two warriors! They are putting on a show!
Aoki lands a couple of elbows.
Monet is rocked!
Monet looks winded!
Aoki landing with the ground and pound.
Monet is still in real trouble! Can Aoki finish him?
Aoki cracks Monet with a solid left hand.
Aoki postures up from his opponent's guard, before exploding into some vicious ground and pound! Monet covers up, he's hurt! Aoki keeps throwing the strikes, glancing at the referee... Will he stop it?? One more big shot from Aoki and the ref steps in to end the fight! Aoki can't hide his delight as he celebrates with his corner.
Ladies and gentlemen, after 4:59 of round 1, we have a winner by way of TKO (Strikes). Chan Sung Aoki!
Chan Sung Aoki bigged himself up after the win. The crowd seemed to love it.
|
|
|
|
|
|
|
|
|
|
|
|
|
|
|
|
|
|
|
|
|
|
|
| S |
C
A |
G |
S |
C
B |
G |
|
S |
C |
G |
|
energy
A | B |
|
hype
A | B |
|
pop
A | B |
|
mgr
A | B |
|
FIGHT
RATING
61% |
|
|
|
|
|
|
|
Co-main event
|
Coming up we have a lightweight MMA rules bout between Jimmy Karl (ranked 0 p4p, 0 weight class) and Timothy Robinson (ranked 0 p4p, 0 weight class). I'm sure you'll be fascinated to know that I was talking to some pointless Z list celebrity before the fight and he thought that Timothy Robinson was going to win. Let's see if he was right.
 |
|
 |
| 179 cm
26
155 lbs
4 - 2 - 0 |
|
173 cm
17
157 lbs
5 - 1 - 0 |
BJJ Blue Belt
Brawler
Granite chin |
|
Good takedowns
Brawler
Determined |
|
| |
|
Ladies and gentlemen. This fight is 3 rounds, in the lightweight division.
Introducing the fighter to my left, fighting out of the red corner.
With a record of
4 - 2 - 0, fighting out of London, Jimmy Karl!
And introducing the fighter to my right, fighting out of the blue corner.
With a record of
5 - 1 - 0, fighting out of London, Timothy Robinson!
The judges for this bout are Steven Brown, William Gold and Andrew Berry.
The bell rings for round one and we are underway!
Karl looks to land a left hand but Robinson moved out of range nicely.
Robinson has been working on his striking defense in training and it's paying off as Karl is landing a low percentage of strikes.
Robinson fails with a takedown attempt.
Wow, both these guys are really going for it!
Robinson tries to land a front kick but Karl steps back. That was a bit too telegraphed.
Karl swings and misses with a hook to the body.
Karl misses with a jab and misses with a cross straight after too.
Robinson tries for a takedown but Karl sees it coming a mile off and avoids it easily.
Robinson tries to score a power double leg takedown but Karl sees that one coming and sprawls well. That will dishearten Robinson somewhat.
Jimmy Karl has stuffed three takedown attempts in the round now. That's going to take a lot out of Timothy Robinson.
Robinson looks for a takedown here. Will he get it? Karl is fending him off so far but Robinson persists. Nope, Karl circles away and we're back to standing.
Karl misses with a low kick.
Robinson closes the distance and gets a double leg, slamming Karl to the mat! Karl manages to get full guard.
Robinson pressing down on his opponent's thigh, looking to pass guard. Karl is keeping the position for now.
Robinson controlling from the top position.
Robinson trying to control the position from guard on top but Karl is wriggling around, looking for whatever he can.
That's one minute gone in the round.
Robinson looking to pass the guard.
The ref warns both fighters not to hold the cage as they work up against the meshing.
Karl is trying to control the position from the bottom.

It looks like we're going to have a standup here. Neither fighter is doing enough on the ground.
Karl looks to score with a combo but nothing lands.
Robinson shoots in for a double leg but Karl sprawls well. That's going to sap some energy.
Robinson dives in and scores a takedown into Karl's guard.
Robinson wants to pass the guard but Karl is keeping the position.
That's two minutes gone in the round.
Robinson works a leg free and moves into half guard.
Neither fighter is being very active at the moment, with Robinson in particular looking to stall.

Robinson in half guard on the top. He's looking for a kimura... He's got it locked and he's managed to free his trapped foot. Karl tries to escape but it's on too tight and he has to tap! Great BJJ skills there from Robinson!
Ladies and gentlemen, after 2:45 of round 1, we have a winner by way of Submission (Kimura). Timothy Robinson!
After winning the bout, Timothy Robinson thanked all his fans and promised he'd do even better in his next fight. The crowd seemed to love his humility.
|
|
|
|
|
|
|
|
|
|
|
|
|
|
|
|
|
|
|
|
|
|
|
| S |
C
A |
G |
S |
C
B |
G |
|
S |
C |
G |
|
energy
A | B |
|
hype
A | B |
|
pop
A | B |
|
mgr
A | B |
|
FIGHT
RATING
38% |
|
|
|
|
|
|
|
Main event
|
Coming up we have a welterweight MMA rules bout between Francois Leon (ranked 0 p4p, 0 weight class) and Matthew Barnaby (ranked 0 p4p, 0 weight class). Barnaby has chosen Cryin' like a bitch - Godsmack as his entrance music. These two fighters really are very evenly matched on the feet - it will be fascinating to see who can assert themselves in that aspect of the fight.
 |
|
 |
| 180 cm
19
184 lbs
4 - 1 - 0 |
|
186 cm
19
181 lbs
3 - 0 - 0 |
BJJ Blue Belt
Excellent boxer
Cuts easily |
|
BJJ White Belt
Lethal high kicks
Powerful |
|
| |
|
Ladies and gentlemen. This fight is 3 rounds, in the welterweight division.
Introducing the fighter to my left, fighting out of the red corner.
With a record of
4 - 1 - 0, fighting out of London, Francois Leon!
And introducing the fighter to my right, fighting out of the blue corner.
With a record of
3 - 0 - 0, fighting out of Las Vegas, Matthew Barnaby!
The judges for this bout are James Glass, James Ackerman and Richard Clark.
The bell rings for round one and we are underway!
Barnaby turns his hip over beautifully as he lands a nice leg kick.
Leon getting the better of the striking in that exchange.
Leon moves into range and connects with a jab.
Barnaby throws a body kick that digs right into the meat.
Barnaby throws a body kick that misses.
Leon seems to be moving with more speed, compared to his last bout. He must have been working on that in the gym.
Barnaby connects with a high kick.

It looks like Francois Leon has been cut.
The crowd are loving this. Great action here.
Leon scores with a jab to the body.
Barnaby moves out of range of the strikes.
The fighters circle momentarily. Leon darts into range and connects with a nice straight punch.
Leon stooping low to avoid any incoming strikes and then lunges in with an uppercut come cross that lands flush.
Leon throws a leg kick that is checked
and Barnaby counters with a nice leg kick.
Leon lands a vicious shot with the stealth of a sniper and the strength of a viper. Are vipers that strong? I can think of lots of things that are stronger than a viper - not many rhyme with sniper though.
Leon takes a step towards his opponent and connects with a left hand, before circling away.
Leon lands three nice shots there - that looked like it hurt!
Leon throws out a leg kick but Barnaby moves out of range and Leon only half commits.
That's one minute gone in the round.
Barnaby buckles his opponent's knee momentarily with a nice leg kick.
Barnaby lands a nice leg kick that just misses Leon's sensitive parts.
Leon scores with a jab. Barnaby acknowledges it with a nod of the head.
Whack! Barnaby lands a heavy head kick that drops Leon. The ref tackles Barnaby to stop the fight - a great save by the referee because Leon was done.
Ladies and gentlemen, after 1:21 of round 1, we have a winner by way of TKO (Head Kick). Matthew Barnaby!
During a confident post fight interview, Matthew Barnaby thanked all his fans. He seemed very genuine when describing how motivated his fans keep him.
|
|
|
|
|
|
|
|
|
|
|
|
|
|
|
|
|
|
|
|
|
|
|
| S |
C
A |
G |
S |
C
B |
G |
|
S |
C |
G |
|
energy
A | B |
|
hype
A | B |
|
pop
A | B |
|
mgr
A | B |
|
FIGHT
RATING
84% |
|
|
|
|
|
|
|
|
|
|
