 |
ECFC FIGHT NIGHT 9 PBP Commentary |
Undercard bout
|
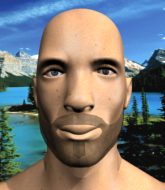
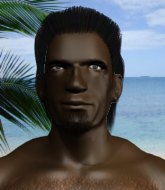
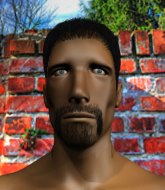
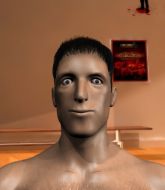
Coming up we have a heavyweight MMA rules bout between Roger Jouban (ranked 0 p4p, 0 weight class) and Jordan Michaels (ranked 0 p4p, 0 weight class). Roger Jouban has a significant reach advantage - let's see if he can make it count.
 |
|
 |
| 216 cm
25
275 lbs
1 - 0 - 0 |
|
200 cm
25
230 lbs
0 - 1 - 0 |
BJJ White Belt
Excellent MT
Granite chin |
|
BJJ Blue Belt
Brawler
Tends to cut |
|
| |
|
Ladies and gentlemen. This fight is 3 rounds, in the heavyweight division.
Introducing the fighter to my left, fighting out of the red corner.
With a record of
1 - 0 - 0, fighting out of Montreal, Roger Jouban!
And introducing the fighter to my right, fighting out of the blue corner.
With a record of
0 - 1 - 0, fighting out of Montreal, Jordan Michaels!
The judges for this bout are Dillan Fox, Alec Ball and Elvis Blanc.

The bell rings for round one and we are underway!
Jouban fails in his attempt to clinch.

Michaels has Jouban up against the cage in a clinch.
Michaels wants to strike at distance but he can't break free of the clinch.
Good anti-grappling being displayed by Jouban as Michaels tries to tie him up.
Michaels wants to take the fight to the mat but Jouban manages to get underhooks and keep the fight in the clinch.
Michaels working hard to break the clinch.
Michaels blocks a knee to the body. He'll have a nicely bruised forearm in the morning.
Jouban unloads a knee to the mid-section. Michaels lets out a prehistoric sounding urrrrgh.
Michaels managing to block the knees to the body from Jouban.
Jouban landing knees to the head.

It looks like Jordan Michaels has been cut.
We've had a slow start to the round here - hopefully the action picks up.
Michaels fails to pull guard.
Michaels takes a knee to the side of the body.
Michaels looks winded!
Jouban landing knees to the head.
Jouban scores with a knee to the head.
Jouban landing knees to the body. They look like they could hurt.
This is a great period of action - very entertaining stuff!
Jouban lands a big knee to the head and Michaels goes down! Jouban pounces and finishes the fight with strikes! He jumps to his feet and celebrates with the crowd!
Ladies and gentlemen, after 1:58 of round 1, we have a winner by way of TKO (Strikes). Roger Jouban!
|
|
|
|
|
|
|
|
|
|
|
|
|
|
|
|
|
|
|
|
|
|
|
| S |
C
A |
G |
S |
C
B |
G |
|
S |
C |
G |
|
energy
A | B |
|
hype
A | B |
|
pop
A | B |
|
mgr
A | B |
|
FIGHT
RATING
62% |
|
|
|
|
|
|
|
Undercard bout
|
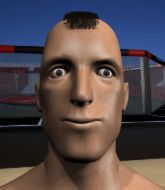
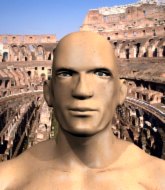
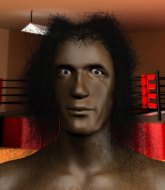
Coming up we have a featherweight MMA rules bout between Lee Jun Fan (ranked 0 p4p, 0 weight class) and Tim Tucker (ranked 0 p4p, 0 weight class). Well, the cameraman is lingering on a pretty young lady for a bit too long there. Keep your eyes on the prize buddy or you'll miss the fighter intros!
 |
|
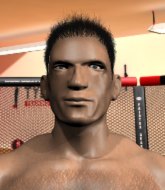 |
| 174 cm
20
157 lbs
1 - 1 - 0 |
|
170 cm
18
150 lbs
1 - 2 - 0 |
BJJ Purple Belt
Dangerous knees
Granite chin |
|
BJJ Brown Belt
Brawler
Solid chin |
|
| |
|
Ladies and gentlemen. This fight is 3 rounds, in the featherweight division.
Introducing the fighter to my left, fighting out of the red corner.
With a record of
1 - 1 - 0, fighting out of Montreal, Lee Jun Fan!
And introducing the fighter to my right, fighting out of the blue corner.
With a record of
1 - 2 - 0, fighting out of Montreal, Tim Tucker!
The judges for this bout are Elvis Blanc, Trevor Gratis and Alec Ball.
The bell rings for round one and we are underway!
Jun Fan ducks down and throws a hook to the body but Tucker moves away.
Jun Fan throws a body kick but he wasn't in range.
Tucker takes a step back and watches a body kick go sailing past his mid section.
Jun Fan moving in and out of range nicely, whilst landing the scoring shot.
Tucker walks straight into a jab right on the nose. That one stung - he's blinking and trying to clear his head.
Tucker will have to do better than that with his takedown attempts.

Jun Fan moves into range and clinches up with Tucker.
Jun Fan tries to land a knee to the head but Tucker blocks with his arms.
Jun Fan throws a hook to the body. More of an arm punch but it's all scoring with the judges.
Jun Fan crunches a lovely knee into Tucker's ribcage.
Jun Fan scores with a knee to the head.
Jun Fan is trying to wear down his opponent with knees to the body.
Tucker looks winded!
The crowd are loving this. Great action here.
Jun Fan scores with a knee to the head.
Jun Fan connects with a knee to the head.

Tucker is rocked!
Jun Fan lands a big knee to the head and Tucker goes down! Jun Fan pounces and finishes the fight with strikes! He jumps to his feet and celebrates with the crowd!
Ladies and gentlemen, after 0:53 of round 1, we have a winner by way of TKO (Strikes). Lee Jun Fan!
|
|
|
|
|
|
|
|
|
|
|
|
|
|
|
|
|
|
|
|
|
|
|
| S |
C
A |
G |
S |
C
B |
G |
|
S |
C |
G |
|
energy
A | B |
|
hype
A | B |
|
pop
A | B |
|
mgr
A | B |
|
FIGHT
RATING
95% |
|
|
|
|
|
|
|
Undercard bout
|
Coming up we have a lightweight MMA rules bout between Juan Carlos Ortiz (ranked 0 p4p, 0 weight class) and Joadson Bidon (ranked 0 p4p, 0 weight class). The fight MMA fans around the world have waited their entire lives for!
 |
|
 |
| 175 cm
25
158 lbs
2 - 1 - 0 |
|
175 cm
25
165 lbs
1 - 1 - 0 |
Decent wrestler
Solid boxing
Big heart |
|
BJJ White Belt
Excellent MT
Determined |
|
| |
|
Ladies and gentlemen. This fight is 3 rounds, in the lightweight division.
Introducing the fighter to my left, fighting out of the red corner.
With a record of
2 - 1 - 0, fighting out of Los Angeles, Juan Carlos Ortiz!
And introducing the fighter to my right, fighting out of the blue corner.
With a record of
1 - 1 - 0, fighting out of Montreal, Joadson Bidon!
The judges for this bout are William Peck, Gregory Folan and Trevor Gratis.
The bell rings for round one and we are underway!
Ortiz slips a jab and a cross from Bidon.
Ortiz showing good head movement there, avoiding the strikes from Bidon.
Ortiz avoids the head kick by Bidon.
Ortiz will have to do better than that with his takedown attempts.
Bidon goes for a high kick. It partially lands.
Bidon misses with a few strikes there.
Ortiz throws a combination but it was largely blocked by Bidon.
Bidon staying out of range there.
Bidon lands a jab to the nose.
Bidon misses with a body kick.
Bidon throws an uppercut from half a mile away. Ortiz sees it coming and avoids it easily.
Ortiz blocks the body kick.
Ortiz scores with a reasonable looking shot to the body. Bidon doesn't seem bothered though.
A solid leg kick lands there for Bidon.

That's one minute gone in the round.
A nice leg kick lands there from Bidon.
Bidon throws a sloppy head kick and Ortiz moves out of range easily.
Ortiz scores to the head and body with a nice combination!
It looks like Joadson Bidon has been cut.
Bidon fails to land with the punch combination there - jab, cross, hook, miss, miss, miss.
Bidon throws a head kick that connects with a bit of head and a bit of hand.
Bidon throws a body kick but he was well out of range there.
Bidon lets the fists fly and connects with a left straight followed by a right hook.
A good leg kick by Bidon.
Ortiz ducks down and throws a hook to the body but Bidon moves away.
A punch combination from Bidon misses.
Fantastic stuff here - a very entertaining period of action, which has drawn cheers from the crowd.
Ortiz misses the shot to the body.
A punch combination from Bidon misses.
Joadson Bidon is looking to keep the fight on the feet at all costs.
Bidon lets the fists fly and connects with a left straight followed by a right hook.
Bidon throws a combination but comes up with nothing but fresh air.

That's two minutes gone in the round.
Bidon throws a sloppy head kick and Ortiz moves out of range easily.
Bidon needs to keep his hands up - Ortiz had a free shot at his head there.
Jab, cross, leg kick. Nice combination by Ortiz!
Ortiz goes to the watering hole and comes back with a big thumbs up from the judges as he scores a three punch combo.
Bidon misses with a half-hearted attempt at a head kick.
Ortiz connects with the punch.
Some wild striking there from Ortiz.
And Bidon tries to counter it with a takedown but Ortiz pushes his down on his head and steps out.
Ortiz fails to land with the punch combination there - jab, cross, hook, miss, miss, miss.
Ortiz throws a body punch but Bidon moves out of range.
Ortiz shoots in for a takedown. He's persisting with it as Bidon sprawls well. Bidon wins this battle and keeps the fight standing. Ortiz gets slowly back to his feet.
Bidon throws a head kick but Ortiz moves out of range.

That's three minutes gone in the round.
Ortiz dodges the punch combination from Bidon.
Ortiz lands a jab, followed by a cross and another cross, as Bidon backs up against the cage.
Ortiz steps to his left, right into the path of a big body kick from Bidon. That one must have hurt.

Ortiz shoots in and bounces Bidon off the cage to secure the takedown into guard.
Ortiz keeps in close for a moment and lands a decent shot to the side of Bidon's head.
Bidon really doesn't want to stay on the ground with Ortiz. If he can't get it back to his feet, it's only a matter of time before he'll be tapping out.
Ortiz's corner is telling him to maintain position.
Ortiz working some ground and pound from guard but it's not doing any damage.
Ortiz postures up and lands some nice ground and pound.
Bidon looks more muscular than last time we saw him. He must have been on the weights.

That's four minutes gone in the round.
Ortiz stays in close to Bidon's body and controls the position.
Bidon avoiding any damage from the ground and pound.
Ortiz landing some decent shots from guard.
Ortiz cracks Bidon with a solid left hand.
This has been an exciting period of action!
Ortiz throws a big elbow that misses.
Ortiz missing there with some ground and pound from the guard.
The fighters are pressed up against the cage, both looking to find a bit of space to work.
Ortiz works over Bidon with some ground and pound from guard.
Ortiz trying to control the position from guard on top but Bidon is wriggling around, looking for whatever he can.
And thats the end of the round the fighters go back to their corners.
That was a close round but I would say that Juan Carlos Ortiz will probably get the nod.
The cut man is working on Joadson Bidon's cut.
The referee calls time. The cornermen exit stage left and we're back to business.

Ortiz misses the shot to the body.
Bidon wants to counter with a clinch but Ortiz pushes him away.
Bidon misses with a head kick.
Ortiz attempts a counter takedown but Bidon avoids it well and moves away.
Bidon tries a head kick but it misses.
Ortiz throws a series of punches but Bidon moves out of range.
Bidon thows a body kick. Ortiz tries to catch it but that hurt him.
Nice straight punches there by Ortiz. You know Roy Jones Jr respects the hands of Ortiz.
Ortiz showing good head movement there, avoiding the strikes from Bidon.
Bidon jabs. That one connects to the head of his opponent.
We've had a slow start to the round here - hopefully the action picks up.
Bidon throws a right hand that Ortiz ducks under and follows up with a left that Ortiz also avoids with ease.
Ortiz appears to be looking for a counter takedown.
No joy there for Ortiz, who threw a few shots but didn't land.
Ortiz showing good head movement there, avoiding the strikes from Bidon.
Ortiz appears to be looking for a counter takedown.
That's one minute gone in the round.
Bidon stuffs a takedown. It's all about dictating where the fight takes place and Bidon wants it to stay on the feet.
Bidon throws a head kick but Ortiz moves out of range.
Ortiz appears to be looking for a counter takedown.
Bidon scores to the head and body with a nice combination!
Bidon misses with a head kick.
Ortiz throws a big counter combination but Bidon scrambles out of danger and avoids any damage.
Bidon chopping away at his opponent's legs.
Bidon tries a head kick but it misses.
Bidon tries a switch kick but it misses it's target.
Bidon misses with a head kick.
Ortiz throws a series of punches but Bidon moves out of range.
Sloppy strikes from Ortiz. Those never looked like landing.
Bidon keeps the fight standing with a nice sprawl.
Bidon throws a nice looking combination but Ortiz bobs and weaves to avoid any damage.
Ortiz rushes forward with a series of wild hooks but Bidon moves out of range and avoids them all easily.
That's two minutes gone in the round.
Bidon tries a head kick but it misses.
This has been an exciting period of action!
Bidon throws a nice looking combination but Ortiz bobs and weaves to avoid any damage.
Ortiz drops down looking for a counter takedown but Bidon sprawls and moves away.
Ortiz showing good head movement there, avoiding the strikes from Bidon.
Bidon stuffs the takedown attempt from Ortiz. Ortiz gets slowly back to his feet.
Bidon tries a counter takedown but it's more of a dummy move, and he uses it to push himself away.
That's three failed takedown attempts in the round for Juan Carlos Ortiz. That's going to take a lot out of him.
A head kick by Bidon misses
and Ortiz counters with a nice double leg into half guard.
Ortiz working over Bidon with some ground and pound. Bidon looks like he wants out of this position, which is understandable.
Ortiz takes advantage of the dominant position to land a couple of big hammer fists.
Ortiz working some ground and pound from close in. He's looking to maintain this position and strike for a while by the looks of things... although he'll probably advance to full mount in a minute now I've said that.
Ortiz passes to full mount!
Bidon taking shots to the head.
Ortiz has been looking to land a fair amount of strikes on the ground. He might be looking to soften his opponent up in order to work for a submission.
That's three minutes gone in the round.
Bidon wants to try and get back to his feet.
Ortiz raining down shots from the mount!
Bidon is rocked!
Ortiz trying to control but Bidon is having none of it.
The ref warns both fighters not to hold the cage as they work up against the meshing.
Ortiz scoring with strikes but Bidon is staying in there.
Bidon is still in real trouble! Can Ortiz finish him?
Ortiz postures up and throws a couple of big shots that have Bidon in real trouble here! The ref calls for Bidon to improve his position which he doesn't do, so the referee has no choice but to end the fight due to the strikes!
Ladies and gentlemen, after 4:59 of round 2, we have a winner by way of TKO (Strikes). Juan Carlos Ortiz!
|
|
|
|
|
|
|
|
|
|
|
|
|
|
|
|
|
|
|
|
|
|
|
| S |
C
A |
G |
S |
C
B |
G |
|
S |
C |
G |
|
energy
A | B |
|
hype
A | B |
|
pop
A | B |
|
mgr
A | B |
|
FIGHT
RATING
65% |
|
|
|
|
|
|
|
Undercard bout
|
Coming up we have a light heavyweight MMA rules bout between Mike Plaskota (ranked 0 p4p, 0 weight class) and Vince Ortiz (ranked 0 p4p, 0 weight class). Vince Ortiz will no doubt be looking to use his reach advantage to good effect.
 |
|
 |
| 180 cm
27
215 lbs
2 - 1 - 0 |
|
195 cm
26
205 lbs
3 - 5 - 0 |
BJJ Brown Belt
Counter fighter
Very quick |
|
Good wrestler
Basic striking
Knockout power |
|
| |
|
Ladies and gentlemen. This fight is 3 rounds, in the light heavyweight division.
Introducing the fighter to my left, fighting out of the red corner.
With a record of
2 - 1 - 0, fighting out of Montreal, Mike Plaskota!
And introducing the fighter to my right, fighting out of the blue corner.
With a record of
3 - 5 - 0, fighting out of Montreal, Vince Ortiz!
The judges for this bout are Robert Douchet, Yves DeLean and Ian Loll.
The bell rings for round one and we are underway!
Oooooooooooh, not good. A low kick from Plaskota lands where it shouldn't have, right in the... well, you know what he did? He kicked him in the penis. He's injured, injured bad. The referee sends both fighters to their corners and Ortiz has 5 minutes to recover. He's OK now though... a thumbs up from Ortiz and we're back underway with a touch of gloves.
Plaskota tries to drive through with a takedown attempt but Ortiz defends well and Plaskota ends up having to push Ortiz into the cage where they will battle it out in the clinch.
Plaskota looks to throw a body kick
enabling Ortiz to counter with a crisp jab.
Plaskota shoots in looking for a takedown. Ortiz tries to sprawl out of it but Plaskota keeps driving through. The fighters are pinned against the cage. Ortiz manages to get underhooks and after a bit of a struggle, circles away and we're back to standing.
Ortiz throws a right and a left that Plaskota avoids nicely.
Plaskota tries to close the distance and clinch up against the cage but Ortiz paws at him with a jab and circles away.
Plaskota shoots in and drives through. Ortiz sprawls well.
That's three failed takedown attempts in the round for Mike Plaskota. That's going to take a lot out of him.
Ortiz throws out a token jab with nothing on it.
We've had a slow start to the round here - hopefully the action picks up.
Ortiz shuffles to his left behind two crisp jabs. Plaskota eats them both and turns towards Ortiz to reposition himself and eats a stinging right hand-left hook combo.
Plaskota has his takedown stuffed
and Ortiz counters with a stiff right hand.
Plaskota shoots in for a takedown. "Ole!" shouts Ortiz as he jumps to the side.
Ortiz lets it all go there with a big combo counter but none of the punches connected.
That's one minute gone in the round.
No luck with that takedown attempt from Plaskota.
No luck for Plaskota with that takedown attempt.
Ortiz swings wildly with a right hand that was never going to find it's target.
Some wild striking there from Ortiz.
Plaskota shoots in for a takedown. "Ole!" shouts Ortiz as he jumps to the side.
Ortiz swings for the body but Plaskota moves out of range.
Plaskota tries to counter with a takedown but Ortiz is quick to defend against it.
Plaskota looks to have improved his striking defense since last time we saw him fight.
Ortiz will need to tighten up his combinations if he doesn't want to gas himself out, swinging at thin air.
Plaskota looks frustrated there after his takedown attempt is stuffed easily.
That's two minutes gone in the round.
Plaskota moves out of range of the strikes.
As Ortiz looks to move away, Plaskota throws a big counter combo bu Ortiz just gets out of the way.
Nice body punch from Ortiz.
The fight stays on the outside here - Plaskota looks like he's thinking about clinching though.
Vince Ortiz is looking to keep the fight on the feet at all costs.
Ortiz misses with a jab and misses with a cross straight after too.
Plaskota feinted with a counter takedown.
Plaskota tries for a takedown but Ortiz sees it coming a mile off and avoids it easily.
Plaskota gets the takedown into side control.
We get told so often about how wrestlers don't like to be on their backs. Let's see if Ortiz can do anything to dispel that myth.
The fans in attendance giving it up for the two fighters, who have really let it all hang out in the last minute or so!
Plaskota advances to full mount.
Ortiz trying desperately to get to his feet.
The ref warns both fighters not to hold the cage as they work up against the meshing.
That's three minutes gone in the round.
Plaskota throws some wild stikes that Ortiz manages to avoid easily.

Plaskota is working on an americana here. Ooh, that looks pretty nasty! Nope, Ortiz has managed to escape the submission attempt.
Plaskota moves to back control.
The fighters are pressed up against the cage, both looking to find a bit of space to work.
Ortiz wants to get back to his feet. He's half way up but Plaskota drags him back down with a jolt, managing to get his forearm deep under Ortiz 's chin! Ortiz is in real trouble! His face is turning bright red and he's forced to tap! This one is all over!
Ladies and gentlemen, after 3:49 of round 1, we have a winner by way of Submission (RNC). Mike Plaskota!
|
|
|
|
|
|
|
|
|
|
|
|
|
|
|
|
|
|
|
|
|
|
|
| S |
C
A |
G |
S |
C
B |
G |
|
S |
C |
G |
|
energy
A | B |
|
hype
A | B |
|
pop
A | B |
|
mgr
A | B |
|
FIGHT
RATING
42% |
|
|
|
|
|
|
|
Undercard bout
|
Coming up we have a bantamweight MMA rules bout between Noah Sauvageau (ranked 0 p4p, 0 weight class) and Evan Baxter (ranked 0 p4p, 0 weight class). Well, I have no idea who's going to take this one!
 |
|
 |
| 178 cm
26
144 lbs
3 - 3 - 0 |
|
175 cm
23
145 lbs
5 - 4 - 0 |
BJJ White Belt
Excellent boxer
Big right hand |
|
BJJ Blue Belt
Decent boxing
Heavy handed |
|
| |
|
Ladies and gentlemen. This fight is 3 rounds, in the bantamweight division.
Introducing the fighter to my left, fighting out of the red corner.
With a record of
3 - 3 - 0, fighting out of Montreal, Noah Sauvageau!
And introducing the fighter to my right, fighting out of the blue corner.
With a record of
5 - 4 - 0, fighting out of Montreal, Evan Baxter!
The judges for this bout are Elvis Blanc, Gregory Folan and Dillan Fox.
The bell rings for round one and we are underway!
Sauvageau throws a nice hook to the body that draws an oooh from the crowd.
Sauvageau lands a really nice looking cross but Baxter seems unphased.
Nice shot lands for Sauvageau.
Baxter is rocked!
Sauvageau ducks low and lands a nice hook to the body of his opponent.
Baxter is still on wobbly legs! Can Sauvageau finish him?
Baxter wings a very wild body shot but it does the job and lands to the midsection.
Baxter is the aggressor but that punch slipped nicely by Sauvageau.
Baxter seems to have recovered his senses.
Sauvageau bobs and weaves well there to avoid the strikes.

Sauvageau sends Baxter crashing to the mat with a devastating uppercut! Sauvageau is motioning to the referee to let Baxter up. He wants to try and finish this one on the feet!
We've seen a great period of action over the last minute or so - credit to both fighters for going all out!
Sauvageau keeping at a good range here, avoiding a leg kick.
Sauvageau is looking to counter punch.
Sauvageau cracks Baxter with a left hook right on the temple and Baxter goes down! He's out! Referee! Stop the fight! Sauvageau lands a few more punches before the dopey ref steps in - hopefully Baxter is OK!
Ladies and gentlemen, after 0:38 of round 1, we have a winner by way of KO (Punch). Noah Sauvageau!
Our winner, Noah Sauvageau, made sure he spent some time buttering up the crowd during his post fight interview, which will no doubt bring him a few more fans.
|
|
|
|
|
|
|
|
|
|
|
|
|
|
|
|
|
|
|
|
|
|
|
| S |
C
A |
G |
S |
C
B |
G |
|
S |
C |
G |
|
energy
A | B |
|
hype
A | B |
|
pop
A | B |
|
mgr
A | B |
|
FIGHT
RATING
100% |
|
|
|
|
|
|
|
Undercard bout
|
Coming up we have a light heavyweight MMA rules bout between Phillip Rockhound (ranked 0 p4p, 0 weight class) and Jon Stevenson (ranked 0 p4p, 0 weight class). Both these guys have solid standup skills and neither is particularly fantastic on the ground, so let's hope for a nice standup war!
 |
|
 |
| 188 cm
22
203 lbs
3 - 1 - 0 |
|
195 cm
23
220 lbs
2 - 1 - 0 |
BJJ Blue Belt
Solid boxing
Big heart |
|
BJJ White Belt
Decent boxing
Powerful |
|
| |
|
Ladies and gentlemen. This fight is 3 rounds, in the light heavyweight division.
Introducing the fighter to my left, fighting out of the red corner.
With a record of
3 - 1 - 0, fighting out of New York, Phillip Rockhound!
And introducing the fighter to my right, fighting out of the blue corner.
With a record of
2 - 1 - 0, fighting out of Montreal, Jon Stevenson!
The judges for this bout are Gregory Folan, Trevor Gratis and Yves DeLean.
The bell rings for round one and we are underway!
Rockhound fails with the takedown
and Stevenson counters with a one-two to the body.
Nice straight punches there by Stevenson. You know Roy Jones Jr respects the hands of Stevenson.
No luck for Rockhound with that takedown attempt.
Rockhound fails with the takedown.
That's three failed takedown attempts in the round for Phillip Rockhound. That's going to take a lot out of him.
Stevenson keeps his opponent at a distance with a nice jab.
Stevenson throws a 1-2 combo that connects squarely on Rockhound's jaw, knocking him onto his back! Stevenson dives in looking to finish as Rockhound flails his arms in a desperate attempt to block Stevenson's strikes! Stevenson is raining down hammerfists and the ref stops it! Rockhound's desperate flailing just didn't constitute intelligent defence. Some people will probably question the ref's decision but Rockhound was definitely hurt and the ref saved him from taking unnecessary punishment. A fighter's safety is paramount in this sport.
Ladies and gentlemen, after 0:33 of round 1, we have a winner by way of TKO (Strikes). Jon Stevenson!
|
|
|
|
|
|
|
|
|
|
|
|
|
|
|
|
|
|
|
|
|
|
|
| S |
C
A |
G |
S |
C
B |
G |
|
S |
C |
G |
|
energy
A | B |
|
hype
A | B |
|
pop
A | B |
|
mgr
A | B |
|
FIGHT
RATING
100% |
|
|
|
|
|
|
|
Undercard bout
|
Coming up we have a featherweight MMA rules bout between Masato Koyabashi (ranked 0 p4p, 0 weight class) and Vinnie Longworth (ranked 0 p4p, 0 weight class). Masato Koyabashi has the edge in experience - let's see if he can make that count tonight.
 |
|
 |
| 174 cm
26
150 lbs
4 - 3 - 0 |
|
168 cm
26
145 lbs
3 - 2 - 0 |
BJJ White Belt
Solid boxing
Experienced |
|
Good wrestler
Brawler
Granite chin |
|
| |
|
Ladies and gentlemen. This fight is 3 rounds, in the featherweight division.
Introducing the fighter to my left, fighting out of the red corner.
With a record of
4 - 3 - 0, fighting out of Montreal, Masato Koyabashi!
And introducing the fighter to my right, fighting out of the blue corner.
With a record of
3 - 2 - 0, fighting out of Montreal, Vinnie Longworth!
The judges for this bout are Gregory Folan, Yves DeLean and Ian Loll.
The bell rings for round one and we are underway!
Longworth darts in and clinches Koyabashi up against the cage.

Longworth has hold of one of Koyabashi's legs. Koyabashi is fighting the takedown attempt but Longworth gets the trip and lands the takedown into guard.
Longworth makes a bit of distance and scores with some ground and pound, still in guard.
Longworth slows down the pace of the fight for a moment. He'll need to remain active if he doesn't want to see the fight stood back up.
Longworth is working the ground and pound from guard. He might want to try advancing position though to get more of an impact.
Longworth cracks Koyabashi with a solid left hand.
Longworth postures up and lands a big shot to Koyabashi's brow.
Longworth is working Koyabashi over from the guard. He should look to pass the guard and do a little more damage with these strikes.
Longworth won't allow Koyabashi to sweep him here.
The fighters are pressed up against the cage, both looking to find a bit of space to work.
Longworth engaging in some classic timewasting tactics.
Longworth is pushing down on Koyabashi's leg trying to pass to half guard. Koyabashi is fighting to maintain full guard but Longworth has managed to sneak the leg through.
Longworth takes advantage of the dominant position to land a couple of big hammer fists.
Longworth working some ground and pound from close in. He's looking to maintain this position and strike for a while by the looks of things... although he'll probably advance to full mount in a minute now I've said that.

Longworth has hold of the far side arm. He's working for the Kimura, can Koyabashi defend it? Longworth steps over the head and cranks it - Koyabashi is tapping out! That was textbook stuff right there - nice submission victory for Longworth!
Ladies and gentlemen, after 1:59 of round 1, we have a winner by way of Submission (Kimura). Vinnie Longworth!
An out of breath Vinnie Longworth thanked his loyal fans in his post fight interview, giving them credit for his success over the course of his career.
|
|
|
|
|
|
|
|
|
|
|
|
|
|
|
|
|
|
|
|
|
|
|
| S |
C
A |
G |
S |
C
B |
G |
|
S |
C |
G |
|
energy
A | B |
|
hype
A | B |
|
pop
A | B |
|
mgr
A | B |
|
FIGHT
RATING
71% |
|
|
|
|
|
|
|
Undercard bout
|
Coming up we have a light heavyweight MMA rules bout between Ace Cobella (ranked 0 p4p, 0 weight class) and Mac Mcgregor (ranked 0 p4p, 0 weight class). Over to our ring announcer for the fighter introductions!
 |
|
 |
| 188 cm
22
212 lbs
5 - 1 - 1 |
|
187 cm
28
209 lbs
6 - 12 - 1 |
BJJ Purple Belt
Excellent boxer
Very quick |
|
BJJ White Belt
Excellent boxer
Knockout power |
|
| |
|
Ladies and gentlemen. This fight is 3 rounds, in the light heavyweight division.
Introducing the fighter to my left, fighting out of the red corner.
With a record of
5 - 1 - 1, fighting out of Montreal, Ace Cobella!
And introducing the fighter to my right, fighting out of the blue corner.
With a record of
6 - 12 - 1, fighting out of Montreal, Mac Mcgregor!
The judges for this bout are Steve Smith, Alec Ball and Gregory Folan.
The bell rings for round one and we are underway!
A telegraphed takedown attempt from Cobella is defended easily by Mcgregor.
Cobella fails with the takedown.
Cobella shoots in for a takedown. "Ole!" shouts Mcgregor as he jumps to the side.
That's three failed takedown attempts in the round for Ace Cobella. That's going to take a lot out of him.
Cobella fails to land the takedown.
Cobella tries to drive through with a takedown attempt but Mcgregor defends well and Cobella ends up having to push Mcgregor into the cage where they will battle it out in the clinch.
A little jabbing left from Mcgregor on the counter but it doesn't find it's target.
Cobella shoots in but Mcgregor avoids the takedown attempt easily.
And an attempted straight right on the counter from Mcgregor! But no joy.
We've had a slow start to the round here - hopefully the action picks up.
Cobella throws a combination but comes up with nothing but fresh air.
Cobella dips down and scores with a jab to the body.
Cobella lands the left hand.
Cobella throws a looping left and ducks down for a takedown. He's got his arms around Mcgregor's waist but Mcgregor gets an underhook and avoids the takedown by throwing Cobella off to one side.
Cobella tries to close the distance and clinch up against the cage but Mcgregor paws at him with a jab and circles away.
Mcgregor throws a hook to the side of Cobella's head but Cobella sees it coming and ducks under it beautifully.
That's one minute gone in the round.
A punch combination from Mcgregor misses.
Cobella moves into the clinch.
Cobella throws an elbow but it misses.
Cobella misses with a body punch.
A head punch blocked on the inside by Cobella.
Cobella tries a shoulder strike but it doesn't do any damage.
Mcgregor wants to get back to striking at distance but Cobella won't allow it.

Mcgregor manages to break the clinch.
Mcgregor moves out of range as Cobella throws a body kick.
Cobella closes the distance and clinches.
Cobella blocks a punch to the side of the head.
Mcgregor escapes the clinch and we're back to striking.
Mcgregor looks to land a left hand but Cobella moved out of range nicely.
Mac Mcgregor is looking to keep the fight on the feet at all costs.
Cobella shoots for a double leg takedown but Mcgregor sprawls well. He's pushed Cobella's face into the mat and manages to get back to his feet relatively easily.
Cobella lands a nice shot to the body.
Mcgregor moves into the clinch.
That's two minutes gone in the round.
Cobella is working Mcgregor over against the cage.
A head punch on the inside from Mcgregor fails to land.
Mcgregor misses with some punches.
The crowd cheering loudly, showing their appreciation for the quality fight we're seeing here.

Cobella breaks the clinch and we're back to striking at distance.
Cobella scores with a punch to the head.
Cobella feints and as Mcgregor raises his hands in defense, Cobella changes levels and drives through with a takedown into guard.
Mcgregor working the defensive guard well to avoid strikes from Cobella.
Cobella is in a tricky position. We've heard reports from his gym mates at Werewolf's cave that he's been drilling escapes, so let's see if he can get back to his feet.
Cobella postures up to throw the ground and pound strikes but they don't connect.
Cobella stops Mcgregor from standing up.
Mcgregor really doesn't want to stay on the ground with Cobella. If he can't get it back to his feet, it's only a matter of time before he'll be tapping out.
Cobella postures up in Mcgregor's guard and throws a big left but Mcgregor blocks it.

Cobella decides he's had enough of playing guard and decides to stand. Come on Mcgregor, up you get!
Cobella shoots in for a takedown. He's persisting with it as Mcgregor sprawls well. Mcgregor wins this battle and keeps the fight standing. Cobella gets slowly back to his feet.
Mcgregor tries to clinch but is not successful on this occasion.
Cobella is looking to counter punch.
That's three minutes gone in the round.
Cobella connects nicely with a jab. Noted by the judges no doubt.
Cobella dips to his left and cracks Mcgregor with an uppercut!
Cobella gets in close and instigates a clinch.
Cobella scores with a shot to the side of Mcgregor's head.
Cobella throws a head punch that misses.
Cobella swings away with an uppercut that misses.
A head punch blocked on the inside by Mcgregor.
Nice body punch from Cobella - that landed with a thud.
Mcgregor blocks a body shot from Cobella.
A head punch on the inside from Cobella fails to land.
Cobella goes for a body shot but it's blocked.
Mcgregor swings away with an uppercut that misses.
Mcgregor lands with a left to the head.
Mcgregor softening up his opponent with strikes, against the cage.

It looks like Ace Cobella has been cut.
Cobella throws an elbow but it's blocked.
That's four minutes gone in the round.
Cobella tries to work over Mcgregor's body with a swooping hook but it only glances the target.
Cobella's corner calls for him to break the clinch, which he does.
This has been an exciting period of action!
Mcgregor takes a shot right to the liver - Bas would have been proud of that punch.
Cobella lands a straight punch to the body, keeping Mcgregor at a distance.
Mcgregor displays good takedown defense there as he swats away a double leg from Cobella.
Cobella shoots in for a takedown. "I don't think so" says Mcgregor as he avoids it easily.
Mcgregor swats away the attempt to clinch by Cobella.
Cobella connects with a lovely jab that went straight through the gap between Mcgregor's hands.
Mcgregor misses with a jab and misses with a cross straight after too.
Cobella shoots in and drives through. Mcgregor sprawls well.
Cobella throws a body shot but no joy.
No luck with that takedown attempt from Cobella.
And thats the end of the round the fighters go back to their corners.
Ace Cobella dominated that round.
The cut man is working on Ace Cobella's cut.
OK. That's time! The bell goes and we're back to the action.
Mcgregor lunges in with swinging rights and lefts but Cobella circles away quickly and effectively.
Cobella swung with a counter right hand that didn't connect.
Donk. Cobella catches Mcgregor right on the button with a cross.
Mcgregor wants to clinch up but Cobella keeps it at a distance.
Cobella closes this distance looking for a takedown but Mcgregor circles away.
Cobella is really dominating this fight. Is there anything that Mcgregor can do to turn this around?
Mcgregor tries to clinch up against the cage, rushing in to close the distance. Cobella manages to break the clinch and circles back to the middle of the mat.
Cobella scores with a big left there. The judges will like that one.
Cobella connects with a crisp jab.
Mcgregor staying out of range there.
Mcgregor is loading up here, looking for a big counter of his own.
Mcgregor tries to clinch but Cobella is having none of it.
Cobella shoots in looking for a double leg takedown. Mcgregor defends it nicely.
We've had a slow start to the round here - hopefully the action picks up.
Cobella has a takedown stuffed.
That's three failed takedown attempts in the round for Ace Cobella. That's going to take a lot out of him.
Mcgregor gets in close and instigates a clinch.
Cobella working some nice short punches in the clinch.
That's one minute gone in the round.
The pace really dropping off here, momentarily.
Still in the clinch, Mcgregor scores with a nice short uppercut.
Cobella escapes the clinch and we're back to striking.
Cobella throws a right and a left that both miss.
Cobella shoots in for a takedown. "Ole!" shouts Mcgregor as he jumps to the side.
Cobella connects with a high kick.
Cobella throws a nice looking combination but Mcgregor bobs and weaves to avoid any damage.
Cobella fails with a rather predictable takedown attempt.
Mcgregor gets to the clinch - let's see what his plan is here.
Mcgregor misses with a punch on the inside.
That's two minutes gone in the round.
A nice left hand lands by Cobella.
Cobella keeps control of Mcgregor as he tries to wriggle out of the double underhooks.
Cobella stalling.
With the two fighters working up against the cage, Cobella just misses with a elbow thrown towards Mcgregor's brow.
Cobella misses with some punches.
With the fighters clinched against the cage, Cobella creates a bit of distance for himself and scores with a nice uppercut.
The crowd cheering loudly, showing their appreciation for the quality fight we're seeing here.
Cobella blocking some punches.
Mcgregor pushes off and circles away, back to the middle of the mat.
Ace Cobella seems to be the more aggressive standup fighter in this bout.
Cobella misses with a wild combination.
Cobella displaying good standup as he scores with a three punch combination.
Cobella dives in for a single leg takedown but Mcgregor sprawls and the fighters end up clinched against the cage.
Mcgregor throws a hook to the side of Cobella's head but Cobella sees it coming and ducks under it beautifully.
Cobella was looking to counter that move with a punch but didn't quite pull the trigger.
Ace Cobella is winning the standup battle so far.
Mcgregor throws a shot from downtown. Cobella moves away and avoids it.
That's three minutes gone in the round.
Mcgregor wants to clinch up but Cobella keeps it at a distance.
It looked like Cobella was looking amped, ready to throw a big counter but didn't commit.
Mcgregor connects with a jab.
Mcgregor walks into a stiff left hand from Cobella.
Cobella tries to shoot in for a takedown. He's got hold of a leg but Mcgregor swivels and escapes.
Cobella fails with the takedown.
Cobella tries to drive through with a takedown attempt but Mcgregor defends well and Cobella ends up having to push Mcgregor into the cage where they will battle it out in the clinch.
Both fighters are absolutely exhausted here.
Cobella goes for a double leg but Mcgregor avoids the attempt and the two fighters end up clinched against the cage as Mcgregor continues to drive forward.
Cobella gets tackled into the cage by Mcgregor. Mcgregor maintains the clinch.
Cobella breaks the clinch and we return to the middle of the mat.
Sloppy strikes from Cobella. Those never looked like landing.
Mcgregor unleashes a big counter combination but Cobella bobs and weaves and avoids any damage.
Cobella uses good head movement to avoid the hook from Mcgregor.
Cobella swats away the attempt to clinch by Mcgregor.
Mcgregor wants to clinch.
That's four minutes gone in the round.
Mcgregor connects with a hook to the side of his opponent's head.
Cobella throws a looping left and ducks down for a takedown. He's got his arms around Mcgregor's waist but Mcgregor gets an underhook and avoids the takedown by throwing Cobella off to one side.
Mcgregor moves into range and throws a combination. A nice jab followed by a hook to the body.
We've seen a great period of action over the last minute or so - credit to both fighters for going all out!
Cobella fails with a takedown attempt from distance.
Cobella misses with a jab and misses with a cross straight after too.
Mac Mcgregor is looking to throw some combinations by the looks of things.
Mcgregor takes a jab right on the nose. That must have hurt but he shrugs his shoulders and looks to return the favor.
Mcgregor tries to clinch but Cobella moves out of range.
Cobella slips a jab and a cross from Mcgregor.
Cobella tries to clinch but Mcgregor is having none of it.
Mcgregor is looking for the big counter here.
Cobella throws a hook but Mcgregor blocks it.
Cobella darts in looking for a takedown but Mcgregor gets double underhooks and turns Cobella into the cage.
Mcgregor looked like he wanted to counter with a punch but didn't throw it.
Mcgregor throws a combination but comes up with nothing but fresh air.
Cobella shoots in but doesn't get the takedown
and Mcgregor counters with a series of strikes. Cobella will be more careful next time no doubt.
And thats the end of the round the fighters go back to their corners.
A close second round but Mac Mcgregor will probably get the nod - 10:9.
The cut man is working on Ace Cobella's cut.
Well, the break between rounds is over. Let's get back to the scrappin! This is the final round!

Cobella moves forwards but Mcgregor connects with a nice, crisp jab.
Cobella is trying hard to land a takedown here. Mcgregor sprawls well and keeps this one on the feet.
Horrible takedown attempt by Cobella or perhaps it was just good defense by Mcgregor, which made it look bad.
Cobella throws a body shot but no joy.
Mcgregor tries to clinch but is not successful on this occasion.
Mcgregor misses with a series of wild punches.
Mcgregor moves in looking to clinch but Cobella pushes him off.
Cobella is trying to close the distance and clinch up, after that failed offence from Mcgregor.
Mcgregor misses with an uppercut. Cobella saw that one coming.
Mcgregor tries to clinch there but Cobella circles away.
We've had a slow start to the round here - hopefully the action picks up.
Cobella throws a combination. Mcgregor tries to block but a couple of punches get through.
Cobella lands the left hand.
Cobella shoots in for a takedown. "Ole!" shouts Mcgregor as he jumps to the side.
That's three failed takedown attempts in the round for Ace Cobella. That's going to take a lot out of him.
Both fighters are breathing heavily.
Mcgregor closes the distance and presses his opponent up against the cage.
That's one minute gone in the round.
Mcgregor pushes off and circles away, back to the middle of the mat.
Cobella darts in and out, connecting with a jab.
Cobella rushes Mcgregor and presses him up against the cage.
Mcgregor prevents a body shot from Cobella.
Mcgregor lands with a left to the head.
Cobella tries to stall but Mcgregor uses the opportunity to gain a better position.
Cobella wants a takedown but no success here.
Mcgregor misses with a short punch on the inside.
A frustrated look appears on Mcgregor's face as he tries to break the clinch.
A head punch blocked on the inside by Mcgregor.
Cobella can't find room to land a body shot as Mcgregor controls the action.
Mcgregor has a couple of punches blocked by Cobella.
Cobella manages to break the clinch.
Nice uppercut lands for Mcgregor. That snapped Cobella's head back.
That's two minutes gone in the round.
Mcgregor misses with the combination.
A really sloppy takedown attempt there from Cobella.
Cobella connects nicely with a jab. Noted by the judges no doubt.
Cobella throws an overhand right that lands on Mcgregor's shoulder, as Mcgregor tries to avoid the shot.
Cobella looks to land a body kick but Mcgregor moved away.
Mcgregor unleashes a big counter combination but Cobella bobs and weaves and avoids any damage.
Wooooo! Give it up for these two warriors! They are putting on a show!
Cobella shoots in for a takedown - he's clinched up with Mcgregor but Mcgregor pushes him off and we're back to square one.
Mcgregor might want to mix his strikes up a bit more. He's just going for head shots at the moment and that can become a bit predictable.
Cobella jabbing away but nothing is landing.
A lazy left from Cobella finds it's target.
Cobella pushes forward with a 1-2 combination that forces Mcgregor back to the cage. Cobella follows up with a solid lead hook to the liver.
Mcgregor fails to land with the punch combination there - jab, cross, hook, miss, miss, miss.
The fight stays on the outside here - Mcgregor looks like he's thinking about clinching though.
That's three minutes gone in the round.
Mcgregor lands a jab.
Mcgregor displays good takedown defense there as he swats away a double leg from Cobella.
Cobella tries to drive through with a takedown attempt but Mcgregor defends well and Cobella ends up having to push Mcgregor into the cage where they will battle it out in the clinch.
A little jabbing left from Mcgregor on the counter but it doesn't find it's target.
Mcgregor throws a jab but it's blocked by Cobella.
Cobella avoids the clinch attempt nicely.
Cobella attempts a counter takedown but Mcgregor avoids it well and moves away.
Mcgregor displays good takedown defense there as he swats away a double leg from Cobella.
Cobella shoots in but Mcgregor avoids the takedown attempt easily.
Horrible takedown attempt by Cobella or perhaps it was just good defense by Mcgregor, which made it look bad.
Mcgregor fails to land with a series of punches.
Cobella rushes in with a sloppy looking punch
and Mcgregor counters with a straight right hand.
That's four minutes gone in the round.
Mcgregor clinches with his opponent.
Still in the clinch, Mcgregor scores with a nice short uppercut.
Cobella swings wildly with an uppercut but Mcgregor uses good head movement to avoid it.
Mcgregor scores with a nice hook to the head.
Mcgregor's corner calls for him to break the clinch, which he does.
The crowd cheering loudly, showing their appreciation for the quality fight we're seeing here.
The fight stays on the outside here - Mcgregor looks like he's thinking about clinching though.
Mcgregor dodges the punch combination from Cobella.
Nice sprawl there from Mcgregor as Cobella shoots in.
Mcgregor tries to clinch up.
Cobella fails with the takedown.
Mcgregor wants to clinch up but Cobella keeps it at a distance.
And that's the end of the fight!
Mac Mcgregor comfortably won the final round on my scorecard.
I think Mcgregor has won this one but let's see whether the judges agree with me. Over to the ring announcer for the scorecards.
Ladies and gentlemen, after 3 rounds of action, we go to the scorecards for a decision.
Judge Steve Smith scores the fight 28:29
Judge Alec Ball scores the fight 28:29
Judge Gregory Folan scores the fight 29:28
In favor of your winner, by split decision... Mac Mcgregor!
Mac Mcgregor was full of energy after the big win and talked about how he thinks he can do big things in this sport. The crowd were appreciative of his determination to succeed.
|
|
|
|
|
|
|
|
|
|
|
|
|
|
|
|
|
|
|
|
|
|
|
| S |
C
A |
G |
S |
C
B |
G |
|
S |
C |
G |
|
energy
A | B |
|
hype
A | B |
|
pop
A | B |
|
mgr
A | B |
|
FIGHT
RATING
60% |
|
|
|
|
|
|
|
Co-main event
|
Coming up we have a middleweight MMA rules bout between Jalique Faloure (ranked 0 p4p, 0 weight class) and Mack Wiatrzyk (ranked 0 p4p, 0 weight class). I'm sure you'll be fascinated to know that I was talking to some pointless Z list celebrity before the fight and he thought that Mack Wiatrzyk was going to win. Let's see if he was right.
 |
|
 |
| 181 cm
22
194 lbs
2 - 1 - 0 |
|
179 cm
26
198 lbs
10 - 7 - 1 |
Good wrestling
Basic striking
Granite chin |
|
Decent wrestler
Brawler
Determined |
|
| |
|
Ladies and gentlemen. This fight is 3 rounds, in the middleweight division.
Introducing the fighter to my left, fighting out of the red corner.
With a record of
2 - 1 - 0, fighting out of Montreal, Jalique Faloure!
And introducing the fighter to my right, fighting out of the blue corner.
With a record of
10 - 7 - 1, fighting out of Montreal, Mack Wiatrzyk!
The judges for this bout are Dillan Fox, Trevor Gratis and Alec Ball.
The bell rings for round one and we are underway!
Faloure lands with a shot to the body.
Wiatrzyk throws a hook to the body but it doesn't connect.
Faloure clinches with his opponent.
Faloure leaning his opponent against the cage.
Faloure drops down for a takedown but doesn't get it.
Faloure misses the knee to the body. Nice hip positioning from Wiatrzyk.
Faloure definitely looks more muscular than last time we saw him fight.
Faloure tries to land a shot to the body but it's blocked.
Faloure gets a nice trip takedown into half guard.
We've had a slow start to the round here - hopefully the action picks up.
Wiatrzyk tries to get to full guard but Faloure has control of the leg.
Faloure is pressing down on Wiatrzyk's thigh, looking to free his foot. Wiatrzyk is holding on for now.
Faloure is trying a forearm choke
I don't think that's going to do much at this level of the game.
Wiatrzyk really doesn't want to stay on the ground with Faloure. If he can't get it back to his feet, it's only a matter of time before he'll be tapping out.
That's one minute gone in the round.
Faloure stops Wiatrzyk from getting back to his feet.
Faloure throwing shots but they're hitting the canvas more than the man.
Faloure seems very keen to just sit and control from half guard but Wiatrzyk does not like that idea so much and is remaining active off his back.
Wiatrzyk trying to hold on to Faloure's head to control him but Faloure postures up.
Faloure looks towards his corner to check for any instructions. The corner give him nothing to work with, so he cracks Wiatrzyk with a short hammerfist. I guess that's as good as any advice he could get in this position.
Faloure scores with a couple of good hammerfists.
Faloure working the head and body with strikes.
That's two minutes gone in the round.
Wiatrzyk trying to control but Faloure postures up.
Faloure is nestled in close to Wiatrzyk, controlling him well. He's worked in a nice elbow to the side of the head as well, for good measure.
Wiatrzyk is trying to get back to full guard.
Faloure scores with a couple of good hammerfists.
Faloure looks over to his corner - he wants some instructions but his corner are not responding.
Faloure has been looking to land a fair amount of strikes on the ground. He might be looking to soften his opponent up in order to work for a submission.
Faloure looks to score some points with some ground and pound.
Wiatrzyk pushes Faloure off looking to stand but Faloure dives back in and keeps control.
Wiatrzyk is staying active underneath Faloure, who seems content to just control the action from this position.
Wiatrzyk is looking for a sweep. Faloure is wise to his cunning plan and keeps the top position.
The fighters are starting to get a bit slippery now, which will make submissions a bit more difficult.
Faloure is trying to work for a kimura but Wiatrzyk is defending well.
That's three minutes gone in the round.
Faloure working some ground and pound from close in. He's looking to maintain this position and strike for a while by the looks of things... although he'll probably advance to full mount in a minute now I've said that.
Wiatrzyk wants to control but Faloure is keeping busy and won't allow it.
Faloure takes advantage of the dominant position to land a couple of big hammer fists.
Faloure is looking for submissions but instead, Wiatrzyk has regained full guard.
Wiatrzyk trying to keep a closed guard but Faloure is proving a slippery customer.
Faloure passes Wiatrzyk's right leg, so he's now in half guard.
Wiatrzyk is staying active underneath Faloure, who seems content to just control the action from this position.
That's four minutes gone in the round.
Faloure decides to stand up and try his luck on the feet.
Faloure throws a head kick that misses.
Wiatrzyk now looks to counter with a shot at the body.
Faloure forces Wiatrzyk back against the cage and clinches.
Wiatrzyk managing to block the knees to the body from Faloure.
Wiatrzyk blocks a punch to the side of the head.
Faloure is leaning against Wiatrzyk and scores with a nice uppercut to the body.
Faloure throws an elbow but it's blocked.
Faloure is working on a single leg takedown against the cage. Wiatrzyk can't fight it off and eventually Faloure manages to take the fight to the floor. Wiatrzyk looks annoyed but at least he's managed to land in guard.
Faloure trying to control but Wiatrzyk is working from the bottom.
The crowd thankful this round is nearly over.
Wiatrzyk looking to sweep here. No luck so far.
And thats the end of the round the fighters go back to their corners.
Jalique Faloure dominated that round.
OK. That's time! The bell goes and we're back to the action.
Faloure moves into the clinch.
Faloure misses with a hook to the ribs.
Wiatrzyk tries to score a body lock takedown but Faloure shows good agility there to stay on his feet.
Faloure is looking for a takedown up against the cage. Wiatrzyk gets underhooks though and prevents the takedown attempt.
Wiatrzyk wants to push off and get back to the center of the mat but Faloure has him pressed against the cage.
Wiatrzyk misses with a punch to the body.
Faloure misses with a short punch on the inside.
Faloure pushes Wiatrzyk back against the cage and lands a hook to the side of the head.
Faloure scores with a nice hook to the head.
Faloure holding his opponent close, against the cage.
We've had a slow start to the round here - hopefully the action picks up.
Wiatrzyk is looking for a takedown.
Faloure has moved round to his opponent's back and is looking for a suplex! Oh snap! He's tossed Wiatrzyk clear over his head and slammed him to the mat!
Faloure punishes Wiatrzyk with strikes from the back mount.
Wiatrzyk is rocked!
That's one minute gone in the round.
Faloure lands an elbow to the side of the head.
Wiatrzyk is still in real trouble! Can Faloure finish him?
Faloure cracks Wiatrzyk with a big right hand from the back mount! Wiatrzyk immediately covers up and the referee dives in to save him under a barrage of more strikes! Faloure takes this one by TKO!
Ladies and gentlemen, after 1:27 of round 2, we have a winner by way of TKO (Strikes). Jalique Faloure!
|
|
|
|
|
|
|
|
|
|
|
|
|
|
|
|
|
|
|
|
|
|
|
| S |
C
A |
G |
S |
C
B |
G |
|
S |
C |
G |
|
energy
A | B |
|
hype
A | B |
|
pop
A | B |
|
mgr
A | B |
|
FIGHT
RATING
39% |
|
|
|
|
|
|
|
Main event
|
Coming up we have a featherweight MMA rules bout between Lucas Blye (ranked 0 p4p, 0 weight class) and Wayde Parcins (ranked 0 p4p, 0 weight class). Wayde Parcins has the better chin. Will he look to stand and bang today?
 |
|
 |
| 173 cm
20
155 lbs
6 - 0 - 0 |
|
159 cm
29
142 lbs
11 - 5 - 0 |
Dangerous GnP
Brawler
Very quick |
|
Good wrestler
Great elbows
Granite chin |
|
| |
|
Ladies and gentlemen. This fight is 3 rounds, in the featherweight division.
Introducing the fighter to my left, fighting out of the red corner.
With a record of
6 - 0 - 0, fighting out of Montreal, Lucas Blye!
And introducing the fighter to my right, fighting out of the blue corner.
With a record of
11 - 5 - 0, fighting out of Montreal, Wayde Parcins!
The judges for this bout are Gregory Folan, Dillan Fox and Robert Douchet.
The bell rings for round one and we are underway!
Parcins tries to clinch up but Blye circles away and keeps his distance.
We've been hearing reports that Blye has been drilling takedowns in recent sessions so let's see if that has an impact on the result of this fight.
Blye shoots in for a double leg but Parcins sprawls well. That's going to sap some energy.
Some wild striking there from Blye.
Parcins should think about turning a few of those tyres round his middle into muscle if he wants people to take him seriously as an athlete.
Blye dives in and grabs Parcins's left leg, looking for a takedown. Parcins pushes down on Blye's head and hops out.
Parcins scores with a jab to the jaw.
Blye tries a switch kick but it misses it's target.
Blye attempts a leg kick but it's missed by a good margin.
Parcins walks into a jab.
Blye swats away the attempt to clinch by Parcins.
We've had a slow start to the round here - hopefully the action picks up.
Blye throws a looping overhand right but Parcins ducks down to avoid it.
Blye sets himself, and Parcins steps forward looking for the clinch! Blye avoids it this time.
Blye misses with a looping left.
Parcins tries to counter with a clinch but Blye shakes him off and moves away.
Blye moves out of range as Parcins strikes.
Nice uppercut lands for Blye. That snapped Parcins's head back.
That's one minute gone in the round.
Blye ducks under an overhand right and circles away with a smile on his face.
Blye tries a head kick but it misses.
Blye tries to drive through with a takedown attempt but Parcins defends well and Blye ends up having to push Parcins into the cage where they will battle it out in the clinch.
That's three failed takedown attempts in the round for Lucas Blye. That's going to take a lot out of him.
Blye throws an ugly left hook that misses
and Parcins counters by moving into the clinch.
Blye softening up his opponent with strikes, against the cage.
Blye is trying to break the clinch but Parcins has him pressed against the cage.
Blye is trying to drag Parcins to the mat but Parcins just about manages to keep his footing. He used the cage to his advantage there.
Blye is working for a takedown up against the cage. He can't get it on this occasion though.
Blye can't get the takedown.
Blye dodges an elbow strike from Parcins.
Parcins lands a damaging elbow.
That's two minutes gone in the round.
Blye wants to break the clinch but can't.
Blye is trying to drag Parcins to the mat but Parcins just about manages to keep his footing. He used the cage to his advantage there.
Blye avoids a wild elbow strike from Parcins.
Blye blocks the elbow strike.
Blye blocks an elbow strike from Parcins.
Parcins goes for a body shot but it's blocked.
Parcins misses with a punch to the body.
Blye tries for a takedown. No joy.
Blye goes for a takedown attempt but Parcins pushes him away and we're back to fighting at a distance.
Blye looks to land a left hand but Parcins moved out of range nicely.
Parcins throws a looping overhand right but Blye ducks down to avoid it.
That's three minutes gone in the round.
Parcins keeps the fight standing with a nice sprawl.
Blye goes for a double leg but Parcins avoids the attempt and the two fighters end up clinched against the cage as Parcins continues to drive forward.
Parcins closes the distance and presses his opponent up against the cage.
Parcins keeps the fight in the clinch, despite Blye's efforts to push away.
Blye wants to break the clinch but can't.
Blye misses with some punches.
Parcins misses with an elbow over the top.
Blye wants to break free but Parcins has control.
Parcins keeps control of Blye as he tries to wriggle out of the double underhooks.
Blye is trying to force a seperation but Parcins has the dominant position.
With the fighters up against the cage, Parcins throws an elbow but misses.
That's four minutes gone in the round.
With the fighters up against the cage, Parcins throws an elbow but misses.
Blye misses with some punches.
Blye wants to strike at distance but he can't break free of the clinch.
Blye has had enough of the clinch and is looking to separate.
Blye is trying to stall.
Blye working aggressively here.
Blye tries to break the clinch but Parcins is controlling the position.
Blye has dropped down and is looking to force the takedown but it's defended by Parcins after a bit of a struggle.
Blye manages to break the clinch.
The crowd thankful this round is nearly over.
Blye closes the distance and lands a one-two.
Parcins stuffs the takedown attempt from Blye. Blye gets slowly back to his feet.
And thats the end of the round the fighters go back to their corners.
A close round but Wayde Parcins will probably get the nod.
The fighters' corners scream their final instructions, as the referee calls time. Here we go, back to the action!
Parcins tries to land with a swinging hook to the body but Blye was well out of range. Poor timing from Parcins.
An attempted straight right counter from Blye misses the target.
Parcins avoids the body shot from Blye.
Parcins is trying to avoid his opponent's strikes and get into the clinch.
Parcins steps to the side to avoid the strikes from Blye.
Parcins throws a body punch but Blye moves out of range.
Blye scores with a reasonable looking shot to the body. Parcins doesn't seem bothered though.
Blye slips a straight right by Parcins.
Blye swung with a counter right hand that didn't connect.
Parcins takes one on the button.
A lazy left from Blye finds it's target.
Blye cracks Parcins with a good shot that sees him stumbling back into the cage.
Blye fails with a rather predictable takedown attempt.
We've had a slow start to the round here - hopefully the action picks up.
Blye keeping his hands up high there, blocking the jab from Parcins.
Parcins connects with a body shot.
Parcins fakes with an overhand right and moves in to clinch with Blye, pushing him back against the cage.
That's one minute gone in the round.
Parcins blocks a punch to the side of the head.
Blye is trying to break the clinch but Parcins is controlling him.
With the two fighters working up against the cage, Parcins just misses with a elbow thrown towards Blye's brow.
Parcins is really struggling to land any decent head shots against his taller opponent.
A head punch on the inside from Parcins fails to land.
Parcins gets underhooks to prevent Blye's takedown attempt.
Blye blocks the elbow strike.
With the fighters up against the cage, Parcins throws an elbow but misses.
A nice glancing elbow lands by Parcins.
Blye lands a shoulder strike.
Blye lands a hook that snaps the head of Parcins backwards.
Blye letting Parcins take a breather here.
Wayde Parcins seems to be working more effectively in the clinch in the fight so far.
Blye wants to break free. God knows he wants to breaaaak freeee.
That's two minutes gone in the round.
Blye is working on a leg, looking for a takedown but Parcins is defending well.
That's three failed takedown attempts in the round for Lucas Blye. That's going to take a lot out of him.
Blye manages to break the clinch.
Blye looks to land a left hand but Parcins moved out of range nicely.
Parcins throws a right hand that misses
and Blye counters with a nice uppercut.
Parcins slips a straight right by Blye.
Parcins wants to counter the offense by Blye and move into the clinch position.
Blye lands with an uppercut that bounces Parcins off the cage and back into range.
Blye thuds his right hand into Parcins's forehead from close range. That could be painful for both fighters.
The crowd are loving this. Great action here.
Parcins gets cracked there but stands up to it.
Parcins throws a hook but Blye avoids it easily.
Blye is using his reach advantage well here, landing the more effective single shots from range.
Parcins displays some good footwork, moving neatly out of range as Blye throws out the jab.
Blye throws a right hand that Parcins ducks under and follows up with a left that Parcins also avoids with ease.
Blye thows a left - swing and a miss!
Blye misses with a body shot. Nice footwork from Parcins.
Parcins tries to counter with a clinch but Blye shakes him off and moves away.
That's three minutes gone in the round.
Nice defenses there by Parcins.
Parcins misses with a hook.
An attempted straight right counter from Blye misses the target.
Blye takes a hook to the side of the head. I wonder if that's got his ears ringing.
Blye takes a body punch that cleary hurt but he's trying not to show any weakness.
A big right from Parcins misses.
Blye swung with a counter right hand that didn't connect.
Parcins throws the left hand but Blye avoids the punch easily.
Parcins swings widly with a right hand
and Blye counters with a good right hand that lands right on the jaw.
Blye uses good footwork to get in and out and land a nice right hand before Parcins has time to react.
Parcins throws a poor cross that misses
and Blye counters with a left to the body.
Blye avoids the body shot from Parcins.
Wayde Parcins is looking to keep the fight on the feet at all costs.
Blye misses with a body shot.
No luck with that takedown attempt from Blye.
That's four minutes gone in the round.
Parcins gets cracked there but stands up to it.
Blye lands a powerful looking uppercut that connected with his opponent's jaw.
We've seen a great period of action over the last minute or so - credit to both fighters for going all out!
Parcins forces Blye back against the cage and clinches.
With the two fighters working up against the cage, Parcins just misses with a elbow thrown towards Blye's brow.
Blye blocks the elbow strike.
Blye is trying to drag Parcins to the mat but Parcins just about manages to keep his footing. He used the cage to his advantage there.
Blye avoids the elbow strike from Parcins, against the cage.
Blye is trying to work for a single leg takedown but Parcins pulls him back up using the underhooks.
Parcins stops a takedown attempt from Blye.
And thats the end of the round the fighters go back to their corners.
Lucas Blye dominated that second round.
The corners get their ten second warning. Both fighters stand from their stools and stare eachother down, ready to get back to the action. This is the final round!
Blye throws a hard body shot but it just misses.
Parcins wants to counter with a clinch but Blye pushes him away.
Parcins tries to land with a swinging hook to the body but Blye was well out of range. Poor timing from Parcins.
Parcins keeping a good distance there, avoiding the body shot.
Parcins blocks a jab.
Blye slips a straight right by Parcins.
Blye fakes a jab and then connects with a hook.
Parcins swinging wildly here.
Parcins on the wrong end of a decent looking cross there.
We've had a slow start to the round here - hopefully the action picks up.
Parcins tries to clinch but fails miserably
and Blye counters with a stiff right hand.
Blye shoots in for a takedown. He's persisting with it as Parcins sprawls well. Parcins wins this battle and keeps the fight standing. Blye gets slowly back to his feet.
That's one minute gone in the round.
Parcins swings and misses with a hook to the body.
Parcins scores with a jab to the jaw.
Parcins misses with a looping left.
Parcins throws a lazy right hand but Blye sees it coming a mile off and sidesteps it easily.
Blye scores with a jab to the head.
Parcins needs to keep his hands up - Blye had a free shot at his head there.
Parcins takes a big uppercut there. He seems a bit wobbly but no, he's OK.
A big right from Parcins misses.
Blye ducks under an overhand right and circles away with a smile on his face.
Parcins moves into the clinch successfully.
Blye wants to break free but Parcins has control.
A short right from Parcins on the inside.
Parcins prevents Blye from breaking the clinch.
Blye is using his height advantage well here, landing a good percentage of his punches.
That's two minutes gone in the round.
A frustrated look appears on Blye's face as he tries to break the clinch.
Blye is working for a takedown up against the cage. He can't get it on this occasion though.
Parcins lands a damaging elbow.
Parcins throws an elbow but it misses.
We've seen a great period of action over the last minute or so - credit to both fighters for going all out!
Blye blocks the elbow strike.
Blye dodges an elbow strike from Parcins.
Blye is looking to control Parcins's arms but Parcins gets an underhook and turns him. Now Blye has his back to the cage.
Parcins misses with an elbow strike.
Parcins lands a nice elbow from the clinch.
Blye changes levels and goes for a takedown here. Parcins fights it off and pushes away nicely.
That's three failed takedown attempts in the round for Lucas Blye. That's going to take a lot out of him.
Blye looks to throw the jab but Parcins is out of range.
Good exchange - Blye coming out on top.
That's three minutes gone in the round.
Parcins moves in looking to clinch but Blye pushes him off.
Blye keeping a good distance there, avoiding the body shot.
Parcins slips a jab from Blye.
Blye misses with a looping left.
Parcins lands an overhand left. A wild punch that just about connected.
Parcins tries to clinch up against the cage, rushing in to close the distance. Blye manages to break the clinch and circles back to the middle of the mat.
Blye darts in and out, connecting with a jab.
Parcins tries to clinch up against the cage, rushing in to close the distance. Blye manages to break the clinch and circles back to the middle of the mat.
A swing and a miss from Parcins.
Blye throws a hook but Parcins blocks it.
Parcins thows a left - swing and a miss!
Blye throws a series of punches but Parcins avoids them all with ease.
Parcins forces Blye back against the cage and clinches.
That's four minutes gone in the round.
Blye takes an elbow to the temple.
Parcins creates a bit of space for himself and sneaks an elbow through Blye's defenses.
Parcins prevents Blye from breaking the clinch.
Parcins lands a damaging elbow.
Fantastic stuff here - a very entertaining period of action, which has drawn cheers from the crowd.
Blye tries to break the clinch but Parcins is controlling the position.
Parcins tries to work over Blye's body with a swooping hook but it only glances the target.
Parcins throws an elbow but it misses.
Parcins throws a nice elbow but it doesn't land.
Parcins lands a nice elbow.
Parcins misses with a hook from the clinch.
Blye wants to take the fight to the mat but Parcins manages to get underhooks and keep the fight in the clinch.
Parcins lands an elbow just above Blye 's eye.
And that's the end of the fight!
Wayde Parcins comfortably won the final round on my scorecard.
I think Parcins has won this one but let's see whether the judges agree with me. Over to the ring announcer for the scorecards.
Ladies and gentlemen, after 3 rounds of action, we go to the scorecards for a decision.
Judge Gregory Folan scores the fight 28:29
Judge Dillan Fox scores the fight 28:29
Judge Robert Douchet scores the fight 29:28
In favor of your winner, by split decision... Wayde Parcins!
Wayde Parcins decided to thank the fans in attendance for making a great atmosphere. It seemed to go down pretty well.
|
|
|
|
|
|
|
|
|
|
|
|
|
|
|
|
|
|
|
|
|
|
|
| S |
C
A |
G |
S |
C
B |
G |
|
S |
C |
G |
|
energy
A | B |
|
hype
A | B |
|
pop
A | B |
|
mgr
A | B |
|
FIGHT
RATING
48% |
|
|
|
|
|
|
|
|
|
|
