|
TWGC 12 (145lbs, D3): Tokyo Qualifier - Round 2 PBP Commentary |
Co-main event
|
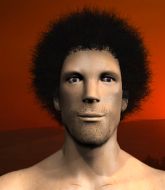
Coming up we have a featherweight Tycoon World Grappling Championship rules bout between William Dewey and Akira Ozawa. Both fighter's entrance songs getting the crowd jumping here.
This TWGC bout is 1 fifteen minute round in the featherweight division. Introducing today's competitors. In the red corner, competing out of Tokyo, with a TWGC record of 2 wins and 2 losses; William Dewey! And in the blue corner, fighting out of Tokyo, with a TWGC record of 1 wins and 0 losses; Akira Ozawa!
The judges for this bout are Shigeki Fujiwara, Shirou Masuda and Kenichi Hosakawa.
The official calls the fighters to the middle and the contest is under way.
Ozawa tries for a takedown but Dewey sees it coming a mile off and avoids it easily.
Ozawa shoots for a double leg takedown but Dewey sprawls well. He's pushed Ozawa's face into the mat and manages to get back to his feet relatively easily.
Dewey slaps away a takedown attempt from Ozawa, before circling back to the center of the mat.
Dewey tries to counter by clinching up but Ozawa breaks away and moves out of range.
William Dewey has stuffed three takedown attempts in the round now. That's going to take a lot out of Akira Ozawa.

Dewey clinches up with Ozawa and pushes him back against the cage.
Ozawa tries to score a body lock takedown but Dewey shows good agility there to stay on his feet.
Ozawa has a body lock and is looking for a takedown. Dewey is bouncing around trying to prevent the takedown and somehow he has indeed managed to stay on his feet.
Ozawa drops to a knee looking for a takedown but Dewey gets the underhooks and prevents it.

Dewey has Ozawa pressed up against the cage. He's trying to work for a single leg takedown. Dewey pulls back from the cage and twists to the side, sending Ozawa tumbling to the mat - Dewey dives into Ozawa's guard. Score +2 for takedown into guard / half guard: Dewey (2) vs (0) Ozawa
Dewey wants to pass the guard but Ozawa is keeping the position.
We've had a slow start to the round here - hopefully the action picks up.

Ozawa looking for submissions from the bottom but instead Dewey passes into side control.
Score +3 for passing guard: Dewey (5) vs (0) Ozawa
Ozawa is trying to get back to half guard. He's pushing on Dewey's leg. He's managed it. Nice work.

That's one minute gone in the round.
Ozawa is looking to improve his position.
Dewey passes to full mount! Score +3 for passing guard: Dewey (8) vs (0) Ozawa
Dewey trying to control but Ozawa is having none of it.
Ozawa is wriggling around trying to escape.
Ozawa wants to improve position but instead he's given up his back. Score +3 for taking back: Dewey (11) vs (0) Ozawa

Dewey looking to break Ozawa's wrist control so he can sink in the choke. Ozawa remaining controlled and patient though - he really has to keep calm otherwise Dewey will wrap this one up with the rear naked choke!
Ozawa tries to escape the position.

That's two minutes gone in the round.
Ozawa preventing the rear naked choke attempt from Dewey.
Ozawa is trying to break free.
Ozawa is very frustrated here, being controlled quite effectively by Dewey.
Dewey is remaining active here, looking for the choke. The more discerning members of the crowd will appreciate his efforts.
Dewey looking to break Ozawa's wrist control so he can sink in the choke. Ozawa remaining controlled and patient though - he really has to keep calm otherwise Dewey will wrap this one up with the rear naked choke!
Dewey keeps control of the position as Ozawa tries to break free.

That's three minutes gone in the round.
Dewey just keeping the dominant position. He can't wait too long though, otherwise the referee will stand them back up.
Ozawa rolls, trying to escape but Dewey keeps control of the position.
The fighters are pressed up against the cage, both looking to find a bit of space to work.
Dewey tightening his grip on Ozawa, looking for the choke.
Ozawa tries to break free.
Dewey biding his time, controlling Ozawa.
Ozawa trying to control the hands but Dewey won't let him.

That's four minutes gone in the round.
Ozawa might have to switch it up a bit here because his efforts to control Dewey haven't been going to plan, at least at the current moment in time.
The ref warns both fighters not to hold the cage as they work up against the meshing.
Dewey looking to break Ozawa's wrist control so he can sink in the choke. Ozawa remaining controlled and patient though - he really has to keep calm otherwise Dewey will wrap this one up with the rear naked choke!
Dewey is looking cool and calm here, just waiting for a good opportunity to attack and finish the fight from this dominant position.
Ozawa preventing the rear naked choke attempt from Dewey.
Dewey has his hand under the chin of his opponent looking for the choke. He's nearly got it! This one could be all over! But no, Ozawa has freed his hand and lives to survive another
well, another couple of seconds at least!
Ozawa fending off the submission attempt from Dewey.

That's five minutes gone in the round.
Dewey is staying calm and holding on to the back position, whilst working on a rear naked choke. Ozawa is defending well though. Dewey let's go of the attempt for now.
Ozawa tries to roll but Dewey sticks to his back.
Will Dewey go for the finish here or will he try and keep control of the position?
Dewey working for the choke.
Dewey controlling well, preventing Ozawa from escaping the position.
Dewey has his hand under the chin of his opponent looking for the choke. He's nearly got it! This one could be all over! But no, Ozawa has freed his hand and lives to survive another
well, another couple of seconds at least!
Ozawa tries to escape the position.

That's six minutes gone in the round.
Ozawa is still trying to improve position.
Dewey looking for the choke from the back.
Dewey is looking to control Ozawa but Ozawa is wriggling around and keeping busy.
Dewey tightening his grip on Ozawa, looking for the choke.
Dewey controlling well, preventing Ozawa from escaping the position.

That's seven minutes gone in the round.
Ozawa is persisting with the attempt to improve his position.
Dewey working for a RNC but it's not happening just yet.
Dewey tries to get the hooks in deep but Ozawa pushed the leg off.
Dewey is staying calm and holding on to the back position, whilst working on a rear naked choke. Ozawa is defending well though. Dewey let's go of the attempt for now.
Dewey controlling well, preventing Ozawa from escaping the position.
Ozawa breaks Dewey's hooks off and manages to turn into his guard.
Score +2 for sweep to guard / half guard: Dewey (11) vs (2) Ozawa
Ozawa advances to half guard.
Ozawa is keen to just control but Dewey is a slippery customer.

That's eight minutes gone in the round.
Ozawa trying to work for an americana but Dewey has managed to regain full guard.
Dewey wants to sweep but no luck.
There's a bit of a scramble here and now Dewey is on top in guard.
Score +2 for sweep to guard / half guard: Dewey (13) vs (2) Ozawa
Ozawa trying to keep a closed guard but Dewey is proving a slippery customer.
Ozawa looking for a sweep. Not yet Ozawa, not yet.
Ozawa is working from a closed guard but he's struggling to control his opponent.
Ozawa wants to sweep here but Dewey controlling him for the moment.
Ozawa is trying to hold Dewey in close to prevent damage but Dewey has managed to pass into half guard.
Dewey passes the guard and advances to mount! Score +3 for passing guard: Dewey (16) vs (2) Ozawa

That's nine minutes gone in the round.
Dewey takes Ozawa's back. Could be looking for a rear naked choke here - either way, Ozawa is in trouble. Score +3 for taking back: Dewey (19) vs (2) Ozawa
Dewey doesn't have the hooks in and Ozawa manages to turn into his guard.
Score +2 for sweep to guard / half guard: Dewey (19) vs (4) Ozawa
Dewey is pulling down on Ozawa's head to control his posture.
Dewey working for a triangle but Ozawa defends it easily.
Dewey trying to control the position.
Dewey is doing well to control the posture of his opponent and prevent any damage.

That's ten minutes gone in the round.
Dewey looking to hit a scissor sweep but Ozawa is one step ahead there.
Ozawa looking to pass the guard.
Dewey working a defensive guard here.
Dewey keeping moving, preventing Ozawa from controlling successfully.
Ozawa slips effortlessly into side control - very nice. Score +3 for passing guard: Dewey (19) vs (7) Ozawa
Dewey prevents Ozawa from moving into mount.
Ozawa trying to control the position but Dewey is working away.

That's eleven minutes gone in the round.
Dewey is trying to get back to half guard.
Ozawa working away.
Ozawa tries to move into full mount but can't pass Dewey's legs.
Dewey regains half guard.
The fighters are battling for position here. Dewey manages to regain full guard. Nice work.
Ozawa slips nicely into half guard.
Ozawa is trying to work for a kimura but Dewey is defending well.
Dewey has no desire to be mounted, so is trying to control. Ozawa is working away from the top position though.

That's twelve minutes gone in the round.
Dewey tries to roll over but Ozawa keeps him under control.
Ozawa is pressing down on Dewey's thigh, looking to free his foot. Dewey is holding on for now.
Dewey is refusing to be controlled, as Ozawa sits in half guard.
Dewey moves his hips nicely and gets into full guard.
Dewey looking to control.
Ozawa trying to move into half guard but instead Dewey has managed to sweep! Score +2 for sweep to guard / half guard: Dewey (21) vs (7) Ozawa
We get told so often about how wrestlers don't like to be on their backs. Let's see if Ozawa can do anything to dispel that myth.
Ozawa looking for submissions from the bottom but instead Dewey passes into half guard.
Ozawa is trying to get back to full guard.
Ozawa looks winded!

That's thirteen minutes gone in the round.
Dewey is working for a submission of some sort.
Dewey sitting and controlling from the half guard.
Ozawa is looking for a sweep. Dewey is wise to his cunning plan and keeps the top position.

That's fourteen minutes gone in the round.
Ozawa wants to sweep but Dewey has passed to side control! Score +3 for passing guard: Dewey (24) vs (7) Ozawa
Ozawa is looking for a sweep.
Dewey is trying to get an arm triangle but Ozawa is defending well.
Ozawa is looking to slip a leg under and get half guard but Dewey is one step ahead and moves to full mount! Score +2 for reaching mount: Dewey (26) vs (7) Ozawa
Ozawa sneaks a leg under to get to half guard.
Dewey wants to control but Ozawa is keeping him busy.
Boooooooooooooooooooo!!! God, this has been a terrible round. Come on you two, sort yourselves out!
Dewey performing his best blanket impression for a moment.
Dewey prevents Ozawa from improving his position.
And that's the end of the fight!
Dewey takes the fight on points by 26 to 7. |
|
|
|
Main event
|
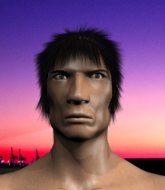
Coming up we have a featherweight Tycoon World Grappling Championship rules bout between Nelson Preto and Hayato Yamamoto. Both fighters look pumped up here. Let's hope this is a good fight!
This TWGC bout is 1 fifteen minute round in the featherweight division. Introducing today's competitors. In the red corner, competing out of Sydney, with a TWGC record of 1 wins and 0 losses; Nelson Preto! And in the blue corner, fighting out of Tokyo, with a TWGC record of 1 wins and 0 losses; Hayato Yamamoto!
The judges for this bout are Sosuke Kotani, Yasuomi Hirokawa and Ren Mimura.
The fighters connect hands in the middle of the mat and we are under way.
Yamamoto shoots in for a double leg but Preto sprawls well. That's going to sap some energy.
Preto tries to counter by moving into the clinch but Yamamoto manages to circle out of the way.
Yamamoto swats away the attempt to clinch by Preto.
Yamamoto swats away the attempt to clinch by Preto.

Yamamoto shoots in for a takedown and gets it. Let's see what he's got on the mat. Score +2 for takedown into guard / half guard: Preto (0) vs (2) Yamamoto
Yamamoto wants to control from the top but Preto keeps moving.
Yamamoto got a little sloppy there for a moment and Preto has worked his way into a loose triangle - can he finish it?! No, Yamamoto has managed to get both his arms back between Preto's legs - danger averted.
We've had a slow start to the round here - hopefully the action picks up.
Yamamoto pressing down on his opponent's thigh, looking to pass guard. Preto is keeping the position for now.
Yamamoto looking to control the position here, rather than advance.
Preto definitely looks more muscular than last time we saw him fight.
Yamamoto avoids a guillotine attempt easily.
That's one minute gone in the round.
Yamamoto sneaks a leg through and gets to half guard. That was like a knife through butter how easily he passed Preto's guard.
Preto wants to improve his position but Yamamoto is controlling well.
Preto trying to control but Yamamoto postures up.
Preto wants to improve his position but Yamamoto is controlling well.
Yamamoto trying to control the action but Preto is working from the bottom.
Yamamoto looks over to his corner - he wants some instructions but his corner are not responding.
Yamamoto is looking to pass Preto's guard but actually Preto recovers to full guard.
That's two minutes gone in the round.
Yamamoto advances position into side control! Score +3 for passing guard: Preto (0) vs (5) Yamamoto
The fighters are starting to perspire pretty heavily.
Yamamoto works to advance to full mount. Preto defends for a few seconds but eventually he succumbs. Score +2 for reaching mount: Preto (0) vs (7) Yamamoto
Yamamoto jumps to the side looking to secure the arm triangle
. Ooooh, that looks tight
Preto is gargling but he's managed to escape! Nice work there by Preto and Yamamoto has given up the dominant position trying to land that submission.
Preto tries to get back to half guard but can't.
Yamamoto wants to lay and pray for a moment but Preto keeps working.
Preto struggling a bit here.
Yamamoto advances to full mount. Score +2 for reaching mount: Preto (0) vs (9) Yamamoto
That's three minutes gone in the round.
Yamamoto can't quite control the action as he would like just now, as Preto is looking to escape.
Yamamoto is working on an americana here. Ooh, that looks pretty nasty! Nope, Preto has managed to escape the submission attempt.
Preto is writhing around trying to get back to his feet.
Preto is working to get back to half guard.
Yamamoto takes his opponent's back. Perhaps a chance to lock up a rear naked choke here.
Score +3 for taking back: Preto (0) vs (12) Yamamoto
Preto tries to escape but Yamamoto has the hooks in and won't let him break free.
That's four minutes gone in the round.
Yamamoto looking for the choke from the back.
Preto trying to control the hands but Yamamoto won't let him.
Yamamoto has the rear naked choke here! This is very bad for Preto! Can he survive? No! He's out! Yamamoto gets to his feet and celebrates with his cornermen. He looks absolutely delighted. In the post fight interviews he takes time to thank his parents and everyone who has believed in him from the start. How sweet.
Ladies and gentlemen, after 4:27 of round 1, we have a winner by way of Submission (RNC). Hayato Yamamoto! |
|
|
|
|
|
|