 |
CEFC Live 9 PBP Commentary |
Undercard bout
|
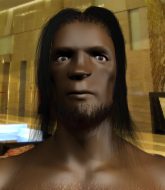
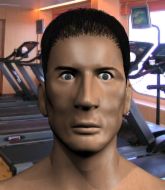
Coming up we have a middleweight MMA rules bout between Jack Hillman (ranked 0 p4p, 0 weight class) and Bart Hayden (ranked 0 p4p, 0 weight class). These two fighters really are very evenly matched on the feet - it will be fascinating to see who can assert themselves in that aspect of the fight.
 |
|
 |
| 193 cm
24
195 lbs
8 - 10 - 0 |
|
181 cm
25
186 lbs
0 - 1 - 0 |
BJJ Blue Belt
Brawler
Experienced |
|
Good wrestler
Brawler
Granite chin |
|
| |
|
Ladies and gentlemen. This fight is 3 rounds, in the middleweight division.
Introducing the fighter to my left, fighting out of the red corner.
With a record of
8 - 10 - 0, fighting out of Montreal, Jack Hillman!
And introducing the fighter to my right, fighting out of the blue corner.
With a record of
0 - 1 - 0, fighting out of Montreal, Bart Hayden!
The judges for this bout are Elvis Blanc, Ian Loll and Trevor Gratis.

The bell rings for round one and we are underway!

Hayden gets a takedown into half guard.

Hillman actively working from the bottom here.
Hayden keeping composed on the top, looking to control the action.
Hillman actively working from the bottom here.
Hayden is looking to advance position but Hillman won't allow it.
Hayden takes a deep breath and rests his weight momentarily on top of his opponent, to control the position.
Hillman is not content to let Hayden control the position.
Hillman is looking to improve his position.
We've had a slow start to the round here - hopefully the action picks up.
Hillman actively working from the bottom here.
The ref warns both fighters not to hold the cage as they work up against the meshing.
Hayden seems content to maintain position for now, rather than mounting any offense.
Hillman looking to work for a kimura from the bottom.

That's one minute gone in the round.
Hayden takes a deep breath and rests his weight momentarily on top of his opponent, to control the position.
Hillman looking for subs from the bottom but Hayden mounts him!
Hayden takes a little breather and maintains the position. The referee will be looking for him to stay active from such a dominant position though.
Hayden with the ground and pound from mount.
The fighters are pressed up against the cage, both looking to find a bit of space to work.
Hillman is working to get back to half guard.
Hayden looking to control and managing it successfully.
Hillman tries to reverse the position but Hayden maintains control.
Hayden looking to control but Hillman is working nicely, looking to advance position himself.
Hayden controlling his opponent.

That's two minutes gone in the round.
Hillman is trying to escape the mount.
Hayden landing shots from mount.
Hillman is trying desperately to improve position.
Hayden controlling from mount.
Hayden tries to control but Hillman wriggling away.
Hillman is trying to escape the mount.
In the pre-fight buildup videos we saw Hayden working his ground and pound in the gym. So far it seems to be working well.
Hillman is working hard here to advance position.

That's three minutes gone in the round.
Hayden looking to control and managing it successfully.
Hillman is looking to get to half guard.
Hayden scores with a couple of good head shots there.
Hillman is desperately trying to get back to half guard.
Hayden looking to control and managing it successfully.
Hayden unloading with bombs!
Hayden with good strikes from the mount here!
Hillman is desperately trying to get back to half guard.
Hayden controlling from mount.
Hayden's corner are shouting for him to control the position and he seems happy to oblige.

That's four minutes gone in the round.
Hayden lands with some vicious ground and pound - can Hillman hang on?
Hillman is trying to escape the mount.
Hillman is squirming around, avoiding Hayden's attempts to control the action.
Hayden scoring with strikes but Hillman is staying in there.
Hayden has his opponent pinned against the cage, landing some nasty ground and pound that is really making a bit of a mess out of Hillman's face.
Hillman is desperately trying to improve his position but Hayden has a good base and remains in mount.
Hayden tucks in and makes sure he doesn't lose the dominant position.
Hayden has the superior BJJ but he's also working some ground strikes into his gameplan.
Hayden can't quite control the action as he would like just now, as Hillman is looking to escape.
We've seen a great period of action over the last minute or so - credit to both fighters for going all out!
Hayden putting on the heat here with some good ground and pound!
Hayden with good strikes from the mount here!
Hayden looking to control and managing it successfully.
And thats the end of the round the fighters go back to their corners.
Bart Hayden dominated that round.
The fighters get back to their feet, the hooter sounds and we're back to the action!

Hillman shoots in for a takedown. He's persisting with it as Hayden sprawls well. Hayden wins this battle and keeps the fight standing. Hillman gets slowly back to his feet.
Hayden shoots in and gets a takedown into Hillman's guard.
Hayden got a little sloppy there for a moment and Hillman has worked his way into a loose triangle - can he finish it?! No, Hayden has managed to get both his arms back between Hillman's legs - danger averted.
Bart Hayden has got the better of the ground game so far.

Hayden stands up from guard. Let's bang!
Hayden shoots in for a takedown from distance. He catches Hillman napping and manages to drive through into side control!
Hayden trying to control the position but Hillman is working away.
Hillman is trying to escape the position but Hayden is controlling the position.
We've had a slow start to the round here - hopefully the action picks up.
Hayden scores with a couple of short elbows.
Hayden landing strikes.
Hillman is positioning himself to get back to half guard.
Hayden is looking to take a break and control but Hillman is keeping him honest, looking to work from the bottom.
That's one minute gone in the round.
Hillman is positioning himself to get back to half guard.
Hayden working away diligently from side control. Landing strikes effectively there - that will score him some points on the judges scorecards.
Hillman is not content to let Hayden control the position.
Hayden controls the position.
Hillman is positioning himself to get back to half guard.
Hayden controls the position from side control.
That's two minutes gone in the round.
Neither fighter has done anything of merit for a good minute or two here and the crowd are not happy about it.
Hayden cracks Hillman with an elbow. That is naaassty.
Hillman is not content to let Hayden control the position.
Hayden lands an elbow.

Hayden is looking for a kimura. He might have it! No, Hillman has escaped the position, nice work there.
Hayden is trying to get an arm triangle but Hillman is defending well.
Hayden is breathing heavily.
Hillman tries to improve position but can't.
That's three minutes gone in the round.
Hayden wants to lay and pray for a moment but Hillman keeps working.
Hillman is looking to regain half guard here but Hayden keeps moving and retains side control.
Hayden wants to control but Hillman is keeping him busy.
Hayden has been the more effective fighter overall so far.
Hillman is trying to improve his position.
Hillman sneaks a leg under to get back to half guard.
Hillman slips a foot under and gets full guard. Nice work.
Hayden wants to control from the top but Hillman keeps moving.
Hillman is looking for a triangle but Hayden pushes his legs off easily.
Hayden slips nicely into half guard.
Hayden is keen to just control but Hillman is a slippery customer.
That's four minutes gone in the round.
Hillman looking for submissions from an awkward position here.
Hayden seems very keen to just sit and control from half guard but Hillman does not like that idea so much and is remaining active off his back.
Hillman looking to work for a kimura from the bottom.
Nice strikes from Hayden there.
Hayden is controlling the pace.
Boooooooooooooooooooo!!! God, this has been a terrible round. Come on you two, sort yourselves out!
Hillman actively working from the bottom here.
And thats the end of the round the fighters go back to their corners.
Bart Hayden showed his class in that round. I'd imagine he'll take it on all the scorecards.
OK. That's time! The bell goes and we're back to the action. This is the final round!

Hillman darts in looking for a takedown but Hayden gets double underhooks and turns Hillman into the cage.
Hayden fakes a strike and closes the distance, dragging Hillman to the ground. Hayden is now in Hillman's guard.
Hayden not doing a lot at the moment. He'll have to show some more aggression or the fight will get stood up.
Hillman is active off his back here, looking for submissions.
Hillman escapes his hips to the side and looks to be working for an armbar. Hayden gives him a little smile and shakes his head. No chance.
Hillman has an omoplata and is looking to use it perhaps as a submission or perhaps to transition. Hayden is in a bit of discomfort here, but he's managed to free himself and has dived into side control! That didn't work out too well for Hillman.
We've had a slow start to the round here - hopefully the action picks up.
Hayden lands a decent elbow from side control.
Hillman is not content to let Hayden control the position.
Hayden decides to stand back up. Hayden steps back and let's Hillman get back to his feet.
Both fighters are breathing heavily.
That's one minute gone in the round.
Hillman tries for a takedown but Hayden circles away easily
and Hayden counters with an inside leg kick.
Hayden shoots in and gets a takedown into Hillman's guard.
Hayden slips effortlessly into side control - very nice.
Hayden staying calm.
Hillman tries to work a leg under to get back to half guard but Hayden wriggles his own leg back out and remains in side control.
Hayden is looking to take a break and control but Hillman is keeping him honest, looking to work from the bottom.
Hillman is working to avoid the ground and pound but Hayden connects with a decent elbow.
That's two minutes gone in the round.
Hillman is being controlled here.
Hillman is looking to regain half guard here but Hayden keeps moving and retains side control.
You can see the frustration on Hillman's face as Hayden controls the position.
Hillman takes an elbow right on the bridge of the nose and winces in pain.
Hillman is letting Hayden control him for a moment.
Hillman is looking to regain half guard here but Hayden keeps moving and retains side control.
Hayden trying to control the action but Hillman is working from the bottom.
That's three minutes gone in the round.
Hillman tries to improve position but can't.
Hayden controls the position.
Hayden stands up and beckons Hillman to his feet.
Hillman staying out of range there.
Hayden shoots in and scores a nice double leg takedown into half guard.
Hillman actively working from the bottom here.
Hillman looking to work for a kimura from the bottom.
Hayden is nestled in close to Hillman, controlling him well. He's worked in a nice elbow to the side of the head as well, for good measure.
That's four minutes gone in the round.
Hayden looking to pass the half guard. Not this time.
Hillman looking for submissions from an awkward position here.
Hayden seems content to maintain position for now, rather than mounting any offense.
Hayden lands with an elbow from half guard - that looked like it hurt.
Hayden controlling the pace.
Hillman actively working from the bottom here.
The crowd thankful this round is nearly over.
Hillman is looking for a sweep. Hayden is wise to his cunning plan and keeps the top position.
Jack Hillman has stepped it up - he knows he needs a finish here!
Bart Hayden is fighting for a decision - hopefully he's judged it right and he's actually winning the fight.
Hayden sitting and controlling from the half guard.
And that's the end of the fight!
Bart Hayden comfortably won the final round on my scorecard.
Well Hayden has outworked and out performed his opponent in all aspects of the game today. He was simply too good and the decision should be no more than a formality. Over to the ring announcer for the scorecards.
Ladies and gentlemen, after 3 rounds of action, we go to the scorecards for a decision.
Judge Elvis Blanc scores the fight 27:30
Judge Ian Loll scores the fight 27:30
Judge Trevor Gratis scores the fight 26:30
In favor of your winner, by unanimous decision... Bart Hayden!
|
|
|
|
|
|
|
|
|
|
|
|
|
|
|
|
|
|
|
|
|
|
|
| S |
C
A |
G |
S |
C
B |
G |
|
S |
C |
G |
|
energy
A | B |
|
hype
A | B |
|
pop
A | B |
|
mgr
A | B |
|
FIGHT
RATING
32% |
|
|
|
|
|
|
|
Undercard bout
|
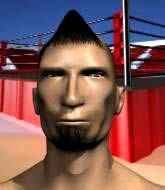
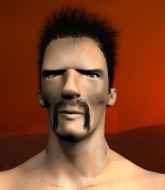
Coming up we have a lightweight MMA rules bout between Alfredo Vinchensa (ranked 0 p4p, 0 weight class) and Joey Troublefield (ranked 0 p4p, 0 weight class). Vinchensa comes to the cage accompanied by In Italia. Troublefield has chosen Hell Song - Sum 41 as his entrance music. Over to our ring announcer for the fighter introductions!
 |
|
 |
| 185 cm
25
155 lbs
1 - 0 - 0 |
|
179 cm
25
166 lbs
3 - 3 - 0 |
Good wrestling
Basic striking
Good chin |
|
BJJ Purple Belt
Counter fighter
Granite chin |
|
| |
|
Ladies and gentlemen. This fight is 3 rounds, in the lightweight division.
Introducing the fighter to my left, fighting out of the red corner.
With a record of
1 - 0 - 0, fighting out of Montreal, Alfredo Vinchensa!
And introducing the fighter to my right, fighting out of the blue corner.
With a record of
3 - 3 - 0, fighting out of Amsterdam, Joey Troublefield!
The judges for this bout are Alec Ball, Ian Loll and Trevor Gratis.
The bell rings for round one and we are underway!
Troublefield thuds his shin into the meat of Vinchensa's side.
Vinchensa shoots in but Troublefield avoids the takedown attempt easily.
A countering left hand to the body from Troublefield misses.

Vinchensa closes the distance and after a bit of a stuggle, scores a takedown into Troublefield's guard.
Troublefield looking to control.
Vinchensa throws an elbow that misses. Troublefield uses the momentum to reverse the position. He's now in Vinchensa's guard. Nice move by Troublefield!

Troublefield throws a big right hand that misses.
Troublefield loading up with the ground and pound but he's missing more than he's landing in this flurry.
Vinchensa trying to control the position here.
We've had a slow start to the round here - hopefully the action picks up.
Troublefield gets to his feet - Vinchensa follows without any prompting.
Vinchensa fails with a takedown attempt.
That's one minute gone in the round.
Vinchensa keeping at a good range here, avoiding a leg kick.
Troublefield throws a two punch combo that lands nicely.

It looks like Alfredo Vinchensa has been cut.
Vinchensa fails with the takedown.
Troublefield with the counter takedown but Vinchensa avoids it easily.
We've been informed that Troublefield has been sparring a lot of Muay Thai in the buildup to this fight so let's see if that has an impact on the result.
That's three failed takedown attempts in the round for Alfredo Vinchensa. That's going to take a lot out of him.
Troublefield jabs at Vinchensa's body.
Vinchensa is breathing heavily.
Vinchensa misses with a takedown attempt
and Troublefield counters with a nice double leg into side control. Vinchensa won't be happy with that.
Sloppy strikes there by Troublefield.
Troublefield throws a knee to the body but it doesn't do much damage.
A bit of a lull in the action. I'm sure it will pick up again soon... even if the ref has to physically pick them up and put them back on their feet.
Troublefield has hold of Vinchensa's arm. He's looking for a kimura. Vinchensa seems comfortable defending it but Troublefield has shifted his position slighty and is cranking on the arm! Vinchensa is real pain and he's forced to tap out! Vinchensa is disgusted with himself for not defending it better but Troublefield couldn't care less - he's delighted!
Ladies and gentlemen, after 2:05 of round 1, we have a winner by way of Submission (Kimura). Joey Troublefield!
A victorious Joey Troublefield thanked his army of followers in his post fight interview, telling people to make sure they follow him on Twitter.
|
|
|
|
|
|
|
|
|
|
|
|
|
|
|
|
|
|
|
|
|
|
|
| S |
C
A |
G |
S |
C
B |
G |
|
S |
C |
G |
|
energy
A | B |
|
hype
A | B |
|
pop
A | B |
|
mgr
A | B |
|
FIGHT
RATING
52% |
|
|
|
|
|
|
|
Co-main event
|
Coming up we have a welterweight MMA rules bout between Jeremy Ring (ranked 0 p4p, 0 weight class) and Trey Golden (ranked 0 p4p, 0 weight class). Golden has chosen Kongos- Come with me now as his entrance music. Over to our ring announcer for the fighter introductions!
 |
|
 |
| 180 cm
39
187 lbs
33 - 21 - 1 |
|
187 cm
37
184 lbs
24 - 19 - 1 |
Good wrestling
World class MT
Cardio machine |
|
Good wrestler
World class MT
Good gas tank |
|
| |
|
Ladies and gentlemen. This fight is 3 rounds, in the welterweight division.
Introducing the fighter to my left, fighting out of the red corner.
With a record of
33 - 21 - 1, fighting out of Montreal, Jeremy Ring!
And introducing the fighter to my right, fighting out of the blue corner.
With a record of
24 - 19 - 1, fighting out of Montreal, Trey Golden!
The judges for this bout are Yves DeLean, Ian Loll and Robert Douchet.
The bell rings for round one and we are underway!
Ring moves in looking to clinch but Golden pushes him off.

Ring clinches up with Golden and pushes him back against the cage.
Golden is trying to work for a single leg takedown but Ring pulls him back up using the underhooks.
Golden lands a knee to the body.
A nice right hand lands inside from Golden.
Golden with an attempt at a knee that misses.
Golden tries a knee to the head but Ring blocks it.
Ring tries to land a knee to the head but Golden blocks with his arms.
Golden misses with a punch to the body.
Ring tries to land a knee to the body but he is off balance and Golden avoids it.
Golden wants a takedown but no success here.
Golden lands with a short shot to the head.
We've had a slow start to the round here - hopefully the action picks up.
Golden tries to throw a body punch but Ring avoids it by throwing Golden back against the cage.
Golden lands a good knee to the midsection. Ring won't want to take too many of those.
Golden crunches a lovely knee into Ring's ribcage.
Ring swings wildly with an uppercut but Golden uses good head movement to avoid it.
Golden creates a bit of space for himself and sneaks an elbow through Ring's defenses.
That's one minute gone in the round.
Golden lands an elbow inside.
Ring managing to block the knees to the body from Golden.
A nice glancing elbow lands by Golden.
Ring tries to land a knee to the head but misses.
Ring putting his Muay Thai to good use. He has Golden in a tight clinch and is doing some damage with knees to the body.
Golden lands with a light punch inside.
Knees to the body from Ring.
Ring working Golden over with knees to the body.
Ring pushes off an throws an elbow but Golden leans to the side and avoids it. We're back to clinching against the cage.
Ring unloads a knee to the mid-section. Golden lets out a prehistoric sounding urrrrgh.
Golden takes a shot to the head.
Ring lands a damaging elbow.
We've seen a great period of action over the last minute or so - credit to both fighters for going all out!
Ring fails to land with a short punch on the inside.
Ring lands an elbow just above Golden 's eye.

It looks like Trey Golden has been cut.
Golden avoids the elbow strike from Ring, against the cage.
That's two minutes gone in the round.
Golden softening up his opponent with strikes, against the cage.
Ring lands a knee to the head there! That was nasty!
Golden takes a knee to the side of the body.
A short right hand to the side of the head by Golden.
Ring lands a nice elbow from the clinch.
Ring trying to land knees to the body.
Golden drops to a knee looking for a takedown but Ring gets the underhooks and prevents it.
Jeremy Ring has stuffed three takedown attempts in the round now. That's going to take a lot out of Trey Golden.
Ring is looking to score with knees to the body. Maybe he'll change it up and go body then head. Golden is defending well for now.
Ring prevents the takedown attempt.
Golden managing to block the knees to the body from Ring.
Golden wants a takedown.
Golden is working on a leg, looking for a takedown but Ring is defending well.
Golden prevents a body shot from Ring.
Ring missing with knees to the body.
That's three minutes gone in the round.
Ring landing knees to the body. They look like they could hurt.
With the fighters up against the cage, Golden throws an elbow but misses.
Ring throws a vicious knee straight up the middle but Golden blocks it with crossed arms.
Golden trying to land knees to the body.
Golden lands a body shot in the clinch.
Golden avoids the elbow strike from Ring, against the cage.
Golden tries to throw a body punch but Ring avoids it by throwing Golden back against the cage.
Ring trying to land knees to the body.
Ring trying to land knees to the body.
Golden misses with a hook to the ribs.
Golden connects with a knee to the head.
Ring gets an overhook and lands an elbow to the side of the head.
Golden lands with a right to the head.
A nice glancing elbow lands by Ring.
Golden tries to land a knee to the body but he is off balance and Ring avoids it.
That's four minutes gone in the round.
Golden avoiding damage as Ring throws knees to the body.
Ring with an attempt at a knee that misses.
Ring is pressed up against the cage. Golden has hold of a leg and is looking to drag Ring down to the mat. Ring avoids the attempt though and has circled away. We're back to striking at a distance.
Fantastic stuff here - a very entertaining period of action, which has drawn cheers from the crowd.
Ring defends well against a solid takedown attempt from Golden.
Golden has been working on his striking defense in training and it's paying off as Ring is landing a low percentage of strikes.
Ring avoids the head kick by Golden.

The fight moves into the clinch position.

Ring manages to break the clinch.
Ring throws a sloppy head kick and Golden moves out of range easily.
Golden throws a head kick that half lands.
Some bone on bone action there as Ring checks a low kick. Luckily it wasn't a particularly hard one.
Golden is looking to take this fight into the clinch.
Ring throws a body kick that sends a sickening thudding noise reverberating around the arena.
Ring stuffs a takedown. It's all about dictating where the fight takes place and Ring wants it to stay on the feet.
And thats the end of the round the fighters go back to their corners.
That was a close round but I would say that Jeremy Ring will probably get the nod.
The cut man is working on Trey Golden's cut.
That's the end of the interval. I'm sure that seemed a lot quicker than a minute for our two fighters! Back to the action.
Ring lands with a nice low kick. That'll leave a bruise.
Golden lunges in with swinging rights and lefts but Ring circles away quickly and effectively.
Nice defenses there by Ring.
Golden dodges the punch combination from Ring.
Golden shoots in looking for a single leg takedown. Ring is trying to defend but Golden finishes it well and ends up in half guard. Let's see if he can advance position further.
Golden wants to lay and pray for a moment but Ring keeps working.
Golden not throwing his punches with enough precision this time.
We've had a slow start to the round here - hopefully the action picks up.
Golden wants to free his trapped foot but Ring is holding on for dear life with his legs.
Golden is trying for a guillotine from the top but the pressure isn't in the right place so Ring is just riding it out for now. Golden eventually gives up the hold.
That's one minute gone in the round.
Golden seems very keen to just sit and control from half guard but Ring does not like that idea so much and is remaining active off his back.
Golden is stalling here. Ring is in no mood to hang around though. He's locked up a kimura from the bottom! Golden seems to be keeping calm but he's forced to roll out of the hold and Ring has ended up in side control on the top. Nice work.
Golden is trying to get back to half guard.
Ring is looking to take a break and control but Golden is keeping him honest, looking to work from the bottom.
Golden can't do much from the bottom here.
That's two minutes gone in the round.

Ring stands up.
Jeremy Ring is looking to throw some combinations by the looks of things.
Horrible takedown attempt by Golden or perhaps it was just good defense by Ring, which made it look bad.
Ring tries a switch kick but it misses it's target.
Golden shoots in looking for a takedown. Ring tries to sprawl out of it but Golden keeps driving through. The fighters are pinned against the cage. Ring manages to get underhooks and after a bit of a struggle, circles away and we're back to standing.
Ring swats away the attempt to clinch by Golden.
Golden connects with a hook to the side of his opponent's head.
Golden moves in looking to clinch but Ring pushes him off.
Ring throws a sloppy head kick and Golden moves out of range easily.
Golden tries to clinch there but Ring circles away.
Golden swinging wildly here.
That's three minutes gone in the round.
A head kick misses from Ring.
A looping hook to the body misses from Golden. Ring does a little dance to reset his feet.
Ring throws a body punch but Golden moves out of range.
Trey Golden seems to be the more aggressive standup fighter in this bout.
Golden is looking to clinch.
Golden shoots for a double leg takedown but Ring sprawls well. He's pushed Golden's face into the mat and manages to get back to his feet relatively easily.
Jeremy Ring has stuffed three takedown attempts in the round now. That's going to take a lot out of Trey Golden.
Golden closes the distance and clinches up with Ring, looking for a takedown. Golden pushes Ring against the cage but Ring circles to the side and manages to break the clinch.
Jeremy Ring is looking to keep the fight on the feet at all costs.
Ring looking to land some kicks to the body here.
Ring slips a jab from Golden.
Ring gets in close and instigates a clinch.
Ring is trying to wear down his opponent with knees to the body.
Golden is breathing heavily.
Ring throws a vicious knee straight up the middle but Golden blocks it with crossed arms.
Ring looking to throw knees to the head but Golden is blocking nicely.
Golden tries to throw a body punch but Ring avoids it by throwing Golden back against the cage.
Jeremy Ring has scored more points in the clinch so far.
Ring takes a knee right on the jaw!
Ring tries to break free but Golden pushes him back against the cage.
Ring is really dominating this fight. Is there anything that Golden can do to turn this around?
Golden takes an elbow to the forehead.
That's four minutes gone in the round.
Golden drops to a knee looking for a takedown but Ring gets the underhooks and prevents it.
Golden misses with a punch on the inside.
Ring throws an elbow but it misses.
Ring prevents the takedown attempt.
Golden tries a shoulder strike but it doesn't do any damage.
The fans in attendance giving it up for the two fighters, who have really let it all hang out in the last minute or so!
Golden tries to score a body lock takedown but Ring shows good agility there to stay on his feet.
Golden has a body lock and is looking for a takedown. Ring is bouncing around trying to prevent the takedown and somehow he has indeed managed to stay on his feet.
Golden misses with a hook to the ribs.
Ring misses the knee to the body. Nice hip positioning from Golden.
Ring with a knee to the head.
Ring using the Thai plumb to throw knees but Golden has his back arched nicely, preventing the strike.
Ring using the Thai plumb to throw knees but Golden has his back arched nicely, preventing the strike.
Ring misses with an elbow strike.
And thats the end of the round the fighters go back to their corners.
Jeremy Ring dominated that second round.
The cut man is working on Trey Golden's cut.
The minute break is over - no more time for sponges and pep talks - back to the action! This is the final round!
Golden throws a body kick despite being completely out of range
and Ring counters by moving into the clinch.
Ring lands a body punch in the clinch.
Ring is working hard here but doesn't seem to be able to control effectively, up against the cage.
Ring blocks a couple of punches on the inside.
Ring is defending well against a takedown attempt.
Ring leaning his opponent against the cage.
Ring unloads a knee to the mid-section. Golden lets out a prehistoric sounding urrrrgh.
Golden goes for a body shot but it's blocked.
We've had a slow start to the round here - hopefully the action picks up.
Ring lands a knee to the head there! That was nasty!
Golden missing with knees to the body.
Ring lands a nice knee to the body.
Golden blocks the elbow strike.
Golden struggles to land a body shot inside as Ring controls his hands.
Golden takes a big intake of breath there - he's definitely tired.
That's one minute gone in the round.
Ring lands a hook to the side of the head.
Ring blocks an uppercut.
Golden is looking for a takedown up against the cage. Ring gets underhooks though and prevents the takedown attempt.
Ring breaks the clinch and we're back to striking at distance.
Golden is on the wrong end of a nice combination from Ring.
Golden is looking to take this fight into the clinch.
Ring went nuts there looking for a big combo counter but none of the flurry connected.
An inside leg kick from Golden misses.
Golden digs a good hook to Ring's body.
Ring misses with a body shot. Nice footwork from Golden.
Golden throws a head kick that misses.
Golden tries to shoot in for a takedown. He's got hold of a leg but Ring swivels and escapes.
Jeremy Ring has stuffed three takedown attempts in the round now. That's going to take a lot out of Trey Golden.
Ring fails to land with a series of punches.
Golden tries to clinch
letting Ring counter with a right hand.
Ring lands a hook that stumbles Golden back into the cage. Ring follows up with a straight and another hook that land right on the button, dropping Golden to the canvas! Ring pounces and lands several unanswered shots - Golden has had enough and taps out! This one is all over!
Ladies and gentlemen, after 2:56 of round 3, we have a winner by way of Submission (Strikes). Jeremy Ring!
During a confident post fight interview, Jeremy Ring thanked all his fans. He seemed very genuine when describing how motivated his fans keep him.
|
|
|
|
|
|
|
|
|
|
|
|
|
|
|
|
|
|
|
|
|
|
|
| S |
C
A |
G |
S |
C
B |
G |
|
S |
C |
G |
|
energy
A | B |
|
hype
A | B |
|
pop
A | B |
|
mgr
A | B |
|
FIGHT
RATING
64% |
|
|
|
|
|
|
|
Main event
|
Coming up we have a lightweight MMA rules bout between Sparky Anderson (ranked 0 p4p, 0 weight class) and Roman Yakimyuk (ranked 0 p4p, 0 weight class). This should be a great matchup!
 |
|
 |
| 173 cm
40
164 lbs
25 - 9 - 0 |
|
177 cm
37
167 lbs
28 - 19 - 2 |
Great wrestler
World class boxer
Cardio machine |
|
Good wrestler
Lethal high kicks
Heavy handed |
|
| |
|
Ladies and gentlemen. This fight is 5 rounds, for the lightweight championship of the world!
Introducing the champion to my left, fighting out of the red corner.
With a record of
25 - 9 - 0, fighting out of Montreal, Sparky Anderson!
And introducing the challenger to my right, fighting out of the blue corner.
With a record of
28 - 19 - 2, fighting out of New York, Roman Yakimyuk!
The judges for this bout are Gregory Folan, Ian Loll and Alec Ball.
The bell rings for round one and we are underway!
A head kick misses from Yakimyuk.
Anderson darts in and clinches Yakimyuk up against the cage.
Anderson misses with a punch to the body.
Anderson is working Yakimyuk over against the cage.
Anderson breaks from the clinch.
Anderson instigates a clinch.
Anderson breaks the clinch and we're back to striking at distance.
Yakimyuk tries to close the distance and clinch up but Anderson swats him away and circles back towards the center.
Anderson scores with a punch to the head.
It looks like Roman Yakimyuk has been cut.
Yakimyuk misses with a combination
and Anderson counters with a quick right hand to the jaw.
Anderson moving in and out of range nicely, whilst landing the scoring shot.
Yakimyuk moves out of range of the strikes.
Yakimyuk keeps Anderson at a distance using the push kick.
A combination from Yakimyuk does no damage.
Wooooo! Give it up for these two warriors! They are putting on a show!
Jab from Anderson.
Anderson throws out a token jab with nothing on it.
That's one minute gone in the round.
Yakimyuk connects with a solid leg kick.
Yakimyuk slips a jab from Anderson.
Anderson lands a nice looking body kick.
Yakimyuk throws a head kick that half lands.
Anderson lands a nice looking body shot.
Anderson scores with a leg kick.
Sparky Anderson seems to be the more aggressive standup fighter in this bout.
Anderson throws a front kick that sends Yakimyuk stumbling back into the cage.
Yakimyuk takes a punch right to his stomach. That took the wind out of him momentarily.
Yakimyuk slips a straight right by Anderson.
Anderson scores with a big left there. The judges will like that one.
Yakimyuk gets cracked with a nice right hand there by Anderson.

Yakimyuk is rocked!
This is a great period of action - very entertaining stuff!
Anderson works his jab well there, keeping his opponent at a distance.
Yakimyuk is still on wobbly legs! Can Anderson finish him?
Anderson scores with a jab to the body.
An inside leg kick lands from Anderson.
Yakimyuk gets caught by a big overhand right and goes down! Anderson gets on top of him and starts throwing some serious punches until the ref intervenes and stops the fight!
Ladies and gentlemen, after 1:56 of round 1, we have a winner by way of TKO (Strikes). Sparky Anderson!
Sparky Anderson retains his lightweight title!
Sparky Anderson decided to call for a title shot in his post fight interview, which was very strange given the fact this fight was for a title and he's already the champion. I guess that's what getting punched in the head does for you.
|
|
|
|
|
|
|
|
|
|
|
|
|
|
|
|
|
|
|
|
|
|
|
| S |
C
A |
G |
S |
C
B |
G |
|
S |
C |
G |
|
energy
A | B |
|
hype
A | B |
|
pop
A | B |
|
mgr
A | B |
|
FIGHT
RATING
65% |
|
|
|
|
|
|
|
|
|
|
