 |
BBD in a C - 17 PBP Commentary |
Undercard bout
|
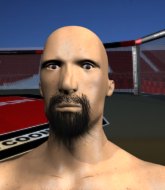
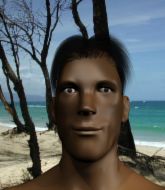
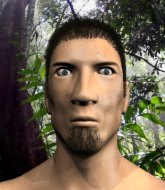
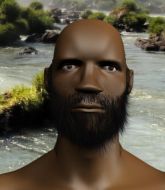
Coming up we have a featherweight MMA rules bout between Hunter Mc Dougall (ranked 0 p4p, 0 weight class) and James Mitchell (ranked 0 p4p, 0 weight class). Both fighters look fresh as a daisy as they make their way towards the cage.
 |
|
 |
| 169 cm
26
145 lbs
1 - 0 - 0 |
|
187 cm
19
137 lbs
0 - 5 - 0 |
BJJ White Belt
Excellent boxer
Very strong |
|
BJJ Blue Belt
Basic striking
Determined |
|
| |
|
Ladies and gentlemen. This fight is 3 rounds, in the featherweight division.
Introducing the fighter to my left, fighting out of the red corner.
With a record of
1 - 0 - 0, fighting out of The Island, Hunter Mc Dougall!
And introducing the fighter to my right, fighting out of the blue corner.
With a record of
0 - 5 - 0, fighting out of The Island, James Mitchell!
The judges for this bout are Bart Greer, Winston Alpacca and Santiago Holmes.

The bell rings for round one and we are underway!
Mitchell just misses with a punch to the body.
Mc Dougall definitely looks more muscular than last time we saw him fight.
Mc Dougall keeping at a good range here, avoiding a leg kick.
Mc Dougall takes a shot to the body in his stride.
Mitchell throws a lazy head kick
and Mc Dougall counters with a crisp hook to the side of the head.
Mc Dougall avoids the head kick by Mitchell.
Mc Dougall thinks about countering with a head kick.
Like a baseball bat into the meat of his leg there - nice leg kick by Mitchell.
Mitchell throws a body shot but no joy.
A looping hook to the body misses from Mc Dougall. Mitchell does a little dance to reset his feet.
Mc Dougall walks into a left hand.
Mitchell throws a leg kick but Mc Dougall moved away.
Mc Dougall misses with a looping right.
Mitchell misses with a leg kick
and Mc Dougall counters with a lovely straight right hand!
Mitchell lands a front kick.
Mitchell tries to clinch but is not successful on this occasion.
Mitchell motions for Mc Dougall to come forward. Mitchell throws a leg kick but it misses it's target.
Mitchell throws a leg kick but Mc Dougall moved away.
James Mitchell seems to be the more aggressive standup fighter in this bout.
Mc Dougall takes a nice looking leg kick right on the meat of his thigh there.
This is a great period of action - very entertaining stuff!
Mc Dougall swings for the body but Mitchell moves out of range.

That's one minute gone in the round.
Mitchell misses with a kick to the body.
Mc Dougall throws a quick counter kick to the body but Mitchell avoids it.
A big left from Mc Dougall misses.
The fighters circling - Mitchell throws out the jab but it was never going to land.
Some wild striking there from Mc Dougall.
A bone on bone clash there as Mitchell blocks the leg kick.

Mitchell clinches.
Mitchell using the Thai plumb to throw knees but Mc Dougall has his back arched nicely, preventing the strike.
Mitchell trying to land knees to the body.

Mitchell pushes off and circles away, back to the middle of the mat.
Mc Dougall jabs at Mitchell's body.
Mitchell feints with a shoulder and throws a nice leg kick to Mc Dougall's calf.
Mc Dougall throws a head kick that misses and slips in the process. He scrambles back to his feet and the fighters circle.
Mc Dougall tries to close the distance and clinch up but Mitchell swats him away and circles back towards the center.
Mitchell throws an off balance right hand
and Mc Dougall counters with a stiff right hand.
Mc Dougall circles away from the clinch attempt.

That's two minutes gone in the round.
Mc Dougall swings and misses with a hook to the body.
Mitchell scores with a jab. Mc Dougall acknowledges it with a nod of the head.
The crowd are loving this. Great action here.
Mitchell clinches.
Both guys are working to get underhooks.
Mitchell lands a knee to the head there! That was nasty!
Mitchell tries to land a knee to the body but he is off balance and Mc Dougall avoids it.
Mitchell escapes the clinch and we're back to striking.
Mc Dougall takes a kick to the body and keeps moving.
Mc Dougall waving his hands out in front of him, looking to distract Mitchell.
Mitchell is clearly trying to counter these attacks from Mc Dougall with a body shot.
Mitchell feints with a shoulder and throws a nice leg kick to Mc Dougall's calf.
Mitchell's coach down at ReVoLuT!oN !sL@nD GYM was telling us pre-fight that they have been working on Mitchell's balance. Obviously they view that as a key factor in the outcome of this fight.
Mitchell wants to slow Mc Dougall down by chopping away at his legs.
Mc Dougall on the wrong end of a kick to the body.
Mc Dougall looks to throw the jab but Mitchell is out of range.
Mitchell tries to land a leg kick but Mc Dougall saw it coming and moves away.
Mitchell walks straight into a jab right on the nose. That one stung - he's blinking and trying to clear his head.
Mitchell tries to clinch but Mc Dougall moves out of range.

That's three minutes gone in the round.
Mitchell explodes with a nice body kick and back out of range. Nice work.
Mc Dougall fakes high and swings low for a body shot but Mitchell manages to avoid it.
Mitchell blocks a head kick by Mc Dougall.
Mitchell tries to score with an inside leg kick but telegraphs it and Mc Dougall is able to avoid easily.
An inside leg kick lands from Mitchell.
Mitchell forces Mc Dougall back against the cage and clinches.
Mitchell tried to land a shot to the body but connects with Mc Dougall's elbow.
Mitchell struggles to land a body shot inside as Mc Dougall controls his hands.
Mitchell breaks the clinch and we return to the middle of the mat.
Mc Dougall moves out of range of the body kick from Mitchell.
Mitchell lands a leg kick and bounces back out of range.
Mitchell misses with a body shot.
Mc Dougall is looking to counter punch.
Mitchell is a painfully thin specimen of a man. You do wonder whether a good body kick would snap him clean in two.
Mc Dougall is looking to clinch but Mitchell is avoiding it.
Mc Dougall lands with a nice combination. Mitchell backs away looking to recover.
Mc Dougall misses with a body shot. Nice footwork from Mitchell.
Mc Dougall backing away here, and Mitchell unleashes a leg kick that just misses.
Mitchell misses the body punch
and Mc Dougall counters with a lovely straight right hand!

That's four minutes gone in the round.
The crowd are loving this. Great action here.
Mc Dougall throws a hard body shot but it just misses.
Mitchell clinches with his opponent.
Mitchell misses with an elbow over the top.
Mitchell breaks from the clinch.
A head kick by Mc Dougall misses
and he gets countered with a snapping leg kick.
Mc Dougall will need to tighten up his combinations if he doesn't want to gas himself out, swinging at thin air.
Mitchell fakes a jab and throws a low kick but Mc Dougall checks it well.
Mitchell cracks Mc Dougall with an open hand slap.
Mitchell wings a very wild body shot but it does the job and lands to the midsection.
Mc Dougall with a body punch. A glancing blow.
Mitchell lands a nice leg kick that just misses Mc Dougall's sensitive parts.
Mc Dougall takes a thudding leg kick, right into the meat of the thigh.
Mitchell on the receiving end of a decent leg kick there by Mc Dougall. Mc Dougall obviously looking to wear him down.
The crowd applaud the fighters' efforts here as the round comes to an end.
Mc Dougall is looking to land body kicks.
And thats the end of the round the fighters go back to their corners.
James Mitchell dominated that round.
The corners get their ten second warning. Both fighters stand from their stools and stare eachother down, ready to get back to the action.

Nice jab there from Mitchell.
Mc Dougall is hobbling a little on that front leg after taking quite a few leg kicks so far in this fight.
Mc Dougall moving in and out of range nicely, whilst landing the scoring shot.
Mitchell throws out a token jab with nothing on it.
Jab, cross, leg kick. Nice combination by Mc Dougall!
Mc Dougall thuds a left hand into Mitchell's body.
Mitchell fails to land with a series of punches.
Mc Dougall jabs Mitchell to the body, keeping him at a distance.
Mc Dougall blocks a head kick by Mitchell.
A swing and a miss from Mc Dougall.
Mitchell loads up on a big right hand but Mc Dougall slips the punch.
Mitchell cracks a nice hook into Mc Dougall's ribs.
We've seen a great period of action over the last minute or so - credit to both fighters for going all out!
Mc Dougall slips under a jab.
Mitchell tries to clinch there but Mc Dougall circles away.
We are yet to see a takedown attempt from Mitchell in the fight. On paper you would think he is the more dominant ground fighter so let's see if these unusual tactics pay off.
Mitchell is looking to land body kicks.
Mc Dougall is the aggressor but that punch slipped nicely by Mitchell.
Mc Dougall jabbing away but nothing is landing.
That's one minute gone in the round.
Mc Dougall throws a hook to the body but it doesn't connect.
A nice inside leg kick there by Mitchell. That's going to slow Mc Dougall down.
Mc Dougall waving his hands out in front of him, looking to distract Mitchell.
Mc Dougall will need to tighten up his combinations if he doesn't want to gas himself out, swinging at thin air.
Mitchell tries a quick counter leg kick but Mc Dougall is wise to it.
Mc Dougall checks the leg kick nicely there.
Mc Dougall throws a leg kick but Mitchell sees it coming and moves out of range.
Mitchell wants to land a leg kick but Mc Dougall is out of range.
Mitchell moves out of range of the strikes.
Mc Dougall backing away here, and Mitchell unleashes a leg kick that just misses.
Mitchell slips under a jab.
Mitchell throws a mid kick that lands with a slap.
Both fighters circling a little - Mitchell finishes the exchange with a kick to the body.
Mitchell ducks down and throws a hook to the body but Mc Dougall moves away.
Mc Dougall keeping a good distance there, avoiding the body shot.
Mc Dougall quickly followed up with a counter body kick but doesn't connect.
Mitchell uses good footwork to avoid the strikes from Mc Dougall.
James Mitchell seems to be getting the better of the standup.
Mitchell misses with a low kick.
That's two minutes gone in the round.
Nice uppercut lands for Mc Dougall. That snapped Mitchell's head back.
Mitchell motions for Mc Dougall to come forward. Mitchell throws a leg kick but it misses it's target.
Mc Dougall was looking to counter that last move with a shot to the body but he didn't commit.
Mc Dougall pulls out of a head kick attempt.
Mitchell scores with a leg kick.
Mc Dougall lands with a right hand.
This has been an exciting period of action!
Mitchell lands with a nice body punch.
Mc Dougall gets cracked there but stands up to it.
Mc Dougall throws a big shot that misses.
Mitchell throws a quick inside leg kick.
Mitchell throws a head kick but Mc Dougall moves out of range.
Mc Dougall blocks a head kick by Mitchell.
Mc Dougall throws a quick counter head kick but Mitchell was just out of range.
Mitchell tries to clinch but Mc Dougall is having none of it.
Mc Dougall misses with an uppercut. Mitchell saw that one coming.
Mc Dougall pushing out the jab but it's not landing.
A slow jab from Mc Dougall misses its intended target.
That's three minutes gone in the round.
Mitchell throws a lazy right hand but Mc Dougall sees it coming a mile off and sidesteps it easily.
Mitchell avoids the clinch attempt nicely.
Mitchell takes a body punch that cleary hurt but he's trying not to show any weakness.
Mitchell lands a leg kick. The shin dug right into the meat of the thigh.
Mc Dougall has his front leg slapped to the side - a nice low kick landing there from Mitchell.
Mitchell ducks under a wild hook from Mc Dougall.
The fighters are going at a pretty good pace and they're both starting to sweat now.
Mc Dougall checks a low kick from Mitchell.
Mc Dougall misses with a combination
and Mitchell makes him pay by landing a thudding low kick.
Mitchell misses with a wild combination.
Mitchell just misses with a punch to the body.
Mitchell misses with a double jab.
Mitchell shapes like he's going to throw a leg kick but settles back down.
Mc Dougall lets loose with a powerful body kick. Mitchell will feel that in the morning.
That's four minutes gone in the round.
Mitchell fakes a jab and throws a low kick but Mc Dougall checks it well.
Mc Dougall will be looking to protect his midsection after taking some solid kicks to the body.
Mitchell ducks under a wild hook from Mc Dougall.
Mitchell tries a switch kick but it misses it's target.
Mitchell throws a leg kick but Mc Dougall moved away.
Mitchell slips under a jab from Mc Dougall.
An inside leg kick from Mitchell misses.
Mc Dougall checks a leg kick.
Mc Dougall throwing a counter right hand but Mitchell manages to avoid it.
Mitchell throws a half hearted mid kick.
We've seen a great period of action over the last minute or so - credit to both fighters for going all out!
Mc Dougall thows a left - swing and a miss!
Mitchell avoids the body shot from Mc Dougall.
The fight stays on the outside here - Mc Dougall looks like he's thinking about clinching though.
Mitchell dances in quickly and lands a nice inside leg kick on Mc Dougall. That did some damage!
Mitchell tries to land a front kick but Mc Dougall steps back. That was a bit too telegraphed.
And thats the end of the round the fighters go back to their corners.
A close second round but James Mitchell will probably get the nod - 10:9.
OK. That's time! The bell goes and we're back to the action. Let's hear some noise people - this is the final round!

Mitchell moves into range and connects with a jab.
Mc Dougall on the wrong end of a nice low kick. He's acting like it's no big deal but he doesn't want to take many more of those.
Mitchell avoids the clinch attempt nicely.
Mc Dougall throws a jab when Mitchell was well out of range.
Mitchell swings for the body but Mc Dougall moves out of range.
Mc Dougall is looking to counter punch.
Mc Dougall takes a kick to the body and keeps moving.
Mitchell delivers a nice body kick.
Mc Dougall throws a wild body kick that Mitchell sees coming a mile off.
Mc Dougall with a body punch. A glancing blow.
Mc Dougall misses with a hook. Mitchell ducked under it nicely.
Mitchell pivots as if he's going to throw a leg kick but stops half way.
We've had a slow start to the round here - hopefully the action picks up.
Mc Dougall tries a head kick but it misses.
Mitchell throws a body kick but he wasn't in range.
Mitchell throws a lazy right hand but Mc Dougall sees it coming a mile off and sidesteps it easily.
An attempted straight right counter from Mc Dougall misses the target.
Mitchell pushes Mc Dougall away with a front kick.
Mc Dougall is looking to clinch but Mitchell is avoiding it.
Mitchell doesn't fully commit to the body shot counter.
That's one minute gone in the round.
Mc Dougall clobbers Mitchell with an overhand right that has the crowd gasping. That made a horrendous noise.
Mc Dougall throws a body punch but Mitchell moves out of range.
Mitchell lands a nice leg kick that just misses Mc Dougall's sensitive parts.
Mc Dougall fakes high and swings low for a body shot but Mitchell manages to avoid it.
Mitchell feints a counter leg kick.
Mc Dougall keeping a good distance there, avoiding the body shot.
Mc Dougall fires out a quick counter leg kick but Mitchell just manages to avoid it.
Mitchell is looking to land body kicks.
Donk. Mitchell catches Mc Dougall right on the button with a cross.
Good standup being displayed there by Mc Dougall as he connects with a hook.
Mc Dougall blocks a head kick by Mitchell.
An attempted straight right counter from Mc Dougall misses the target.
Mc Dougall throws a body kick but he wasn't in range.
Mitchell scoring well with a low kick there.
Mitchell takes an uppercut right on the button but keeps his composure.
A head kick misses from Mitchell.
Mitchell throws a hook to the side of Mc Dougall's head but Mc Dougall sees it coming and ducks under it beautifully.
Mitchell bobs and weaves well there to avoid the strikes.
That's two minutes gone in the round.
Mitchell walks forward and throws out a flicking leg kick. Mc Dougall checks it nicely though, as he moves to the side.
Mitchell is looking to land body kicks.
This is a great period of action - very entertaining stuff!
Mc Dougall misses with a wild body shot.
Mitchell misses with a low kick as Mc Dougall jumps back.
Mc Dougall steps to the side to avoid the strikes from Mitchell.
Mitchell misses the shot to the body.
Mc Dougall circles away from the clinch attempt.
Mitchell pushes Mc Dougall up against the cage in a clinch.
Mitchell blocks a punch to the side of the head.
Mitchell lands a knee to the head.
Mitchell throws an elbow but it's blocked.
Mitchell trying to land knees to the body.
Mitchell's corner calls for him to break the clinch, which he does.
Mitchell throws a leg kick that is checked
and Mc Dougall cracks him with a counter punch right on the button.
Mc Dougall just misses with a punch to the body.
That's three minutes gone in the round.
Mitchell throws the kick towards the body but Mc Dougall avoids it.
Mc Dougall lands with a nice low kick. That'll leave a bruise.
Mitchell looks to land a left hand but Mc Dougall moved out of range nicely.
Mitchell misses with a looping right.
Mc Dougall swung with a counter right hand that didn't connect.
Mc Dougall throws a head kick that misses and slips in the process. He scrambles back to his feet and the fighters circle.
Nice shot by Mc Dougall.
Mc Dougall on the wrong end of a kick to the body.
Mitchell plants his feet and lands a nice head kick!
Mc Dougall misses with a wild body shot.
Mc Dougall misses with a straight left.
Like a baseball bat into the meat of his leg there - nice leg kick by Mitchell.
Mitchell uses good head movement to avoid the hook from Mc Dougall.
Mitchell fakes a jab and scores with a low kick.
Mc Dougall dips down and scores with a jab to the body.
That's four minutes gone in the round.
Good leg kick by Mitchell there. It's the ones that make that thud noise that hurt and that was an almighty thud.
This is a great period of action - very entertaining stuff!
Mitchell moves out of range of the body kick.
Mitchell loads up on a big right hand but Mc Dougall slips the punch.
Mc Dougall scores with a body shot.
Mc Dougall on the wrong end of a kick to the body.
Mc Dougall lands with a shot to the body.
Mitchell takes a big intake of breath there - he's definitely tired.
Mitchell displays some good footwork, moving neatly out of range as Mc Dougall throws out the jab.
Mitchell throws a leg kick but Mc Dougall sees it coming and moves out of range.
Mc Dougall scores with a straight right hand, right through his opponent's guard.
Mitchell clinches with his opponent.
Mitchell tries to land knees in the clinch but Mc Dougall avoids the damage to the body.

Mc Dougall manages to break the clinch.
Mc Dougall throws the left hand but Mitchell avoids the punch easily.
Mc Dougall looks to throw the jab but Mitchell is out of range.
Hunter Mc Dougall has stepped it up - he knows he needs a finish here!
Mitchell tries to close the distance and clinch but Mc Dougall swats him to one side with an open hand palm strike and circles away.
And that's the end of the fight!
I would just about give that final round to James Mitchell.
Well Mitchell has outworked and out performed his opponent in all aspects of the game today. He was simply too good and the decision should be no more than a formality. Over to the ring announcer for the scorecards.
Ladies and gentlemen, after 3 rounds of action, we go to the scorecards for a decision.
Judge Bart Greer scores the fight for James Mitchell!
Judge Winston Alpacca scores the fight for James Mitchell!
Judge Santiago Holmes scores the fight for James Mitchell!
James Mitchell wins by unanimous decision!
James Mitchell decided to thank the fans in attendance for making a great atmosphere. It seemed to go down pretty well.
|
|
|
|
|
|
|
|
|
|
|
|
|
|
|
|
|
|
|
|
|
|
|
| S |
C
A |
G |
S |
C
B |
G |
|
S |
C |
G |
|
energy
A | B |
|
hype
A | B |
|
pop
A | B |
|
mgr
A | B |
|
FIGHT
RATING
70% |
|
|
|
|
|
|
|
Undercard bout
|
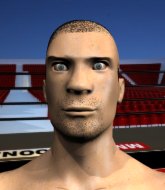
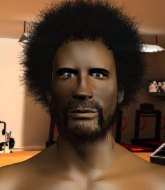
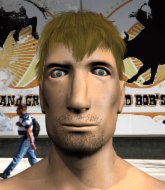
Coming up we have a featherweight MMA rules bout between Denis Cutesic Junior (ranked 0 p4p, 0 weight class) and William Biah (ranked 0 p4p, 0 weight class). Over to our ring announcer for the fighter introductions!
 |
|
 |
| 215 cm
18
140 lbs
0 - 1 - 0 |
|
169 cm
21
135 lbs
1 - 1 - 0 |
BJJ White Belt
Brawler
Intelligent |
|
BJJ White Belt
Counter fighter
Determined |
|
| |
|
Ladies and gentlemen. This fight is 3 rounds, in the featherweight division.
Introducing the fighter to my left, fighting out of the red corner.
With a record of
0 - 1 - 0, fighting out of The Island, Denis Cutesic Junior!
And introducing the fighter to my right, fighting out of the blue corner.
With a record of
1 - 1 - 0, fighting out of The Island, William Biah!
The judges for this bout are Dirk Anderson, Winston Alpacca and Peter Branson.
The bell rings for round one and we are underway!
Cutesic Junior stuffs a takedown. It's all about dictating where the fight takes place and Cutesic Junior wants it to stay on the feet.
Cutesic Junior tries to counter by clinching up but Biah breaks away and moves out of range.
Biah blocks a head kick by Cutesic Junior.
Cutesic Junior takes a step towards his opponent and connects with a left hand, before circling away.
Biah tries to close the distance and clinch up but Cutesic Junior swats him away and circles back towards the center.
Biah on the wrong end of a nice jab.

Biah shoots in from a long way out. He's driving through with the takedown attempt and he eventually gets it, landing in Cutesic Junior's guard.
Cutesic Junior looking to control.
Cutesic Junior knows he needs to get back to his feet asap. He's simply no match for Biah on the ground.

Biah is trying to work a guillotine from the top, or something like that? Don't know how he thinks he's going to get a finish from there.
Biah trying to control but Cutesic Junior is working from the bottom.
We've had a slow start to the round here - hopefully the action picks up.
Cutesic Junior is trying to stand up but he's not managed so far.
That's one minute gone in the round.
The ref warns both fighters not to hold the cage as they work up against the meshing.
Biah works a leg free and moves into half guard.

Cutesic Junior looking for submissions off his back.
Biah slips a nice elbow through Cutesic Junior's hands, connecting with Cutesic Junior's forehead.
Biah is trying to control the action in half guard but Cutesic Junior is working away on the bottom, looking perhaps to get back to full guard.
Biah is in a good position here but he's just trying to control... And he's not even managing to do that successfully.
Cutesic Junior is in trouble now - Biah has advanced to mount!
That's two minutes gone in the round.
Biah looks like he's working for a submission but he's not found anything just yet.
Cutesic Junior tries to buck Biah off but he can't manage it.
Biah thowing strikes but they're hitting the gloves, not doing any damage.
Cutesic Junior is squirming around, avoiding Biah's attempts to control the action.
Biah wants to finish this one by submission but Cutesic Junior is holding onto his waist, trying to prevent any attacks from Biah.
Biah trying to control but he's not successful this time.
That's three minutes gone in the round.
The fighters are starting to get a bit slippery now, which will make submissions a bit more difficult.
Cutesic Junior is writhing around trying to get back to his feet.
Cutesic Junior tries to reverse the position but Biah maintains control.
Biah is still in mount, landing shots to his trapped opponent. Cutesic Junior can't stay in a position like this for much longer.
Biah is going oldschool here, as he tries to force Cutesic Junior to tap using a forearm choke. This isn't 1993 though, so Cutesic Junior shrugs it off.
Biah content just to control the position here.
That's four minutes gone in the round.
Cutesic Junior holds on, trying desperately to control.
Cutesic Junior is wriggling around trying to escape.
Cutesic Junior wants to control but Biah is having none of it.
Biah punishing his opponent with strikes.
Cutesic Junior tries to reverse the position but Biah maintains control.
The crowd thankful this round is nearly over.
Biah scoring with some good ground and pound from mount here. Will he manage to finish Cutesic Junior?
Biah trying to control but Cutesic Junior is having none of it.
Biah sitting in mount, just looking to control for the moment.
And thats the end of the round the fighters go back to their corners.
William Biah dominated that round.
OK. That's time! The bell goes and we're back to the action.
A head kick misses from Cutesic Junior.
Denis Cutesic Junior is looking to throw some combinations by the looks of things.
Biah shoots and misses

and Cutesic Junior holds on and brings the fighters into a clinch.
Biah's corner calls for him to break the clinch, which he does.
Biah has been the more effective fighter overall so far.
Cutesic Junior closes the distance and pushes Biah back into the cage.
Cutesic Junior is trying to break free.
Biah wants to take the fight to the mat but Cutesic Junior manages to get underhooks and keep the fight in the clinch.
Biah tries to pull guard but Cutesic Junior holds him up against the cage and eventually Biah drops back down to his feet.
Denis Cutesic Junior has stuffed three takedown attempts in the round now. That's going to take a lot out of William Biah.
Cutesic Junior wants to strike at distance but he can't break free of the clinch.
Cutesic Junior really does look like a pencil wearing a pair of gloves. Let's hope he has a gameplan to suit that ridiculous body shape.
Cutesic Junior lands a nice uppercut.
We've had a slow start to the round here - hopefully the action picks up.
The pace really dropping off here, momentarily.
Biah's coach down at KING OF PAIN was telling us pre-fight that they have been working on Biah's balance. Obviously they view that as a key factor in the outcome of this fight.
Cutesic Junior prevents a takedown attempt there.
That's one minute gone in the round.
Biah successfully pulls guard.
Biah looking to hit a scissor sweep but Cutesic Junior is one step ahead there.
Cutesic Junior is just sitting in guard, looking to avoid any submissions.
We get told so often about how wrestlers don't like to be on their backs. Let's see if Biah can do anything to dispel that myth.

Cutesic Junior decides to stand up and beckons his opponent to follow.
Biah is breathing heavily.
Biah leaves Cutesic Junior with his face pressed against the mat as he sprawls beautifully, defending against a solid takedown attempt.
Cutesic Junior throws a right and a left that both miss.
Cutesic Junior fails with a takedown attempt.
That's two minutes gone in the round.
Cutesic Junior displays good takedown defense there as he swats away a double leg from Biah.
Cutesic Junior keeps the fight standing with a nice sprawl.
Cutesic Junior looks to have improved his striking defense since last time we saw him fight.
Cutesic Junior has closed the distance and engaged Biah in a clinch.
Biah tries to pull guard but Cutesic Junior forces him back to his feet, against the cage.
Biah is trying to work out of this bad position, with his back against the cage.
Cutesic Junior is trying to pull guard but Biah turns him against the cage and we stay in the clinch.
Cutesic Junior content to slow the pace in the clinch.
That's three minutes gone in the round.
Biah can't get the takedown.
Biah on the defensive, avoiding the knees to the body.
Biah is working for takedown but Cutesic Junior is calmly controlling the position for now.
Cutesic Junior avoiding damage as Biah throws knees to the body.
Cutesic Junior has Biah pressed against the cage.
Biah breaks the clinch and we're back to striking at distance.
A clash of legs there as Biah blocks the low kick.

Cutesic Junior closes the distance, clinches up and gets a nice trip takedown into side control. Very smooth.
Cutesic Junior throwing strikes but missing, from side control.
The fighters are pressed up against the cage, both looking to find a bit of space to work.
Biah can't do much from the bottom here.
Cutesic Junior stands up.
That's four minutes gone in the round.
Cutesic Junior fakes a strike and closes the distance, dragging Biah to the ground. Cutesic Junior is now in Biah's guard.
Cutesic Junior looking to control the position here, rather than advance.
The crowd thankful this round is nearly over.
Cutesic Junior's ground tactics aren't going to win him many fans. Let's hope he's got fireworks for us if he gets back to his feet because he's not doing much on the ground.
And thats the end of the round the fighters go back to their corners.
Denis Cutesic Junior dominated that second round.
That's the end of the round. The referee orders the cornermen out of the cage so we can get back down to business. This is the final round!
Cutesic Junior shoots in but no luck this time.
Cutesic Junior rushes Biah and pushes him back against the cage in a clinch.
Biah tries to score a body lock takedown but Cutesic Junior shows good agility there to stay on his feet.
Biah fails to pull the fight into his guard.
Cutesic Junior fails to pull guard.
Biah fails to pull guard.
Denis Cutesic Junior has stuffed three takedown attempts in the round now. That's going to take a lot out of William Biah.
Cutesic Junior is looking to score with knees to the body. Maybe he'll change it up and go body then head. Biah is defending well for now.
Cutesic Junior tries to pull guard but Biah holds him up against the cage and eventually Cutesic Junior drops back down to his feet.
A short left from Cutesic Junior.
We've had a slow start to the round here - hopefully the action picks up.
Cutesic Junior is trying to push Biah away but Biah has him pressed against the cage, so he's going nowhere.
Cutesic Junior tries to take the fight to the ground by pulling guard but can't manage it.
Biah wants to push off and get back to the center of the mat but Cutesic Junior has him pressed against the cage.
Biah prevents a takedown attempt there.
That's one minute gone in the round.
Cutesic Junior has had enough of the clinch but Biah keeps him there for the moment.
Biah misses with an elbow strike.
Biah jumps guard but Cutesic Junior turns him against the cage and keeps the fight standing.
Biah takes a big intake of breath there - he's definitely tired.
Cutesic Junior is trying to work out of this bad position, with his back against the cage.
Cutesic Junior is trying to pull guard but Biah has him pressed against the cage.
Biah is trying to pull guard but Cutesic Junior has him pressed against the cage.
Biah stops a takedown attempt from Cutesic Junior.
Cutesic Junior fails to pull guard.
A real battle for position is taking place between these two warriors.
Cutesic Junior is working for a takedown up against the cage. He can't get it on this occasion though.
Biah is struggling to control the position.
Cutesic Junior drops to a knee looking for a takedown but Biah gets the underhooks and prevents it.
That's two minutes gone in the round.
The crowd are getting on the fighters' backs, as the pace has dropped off in the last minute or so.
Biah with the Thai clinch. He's looking to land a big knee but he's not managed it this time.
Biah tried to land a shot to the body but connects with Cutesic Junior's elbow.
Cutesic Junior throws a vicious knee straight up the middle but Biah blocks it with crossed arms.
A frustrated look appears on Cutesic Junior's face as he tries to break the clinch.
Biah lands a body punch - he's looking to wear down Cutesic Junior.
Cutesic Junior is trying to break the clinch but Biah is controlling him.
Biah has a body lock and is looking for a takedown. Cutesic Junior is bouncing around trying to prevent the takedown and somehow he has indeed managed to stay on his feet.
Cutesic Junior manages to get underhooks and slows down the pace for a moment.
Biah pulls guard effortlessly.
That's three minutes gone in the round.
Biah bucks up whilst keeping hold of a body lock, managing to reverse the position. Now he's in top in Cutesic Junior's guard.

Cutesic Junior keeping moving, preventing Biah from controlling successfully.
Cutesic Junior wants to stand up but Biah is controlling him.
Cutesic Junior controls Biah momentarily but Biah frees himself.
Cutesic Junior looking for submissions from the bottom but instead Biah passes into half guard.
That's four minutes gone in the round.
Cutesic Junior has no desire to be mounted, so is trying to control. Biah is working away from the top position though.
Biah is trying to control. Cutesic Junior wants to improve his position but can't escape this time.
Biah is figuring out what he wants to do next.
Cutesic Junior is looking to escape.
Boooooooooooooooooooo!!! God, this has been a terrible round. Come on you two, sort yourselves out!
Biah has freed up his trapped foot and advances to mount.
Denis Cutesic Junior has stepped it up - he knows he needs a finish here!
Biah looking to control but Cutesic Junior is working nicely, looking to advance position himself.
And that's the end of the fight!
William Biah comfortably won the final round on my scorecard.
I think Biah has won this one but let's see whether the judges agree with me. Over to the ring announcer for the scorecards.
Ladies and gentlemen, after 3 rounds of action, we go to the scorecards for a decision.
Judge Dirk Anderson scores the fight for William Biah!
Judge Winston Alpacca scores the fight for William Biah!
Judge Peter Branson scores the fight for William Biah!
William Biah wins by unanimous decision!
|
|
|
|
|
|
|
|
|
|
|
|
|
|
|
|
|
|
|
|
|
|
|
| S |
C
A |
G |
S |
C
B |
G |
|
S |
C |
G |
|
energy
A | B |
|
hype
A | B |
|
pop
A | B |
|
mgr
A | B |
|
FIGHT
RATING
31% |
|
|
|
|
|
|
|
Undercard bout
|
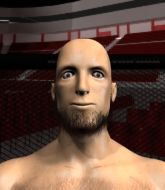
Coming up we have a super heavyweight MMA rules bout between Wade Quigley (ranked 0 p4p, 0 weight class) and Isidoro Rodrigues (ranked 0 p4p, 0 weight class). We have two fighters making their debuts here, so let's see who comes out of this one with their first professional victory.
 |
|
 |
| 209 cm
20
262 lbs
0 - 0 - 0 |
|
185 cm
18
250 lbs
0 - 0 - 0 |
BJJ Blue Belt
Brawler
Self confident |
|
BJJ White Belt
Excellent MT
Good gas tank |
|
| |
|
Ladies and gentlemen. This fight is 5 rounds, in the super heavyweight division.
Introducing the fighter to my left, fighting out of the red corner.
With a record of
0 - 0 - 0, fighting out of The Island, Wade Quigley!
And introducing the fighter to my right, fighting out of the blue corner.
With a record of
0 - 0 - 0, fighting out of The Island, Isidoro Rodrigues!
The judges for this bout are Dirk Anderson, Winston Alpacca and Sandra Marshall.
The bell rings for round one and we are underway!
Quigley fails in his attempt to clinch.
Quigley moves in looking to clinch but Rodrigues pushes him off.
A shot to the body from Quigley misses
and Rodrigues counters by moving into the clinch. Good anticipation by Rodrigues.
Rodrigues lands a shot to the body.
Rodrigues lands with a light punch inside.
Quigley tries to land a knee to the body but he is off balance and Rodrigues avoids it.
A right hook to the body lands for Rodrigues.
Quigley is breathing heavily.
Rodrigues scores with a nice hook to the head.
Stalling in the clinch from Rodrigues.
A short body shot lands from Rodrigues as the two fighters clinch.
Rodrigues lands with a quick shot inside that doesn't really do much damage.
We've had a slow start to the round here - hopefully the action picks up.
Rodrigues works on Quigley's body with a couple of short punches.
Rodrigues lands a hook to the side of the head.
Rodrigues lands a right hand that snaps the head of Quigley backwards.
We've seen a great period of action over the last minute or so - credit to both fighters for going all out!
A right hook to the body lands for Rodrigues.
Rodrigues lands a short shot on the inside that snaps the head of Quigley backwards.

Quigley is rocked!
That's one minute gone in the round.
Rodrigues unloads with a big right hand that wobbles Quigley! He's leaning against the cage trying to keep his feet but Rodrigues is unloading with more strikes now! Quigley drops to his knees and the referee stops the fight for a TKO!
Ladies and gentlemen, after 1:10 of round 1, we have a winner by way of TKO (Strikes). Isidoro Rodrigues!
After the fight, Isidoro Rodrigues was humble in paying tribute to his opponent but made it clear he wants to go on to bigger and better things. It seemed to go down well with the crowd who cheered him loudly.
|
|
|
|
|
|
|
|
|
|
|
|
|
|
|
|
|
|
|
|
|
|
|
| S |
C
A |
G |
S |
C
B |
G |
|
S |
C |
G |
|
energy
A | B |
|
hype
A | B |
|
pop
A | B |
|
mgr
A | B |
|
FIGHT
RATING
64% |
|
|
|
|
|
|
|
Undercard bout
|
Coming up we have a super heavyweight MMA rules bout between Damian Kita (ranked 0 p4p, 0 weight class) and Harold Shermann (ranked 0 p4p, 0 weight class). Kita comes to the cage accompanied by Aleja Gwiazd. Shermann has chosen Nirvana - Dumb as his entrance music. Well, the cameraman is lingering on a pretty young lady for a bit too long there. Keep your eyes on the prize buddy or you'll miss the fighter intros!
 |
|
 |
| 195 cm
26
286 lbs
3 - 6 - 0 |
|
186 cm
26
300 lbs
2 - 5 - 0 |
BJJ Purple Belt
Solid boxing
Experienced |
|
Good wrestler
Brawler
Determined |
|
| |
|
Ladies and gentlemen. This fight is 3 rounds, in the super heavyweight division.
Introducing the fighter to my left, fighting out of the red corner.
With a record of
3 - 6 - 0, fighting out of The Island, Damian Kita!
And introducing the fighter to my right, fighting out of the blue corner.
With a record of
2 - 5 - 0, fighting out of The Island, Harold Shermann!
The judges for this bout are Santiago Holmes, David Hoff and Dirk Anderson.
The bell rings for round one and we are underway!
Shermann closes the distance and clinches up with Kita, looking for a takedown. Shermann pushes Kita against the cage but Kita circles to the side and manages to break the clinch.
Nice sprawl there from Kita as Shermann shoots in.
Shermann shoots in with a takedown attempt and he has Kita pinned against the cage. Kita gets the underhooks and manages to circle away.
Damian Kita has stuffed three takedown attempts in the round now. That's going to take a lot out of Harold Shermann.
Kita looks to land a combination. Shermann sees it coming but can only parry a couple of the shots.

It looks like Harold Shermann has been cut.
Kita throws a leg kick that is checked
and Shermann decides to take the opportunity to score a takedown. He's landed in Kita's guard.

Kita manages to wriggle out and sneak his way back up to his feet, so the fighters are now clinched up against the cage.
Fantastic stuff here - a very entertaining period of action, which has drawn cheers from the crowd.
Kita has managed to pull guard. Let's see whether he can work an aggressive guard. It will also be interesting to see what tactics Shermann uses from the top position.
Shermann wants to control from the top but Kita keeps moving.
Kita looking for a guillotine here but Shermann defends easily.
Shermann passes easily into side control. Nice work.
That's one minute gone in the round.
Kita regains half guard.
Shermann prevents Kita from improving his position.
Shermann scoring with strikes to the body and head.
Kita trying to control but Shermann postures up.
Shermann landing with strikes to the body and head, softening up his opponent.
Shermann lands with a punch from half guard.
Kita wants to control but Shermann is keeping busy.
Kita is in a tricky position but he's been working on his transitions down at ReVoLuT!oN !sL@nD GYM, so we'll see if he gets out of it.
Shermann working some ground and pound from close in. He's looking to maintain this position and strike for a while by the looks of things... although he'll probably advance to full mount in a minute now I've said that.
That's two minutes gone in the round.
Shermann seems to be looking for submissions.
Well, if Shermann is going to just lie there, perhaps we should talk about what we're having for dinner tonight
I'm having a ham and pineapple pizza
Yum. Can't wait.
Kita moves into full guard.
Shermann stands up and looks to throw the legs aside to pass to side control. Kita swivels though and keeps the full guard.
Kita had isolated an arm as going for a kimura. Shermann defends it easily.
Shermann keeps in close for a moment and lands a decent shot to the side of Kita's head.
That's three minutes gone in the round.
Shermann cracks Kita with a solid left hand.
Shermann trying to move into half guard but instead Kita has managed to sweep!

Kita wants to control from the top but Shermann keeps moving.
Kita is looking to work some ground and pound but Shermann has wrist control.
We get told so often about how wrestlers don't like to be on their backs. Let's see if Shermann can do anything to dispel that myth.
Kita loading up with the ground and pound but he's missing more than he's landing in this flurry.
Shermann managing to control the position.
Shermann punching to the body, from the bottom.
Shermann has a closed guard, preventing anything of note from happening. Perhaps he's looking to stall.
That's four minutes gone in the round.

Shermann has his feet on Kita's hips. He pushes off and gets to his feet. Nice work.
Kita tries a switch kick but it misses it's target.
Kita tries to close the distance and clinch up against the cage but Shermann paws at him with a jab and circles away.
Kita leaves Shermann with his face pressed against the mat as he sprawls beautifully, defending against a solid takedown attempt.
Kita fakes a head punch and goes low to the body. Nicely done.
Shermann throws a series of punches but Kita moves out of range.
Kita lands a jab, followed by a cross and another cross, as Shermann backs up against the cage.
And thats the end of the round the fighters go back to their corners.
Damian Kita dominated that round.
The cut man is working on Harold Shermann's cut.
The fighters get back to their feet, the hooter sounds and we're back to the action!
Kita tests Shermann's chin there with a solid looking shot.
Shermann misses with a lunging right hand
and Kita counters with a nice body shot.
Decent striking displayed by Kita there.

Kita lands a left and a right that send Shermann crashing to the mat, dazed. Kita thinks about following him to the mat but decides to wave him back up to his feet!

Shermann is rocked!
Kita could do with losing a few pounds - he looks very soft around the mid section, to put it politely.
Shermann looks up at the clock. Bad move! Kita lands a right hand from hell, dropping Shermann. Kita pounces and finishes the fight with a flurry of punches and elbows.
Ladies and gentlemen, after 0:21 of round 2, we have a winner by way of TKO (Strikes). Damian Kita!
A very excited looking Damian Kita made sure he remembered to thank all the fans both in the arena and on the internet. He said all the coolest people spend all day on MMA websites, which got a big reaction.
|
|
|
|
|
|
|
|
|
|
|
|
|
|
|
|
|
|
|
|
|
|
|
| S |
C
A |
G |
S |
C
B |
G |
|
S |
C |
G |
|
energy
A | B |
|
hype
A | B |
|
pop
A | B |
|
mgr
A | B |
|
FIGHT
RATING
45% |
|
|
|
|
|
|
|
Co-main event
|
|
|
|
Main event
|
Coming up we have a super heavyweight MMA rules bout between Pekka Poro (ranked 0 p4p, 0 weight class) and Rostam Xerxes (ranked 0 p4p, 0 weight class). Both fighters look fresh as a daisy as they make their way towards the cage.
 |
|
 |
| 191 cm
26
240 lbs
5 - 3 - 0 |
|
197 cm
26
290 lbs
6 - 2 - 0 |
Good wrestling
Brawler
Cardio machine |
|
BJJ White Belt
Excellent boxer
Heavy handed |
|
| |
|
Ladies and gentlemen. This fight is 3 rounds, in the super heavyweight division.
Introducing the fighter to my left, fighting out of the red corner.
With a record of
5 - 3 - 0, fighting out of The Island, Pekka Poro!
And introducing the fighter to my right, fighting out of the blue corner.
With a record of
6 - 2 - 0, fighting out of The Island, Rostam Xerxes!
The judges for this bout are Santiago Holmes, Michael Johnstone and Sandra Marshall.
The bell rings for round one and we are underway!
Xerxes bobs and weaves well there to avoid the strikes.
Xerxes uses good footwork to avoid the strikes from Poro.
Xerxes avoids the clinch attempt nicely.
Poro misses with an uppercut
and Xerxes counters with a stiff right hand.

It looks like Pekka Poro has been cut.
Poro swings and misses with a hook to the body.
Rostam Xerxes seems to be the more aggressive standup fighter in this bout.
Poro just misses with a punch to the body.

Xerxes cracks Poro with a big right hand that sends him to the floor! Poro looks wobbly but he's sprung back up to his feet straight away
can Xerxes finish him?
Poro is rocked!
Poro definitely looks more muscular than last time we saw him fight.
Wooooo! Give it up for these two warriors! They are putting on a show!
Xerxes is throwing punches like he's double parked. Oh my word! Huge right hand from Xerxes shuts the power down on Poro. Lights out, game over! Xerxes is your winner.
Ladies and gentlemen, after 0:26 of round 1, we have a winner by way of KO (Punches). Rostam Xerxes!
During a confident post fight interview, Rostam Xerxes thanked all his fans. He seemed very genuine when describing how motivated his fans keep him.
|
|
|
|
|
|
|
|
|
|
|
|
|
|
|
|
|
|
|
|
|
|
|
| S |
C
A |
G |
S |
C
B |
G |
|
S |
C |
G |
|
energy
A | B |
|
hype
A | B |
|
pop
A | B |
|
mgr
A | B |
|
FIGHT
RATING
100% |
|
|
|
|
|
|
|
|
|
|
