 |
QFC Tournament 779 Round 3 PBP Commentary |
Co-main event
|
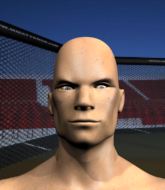
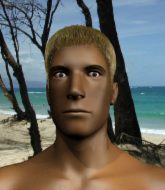
Coming up we have a featherweight MMA rules bout between Trent Lane (ranked 0 p4p, 0 weight class) and Damen Mayer (ranked 0 p4p, 0 weight class). Damen Mayer has the better chin. Will he look to stand and bang today?
 |
|
 |
| 168 cm
23
150 lbs
2 - 0 - 0 |
|
170 cm
23
150 lbs
2 - 0 - 0 |
Good takedowns
Basic striking
Very quick |
|
Good wrestler
Basic striking
Determined |
|
| |
|
Ladies and gentlemen. This fight is 3 rounds, in the featherweight division.
Introducing the fighter to my left, fighting out of the red corner.
With a record of
2 - 0 - 0, fighting out of Helsinki, Trent Lane!
And introducing the fighter to my right, fighting out of the blue corner.
With a record of
2 - 0 - 0, fighting out of Helsinki, Damen Mayer!
The judges for this bout are Marco Blurström, Matti Vanhoillinen and Roosa Järviläinen.

The bell rings for round one and we are underway!
Lane keeping his hands up high there, blocking the jab from Mayer.

Mayer gets to the clinch - let's see what his plan is here.
Mayer is trying to pull guard but Lane has him pressed against the cage.
Mayer is working hard here but doesn't seem to be able to control effectively, up against the cage.
Lane prevents a takedown attempt there.
Mayer being controlled against the cage.

Lane gets a trip takedown into half guard.
Lane is keeping good posture, landing some ground and pound.
The fighters are pressed up against the cage, both looking to find a bit of space to work.
Lane winds up and cracks Mayer with a swinging punch to the side of the head.
We've had a slow start to the round here - hopefully the action picks up.

Mayer is looking to sinch up a guillotine here but Lane pulls his head out easily.
Lane tries to pass to full mount but Mayer defends it.
Mayer is trying to get back to full guard.
We get told so often about how wrestlers don't like to be on their backs. Let's see if Mayer can do anything to dispel that myth.

That's one minute gone in the round.
Mayer looking for submissions off his back.
Lane is trying to control. Mayer wants to improve his position but can't escape this time.
The referee walks around the fighters to get a better view of the action. Lane lands a nice short elbow.
Lane working some ground and pound from close in. He's looking to maintain this position and strike for a while by the looks of things... although he'll probably advance to full mount in a minute now I've said that.
Mayer actively working from the bottom here.
Lane takes advantage of the dominant position to land a couple of big hammer fists.
Lane throwing punches and elbows but they're not doing any damage.

That's two minutes gone in the round.
Mayer looking to force a kimura from the bottom here. He's concentrating on that move too much though and Lane pushes past his half guard into mount!
Mayer is bucking up trying to escape but Lane cracks him with another couple of good strikes.
Lane with a couple of short strikes.
Mayer is desperately trying to improve his position but Lane has a good base and remains in mount.
Mayer gets back to half guard.
Lane missing with the ground and pound from half guard.
Lane is nestled in close to Mayer, controlling him well. He's worked in a nice elbow to the side of the head as well, for good measure.
Mayer looking for submissions off his back.
The crowd are loving this. Great action here.
Lane wants to pass the guard but Mayer is defending well.
Mayer wants to improve his position but Lane is controlling well.
Mayer really doesn't want to stay on the ground with Lane. If he can't get it back to his feet, it's only a matter of time before he'll be tapping out.

That's three minutes gone in the round.
Mayer taking some punishment here, with Lane in his half guard.
Lane has freed up his trapped foot and advances to mount.
Lane with a couple of short strikes.
Lane postures up and cracks his opponent a couple of times before moving back into close ground control. Mayer looks a forlorn figure.
Lane punishing his opponent with strikes.
Mayer working to try and regain half guard.

That's four minutes gone in the round.
Mayer bucks up and manages to get a nice reversal! He's in guard on the top - nicely done!
Lane looking to control.
Lane keeping full guard, as Mayer tries to pass.
Lane utilising some decent striking defenses from the guard, preventing the ground and pound.
Lane trying to strike off his back.
Lane is working the butterfly guard. He manages to land a nice scissor sweep and is now in half guard on the top. Nice move.

And thats the end of the round the fighters go back to their corners.
Trent Lane dominated that round.
The referee calls time. The cornermen exit stage left and we're back to business.

Lane closes the distance and gets a double leg, slamming Mayer to the mat! Mayer manages to get full guard.
Lane chips away with some ground and pound.
The ref warns both fighters not to hold the cage as they work up against the meshing.
Lane throwing strikes but missing.
Mayer looking for submissions from the bottom but instead Lane passes into half guard.
Lane looking to pass the half guard. Not this time.
Lane has been looking to land a fair amount of strikes on the ground. He might be looking to soften his opponent up in order to work for a submission.
We've had a slow start to the round here - hopefully the action picks up.
Mayer is looking to improve his position.
That's one minute gone in the round.
Lane not throwing his punches with enough precision this time.
Nice strikes from Lane there.

Lane is looking for a kimura but Mayer is holding onto that half guard position, so it's hard for Lane to get the leverage.
Mayer is pressing down on Lane's left leg trying to get back to full guard. He's managed it.
Mayer looking for subs off his back but Lane has passed one foot through into half guard.
Mayer moves his hips nicely and gets into full guard.
Mayer looking for submissions from the bottom here. Moving his hips around, possibly looking for an armbar.
That's two minutes gone in the round.
Lane stopping the sweep attempt from Mayer.
Lane is really dominating this fight. Is there anything that Mayer can do to turn this around?
Mayer can't keep his opponent in guard - Lane advances to half guard, no doubt looking to mount.
Lane takes advantage of the dominant position to land a couple of big hammer fists.
Lane is trying to control the action in half guard but Mayer is working away on the bottom, looking perhaps to get back to full guard.
Mayer wants to get back to full guard.
Lane trying to mount his opponent but Mayer defends it.
Lane moves into full mount! Mayer won't be happy about that!
That's three minutes gone in the round.
Mayer regains half guard.
Mayer is looking for a sweep. Lane is wise to his cunning plan and keeps the top position.
Mayer looking for subs from the bottom but Lane mounts him!
Mayer sneaks a leg back under and regains half guard and is working straight away to try and get back to guard. He hasn't managed just yet though.
Lane is looking to take a break and control but Mayer is keeping him honest, looking to work from the bottom.
Lane winds up and cracks Mayer with a swinging punch to the side of the head.
That's four minutes gone in the round.
Lane is working hard to pass the guard. He's done it - he's now in full mount! Trouble for Mayer!
Lane controlling from mount.
Mayer is trying to escape the mount.
Lane punishing his opponent with strikes.
Lane fakes a shot to the body and cracks his opponent in the head. Nice ground and pound there!
The crowd thankful this round is nearly over.
Lane goes for an armbar but Mayer turns quickly into his guard - lovely anticipation from Mayer.
Both fighters are absolutely exhausted here.
This has been an exciting period of action!
There's a bit of a scramble here and now Lane is on top in guard.
And thats the end of the round the fighters go back to their corners.
Trent Lane dominated that second round.
The corners get their ten second warning. Both fighters stand from their stools and stare eachother down, ready to get back to the action. This is the final round!


Mayer darts in and lands a nice takedown into half guard.
Lane gets back to full guard.
Mayer stopping the sweep attempt from Lane.
Mayer is looking to advance position but Lane has hit a scissor sweep - now he's on top in mount!
Mayer is trying to escape the mount.
We've had a slow start to the round here - hopefully the action picks up.
That's one minute gone in the round.
The crowd growing excited in anticipation of a finish here! Right on cue, Lane cracks his opponent with a massive right hand that draws loud cheers!
Mayer is desperately trying to get back to half guard.
Lane trying to control but he's not successful this time.
Mayer sneaks a leg back under and regains half guard and is working straight away to try and get back to guard. He hasn't managed just yet though.
Lane is trying to work for a kimura. This could be trouble! No, Mayer has managed to free his arm - good work.
Lane wants to lay and pray for a moment but Mayer keeps working.
Trent Lane is fighting for a decision here - he's started to take the cautious approach.
That's two minutes gone in the round.
Mayer wants to get back to full guard.
Mayer moves his hips nicely and gets into full guard.
Mayer is throwing his legs up, looking for submissions. Lane is aware though and is defending well.
Lane is intent on slowing down the pace of the fight, simply looking to control.
Lane connects with a couple of short punches.
Lane wants to control from the top but Mayer keeps moving.
That's three minutes gone in the round.
Lane landing some decent shots from guard.
Trent Lane overall seems to be getting the better of the ground position in the fight so far.
Lane won't allow Mayer to sweep him here.
Lane forces his way into half guard.
Lane lands with an elbow from half guard - that looked like it hurt.
Lane misses with a head shot. Mayer uses the momentum to regain guard.
Mayer looking for a triangle here. Lane is fighting it but it looks tight! Mayer pulls the arm across and this one won't last much longer! Nope, Lane is tapping out - this one is all over!
Ladies and gentlemen, after 4:56 of round 3, we have a winner by way of Submission (Triangle Choke). Damen Mayer!
|
|
|
|
|
|
|
|
|
|
|
|
|
|
|
|
|
|
|
|
|
|
|
| S |
C
A |
G |
S |
C
B |
G |
|
S |
C |
G |
|
energy
A | B |
|
hype
A | B |
|
pop
A | B |
|
mgr
A | B |
|
FIGHT
RATING
47% |
|
|
|
|
|
|
|
Main event
|
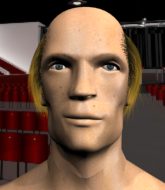
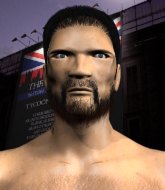
Coming up we have a featherweight MMA rules bout between Paul Wall (ranked 0 p4p, 0 weight class) and H Akeem Cerezo (ranked 0 p4p, 0 weight class). H Akeem Cerezo will no doubt be trying to keep this one on the feet, where he has a distinct advantage.
 |
|
 |
| 167 cm
23
150 lbs
2 - 0 - 0 |
|
176 cm
23
153 lbs
2 - 0 - 0 |
Powerful takedowns
Basic striking
Very strong |
|
BJJ White Belt
Good kicks
Solid chin |
|
| |
|
Ladies and gentlemen. This fight is 3 rounds, in the featherweight division.
Introducing the fighter to my left, fighting out of the red corner.
With a record of
2 - 0 - 0, fighting out of Helsinki, Paul Wall!
And introducing the fighter to my right, fighting out of the blue corner.
With a record of
2 - 0 - 0, fighting out of Helsinki, H Akeem Cerezo!
The judges for this bout are Marco Blurström, Arvi Lind and Johanna Lukiainen.
The bell rings for round one and we are underway!
Wall on the wrong end of a vicious looking body shot.
Cerezo tries a switch kick but it misses it's target.
Wall appears to be looking for a counter takedown.
Wall looks to throw the jab but Cerezo is out of range.
Wall looks frustrated there after his takedown attempt is stuffed easily.
Cerezo swings for the body but Wall moves out of range.
Cerezo tries to bum rush Wall with a series of wild strikes but Wall uses good footwork to avoid the assault.
Cerezo catches Wall with a nice straight right. He seems pissed - ooooh, it's on now! On like donkey kong!
Cerezo scores with a head kick. Wall tried to block it but didn't get his arm up in time.
Cerezo misses with a body shot. Nice footwork from Wall.
Wall tries to land a leg kick but Cerezo saw it coming and moves away.
Wall takes a swing at Cerezo's ribcage but misses.
A big right from Wall misses.
Wall throws a jab when Cerezo was well out of range.
Cerezo connects nicely with a jab. Noted by the judges no doubt.
Cerezo defending well as Wall loads up on a big left hand.
Cerezo looks for a takedown here. Will he get it? Wall is fending him off so far but Cerezo persists. Nope, Wall circles away and we're back to standing.
Wall fakes with the hands and throws a leg kick but Cerezo is out of range.
Cerezo misses with a double jab.
That's one minute gone in the round.
Cerezo defends well against a solid takedown attempt from Wall.
A head kick from Cerezo lands but Wall takes it in his stride.
Cerezo throws a mid kick that lands with a slap.
Cerezo throws a series of strikes that have Wall backpedaling.
Wall takes a head kick and keeps coming.
Wall walks straight into a jab right on the nose. That one stung - he's blinking and trying to clear his head.
Cerezo wings a very wild body shot but it does the job and lands to the midsection.
Cerezo turns his hip over beautifully as he lands a nice leg kick.
Wall pushing out the jab but it's not landing.
As Wall backs off Cerezo throws a huge counter combo but Wall manages to avoid it all.
Cerezo feints a straight left to the body, then turns around with a flashy move and hits Walls jaw with a dramatic spinning back fist!
H Akeem Cerezo seems to be the more aggressive standup fighter in this bout.
The crowd are loving this. Great action here.
Cerezo throws a head kick that misses
so Wall counters with a double leg into guard. Good agility.
The fighters are pressed up against the cage, both looking to find a bit of space to work.
Wall postures up.
The ref warns both fighters not to hold the cage as they work up against the meshing.
Wall stands up and looks to throw the legs aside to pass to side control. Cerezo swivels though and keeps the full guard.
Cerezo wants to get back to his feet but Wall is in a dominant position and won't allow it.
Wall is sitting in guard, working some ground and pound.
That's two minutes gone in the round.
Wall distracts Cerezo with his right hand and drops a big elbow with his other arm.
Cerezo really doesn't want to stay on the ground with Wall. If he can't get it back to his feet, it's only a matter of time before he'll be tapping out.
Cerezo is looking to stand back up... there's a bit of a scramble and Wall dives into side control.
You can see the frustration on Cerezo's face as Wall controls the position.
Wall has been looking to land a fair amount of strikes on the ground. He might be looking to soften his opponent up in order to work for a submission.
Wall wants to work for a kimura but he's foiled early by Cerezo, who protects the arm well.
Wall lands a knee to the body and follows it up with some ground and pound to the head. That will wear Cerezo down.
Cerezo takes a big shot right to the temple there but he's taken it well.
Wall grinds an elbow into Cerezo's temple.
Cerezo taking punishment in the form of punches.
Wall creates a bit of distance and throws down some hard shots.
Wall advances to full mount.
That's three minutes gone in the round.
Wall looking for an armbar but decides to keep the dominant position instead.
Wall working Cerezo over with strikes here.
Wall raining down shots from the mount!
Cerezo taking shots to the head.
Wall is in the full mount, landing strikes.
Wall postures up and cracks his opponent a couple of times before moving back into close ground control. Cerezo looks a forlorn figure.
Cerezo squirming around on the bottom, looking to escape.
Cerezo takes a big shot to the head but keeps on trying to improve his position.
Wall working Cerezo over with strikes here.
That's four minutes gone in the round.
The crowd are loving this. Great action here.
BOOM! Wall connects with a massive shot to the dome!
Wall lands a big shot there that rocks Cerezo but he's holding on and managing to survive for now.
Wall avoids the attempt from Cerezo to control.
Wall is still in mount, landing shots to his trapped opponent. Cerezo can't stay in a position like this for much longer.
Wall landing strikes, looking to finish!
Cerezo can't escape the position.
Cerezo looks winded!
Wall controlling the pace for now.
Cerezo wants to try and get back to his feet.
The crowd applaud the fighters' efforts here as the round comes to an end.
Wall content just to control the position here.
Cerezo is trying to escape but when you're mounted that's not too easy.
And thats the end of the round the fighters go back to their corners.
Paul Wall dominated that round.
OK. That's time! The bell goes and we're back to the action.
A slow jab from Wall misses its intended target.
Wall changes levels and looks for a double leg takedown. Cerezo tries to avoid it but Wall manages to keep hold of a leg and drag Cerezo to the ground. Cerezo escapes though and pops straight back up to his feet.
Cerezo throws out a counter right but Wall avoids it with no problem.
Cerezo fakes a jab and then connects with a hook.
H Akeem Cerezo seems to be getting the better of the standup.
Wall shoots in for a takedown. "Ole!" shouts Cerezo as he jumps to the side.
Nice takedown defense from Wall. No joy for Cerezo on that attempt.
Wall slips a jab and a cross from Cerezo.
Wall gets a double leg takedown into Cerezo's guard.
Wall keeps in close for a moment and lands a decent shot to the side of Cerezo's head.
Wall trying to control the position from guard on top but Cerezo is wriggling around, looking for whatever he can.
We've had a slow start to the round here - hopefully the action picks up.
Wall stands up over Cerezo, holding his feet. He dives back in and lands a decent shot to the head.
Wall stands and throws Cerezo's legs to the side, diving into side control.
That's one minute gone in the round.
Wall connects with a decent looking elbow from side control that caused Cerezo some visible discomfort.
Wall just content to control the position.
Cerezo is trying to stand back up. He's worked his way up against the cage but Wall has just dragged him back down to the mat.
Wall passes to full mount! That's big trouble for Cerezo!
Wall with shots to the head and body - Cerezo looks very uncomfortable down there.
Cerezo taking shots to the head.
Wall trying to control but Cerezo is having none of it.
The crowd growing excited in anticipation of a finish here! Right on cue, Wall cracks his opponent with a massive right hand that draws loud cheers!
Wall is still in mount, landing shots to his trapped opponent. Cerezo can't stay in a position like this for much longer.
That's two minutes gone in the round.
Wall looking to control and managing it successfully.
Wall lands with some strikes.
Cerezo is trying desperately to improve position.
Wall trying to control but Cerezo is having none of it.
This has been an exciting period of action!
Cerezo tries to hold on but Wall postures up.
Wall is really dominating this fight. Is there anything that Cerezo can do to turn this around?
Wall sitting in mount, just looking to control for the moment.
Wall looking to ground and pound his opponent to a finish here.
That's three minutes gone in the round.
Cerezo wants to control but Wall is having none of it.
Cerezo in a bad spot here, taking shots to the head.
Cerezo trying desperately to get to his feet.
Wall raining down hammerfists from mount.
Wall with the ground and pound from mount.
Cerezo really trying hard to get back to half guard here.
Cerezo is breathing heavily.
A nice elbow there by Wall.
Wall looking to control but Cerezo is working nicely, looking to advance position himself.
Wall scoring with some good ground and pound from mount here. Will he manage to finish Cerezo?
That's four minutes gone in the round.
Wall lands a shot to the body, followed up by a shot to the exposed head of his trapped opponent.
We've seen a great period of action over the last minute or so - credit to both fighters for going all out!
A nice elbow there by Wall.
Wall controlling from the full mount.
Cerezo is trying to stand.
Cerezo is looking to get to half guard.
Wall landing punches.
Wall looking to control but Cerezo is working nicely, looking to advance position himself.
Wall pausing momentarily but resumes with a couple of decent strikes that do a bit of damage.
Wall pausing momentarily but resumes with a couple of decent strikes that do a bit of damage.
And thats the end of the round the fighters go back to their corners.
Paul Wall dominated that second round.
Well, the break between rounds is over. Let's get back to the scrappin! Let's hear some noise people - this is the final round!
Wall walks forward, straight into a front kick from Cerezo.
Wall goes for a double leg but Cerezo avoids the attempt and the two fighters end up clinched against the cage as Cerezo continues to drive forward.
Cerezo lands a nice leg kick that just misses Wall's sensitive parts.
Wall throws a shot from downtown. Cerezo moves away and avoids it.
Wall has his front leg slapped to the side - a nice low kick landing there from Cerezo.
Cerezo misses with a body shot. Nice footwork from Wall.
Wall gets a takedown into half guard.
Wall working over Cerezo with some ground and pound. Cerezo looks like he wants out of this position, which is understandable.
We've had a slow start to the round here - hopefully the action picks up.
Wall looks towards his corner to check for any instructions. The corner give him nothing to work with, so he cracks Cerezo with a short hammerfist. I guess that's as good as any advice he could get in this position.
Cerezo is trying to defend against the ground and pound but Wall scores with a couple of nice shots.
Wall is trying to control the action in half guard but Cerezo is working away on the bottom, looking perhaps to get back to full guard.
Cerezo has hold of Wall's hands but Wall slips his arm to the side and lands an elbow.
Fantastic stuff here - a very entertaining period of action, which has drawn cheers from the crowd.
Wall lands with an elbow from half guard - that looked like it hurt.
That's one minute gone in the round.
Wall looks to score some points with some ground and pound.
Wall working Cerezo over with strikes.
Wall scoring with strikes to the body and head.
Cerezo is trying to maintain the position but Wall is very close to passing his half guard.
Wall moves nicely into side control.
Wall cracks Cerezo with a big elbow.
Cerezo tries to escape but Wall is in control.
Wall cracks Cerezo with a big elbow.
Cerezo is not content to let Wall control the position.
Paul Wall is fighting for a decision here - he's started to take the cautious approach.
That's two minutes gone in the round.
Wall advances to full mount.
Wall connects with a couple of good shots from mount.
Cerezo is trying desperately to improve position.
H Akeem Cerezo has stepped it up - he knows he needs a finish here!
Cerezo takes a big intake of breath there - he's definitely tired.
Wall with a couple of short strikes.
Wall lands a big shot there that rocks Cerezo but he's holding on and managing to survive for now.
The crowd cheering loudly, showing their appreciation for the quality fight we're seeing here.
Wall landing punches.
Wall controlling his opponent.
Wall with shots to the head and body - Cerezo looks very uncomfortable down there.
That's three minutes gone in the round.
Wall takes a little breather and maintains the position. The referee will be looking for him to stay active from such a dominant position though.
Wall raining down hammerfists from mount.

Cerezo is rocked!
Wall controlling from the full mount.
Wall punishing his opponent with strikes.
Wall scoring with some good ground and pound from mount here. Will he manage to finish Cerezo?
Cerezo is still in real trouble! Can Wall finish him?
Wall breaks from Cerezo's wrist control and lands an elbow.
Wall landing shots from mount.
Cerezo flailing away with punches but nothing is landing.
Cerezo flailing away with punches but nothing is landing.
Wall controlling from mount.
That's four minutes gone in the round.
Cerezo seems to have recovered his senses.
Cerezo is flailing around like a fish out of water, trying to land strikes.
Wall raining down shots from the mount!
We've seen a great period of action over the last minute or so - credit to both fighters for going all out!
Wall sitting in mount, just looking to control for the moment.
Wall's ground tactics aren't going to win him many fans. Let's hope he's got fireworks for us if he gets back to his feet because he's not doing much on the ground.
And that's the end of the fight!
Paul Wall showed his dominance in that final round.
Well I reckon that's a shut out for Wall, winning every round. Will the judges agree? They are the ones who matter, even if they are often depressingly incompetent. Over to the ring announcer for the scorecards.
Ladies and gentlemen, after 3 rounds of action, we go to the scorecards for a decision.
Judge Marco Blurström scores the fight for Paul Wall!
Judge Arvi Lind scores the fight for Paul Wall!
Judge Johanna Lukiainen scores the fight for Paul Wall!
Paul Wall wins by unanimous decision!
|
|
|
|
|
|
|
|
|
|
|
|
|
|
|
|
|
|
|
|
|
|
|
| S |
C
A |
G |
S |
C
B |
G |
|
S |
C |
G |
|
energy
A | B |
|
hype
A | B |
|
pop
A | B |
|
mgr
A | B |
|
FIGHT
RATING
64% |
|
|
|
|
|
|
|
|
|
|
