 |
NYFN Legends Tournament r. 3 PBP Commentary |
Undercard bout
|
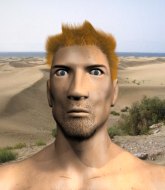
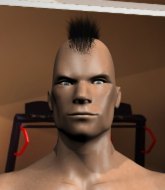
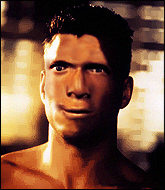
Coming up we have a light heavyweight MMA rules bout between Timmy Timmy (ranked 4918 p4p, 534 weight class) and Grant Brophy (ranked 9116 p4p, 702 weight class). Timmy Timmy could well score a knockout today. He has the power to get to Grant Brophy's chin.
 |
|
 |
| 180 cm
18
212 lbs
2 - 0 - 0 |
|
187 cm
18
205 lbs
0 - 2 - 0 |
Good wrestling
Decent elbows
KO power |
|
BJJ White Belt
Solid Muay Thai
Solid chin |
|
| |
|
Ladies and gentlemen. This fight is 3 rounds, in the light heavyweight division.
Introducing the fighter to my left, fighting out of the red corner.
With a record of
2 - 0 - 0, fighting out of New York, Timmy Timmy!
And introducing the fighter to my right, fighting out of the blue corner.
With a record of
0 - 2 - 0, fighting out of London, Grant Brophy!
The judges for this bout are Columbo Gatti, Eddie Farnsworth and David Schapiro.

The bell rings for round one and we are underway!
Brophy looks to land a combination. Timmy sees it coming but can only parry a couple of the shots.

Timmy darts in and clinches Brophy up against the cage.
Brophy doesn't land with the attempted body shot.
Brophy swings away with an uppercut that misses.
Timmy lands a nice knee to the body.
Brophy fails to land with a short punch on the inside.
Timmy pushes off an throws an elbow but Brophy leans to the side and avoids it. We're back to clinching against the cage.
Brophy swings wildly with an uppercut but Timmy uses good head movement to avoid it.
A short uppercut from Brophy.
Brophy lands a left hand.
Brophy lands a right hand.
Brophy takes an elbow to the temple.

It looks like Grant Brophy has been cut.
Fantastic stuff here - a very entertaining period of action, which has drawn cheers from the crowd.
Brophy tries a shoulder strike but it doesn't do any damage.
Brophy fails to land with a short punch on the inside.
Timmy misses with an elbow strike.
A nice left hand lands by Brophy.
Timmy lands a nice elbow from the clinch.
Brophy throws a head punch that misses.

That's one minute gone in the round.
Brophy dodges an elbow strike from Timmy.
Brophy lands a left hand that snaps the head of Timmy backwards.
Brophy misses with the head strike.
Timmy misses with a knee to the head.
Brophy goes for a body shot but it's blocked.
Brophy scores with a shoulder strike.
Brophy lands with a good tight uppercut to the head.
Brophy doesn't land with the attempted body shot.
Brophy swings away with an uppercut that misses.
Brophy misses with some punches.
Timmy lands a damaging elbow.
That has opened up Grant Brophy's cut even more.
Brophy dodges an elbow strike from Timmy.
Timmy blocks a body shot from Brophy.
Timmy blocks a punch to the side of the head.
Brophy misses with the head strike.
Timmy looks to throw an elbow but misses.
Brophy scores with an uppercut up the middle.

That's two minutes gone in the round.
With the two fighters working up against the cage, Timmy just misses with a elbow thrown towards Brophy's brow.
A head punch blocked on the inside by Timmy.

Brophy pushes off and circles away, back to the middle of the mat.
We've seen a great period of action over the last minute or so - credit to both fighters for going all out!
Timmy gets in close and instigates a clinch.
Timmy blocks a body shot from Brophy.
Brophy tries a body shot but Timmy blocks it.
A short uppercut from Brophy.
Brophy takes an elbow to the forehead.
The cut above Grant Brophy's eye is starting to cause him problems now.
Brophy throws a hook to the body. More of an arm punch but it's all scoring with the judges.
Timmy blocking some punches.
Brophy throws a punch but it's blocked by Timmy.
Brophy lands a short shot on the inside that snaps the head of Timmy backwards.
Brophy is trying to break the clinch but Timmy has him pressed against the cage.
Timmy blocks a couple of punches on the inside.
Brophy is working Timmy over against the cage.
Timmy throws an elbow that misses.
Brophy lands on the inside with an uppercut.

That's three minutes gone in the round.
With the two fighters working up against the cage, Timmy just misses with a elbow thrown towards Brophy's brow.
A short uppercut from Brophy.
A head punch blocked on the inside by Timmy.
Brophy scores with a nice hook to the head.
Brophy can't find room to land a body shot as Timmy controls the action.
With the two fighters working up against the cage, Timmy just misses with a elbow thrown towards Brophy's brow.
A head punch on the inside from Brophy fails to land.
Brophy tries to work over Timmy's body with a swooping hook but it only glances the target.
Timmy blocks a punch to the side of the head.
Timmy pushes off and fires off an elbow that misses, before clinching up again, against the cage.
Timmy throws a vicious knee straight up the middle but Brophy blocks it with crossed arms.
Nice body punch from Brophy - that landed with a thud.
Brophy misses with a body punch.
Brophy is leaning against Timmy and scores with a nice uppercut to the body.
Timmy blocks a punch to the side of the head.
Timmy misses with a knee to the head.
Timmy throws an elbow that misses.

That's four minutes gone in the round.
Brophy wants to push off and get back to the center of the mat but Timmy has him pressed against the cage.
Brophy scores with an uppercut up the middle.
Knees in the clinch landing for Timmy.
Brophy swings away with an uppercut that misses.
Timmy prevents a body shot from Brophy.
Fantastic stuff here - a very entertaining period of action, which has drawn cheers from the crowd.
Timmy misses with a knee strike.
Brophy misses with a shot to the kidneys.
Brophy lands a right hand.
Timmy tries to land knees in the clinch but Brophy avoids the damage to the body.
Brophy scores with a nice hook to the head.
Brophy lands with a short punch from the clinch.
Brophy goes for a body shot but it's blocked.
Brophy avoiding damage as Timmy throws knees to the body.
Brophy managing to block the knees to the body from Timmy.
Brophy misses with a short punch on the inside.
A nice left hand lands by Brophy.
Brophy has had enough of the clinch but Timmy keeps him there for the moment.
And thats the end of the round the fighters go back to their corners.
Grant Brophy dominated that round.
The cut man is working on Grant Brophy's cut.
That's the end of the round. The referee orders the cornermen out of the cage so we can get back down to business.

Timmy drives through and clinches with Brophy against the cage.
Timmy throws an elbow that misses.
Timmy looks to throw an elbow but misses.
Brophy looks more muscular than last time we saw him. He must have been on the weights.
A head punch on the inside from Brophy fails to land.
Brophy stays in close to his opponent and throws a right hand to the body.
Timmy looking to throw knees to the head but Brophy is blocking nicely.
Brophy lands a hook to the side of the head.
Knees in the clinch landing for Timmy.
Brophy tried to land a shot to the body but connects with Timmy's elbow.
Brophy has been the more effective fighter overall so far.
A short left from Brophy.
Timmy tries a knee to the head but Brophy blocks it.
We've had a slow start to the round here - hopefully the action picks up.
Timmy blocks an uppercut.
Brophy lands a short shot on the inside that snaps the head of Timmy backwards.
Timmy trying to land knees to the body.
Brophy tries a shoulder strike but it doesn't do any damage.
Brophy lands a left hand that snaps the head of Timmy backwards.
Brophy takes a knee to the side of the body.
That's one minute gone in the round.
Timmy lands a damaging elbow.
Timmy looking to throw knees to the head but Brophy is blocking nicely.
Brophy lands a nice uppercut.
Brophy misses with a shot to the kidneys.
Timmy tries to land a knee to the body but he is off balance and Brophy avoids it.
Brophy misses with some punches.
Timmy pushes off and fires off an elbow that misses, before clinching up again, against the cage.
Timmy blocks an uppercut.
Brophy presses Timmy against the cage and delivers a mid-strength body shot.
Brophy misses with a shot to the kidneys.
A head punch on the inside from Brophy fails to land.
Timmy creates a bit of space for himself and sneaks an elbow through Brophy's defenses.
Brophy has had enough of the clinch and is looking to separate.
Brophy lands with a quick shot inside that doesn't really do much damage.
Brophy misses with a hook to the ribs.
Timmy blocks a body shot from Brophy.
That's two minutes gone in the round.
Brophy misses with a short punch on the inside.
Timmy tries a knee to the head but he's missed.
Timmy lands an elbow just above Brophy 's eye.
Brophy goes for a body shot but it's blocked.
Timmy looking to throw knees to the head but Brophy is blocking nicely.
Wooooo! Give it up for these two warriors! They are putting on a show!
Brophy tries a shoulder strike but it doesn't do any damage.
Brophy digs a right hand underneath Timmy's ribcage. Timmy let out a lung full of air as it connected.
Brophy doesn't land with the attempted body shot.
Grant Brophy seems to be working more effectively in the clinch in the fight so far.
Brophy has a couple of punches blocked by Timmy.
Brophy is trying to break free.
Timmy blocks a body shot from Brophy.
Brophy lands on the inside with an uppercut.
Brophy has a couple of punches blocked by Timmy.
Brophy misses with a shot to the kidneys.
Timmy's Muay Thai looks sharper than normal. He has obviously been working on it in the gym.
Brophy misses with a short punch on the inside.
Brophy has a couple of punches blocked by Timmy.
That's three minutes gone in the round.
Brophy working aggressively here.
A body shot lands from Brophy.
Timmy looks to throw an elbow but misses.
Timmy blocking some punches.
Brophy tries to throw a body punch but Timmy avoids it by throwing Brophy back against the cage.
Timmy has not gone for a single takedown so far in this fight, which seems like a very strange tactic when you consider that he has the superior wrestling and BJJ.
Timmy blocking some punches.
Brophy tries to work over Timmy's body with a swooping hook but it only glances the target.
Brophy misses with a shot to the kidneys.
Brophy on the defensive, avoiding the knees to the body.
Timmy blocks an uppercut.
Timmy lands an elbow inside that Brophy shrugs off.
Grant Brophy's cut is absolute horrible now. This looks like something out of a horror film with blood covering both fighters.
The referee calls the doctor in to look at Grant Brophy's cut. Oh no, the doctor has called an end to the bout!
Ladies and gentlemen, after 3:52 of round 2, we have a winner by way of TKO (Cut). Timmy Timmy!
Timmy Timmy made sure to give a little speech post fight, saying 'Timmy!'.
|
|
|
|
|
|
|
|
|
|
|
|
|
|
|
|
|
|
|
|
|
|
|
| S |
C
A |
G |
S |
C
B |
G |
|
S |
C |
G |
|
energy
A | B |
|
hype
A | B |
|
pop
A | B |
|
mgr
A | B |
|
FIGHT
RATING
47% |
|
|
|
|
|
|
|
Undercard bout
|
Coming up we have a light heavyweight MMA rules bout between Ruphus Duphus (ranked 8984 p4p, 695 weight class) and Marky Mark (ranked 4488 p4p, 500 weight class). On his way into the cage it seems that Ruphus Duphus has been attacked by a crazed fan! It looks like it might have been the just bleed guy! Luckily Ruphus Duphus seems to be OK! I thought that lunatic was in prison!?
 |
|
 |
| 195 cm
18
205 lbs
0 - 2 - 0 |
|
217 cm
18
211 lbs
1 - 1 - 0 |
Good wrestling
Basic striking
Intelligent |
|
BJJ White Belt
Excellent boxer
Heavy handed |
|
| |
|
Ladies and gentlemen. This fight is 3 rounds, in the light heavyweight division.
Introducing the fighter to my left, fighting out of the red corner.
With a record of
0 - 2 - 0, fighting out of Los Angeles, Ruphus Duphus!
And introducing the fighter to my right, fighting out of the blue corner.
With a record of
1 - 1 - 0, fighting out of Amsterdam, Marky Mark!
The judges for this bout are Jonathan Paton, Chad Campbell and Eddie Farnsworth.
The bell rings for round one and we are underway!
Mark avoids a lazy jab quite easily.
Mark throws a lazy uppercut

and Duphus counters with a nice double leg into half guard.
Mark tries to get to full guard but Duphus has control of the leg.
The fighters are pressed up against the cage, both looking to find a bit of space to work.
Duphus seems to be taking a bit of a break to think of his next move. He lands a short punch in the meantime.
Duphus definitely looks more muscular than last time we saw him fight.
Mark blocking the ground and pound attempt from Duphus.
Duphus thows a wild elbow that connects with the canvas.
Mark tries to get to full guard but Duphus has control of the leg.
Mark is trying to maintain the position but Duphus is very close to passing his half guard.
We've had a slow start to the round here - hopefully the action picks up.

Duphus is working for submissions here but there's nothing on.
That's one minute gone in the round.
Duphus is figuring out what he wants to do next.
Mark really doesn't want to stay on the ground with Duphus. If he can't get it back to his feet, it's only a matter of time before he'll be tapping out.
Mark is looking to control Duphus's leg but it's slowly edging free. Can Mark avoid being mounted?
Duphus seems to be looking for submissions.
Mark is defending against the submission attempts here by Duphus.
That's two minutes gone in the round.
The crowd are getting on the fighters' backs, as the pace has dropped off in the last minute or so.
Duphus is looking to take a break and control but Mark is keeping him honest, looking to work from the bottom.
Duphus is trying to work for a kimura. This could be trouble! No, Mark has managed to free his arm - good work.
Duphus missing with the ground and pound from half guard.
Mark avoiding damage under a succession of punches from Duphus.
That's three minutes gone in the round.
Mark tries to get to full guard but Duphus has control of the leg.
It looks like the ref is thinking about a standup.
Duphus wants to pass the guard but Mark is defending well.

The referee has decided to stand the fighters back up, so we'll restart on the feet.
Mark dips down and scores with a jab to the body.
Mark lands a body shot.
Duphus looks shocked there as he takes a right hand to the temple.
A telegraphed right hand from Mark misses the target.
Mark thuds his right hand into Duphus's forehead from close range. That could be painful for both fighters.
Mark looks to score with a combo but nothing lands.
Duphus throws a body shot but no joy.
Duphus throws out a token jab with nothing on it.
Duphus avoids the body shot from Mark.
Duphus slips under a jab from Mark.
Mark scores with a sloppy punch to the body. Not much technique there but it did the business.
That's four minutes gone in the round.
Duphus fakes an overhand right and shoots for a takedown. Mark sprawls well initially but Duphus persists and gets the takedown into half guard.
This is a great period of action - very entertaining stuff!
Duphus perhaps working for something from half guard, or maybe not. It looks like he's just sitting there.
Mark is a painfully thin specimen of a man. You do wonder whether a good body kick would snap him clean in two.
Mark tries to get to full guard but Duphus has control of the leg.
Duphus is looking for a kimura here.
Duphus seems content to maintain position for now, rather than mounting any offense.
The crowd thankful this round is nearly over.
Duphus is trying a forearm choke
I don't think that's going to do much at this level of the game.
And thats the end of the round the fighters go back to their corners.
Ruphus Duphus dominated that round.
The fighters' corners scream their final instructions, as the referee calls time. Here we go, back to the action!
Mark swings and misses with a hook to the body.
Marky Mark has stepped it up - he knows he needs a finish here!
Duphus throws a loose over hand right and dives in with a double leg takedown. Mark tries to sprawl but it's too late and the fighters hit the mat. Duphus is in Mark's guard.
Duphus controls from within his opponent's guard.
Duphus works a leg free and moves into half guard.
We've had a slow start to the round here - hopefully the action picks up.
Duphus seems to be taking a bit of a break to think of his next move. He lands a short punch in the meantime.
Mark is looking to control Duphus's leg but it's slowly edging free. Can Mark avoid being mounted?
Duphus passes into side control, despite Mark's attempt to control the position.
That's one minute gone in the round.
Mark is trying to improve his position.
Duphus thinks about going for a far side armbar but bails out and retains the dominant position instead.
Duphus trying to control the position but Mark is working away.
Mark looks more muscular than last time we saw him. He must have been on the weights.
Mark is looking to reverse the position.
That's two minutes gone in the round.
There's not a lot going on here and the crowd are letting the fighters know they're not willing to tolerate a lack of action.
Duphus tries for a kimura. Not really close to a finish though.
Duphus tries to land with some ground and pound but misses.
Mark is trying to work for a sweep but Duphus has mounted him!
Duphus lands a big shot there that rocks Mark but he's holding on and managing to survive for now.
Duphus is working for a guillotine from mount but Mark frees his head quite easily.
Duphus is working on an americana here. Ooh, that looks pretty nasty! Nope, Mark has managed to escape the submission attempt.
That's three minutes gone in the round.
Duphus landing strikes from the mount and Mark is in trouble!
Duphus looking to finish Mark with some ground and pound. This is bad for Mark!
The ref warns both fighters not to hold the cage as they work up against the meshing.
Mark working to try and regain half guard.
Duphus works his way to his opponent's back.
Mark trying to control the hands but Duphus breaks the grip.
Duphus is working really hard to secure the rear naked choke. Mark defends successfully for a significant amount of time. Both fighters are looking very determined.
That's four minutes gone in the round.
Mark defending nicely against the rear naked choke attempt.
Duphus is really dominating this fight. Is there anything that Mark can do to turn this around?
Duphus looking for the choke from the back.
Mark is displaying good submission defense - not really looking in danger of submitting to the rear naked choke at the moment. That could change in an instant of course if Duphus gets his way!
Mark is displaying good submission defense - not really looking in danger of submitting to the rear naked choke at the moment. That could change in an instant of course if Duphus gets his way!
And thats the end of the round the fighters go back to their corners.
Ruphus Duphus dominated that second round.
Well, the break between rounds is over. Let's get back to the scrappin! Let's hear some noise people - this is the final round!

Mark lands a nice hook to Duphus's body. Duphus takes it in his stride and looks to land his own strikes.
Mark ducks down and throws a hook to the body but Duphus moves away.
Duphus drops down looking for a counter takedown but Mark sprawls and moves away.
Duphus ducks under a wild hook from Mark.
Duphus on the wrong end of a vicious looking body shot.
Duphus gets cracked there but stands up to it.
Duphus on the wrong end of an overhand right that came out of nowhere.
Mark throws an overhand right that lands on Duphus's shoulder, as Duphus tries to avoid the shot.
As Mark tries to get set, Duphus tries to push him back and clinch up but Mark manages to avoid the attempt.
Mark thows a left - swing and a miss!
Mark scores with a jab.

Duphus is rocked!
Mark cracks Duphus with a left hook right on the temple and Duphus goes down! He's out! Referee! Stop the fight! Mark lands a few more punches before the dopey ref steps in - hopefully Duphus is OK!
Ladies and gentlemen, after 0:48 of round 3, we have a winner by way of KO (Punch). Marky Mark!
Marky Mark decided to go for the less than humble approach in his post fight interview, telling everyone how he is going to conquer the world. The crowd seemed to like it when really that sort of approach could have gone either way.
|
|
|
|
|
|
|
|
|
|
|
|
|
|
|
|
|
|
|
|
|
|
|
| S |
C
A |
G |
S |
C
B |
G |
|
S |
C |
G |
|
energy
A | B |
|
hype
A | B |
|
pop
A | B |
|
mgr
A | B |
|
FIGHT
RATING
39% |
|
|
|
|
|
|
|
Undercard bout
|
Coming up we have a light heavyweight MMA rules bout between Bear Stevenson (ranked 8931 p4p, 693 weight class) and Mr Skull (ranked 8261 p4p, 671 weight class). Both fighters look fresh as a daisy as they make their way towards the cage.
 |
|
 |
| 190 cm
18
215 lbs
1 - 2 - 0 |
|
184 cm
18
210 lbs
1 - 1 - 0 |
Good wrestling
Counter fighter
Granite chin |
|
BJJ Purple Belt
Basic striking
Powerful |
|
| |
|
Ladies and gentlemen. This fight is 3 rounds, in the light heavyweight division.
Introducing the fighter to my left, fighting out of the red corner.
With a record of
1 - 2 - 0, fighting out of Montreal, Bear Stevenson!
And introducing the fighter to my right, fighting out of the blue corner.
With a record of
1 - 1 - 0, fighting out of Las Vegas, Mr Skull!
The judges for this bout are Reed Andrews, Steve Montenegro and Franklyn Lucas.
The bell rings for round one and we are underway!
The fight stays on the outside here - Skull looks like he's thinking about clinching though.
Stevenson throwing a counter right hand but Skull manages to avoid it.
Skull tries to close the distance and clinch but Stevenson swats him to one side with an open hand palm strike and circles away.
Skull looks more muscular than last time we saw him. He must have been on the weights.

Skull takes the fight into the clinch.
Skull tries to take the fight to the ground by pulling guard but can't manage it.
Skull tries to jump guard but he falls flat on his backside. Stevenson smiles and moves away.
Skull has Stevenson up against the cage in a clinch.
Skull fails to pull guard.
Bear Stevenson has stuffed three takedown attempts in the round now. That's going to take a lot out of Mr Skull.
We've had a slow start to the round here - hopefully the action picks up.
Stevenson lands a hook to the body. It's hard to tell if that hurt Skull or not.
Skull tries to jump guard but he falls flat on his backside. Stevenson smiles and moves away.
Stevenson misses with a looping left.
Skull tries to clinch up but Stevenson circles away and keeps his distance.
Skull tries to close the distance and clinch up but Stevenson swats him away and circles back towards the center.
That's one minute gone in the round.
Skull closes the distance but Stevenson moves to the side
and Stevenson counters with a shoot takedown. Skull fights it but they end up in guard.
Stevenson controls from within his opponent's guard.

Stevenson has a momentary lapse of concentration, allowing Skull to throw up a leg and lock on what appears to be a pretty tight triangle! Stevenson is fighting it off but it's all too little too late - Skull pulls down on the head and he's put Stevenson to sleep! This one is all over!
Ladies and gentlemen, after 1:34 of round 1, we have a winner by way of Submission (Triangle). Mr Skull!
Mr Skull seemed lost for words in his post fight interview but he remembered to thank his fans and directed everyone to his website.
|
|
|
|
|
|
|
|
|
|
|
|
|
|
|
|
|
|
|
|
|
|
|
| S |
C
A |
G |
S |
C
B |
G |
|
S |
C |
G |
|
energy
A | B |
|
hype
A | B |
|
pop
A | B |
|
mgr
A | B |
|
FIGHT
RATING
52% |
|
|
|
|
|
|
|
Undercard bout
|
Coming up we have a light heavyweight MMA rules bout between Alika Webb (ranked 9149 p4p, 705 weight class) and Ibrahim Camara (ranked 8217 p4p, 669 weight class). These two fighters really are very evenly matched on the feet - it will be fascinating to see who can assert themselves in that aspect of the fight.
 |
|
 |
| 191 cm
18
208 lbs
0 - 2 - 0 |
|
177 cm
18
205 lbs
1 - 2 - 0 |
BJJ White Belt
Solid boxing
Big right hand |
|
BJJ White Belt
Excellent MT
Powerful |
|
| |
|
Ladies and gentlemen. This fight is 3 rounds, in the light heavyweight division.
Introducing the fighter to my left, fighting out of the red corner.
With a record of
0 - 2 - 0, fighting out of Sydney, Alika Webb!
And introducing the fighter to my right, fighting out of the blue corner.
With a record of
1 - 2 - 0, fighting out of New York, Ibrahim Camara!
The judges for this bout are Dean Styles, John Roberts and Chad Campbell.
The bell rings for round one and we are underway!
Camara scores with a jab to the body.
Camara lands a nice shot that snaps Webb's head back.
Webb misses with a wild combination.
Webb throws a body shot but no joy.
Camara digs a good body shot into Webb's ribs.
Camara keeping his hands up high there, blocking the jab from Webb.
Webb throws a hard body shot but it just misses.
Camara throws a looping overhand right but Webb ducks down to avoid it.
Nice body punch from Camara.
Webb misses with a body shot.
Camara lands with a two punch combination before moving back out of range.
Camara takes a shot to the nose. Hopefully that hasn't broken it.
It looks like Ibrahim Camara has been cut.
Webb definitely looks more muscular than last time we saw him fight.
We've seen a great period of action over the last minute or so - credit to both fighters for going all out!
Camara misses with a body shot.
Camara tries to land with a swinging hook to the body but Webb was well out of range. Poor timing from Camara.
A counter left hand to the body from Webb misses its target.
Camara misses the shot to the body.
Webb throws a body shot but no joy.
Webb swinging wildly here.
That's one minute gone in the round.
Camara fakes a head shot and lands one to the body.
Nice jab there from Camara.
Camara connects with the punch.
Camara throws a shot from downtown. Webb moves away and avoids it.
Jab, jab by Webb - just one landing.
Webb throws a lazy uppercut
and Camara cracks him with a counter punch right on the button.
Camara lands a jab to Webb's midsection.
Webb on the wrong end of a nice hook.
Camara avoids the body shot from Webb.
Camara throws a jab but it's blocked by Webb.
Camara misses with a double jab.
Camara takes a swing at Webb's ribcage but misses.
The fans in attendance giving it up for the two fighters, who have really let it all hang out in the last minute or so!
A big right from Webb misses.
Webb throws a combination but comes up with nothing but fresh air.
That's two minutes gone in the round.
Camara scores with a crisp jab that stopped Webb in his tracks.
Camara misses the body punch
and Webb counters with a crisp hook to the side of the head.
Camara looks more muscular than last time we saw him. He must have been on the weights.
Camara misses with a body punch
and Webb counters with a lovely straight right hand!
Camara throws a one two combo.
Camara gets cracked there but stands up to it.
Camara scores with a nice head shot.
Webb is rocked!
Webb throws a series of punches but Camara moves out of range.
Camara gets cracked there but stands up to it.
Camara misses with a lunging right hand
and Webb cracks him with a counter punch right on the button.
Camara thuds his right hand into Webb's forehead from close range. That could be painful for both fighters.
Oh Webb is still all over the place! His legs are completely gone! Will he be able to recover?!!
A shot to the liver by Camara. Beautiful body shot.
Webb seems to have got his legs back now.
Ibrahim Camara seems to be the more aggressive standup fighter in this bout.
Camara listening to his corner there, landing a nice uppercut.
A jab from Camara misses.
Webb ducks under a wild hook from Camara.
Webb throws a jab when Camara was well out of range.
Webb stooping low to avoid any incoming strikes and then lunges in with an uppercut come cross that lands flush.
Webb throws a combination but comes up with nothing but fresh air.
That's three minutes gone in the round.
Camara fakes a head shot and lands one to the body.
Webb throws out a loose jab but Camara uses good head movement to avoid it.
Camara is clearly trying to counter these attacks from Webb with a body shot.
Camara lands a nice shot to the body.
Webb takes a punch right to his stomach. That took the wind out of him momentarily.
Webb is really peppering his opponent's head with punches.
Boom, another hit is landed. "You're gunna get knocked out" taunts Camara, as that shot connected.
Camara is the aggressor but that punch slipped nicely by Webb.
Webb misses with a body shot.
Webb takes a solid shot to the body. That one hurt him but he's trying not to show it.
Camara steps to the side to avoid the strikes from Webb.
Camara scores with a shot to the body.
Webb throws a body punch but Camara moves out of range.
Camara throws out a loose jab but Webb uses good head movement to avoid it.
Camara ducks down and throws a hook to the body but Webb moves away.
Camara lands with a nice body punch.
Camara fakes a head punch and goes low to the body. Nicely done.
That's four minutes gone in the round.
We've seen a great period of action over the last minute or so - credit to both fighters for going all out!
Camara uses some good footwork to avoid the body shot by Webb.
Camara swings away with a counter right hand but no contact made.
Camara scores with a jab to the head.
Camara with a hook.
Camara scores with a decent looking hook.
Webb throws a shot from downtown. Camara moves away and avoids it.
Camara lands a straight punch to the body, keeping Webb at a distance.
Webb throws a body punch but Camara moves out of range.
Camara thuds a left hand into Webb's body.
Webb takes one on the chin but seems OK.
Camara takes a swing at Webb's ribcage but misses.
Webb throws out a loose jab but Camara uses good head movement to avoid it.
Webb just misses with a punch to the body.
The crowd applaud the fighters' efforts here as the round comes to an end.
Webb walks straight into a jab right on the nose. That one stung - he's blinking and trying to clear his head.
Camara bobs and weaves well there to avoid the strikes.
Camara works Webb's body with a nice hook.
Camara feints a straight left to the body, then turns around with a flashy move and hits Webbs jaw with a dramatic spinning back fist!
And thats the end of the round the fighters go back to their corners.
Ibrahim Camara dominated that round.
The cut man is working on Ibrahim Camara's cut.
That's time! Back to the action!
Camara lands a jab to Webb's midsection.
Camara cracks Webb with a big right hand that sees him stumbling back against the cage! Webb falls to his knees and Camara doesn't need a second invitatation - he rushes in and fires off several unanswered shots that force the referee to stop the fight! This one is all over!
Ladies and gentlemen, after 0:07 of round 2, we have a winner by way of TKO (Strikes). Ibrahim Camara!
An out of breath Ibrahim Camara thanked his loyal fans in his post fight interview, giving them credit for his success over the course of his career.
|
|
|
|
|
|
|
|
|
|
|
|
|
|
|
|
|
|
|
|
|
|
|
| S |
C
A |
G |
S |
C
B |
G |
|
S |
C |
G |
|
energy
A | B |
|
hype
A | B |
|
pop
A | B |
|
mgr
A | B |
|
FIGHT
RATING
72% |
|
|
|
|
|
|
|
Undercard bout
|
Coming up we have a light heavyweight MMA rules bout between Blake Phoenix (ranked 4834 p4p, 530 weight class) and Dana Fight Ii (ranked 7687 p4p, 650 weight class). Blake Phoenix has the better chin. Will he look to stand and bang today?
 |
|
 |
| 194 cm
18
210 lbs
3 - 0 - 0 |
|
189 cm
18
205 lbs
1 - 1 - 0 |
BJJ Blue Belt
Basic striking
Good chin |
|
BJJ Blue Belt
Solid Muay Thai
Intelligent |
|
| |
|
Ladies and gentlemen. This fight is 3 rounds, in the light heavyweight division.
Introducing the fighter to my left, fighting out of the red corner.
With a record of
3 - 0 - 0, fighting out of Las Vegas, Blake Phoenix!
And introducing the fighter to my right, fighting out of the blue corner.
With a record of
1 - 1 - 0, fighting out of Tokyo, Dana Fight Ii!
The judges for this bout are Lou da Vinci, John Kavanagh and Eddie Farnsworth.
The bell rings for round one and we are underway!
Phoenix tries to clinch but Fight Ii moves out of range.
Wow, both these guys are really going for it!
Phoenix clinches.
Fight Ii blocks a body shot from Phoenix.
Phoenix pushes Fight Ii back against the cage and unloads with a body punch.
Fight Ii misses with some punches.
I was talking to Phoenix's coach per-fight and he was telling me that they'd been working on the clinch in the runup to this fight.
Phoenix lands a right uppercut that snaps the head of Fight Ii backwards.
Fight Ii swings wildly with an uppercut but Phoenix uses good head movement to avoid it.
A right hand to the body from Phoenix.
Phoenix avoids a wild elbow strike from Fight Ii.
Phoenix swings wildly with an uppercut but Fight Ii uses good head movement to avoid it.
Fight Ii makes some space for himself and lands an uppercut.
Phoenix misses with the head strike.
We've had a slow start to the round here - hopefully the action picks up.
Phoenix swings wildly with an uppercut but Fight Ii uses good head movement to avoid it.
Phoenix lands a left hand that snaps the head of Fight Ii backwards.
Fight Ii lands an elbow that stopped Phoenix in his tracks for a moment.
Fight Ii pushes off and circles away, back to the middle of the mat.
Fight Ii misses with a jab, cross combination.
The fans in attendance giving it up for the two fighters, who have really let it all hang out in the last minute or so!
Phoenix gets in close and instigates a clinch.
That's one minute gone in the round.
Fight Ii tries a shoulder strike but it doesn't do any damage.
Phoenix is leaning against Fight Ii and scores with a nice uppercut to the body.
Phoenix lands with a short head shot on the inside.
Fight Ii misses with an elbow over the top.
Fight Ii tries for a takedown but Phoenix manages to get underhooks.
Fight Ii has a couple of punches blocked by Phoenix.
Phoenix pushes Fight Ii back against the cage and unloads with a body punch.
Phoenix tries to throw a body punch but Fight Ii avoids it by throwing Phoenix back against the cage.
Phoenix cracks Fight Ii with a nice body shot.
Fight Ii swings wildly with an uppercut but Phoenix uses good head movement to avoid it.
With the fighters clinched against the cage, Phoenix creates a bit of distance for himself and scores with a nice uppercut.
Phoenix digs a right hand underneath Fight Ii's ribcage. Fight Ii let out a lung full of air as it connected.
Fight Ii looks winded!
Phoenix working on landing some head shots here - that one got through nicely.
A shot in the inside from Phoenix.
Phoenix lands with a good tight uppercut to the head.
Phoenix digs a right hand underneath Fight Ii's ribcage. Fight Ii let out a lung full of air as it connected.
This has been an exciting period of action!
Phoenix lands a hook that snaps the head of Fight Ii backwards.
A short left from Phoenix.
That's two minutes gone in the round.
Good body shot from Phoenix.
Phoenix lands punches inside but they're not really causing much damage.
Phoenix lands an uppercut.
Phoenix is working Fight Ii over against the cage.
Phoenix lands with a short shot to the head.
Phoenix makes some space for himself and lands an uppercut.

Fight Ii is rocked!
Phoenix lands with a quick shot inside that doesn't really do much damage.
Fight Ii is still on wobbly legs! Can Phoenix finish him?
Phoenix throws a big uppercut that drops Fight Ii! More strikes from Phoenix and the referee jumps in to stop the fight! Fight Ii lies dazed against the cage as Phoenix celebrates with his cornermen!
Ladies and gentlemen, after 2:31 of round 1, we have a winner by way of TKO (Strikes). Blake Phoenix!
A relieved looking Blake Phoenix thanked the fans for their support and gave the usual line about them being amazing. They seemed to believe that he actually meant it.
|
|
|
|
|
|
|
|
|
|
|
|
|
|
|
|
|
|
|
|
|
|
|
| S |
C
A |
G |
S |
C
B |
G |
|
S |
C |
G |
|
energy
A | B |
|
hype
A | B |
|
pop
A | B |
|
mgr
A | B |
|
FIGHT
RATING
62% |
|
|
|
|
|
|
|
Undercard bout
|
Coming up we have a light heavyweight MMA rules bout between Soyster Nine (ranked 7334 p4p, 642 weight class) and Scooby Ali (ranked 8187 p4p, 668 weight class). I can't wait for this one - let's get the fighter introductions out of the way and get this one started!
 |
|
 |
| 189 cm
18
210 lbs
1 - 1 - 0 |
|
191 cm
18
219 lbs
0 - 1 - 0 |
BJJ Blue Belt
Basic striking
Big heart |
|
Good wrestler
Brawler
Determined |
|
| |
|
Ladies and gentlemen. This fight is 3 rounds, in the light heavyweight division.
Introducing the fighter to my left, fighting out of the red corner.
With a record of
1 - 1 - 0, fighting out of Amsterdam, Soyster Nine!
And introducing the fighter to my right, fighting out of the blue corner.
With a record of
0 - 1 - 0, fighting out of Montreal, Scooby Ali!
The judges for this bout are Reed Andrews, Joseph Jones and Anthony Taglia.
The bell rings for round one and we are underway!
Ali shoots in for a takedown. He's persisting with it as Nine sprawls well. Nine wins this battle and keeps the fight standing. Ali gets slowly back to his feet.
Ali gets to the clinch - let's see what his plan is here.
Ali is trying to pull guard but Nine has him pressed against the cage.
Nine misses with some punches.
I was talking to Nine's coach per-fight and he was telling me that they'd been working on the clinch in the runup to this fight.
The fighters are pressed against the cage, as the pace of the fight slows.
Ali is trying to work for a single leg takedown but Nine pulls him back up using the underhooks.
Soyster Nine has stuffed three takedown attempts in the round now. That's going to take a lot out of Scooby Ali.
Ali is trying to drag Nine to the mat but Nine just about manages to keep his footing. He used the cage to his advantage there.
We've had a slow start to the round here - hopefully the action picks up.
Ali escapes the clinch and we're back to striking.
Nine moves into the clinch.
Ali jumps guard but his hands slip and he falls flat on his back. Well, he's made himself look a right mug there, as Nine walks away with a smile on his face. Ali gets slowly back to his feet and shakes his head.
Nine bobs and weaves and unloads with a good uppercut.
That's one minute gone in the round.
Nine tries to close the distance and clinch up but Ali swats him away and circles back towards the center.
Ali ducks under an overhand right and circles away with a smile on his face.
Ali walks into a left hand.
Ali changes levels and looks for a double leg takedown. Nine tries to avoid it but Ali manages to keep hold of a leg and drag Nine to the ground. Nine escapes though and pops straight back up to his feet.
The crowd cheers as Nine lands an impressive looking overhand right. Ali doesn't seem phased though.
Ali gets cracked there but stands up to it.
Nine throws a body shot but no joy.
Ali closes the distance and clinches.
Ali tries to pull guard but Nine won't allow it.
Ali is trying to work out of this bad position, with his back against the cage.
Nine lands punches inside but they're not really causing much damage.
Nine tries a body shot but Ali blocks it.
Nine swings wildly with an uppercut but Ali uses good head movement to avoid it.
Nine misses with a shot to the kidneys.
Nine doesn't land with the attempted body shot.
Nine doesn't land with the attempted body shot.
Come on Ali - let's have some action - none of this stalling nonsense.
That's two minutes gone in the round.
Ali breaks the clinch and we're back to striking at distance.
Nine pushing out the jab but it's not landing.
Nine with a nice cross.
We've seen a great period of action over the last minute or so - credit to both fighters for going all out!
Ali tries to close the distance and clinch up against the cage but Nine paws at him with a jab and circles away.
Nine tries to clinch but Ali moves out of range.
Soyster Nine seems to be the more aggressive standup fighter in this bout.
Horrible takedown attempt by Ali or perhaps it was just good defense by Nine, which made it look bad.
Ali takes a shot right to the liver - Bas would have been proud of that punch.
Ali moves his head to the side to avoid a jab but walks straight into a cross.
Ali fails with a takedown attempt from distance.
Ali fails with the takedown.
Nine checks the leg kick.
Ali rushes Nine and pushes him back against the cage in a clinch.
Nine is trying to slow down the pace of the fight but Ali is keeping busy.
That's three minutes gone in the round.
Ali has had enough of the clinch and is looking to separate.
An uppercut on the inside fails to land for Nine.
Ali blocks a body shot from Nine.
Ali pressing his opponent against the cage.
Ali blocks a couple of punches on the inside.
Ali escapes the clinch and we're back to striking.
Ali is looking to clinch but Nine is avoiding it.
Ali blocks a jab.
Nine feints a straight left to the body, then turns around with a flashy move and hits Alis jaw with a dramatic spinning back fist!
Ali shoots in for a takedown - he's clinched up with Nine but Nine pushes him off and we're back to square one.
Ali closes the distance and clinches up with Nine, looking for a takedown. Ali pushes Nine against the cage but Nine circles to the side and manages to break the clinch.
Nine scores with a reasonable looking shot to the body. Ali doesn't seem bothered though.
Ali closes the distance and clinches up with Nine, looking for a takedown. Ali pushes Nine against the cage but Nine circles to the side and manages to break the clinch.
That's four minutes gone in the round.
Ali closes the distance and clinches up with Nine, looking for a takedown. Ali pushes Nine against the cage but Nine circles to the side and manages to break the clinch.
Nine gets in close and instigates a clinch.
Nine misses with a punch to the body.
Nine tries to throw a body punch but Ali avoids it by throwing Nine back against the cage.
Nine throws a head punch that misses.
Ali blocks a punch to the side of the head.
Ali stalling here - the referee won't stand for too much of that.
Ali taking a breather.
Ali tries to take the fight to the ground by pulling guard but can't manage it.
Nine has Ali pressed against the cage, preventing Ali from circling away and getting back to striking at range.
Ali prevents a body shot from Nine.
Nine misses with a shot to the kidneys.
Nine doesn't land with the attempted body shot.

Ali pulls guard.
This has been an exciting period of action!
Nine drops back for a leg! It's a sloppy attempt though and Nine jumps back into guard quickly, to retain the dominant position.
Nine drops back for a leg! It's a sloppy attempt though and Nine jumps back into guard quickly, to retain the dominant position.
And thats the end of the round the fighters go back to their corners.
Soyster Nine dominated that round.
The fighters' corners scream their final instructions, as the referee calls time. Here we go, back to the action!
Ali tries to shoot in for a takedown. He's got hold of a leg but Nine swivels and escapes.
No luck with that takedown attempt from Ali.
Nine fakes and then throws a beautiful body shot. Ali looks a bit winded and takes a step backwards to take a breath.
Nine tries to land with a swinging hook to the body but Ali was well out of range. Poor timing from Nine.
Nice uppercut lands for Nine. That snapped Ali's head back.
Ali throws a hard body shot but it just misses.
Nine fakes a head punch and goes low to the body. Nicely done.
Ali swings wildly with a right hand that was never going to find it's target.
Ali slips a jab from Nine.
Nine throws a monster uppercut resembling something out of street fighter but it doesn't land.
We've had a slow start to the round here - hopefully the action picks up.
Nine keeps the fight standing with a nice sprawl.
Soyster Nine has stuffed three takedown attempts in the round now. That's going to take a lot out of Scooby Ali.
Ali wants to clinch up but Nine keeps it at a distance.
Nine misses with a body shot. Nice footwork from Ali.
Nine thuds a left hand into Ali's body.
Nine digs a good hook to Ali's body.
That's one minute gone in the round.
Nine misses with a body shot. Nice footwork from Ali.
Nine connects with a hook to the side of his opponent's head.
Nine moves away from the strike by Ali.
The fight stays on the outside here - Nine looks like he's thinking about clinching though.
Ali misses with a leg kick.
Ali tries to clinch but is not successful on this occasion.
Nine is moving around nicely and scores here with a single head shot.
Ali tries a switch kick but it misses it's target.
Nine fakes and then throws a beautiful body shot. Ali looks a bit winded and takes a step backwards to take a breath.
Ali looks for a takedown but Nine sprawls well.
Nine cracks Ali with a hook to the jaw. Both fighters smile at eachother and high-five before getting back down to business.
Nine closes the distance and pushes Ali back into the cage.
Nine holding his opponent close, against the cage.
That's two minutes gone in the round.
Nine misses with the head strike.
Nine tries to work over Ali's body with a swooping hook but it only glances the target.
A short left from Nine.
Nine misses with a shot to the kidneys.
Ali has dropped down and is looking to force the takedown but it's defended by Nine after a bit of a struggle.
We've seen a great period of action over the last minute or so - credit to both fighters for going all out!
Nine misses with some punches.
Ali blocking some punches.
Nine is pressed up against the cage. Ali has hold of a leg and is looking to drag Nine down to the mat. Nine avoids the attempt though and has circled away. We're back to striking at a distance.
Nice sprawl there from Ali as Nine shoots in.
Ali shoots in and drives through. Nine sprawls well.
Nine scores with a nice strike.
Nine displays good takedown defense there as he swats away a double leg from Ali.
Nine lands a really nice looking cross but Ali seems unphased.
Nine lands with a straight right. Ali didn't see that one coming.
That's three minutes gone in the round.
Nine ducks down and throws a hook to the body but Ali moves away.
Ali is trying hard to land a takedown here. Nine sprawls well and keeps this one on the feet.
Nine lunges at Ali with a hook that half lands and is half blocked by Ali's hand.
Nine misses with an uppercut.
Ali fakes high and shoots in for a takedown but Nine avoids it really well and circles away.
Ali is breathing heavily.
Ali looking to land some kicks to the body here.
A looping hook to the body misses from Nine. Ali does a little dance to reset his feet.
Nine misses with a body shot.
Nine throws an uppercut from half a mile away. Ali sees it coming and avoids it easily.
Nine displays some good footwork, moving neatly out of range as Ali throws out the jab.
Ali darts in looking for a takedown but Nine gets double underhooks and turns Ali into the cage.
Nine lands a right hook to the body.
Nine clinches up against the cage.
Nine lands with a right to the head.
That's four minutes gone in the round.
Ali is working for a takedown up against the cage. He can't get it on this occasion though.
Ali tries to take the fight to the ground by pulling guard but can't manage it.
Nine pressing his opponent against the cage.
Ali is looking for a takedown.
A right hook to the body lands for Nine.
Nine misses with a body punch.
Nice body punch from Nine - that landed with a thud.
This has been an exciting period of action!
Nine working aggressively here.
Ali tries to pull guard but Nine holds him up against the cage and eventually Ali drops back down to his feet.
Nine slows down the pace here.
Ali wants to break free but Nine has control.
And thats the end of the round the fighters go back to their corners.
Soyster Nine dominated that second round.
The fighters' corners scream their final instructions, as the referee calls time. Here we go, back to the action! Let's get this one finished - here comes the final round!
Nine moves into the clinch.
Nine misses with a hook from the clinch.
Ali decides to pull guard.
Nine drops back looking for a submission - "I'm sorry sir, but I'm gunna break your leg" says Nine as he cranks on the unfortunate limb! Ali screams and taps out before any major damage is done! Don't mess with Nine! Nice submission victory there!
Ladies and gentlemen, after 0:29 of round 3, we have a winner by way of Submission (Kneebar). Soyster Nine!
Jumping up and down and very excited, Soyster Nine waved his t-shirt featuring KAISER Nutrition - Q160's logo in front of the cameras.
|
|
|
|
|
|
|
|
|
|
|
|
|
|
|
|
|
|
|
|
|
|
|
| S |
C
A |
G |
S |
C
B |
G |
|
S |
C |
G |
|
energy
A | B |
|
hype
A | B |
|
pop
A | B |
|
mgr
A | B |
|
FIGHT
RATING
56% |
|
|
|
|
|
|
|
Undercard bout
|
Coming up we have a light heavyweight MMA rules bout between Billy Arseworth (ranked 5111 p4p, 547 weight class) and Captain Spaulding (ranked 9165 p4p, 706 weight class). Both fighters look fresh as a daisy as they make their way towards the cage.
 |
|
 |
| 188 cm
18
210 lbs
2 - 0 - 0 |
|
186 cm
18
210 lbs
0 - 2 - 0 |
Decent wrestler
Counter fighter
Self confident |
|
BJJ Blue Belt
Solid Muay Thai
Intelligent |
|
| |
|
Ladies and gentlemen. This fight is 3 rounds, in the light heavyweight division.
Introducing the fighter to my left, fighting out of the red corner.
With a record of
2 - 0 - 0, fighting out of New York, Billy Arseworth!
And introducing the fighter to my right, fighting out of the blue corner.
With a record of
0 - 2 - 0, fighting out of Tokyo, Captain Spaulding!
The judges for this bout are John Roberts, Anthony Taglia and Jonathan Paton.
The bell rings for round one and we are underway!
Arseworth lands with an uppercut that bounces Spaulding off the cage and back into range.
Arseworth lands a nice shot that snaps Spaulding's head back.
Spaulding scores with a hook.
Arseworth throws a jab but it's blocked by Spaulding.
Spaulding ducks under an overhand right and circles away with a smile on his face.
Arseworth avoids a punch combination nicely.
Spaulding lunges in with swinging rights and lefts but Arseworth circles away quickly and effectively.
Spaulding misses with a right hand
and Arseworth cracks him with a counter punch right on the button.
Arseworth has managed to clinch.
Arseworth prevents Spaulding from breaking the clinch.
An uppercut on the inside fails to land for Spaulding.
Spaulding throws a punch but it's blocked by Arseworth.
Arseworth blocks a couple of punches on the inside.
The fans in attendance giving it up for the two fighters, who have really let it all hang out in the last minute or so!
Spaulding escapes the clinch and we're back to striking.
Arseworth throws an overhand right that lands on Spaulding's shoulder, as Spaulding tries to avoid the shot.
Spaulding has been spending a lot of time sparring his boxing in the run up to the fight, trying to sharpen up those hands and look for a knockout.
Spaulding dips down and scores with a jab to the body.
Spaulding avoids a lazy jab quite easily.
Arseworth tests Spaulding's chin there with a solid looking shot.
That's one minute gone in the round.
A combination from Spaulding does no damage.
Spaulding throws an uppercut from half a mile away. Arseworth sees it coming and avoids it easily.
Spaulding swings wildly with a right hand that was never going to find it's target.
Arseworth misses with a wild body shot.
Spaulding scores with a sloppy punch to the body. Not much technique there but it did the business.
Spaulding throws the left hand but Arseworth avoids the punch easily.
Arseworth lands a jab.
Arseworth misses with a straight right.
Captain Spaulding seems to be the more aggressive standup fighter in this bout.
Arseworth has closed the distance and engaged Spaulding in a clinch.
A right hand to the body from Arseworth.
A quick uppercut on the inside from Arseworth.
Spaulding wants to break the clinch but can't.
Arseworth lands a body punch.
Spaulding looks winded!
Spaulding is trying to push Arseworth away but Arseworth has him pressed against the cage, so he's going nowhere.
Arseworth lands with a right to the head.
Spaulding prevents a body shot from Arseworth.
Arseworth pushes Spaulding back against the cage and lands a hook to the side of the head.
This is a great period of action - very entertaining stuff!
A nice right hand lands inside from Arseworth.
Spaulding is rocked!
That's two minutes gone in the round.
A shot in the inside from Arseworth.
Spaulding is still on wobbly legs! Can Arseworth finish him?
Arseworth digs a right hand into Spaulding's ribs. Those have got to be taking their toll on Spaulding's gas tank.
Arseworth digs a right hand into Spaulding's ribs. Those have got to be taking their toll on Spaulding's gas tank.
Arseworth scores with an uppercut up the middle.
Arseworth creates some distance for himself and unleashes a massive uppercut that sends Spaulding's eyes rolling into the back of his head! Spaulding drops to his knees and Arseworth pours it on with more strikes until the referee steps in to end the bout!
Ladies and gentlemen, after 2:16 of round 1, we have a winner by way of TKO (Strikes). Billy Arseworth!
Billy Arseworth decided to thank the fans in attendance for making a great atmosphere. It seemed to go down pretty well.
|
|
|
|
|
|
|
|
|
|
|
|
|
|
|
|
|
|
|
|
|
|
|
| S |
C
A |
G |
S |
C
B |
G |
|
S |
C |
G |
|
energy
A | B |
|
hype
A | B |
|
pop
A | B |
|
mgr
A | B |
|
FIGHT
RATING
65% |
|
|
|
|
|
|
|
Undercard bout
|
Coming up we have a light heavyweight MMA rules bout between King Jong Bwang (ranked 7834 p4p, 656 weight class) and Just Whymer (ranked 4636 p4p, 513 weight class). Bwang comes to the cage accompanied by Liberation. King Jong Bwang has the edge in experience - let's see if he can make that count tonight.
 |
|
 |
| 190 cm
18
205 lbs
2 - 1 - 0 |
|
194 cm
18
209 lbs
1 - 1 - 0 |
BJJ White Belt
Excellent MT
Good chin |
|
BJJ Blue Belt
Excellent boxer
Granite chin |
|
| |
|
Ladies and gentlemen. This fight is 3 rounds, in the light heavyweight division.
Introducing the fighter to my left, fighting out of the red corner.
With a record of
2 - 1 - 0, fighting out of Las Vegas, King Jong Bwang!
And introducing the fighter to my right, fighting out of the blue corner.
With a record of
1 - 1 - 0, fighting out of Las Vegas, Just Whymer!
The judges for this bout are Chad Campbell, Joseph Jones and Reed Andrews.
The bell rings for round one and we are underway!
Bwang looks to throw the jab but Whymer is out of range.
Whymer throws a hard body shot but it just misses.
Bwang lands with a straight right. Whymer didn't see that one coming.
Whymer scores with a sloppy punch to the body. Not much technique there but it did the business.
Whymer cracks Bwang with a right hand to the side of the head.
Whymer throws a nice hook to the body that draws an oooh from the crowd.
Bwang seems to be moving with more speed, compared to his last bout. He must have been working on that in the gym.
Whymer throws a combination but it was largely blocked by Bwang.
Whymer looks to land a right hand but Bwang moved out of range.
Bwang keeping a good distance there, avoiding the body shot.
Whymer throws a body punch but Bwang moves out of range.
Whymer takes the fight into the clinch.
Whymer lands a nice shot to the body.
Bwang has a couple of punches blocked by Whymer.
A nice left hand lands by Bwang.
The fans in attendance giving it up for the two fighters, who have really let it all hang out in the last minute or so!
Bwang tried to land a shot to the body but connects with Whymer's elbow.
Whymer misses with a hook from the clinch.
Whymer blocks an uppercut.
Bwang tries to work over Whymer's body with a swooping hook but it only glances the target.
That's one minute gone in the round.
Whymer blocks a couple of punches on the inside.
Bwang tries to throw a body punch but Whymer avoids it by throwing Bwang back against the cage.
Bwang misses with a body punch.
Bwang misses with a body punch.
Bwang lands with a light punch inside.
Bwang misses with a punch to the body.
A left hand lands to the body for Bwang.
Bwang cracks Whymer with a nice body shot.
Bwang lands with a short shot to the head.
Bwang swings wildly with an uppercut but Whymer uses good head movement to avoid it.
Whymer prevents a body shot from Bwang.
A head punch on the inside from Whymer fails to land.
Whymer lands with a right to the head.
Whymer has been looking to improve his clinch game in recent weeks. Bwang seems to have the measure of him in the clinch so far, so let's see if Whymer can turn it around.
Whymer letting Bwang take a breather here.
Bwang tried to land a shot to the body but connects with Whymer's elbow.
A short right hand to the side of the head by Whymer.
Whymer blocking some punches.
That's two minutes gone in the round.
Bwang misses with a hook from the clinch.
Bwang works for underhooks and lands a body shot in the process.
Whymer swings away with an uppercut that misses.
A body shot lands from Whymer.
Bwang works on Whymer's body with a couple of short punches.
This has been an exciting period of action!
Whymer's head jolts backwards as he takes an uppercut right on the button!
Whymer digs a right hand into Bwang's ribs. Those have got to be taking their toll on Bwang's gas tank.
Whymer blocks a couple of punches on the inside.
Bwang lands a left hand.
Whymer blocks an uppercut.
Bwang swings wildly with an uppercut but Whymer uses good head movement to avoid it.
Bwang blocks a body shot from Whymer.
Bwang tries a body shot but Whymer blocks it.
Whymer lands a short shot on the inside that snaps the head of Bwang backwards.
Bwang tries to land a shot to the body but it's blocked.
An uppercut to the body lands inside from Whymer.
Whymer lands with a short punch from the clinch.
Bwang struggles to land a body shot inside as Whymer controls his hands.
That's three minutes gone in the round.
Bwang tries a body shot but Whymer blocks it.

Bwang breaks the clinch and we're back to striking at distance.
Whymer throws a right and a left that both miss.
Bwang tests Whymer's chin there with a solid looking shot.
A looping hook to the body misses from Bwang. Whymer does a little dance to reset his feet.
Bwang steps to the side to avoid the strikes from Whymer.
Bwang throws a jab when Whymer was well out of range.
Whymer slips under a jab.
Whymer is looking to take this fight into the clinch.
A quick step to the side and Bwang tries to counter with a shot to the body but it doesn't connect.
Bwang staying out of range there.
Whymer lands a straight punch to the body, keeping Bwang at a distance.
Whymer avoids the body shot from Bwang.
Bwang fakes high and swings low for a body shot but Whymer manages to avoid it.
Whymer closes the distance and lands a one-two.

It looks like King Jong Bwang has been cut.
The fighters circle momentarily. Whymer darts into range and connects with a nice straight punch.
That's four minutes gone in the round.
This has been an exciting period of action!
A looping hook to the body misses from Whymer. Bwang does a little dance to reset his feet.
Whymer misses with an uppercut. Bwang saw that one coming.
Bwang throws a front kick aimed at Whymer's knee but Whymer avoids it well.
Whymer has managed to clinch.
Bwang lands with a right to the head.
Whymer blocks a body shot from Bwang.
Bwang tries to work over Whymer's body with a swooping hook but it only glances the target.
Whymer blocks an uppercut.
Bwang tries to throw a body punch but Whymer avoids it by throwing Bwang back against the cage.
Bwang blocks a couple of punches on the inside.
Whymer misses with a punch to the body.
Whymer lands with a left to the head.
Whymer can't find room to land a body shot as Bwang controls the action.
Whymer lands a right hand.
A head punch on the inside from Whymer fails to land.
Bwang tries a body shot but Whymer blocks it.
Whymer lands a hook to the side of the head.
And thats the end of the round the fighters go back to their corners.
A close round but Just Whymer will probably get the nod.
The cut man is working on King Jong Bwang's cut.
The fighters' corners scream their final instructions, as the referee calls time. Here we go, back to the action!
Whymer lands a body shot.
Whymer throws out a loose jab but Bwang uses good head movement to avoid it.
Whymer lands a body shot.
Bwang misses the jab.
Whymer slips a straight right by Bwang.
Whymer throws a series of punches but Bwang moves out of range.
Bwang is looking to counter with a shot to the body.
Whymer throws an uppercut from half a mile away. Bwang sees it coming and avoids it easily.
Whymer misses with a hook
and Bwang counters with a lovely straight right hand!
Bwang takes a swing at Whymer's ribcage but misses.
Whymer jabs Bwang to the body, keeping him at a distance.
Whymer keeping his hands up high there, blocking the jab from Bwang.
We've had a slow start to the round here - hopefully the action picks up.
A looping hook to the body misses from Bwang. Whymer does a little dance to reset his feet.
Whymer scores with a hook to the body. Bwang takes a step back and tries to catch his breath.
Bwang lands with a shot to the body.
Wooooo! Give it up for these two warriors! They are putting on a show!
A big left from Whymer misses.
Whymer swings for the body but Bwang moves out of range.
That's one minute gone in the round.
Whymer with a hook.
Bwang cracks Whymer with a good shot that sees him stumbling back into the cage.
Bwang misses with a straight right.
Whymer blocks a jab.
Whymer is throwing a lot of body shots here, looking to wear down Bwang rather than just go for the knockout.
Whymer lands a head shot.
Nice shot by Whymer.
Bwang is rocked!
Whymer ducks down into range and throws a picture perfect right hook that connects with Bwang's jaw. Bwang's eyes stare off into space as he falls to the mat, out cold! Whymer does the decent thing and steps back, rather than landing any shots to his unconscious opponent.
Ladies and gentlemen, after 1:33 of round 2, we have a winner by way of KO (Punch). Just Whymer!
Just Whymer decided to thank the fans in attendance for making a great atmosphere. It seemed to go down pretty well.
|
|
|
|
|
|
|
|
|
|
|
|
|
|
|
|
|
|
|
|
|
|
|
| S |
C
A |
G |
S |
C
B |
G |
|
S |
C |
G |
|
energy
A | B |
|
hype
A | B |
|
pop
A | B |
|
mgr
A | B |
|
FIGHT
RATING
60% |
|
|
|
|
|
|
|
Co-main event
|
Coming up we have a light heavyweight MMA rules bout between Anti Kristus (ranked 5522 p4p, 578 weight class) and Pablo Spezziale (ranked 4645 p4p, 514 weight class). Spezziale has chosen For Heavy Metal we will die! as his entrance music. I'm sure you'll be fascinated to know that I was talking to some pointless Z list celebrity before the fight and he thought that Pablo Spezziale was going to win. Let's see if he was right.
 |
|
 |
| 188 cm
18
215 lbs
2 - 0 - 0 |
|
200 cm
18
209 lbs
1 - 1 - 0 |
BJJ White Belt
Excellent MT
Good chin |
|
BJJ White Belt
Excellent boxer
Heavy handed |
|
| |
|
Ladies and gentlemen. This fight is 3 rounds, in the light heavyweight division.
Introducing the fighter to my left, fighting out of the red corner.
With a record of
2 - 0 - 0, fighting out of Helsinki, Anti Kristus!
And introducing the fighter to my right, fighting out of the blue corner.
With a record of
1 - 1 - 0, fighting out of Los Angeles, Pablo Spezziale!
The judges for this bout are Alyssa Summers, Bruno Lombardi and Chad Campbell.
The bell rings for round one and we are underway!
Spezziale throws a series of punches but Kristus moves out of range.
Spezziale moves out of range of the strikes.
It seemed like Spezziale was going to counter with the hook but didn't fully commit to it.
Kristus catches Spezziale with a nice straight right. He seems pissed - ooooh, it's on now! On like donkey kong!
Spezziale throws out a loose jab but Kristus uses good head movement to avoid it.
Spezziale bobs and weaves and unloads with a good uppercut.
Spezziale uses decent footwork to sidestep a right hand from Kristus.
A telegraphed right hand from Kristus misses the target.
Nice straight punches there by Spezziale. You know Roy Jones Jr respects the hands of Spezziale.
A punch lands to the side of Kristus 's head but he takes it in his stride.
Spezziale slips a jab and a cross from Kristus.
Spezziale throws out a counter right but Kristus avoids it with no problem.
Kristus ducks under a wild hook from Spezziale.
Kristus's corner calls for a 1, 2 combination and Kristus duly obliges.
The crowd are loving this. Great action here.
Kristus throws a lazy uppercut
and Spezziale counters with a stiff right hand.
Spezziale fakes high and swings low for a body shot but Kristus manages to avoid it.
Spezziale has used his reach advantage pretty well so far tonight.
Spezziale clobbers Kristus with an overhand right that has the crowd gasping. That made a horrendous noise.
Spezziale has done a lot of speed work in the buildup to this fight.
The fighters circle momentarily. Spezziale darts into range and connects with a nice straight punch.
Kristus walks into a stiff left hand from Spezziale.
Kristus avoids the body shot from Spezziale.
Kristus pushing out the jab but it's not landing.
That's one minute gone in the round.
Kristus looks to land a left hand but Spezziale moved out of range nicely.
Spezziale swings away with a counter right hand but no contact made.
Spezziale scores with a decent looking hook.
Kristus slips under a jab.
Spezziale ducks under a wild hook from Kristus.
Kristus throws out a token jab with nothing on it.
It seemed like Spezziale was going to counter with the hook but didn't fully commit to it.
Kristus darts in and out, connecting with a jab.
Spezziale ducks down and throws a hook to the body but Kristus moves away.
Nice cross by Spezziale.
Kristus looks to throw the jab but Spezziale is out of range.
Spezziale takes a step towards his opponent and connects with a left hand, before circling away.
Kristus lands a nice shot that snaps Spezziale's head back.
Spezziale is rocked!
Spezziale steps to the side to avoid the strikes from Kristus.
Spezziale is still on wobbly legs! Can Kristus finish him?
Kristus is really head hunting here, hardly looking to strike to the body at all.
Spezziale slips under a jab.
Spezziale doesn't fully commit to the body shot counter.
Kristus misses with a series of wild punches.
Spezziale seems to have recovered his senses.
Wooooo! Give it up for these two warriors! They are putting on a show!
Spezziale loads up on a big right hand but Kristus slips the punch.
Spezziale staying out of range there.
Kristus throws a lazy uppercut
and Spezziale counters with a stiff right hand.
Kristus throws a hook but Spezziale blocks it.
That's two minutes gone in the round.
Kristus walks straight into an uppercut. Luckily it didn't land flush.
Kristus is rocked!
Kristus jabbing away but nothing is landing.
Spezziale fakes a head shot and lands one to the body.
Kristus uses some good footwork to avoid the body shot by Spezziale.
Kristus is really struggling to find his range with his punches. Spezziale's reach advantage is clearly causing him problems.
Kristus throws a right and a left that Spezziale avoids nicely.
Spezziale will need to tighten up his combinations if he doesn't want to gas himself out, swinging at thin air.
Kristus looks to score with a combo but nothing lands.
Kristus waving his hands out in front of him, looking to distract Spezziale.
Spezziale has his head snapped back a nice jab. A little nod from Spezziale there as he acknowledges the shot.
A telegraphed right hand from Kristus misses the target.
Pablo Spezziale seems to be the more aggressive standup fighter in this bout.
Kristus misses the shot to the body.
Spezziale is using his reach advantage to land shots from outside his opponent's range.
Kristus scores with a punch to the head.
Spezziale lands a jab. Then a cross. Then finally a nice hook to the body. Good work there by Spezziale.
Kristus throws out a token jab with nothing on it.
Kristus looks to score with a combo but nothing lands.
Kristus misses with a body shot. Nice footwork from Spezziale.
That's three minutes gone in the round.
A right-left combo lands from Spezziale.
Oh Kristus is still all over the place! His legs are completely gone! Will he be able to recover?!!
Spezziale lands a jab to Kristus's midsection.
Kristus is breathing heavily.
Spezziale steps in with a hook that catches Kristus right on the chin and knocks him to the floor! Spezziale follows him down with more strikes and that's all she wrote! Kristus looks absolutely devastated.
Ladies and gentlemen, after 3:13 of round 1, we have a winner by way of TKO (Strikes). Pablo Spezziale!
A very excited looking Pablo Spezziale made sure he remembered to thank all the fans both in the arena and on the internet. He said all the coolest people spend all day on MMA websites, which got a big reaction.
The defeated Anti Kristus had this to say: 'WHERE'S THE BOOZE, GODDAMMIT!?!'.
|
|
|
|
|
|
|
|
|
|
|
|
|
|
|
|
|
|
|
|
|
|
|
| S |
C
A |
G |
S |
C
B |
G |
|
S |
C |
G |
|
energy
A | B |
|
hype
A | B |
|
pop
A | B |
|
mgr
A | B |
|
FIGHT
RATING
73% |
|
|
|
|
|
|
|
Main event
|
Coming up we have a light heavyweight MMA rules bout between David Brent (ranked 5027 p4p, 539 weight class) and ThorHGH Grasman (ranked 4580 p4p, 511 weight class). Brent comes to the cage accompanied by Freelove Freeway. The fight MMA fans around the world have waited their entire lives for!
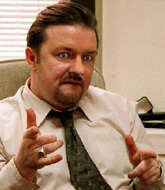 |
|
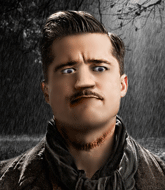 |
| 194 cm
18
210 lbs
3 - 0 - 0 |
|
190 cm
18
210 lbs
1 - 0 - 0 |
BJJ White Belt
Excellent MT
Big right hand |
|
BJJ White Belt
Excellent boxer
Solid chin |
|
| |
|
Ladies and gentlemen. This fight is 3 rounds, in the light heavyweight division.
Introducing the fighter to my left, fighting out of the red corner.
With a record of
3 - 0 - 0, fighting out of Las Vegas, David Brent!
And introducing the fighter to my right, fighting out of the blue corner.
With a record of
1 - 0 - 0, fighting out of Amsterdam, ThorHGH Grasman!
The judges for this bout are Jorge Garcia, John Roberts and Alyssa Summers.
The bell rings for round one and we are underway!
Grasman takes a shot to the body in his stride.
Grasman throws a hook but Brent avoids it easily.
Brent was looking to counter that last move with a shot to the body but he didn't commit.
A decent looking cross lands there for Brent.
It looks like ThorHGH Grasman has been cut.
Grasman swings wildly with a right hand that was never going to find it's target.
A counter left hand to the body from Brent misses its target.
A jab from Brent finds it's way through Grasman's defenses.
Brent looks to score with a jab to the body but Grasman is just out of range.
Grasman let fly with a counter punch to the body but it didn't land.
David Brent seems to be the more aggressive standup fighter in this bout.
Brent throws a lazy right hand but Grasman sees it coming a mile off and sidesteps it easily.
Brent connects with a jab.
Grasman takes a body punch that cleary hurt but he's trying not to show any weakness.
Brent is the aggressor but that punch slipped nicely by Grasman.
Grasman connects with the punch.
Brent takes a swing at Grasman's ribcage but misses.
We've seen a great period of action over the last minute or so - credit to both fighters for going all out!
Grasman throws a monster uppercut resembling something out of street fighter but it doesn't land.
That's one minute gone in the round.
Grasman loads up on a big right hand but Brent slips the punch.
Brent connects with a lovely jab that went straight through the gap between Grasman's hands.
Grasman gets his head snapped back by a nice shot there.
Brent throws a body shot but no joy.
Grasman looked like he wanted to counter with a punch but didn't throw it.
A swing and a miss from Grasman.
Grasman is pinned up against the cage taking some big shots here. The referee is looking closely deciding whether he should stop the fight.
Brent throws a hook but Grasman blocks it.
Grasman swings away with a counter right hand but no contact made.
Brent cracks Grasman with a hook to the jaw. Both fighters smile at eachother and high-five before getting back down to business.
Brent blocks a jab.
Brent throws a hook to the side of Grasman's head but Grasman sees it coming and ducks under it beautifully.
That's two minutes gone in the round.
Grasman missing with a left hand there. Brent was out of range so wasted energy throwing that one.
Brent definitely looks more muscular than last time we saw him fight.
Brent scores with a jab to the jaw.
Grasman is rocked!
Grasman ducks into an uppercut from Brent and that's knocked him out cold! This one is all over!
Ladies and gentlemen, after 2:18 of round 1, we have a winner by way of KO (Punch). David Brent!
A relieved looking David Brent thanked the fans for their support and gave the usual line about them being amazing. They seemed to believe that he actually meant it.
|
|
|
|
|
|
|
|
|
|
|
|
|
|
|
|
|
|
|
|
|
|
|
| S |
C
A |
G |
S |
C
B |
G |
|
S |
C |
G |
|
energy
A | B |
|
hype
A | B |
|
pop
A | B |
|
mgr
A | B |
|
FIGHT
RATING
50% |
|
|
|
|
|
|
|
|
|
|

