|
TWGC 20 (145lbs, D1): Amsterdam Qualifier - Round 1 PBP Commentary |
Undercard bout
|
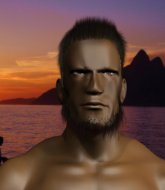
Coming up we have a featherweight Tycoon World Grappling Championship rules bout between Ben Henley (ranked 2865 p4p, 0 weight class) and Mike Charles (ranked 2596 p4p, 245 weight class). The crowd seem to be enjoying Charles's choice of entrance music: Pony. Both fighter's entrance songs getting the crowd jumping here.
This TWGC bout is 1 fifteen minute round in the featherweight division. Introducing today's competitors. In the red corner, competing out of London, with a TWGC record of 3 wins and 4 losses; Ben Henley! And in the blue corner, fighting out of London, with a TWGC record of 2 wins and 2 losses; Mike Charles!
The judges for this bout are Patrick Alders, Saam Ante and Aafke Stam.
Let's get this grappling contest under way! Who will be victorious?

Henley forces Charles back against the cage and clinches.

Charles has managed to pull guard. Let's see whether he can work an aggressive guard. It will also be interesting to see what tactics Henley uses from the top position.
Charles pulls Henley in close to his closed guard and prevents Henley from doing any damage or advancing position.
Henley trying to control the position from guard on top but Charles is wriggling around, looking for whatever he can.
Henley tries to free his leg and advance position but Charles is retaining full guard.
Charles pulls Henley in close to prevent any damage.
We've had a slow start to the round here - hopefully the action picks up.
Charles is working from a closed guard but he's struggling to control his opponent.
Henley seems content to control from guard here. He's going to have to remain active though if he doesn't want to get stood back up.

That's one minute gone in the round.

Charles had isolated an arm as going for a kimura. Henley defends it easily.
Henley slows down the pace of the fight, as he sits in guard.
Charles pulls Henley in close to prevent any damage.
Charles working a defensive guard but Henley manages to pass into side control anyway.
Score +3 for passing guard: Henley (3) vs (0) Charles
Charles seems a little lost for a moment, as Henley dominates the positioning.

That's two minutes gone in the round.
Henley wants to lay and pray for a moment but Charles keeps working.
Henley taking a breather here.
Henley seems to have a rather negative gameplan on the ground. He seems keen to just score the takedown and hold down Charles for as long as he can get away with.
Henley is looking to take a break and control but Charles is keeping him honest, looking to work from the bottom.
Charles tries to work a leg under to get back to half guard but Henley wriggles his own leg back out and remains in side control.
The fighters are pressed up against the cage, both looking to find a bit of space to work.
Henley trying to control the action but Charles is working from the bottom.
Charles is trying to get back to half guard.
Charles is letting Henley control him for a moment.

That's three minutes gone in the round.
Henley trying to control the action but Charles is working from the bottom.
Charles is trying to get back to half guard. He's pushing on Henley's leg. He's managed it. Nice work.
Charles is looking to regain full guard. Not this time though.
Charles is trying to control but can't.
Charles wants to control but Henley passes into side.
Score +3 for passing guard: Henley (6) vs (0) Charles
Henley moving around in side mount but really he's just happy to control for now.
Charles is looking to regain half guard here but Henley keeps moving and retains side control.

That's four minutes gone in the round.
Charles being controlled for a moment.
We've been hearing good reports from Henley's training camp. Apparently he has been rolling around with some good quality BJJ practitioners and has been sharpening his skills. Let's see if that has an impact on the fight today.

Henley is trying to get an arm triangle but Charles is defending well.
Henley trying to control the position but Charles is working away.
Charles struggling a bit here.
Henley staying calm.
Henley thinks about going for a far side armbar but bails out and retains the dominant position instead.

That's five minutes gone in the round.
Charles tries to get back to half guard but can't.
Henley wants to control for a moment but Charles uses the opportunity to move back to half guard.
Henley prevents Charles from improving his position.
Charles is trying to maintain the position but Henley is very close to passing his half guard.

That's six minutes gone in the round.
Henley is looking to take a break and control but Charles is keeping him honest, looking to work from the bottom.
Charles tries to get to full guard but Henley has control of the leg.
Henley is pressing down on Charles's thigh, looking to free his foot. Charles is holding on for now.
Henley is looking for an arm triangle, whilst trying to pass to side control. Charles doesn't seem that keen to cooperate though. No luck this time Henley.
Henley tries to pass the half guard into mount. Charles knows what he's doing though and prevents the attempt.
Henley is working hard here to advance position.

That's seven minutes gone in the round.
Henley is trying to work for a kimura but Charles is defending well.
Charles looking for submissions off his back.
Charles is trying to maintain the position but Henley is very close to passing his half guard.
Henley has hold of the far side arm. He's working for the Kimura, can Charles defend it? Henley steps over the head and cranks it - Charles is tapping out! That was textbook stuff right there - nice submission victory for Henley!
Ladies and gentlemen, after 7:39 of round 1, we have a winner by way of Submission (Kimura). Ben Henley!
Ben Henley really struggled to get his t-shirt on before his hand was raised. Making sure that Sully's Bar & Grill logo gets some air time is pretty tricky when you're all sweaty. |
|
|
|
Undercard bout
|
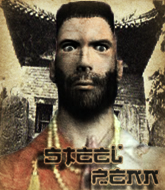
Coming up we have a featherweight Tycoon World Grappling Championship rules bout between Free Agent Steel Penn (ranked 17428 p4p, 0 weight class) and Jolly Leg Byrd (ranked 56 p4p, 12 weight class). I'm sure you'll be fascinated to know that I was talking to some pointless Z list celebrity before the fight and he thought that Jolly Leg Byrd was going to win. Let's see if he was right.
This TWGC bout is 1 fifteen minute round in the featherweight division. Introducing today's competitors. In the red corner, competing out of Hilo, with a TWGC record of 9 wins and 5 losses; Free Agent Steel Penn! And in the blue corner, fighting out of Los Angeles, with a TWGC record of 0 wins and 0 losses; Jolly Leg Byrd!
The judges for this bout are Saam Ante, Nard Betker and Albert Achterberg.
The official calls the fighters to the middle and the contest is under way.

Byrd gets a clinch.
Byrd has managed to pull guard. Let's see whether he can work an aggressive guard. It will also be interesting to see what tactics Steel Penn uses from the top position.
Steel Penn drops back, looking for a kneebar! Byrd looks panicked! The fighters roll across the mat, one looking to finish, one looking to escape. Byrd looks to have wriggled free... Yes, he's got his leg free and he's dived into side control! Good work there from Byrd! Score +4 for clean sweep to past guard: Steel Penn (0) vs (4) Byrd
Byrd taking a breather here.
Steel Penn tries to bench press Byrd off him but Byrd keeps the position.
We've had a slow start to the round here - hopefully the action picks up.
Byrd taking a breather here.
The ref warns both fighters not to hold the cage as they work up against the meshing.
That's one minute gone in the round.
Byrd moves into full mount! Score +2 for reaching mount: Steel Penn (0) vs (6) Byrd
Byrd is trying to take his opponent's back.
Steel Penn is wriggling around trying to escape.
Byrd controlling his opponent.
Steel Penn wants to control but Byrd is having none of it.
That's two minutes gone in the round.
Byrd sitting in mount, just looking to control for the moment.
Steel Penn really trying hard to get back to half guard here.
Byrd tucks in and makes sure he doesn't lose the dominant position.
Steel Penn is writhing around trying to get back to his feet.
That's three minutes gone in the round.
Steel Penn doing his best to control the position. Can he escape?
Steel Penn is working to get back to half guard.
Byrd takes a little breather and maintains the position. The referee will be looking for him to stay active from such a dominant position though.
Byrd avoids the attempt from Steel Penn to control.
Byrd sitting in mount, just looking to control for the moment.
Byrd fails to take his opponent's back.
That's four minutes gone in the round.
Steel Penn is looking to get to half guard.
The fighters are starting to get a bit slippery now, which will make submissions a bit more difficult.
Steel Penn tries to lock up and control but Byrd gives him a forearm to the face and pushes him away.
Byrd controlling his opponent.
Steel Penn is trying to escape the mount.
Byrd controlling from the full mount.
Steel Penn is trying to escape the mount.
Byrd controlling his opponent.
That's five minutes gone in the round.
Steel Penn is desperately trying to get back to half guard.
We've been hearing good reports from Steel Penn's training camp. Apparently he has been rolling around with some good quality BJJ practitioners and has been sharpening his skills. Let's see if that has an impact on the fight today.
That's six minutes gone in the round.
Steel Penn wants to control but Byrd is having none of it.
Steel Penn defends a decent attempt at a guillotine from Byrd.
Steel Penn wants to hold on but Byrd pushes him away.
Byrd content just to control the position here.
The fighters are pressed up against the cage, both looking to find a bit of space to work.
Byrd wants to take his opponent's back but he's not managed it.
Byrd sitting in mount, just looking to control for the moment.
That's seven minutes gone in the round.
Steel Penn is desperately trying to improve his position but Byrd has a good base and remains in mount.
Steel Penn is working hard here to advance position.
Byrd controlling from mount.
Steel Penn is looking to get to half guard.

That's eight minutes gone in the round.
Byrd is dominating on the ground here - he's now on his opponent's back, looking to sink in the hooks. Steel Penn is in real trouble.
Score +3 for taking back: Steel Penn (0) vs (9) Byrd
I really don't envy Steel Penn right now.
Byrd just keeping the dominant position. He can't wait too long though, otherwise the referee will stand them back up.

That's nine minutes gone in the round.
Byrd is not going to allow Steel Penn to sit and survive in this position.
What can Steel Penn do to escape this position? He's going to have to figure it out pretty quick if he wants to stay in the fight!
Byrd wants to control but Steel Penn is keeping busy.

That's ten minutes gone in the round.
Byrd keeps control of the position easily here as Steel Penn tries to buck him off.
Steel Penn looks to control his opponent's hands but he's not mananging it at the moment.
So, who will make the next big move? In this position it could be crucial.
You can see the frustration on Steel Penn's face
He knows he is in trouble unless he improves his position sooner rather than later.

That's eleven minutes gone in the round.
So, who will make the next big move? In this position it could be crucial.
Byrd is not going to allow Steel Penn to sit and survive in this position.
Byrd is looking cool and calm here, just waiting for a good opportunity to attack and finish the fight from this dominant position.

That's twelve minutes gone in the round.
Byrd tries to get the hooks in deep but Steel Penn pushed the leg off.
Byrd controls the position.
Steel Penn is in bad spot here.

That's thirteen minutes gone in the round.
Byrd controls the position.
Will Byrd go for the finish here or will he try and keep control of the position?
I would not like to be Steel Penn right now.
Steel Penn looking very determined here, making life difficult for Byrd.

That's fourteen minutes gone in the round.
Byrd has good solid back control here.
Byrd tries to get the hooks in deep but Steel Penn pushed the leg off.
Boooooooooooooooooooo!!! God, this has been a terrible round. Come on you two, sort yourselves out!
Steel Penn wants to escape the position.
Byrd trying to secure his dominant position for a moment - making sure Steel Penn doesn't escape.
Steel Penn looks to control his opponent's hands but he's not mananging it at the moment.
And that's the end of the fight!
Byrd wins on points by 9 to 0.
Jolly Leg Byrd took to the mic in his post fight interview and said 'Hello, top 10!'. |
|
|
|
Co-main event
|
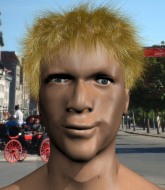
Coming up we have a featherweight Tycoon World Grappling Championship rules bout between Masa Wasa (ranked 2468 p4p, 263 weight class) and Mr Ward (ranked 15510 p4p, 0 weight class). Wasa comes to the cage accompanied by Welcome To The Jungle. Both fighters will be looking to make this an exciting fight for the fans, I'm sure!
This TWGC bout is 1 fifteen minute round in the featherweight division. Introducing today's competitors. In the red corner, competing out of New York, with a TWGC record of 5 wins and 7 losses; Masa Wasa! And in the blue corner, fighting out of Hilo, with a TWGC record of 6 wins and 6 losses; Mr Ward!
The judges for this bout are Daniel Blasius, Aafke Stam and Paulsen Ambrosius.
The fighters bow as they face eachother in the middle of the mat and we are under way.

Wasa closes the distance and gets a double leg, slamming Ward to the mat! Ward manages to get full guard. Score +2 for takedown into guard / half guard: Wasa (2) vs (0) Ward
Wasa wants to control from the top but Ward keeps moving.
Ward trying to control the position here.
The fighters are pressed up against the cage, both looking to find a bit of space to work.
Ward is working an open guard here, looking to improve his position. No doubt that will leave him open to counters but at least he's being more offensive.
Wasa advances position into side control! Score +3 for passing guard: Wasa (5) vs (0) Ward
We've had a slow start to the round here - hopefully the action picks up.
Wasa controlling the position.
Wasa advances nicely into full mount. Score +2 for reaching mount: Wasa (7) vs (0) Ward
That's one minute gone in the round.
Wasa looking to control and managing it successfully.
Ward has given up his back - I dont know if this is a deliberate ploy to try and escape or if he is just struggling down there.
Score +3 for taking back: Wasa (10) vs (0) Ward
Wasa looking to break Ward's wrist control so he can sink in the choke. Ward remaining controlled and patient though - he really has to keep calm otherwise Wasa will wrap this one up with the rear naked choke!
I would not like to be Ward right now.
Ward preventing the rear naked choke attempt from Wasa.
Ward rolls and manages to get back to half guard. Nicely done.
That's two minutes gone in the round.
Ward regains full guard. Nicely done.
Ward seems keen to control Wasa's posture.
Wasa slips nicely into half guard.
Ward wants to control but Wasa is keeping busy and won't allow it.
Ward wants to improve his position but Wasa is controlling well.
Wasa works his way into side control. Score +3 for passing guard: Wasa (13) vs (0) Ward
That's three minutes gone in the round.
Wasa trying to control the action but Ward is working from the bottom.
Wasa happy to just control the position for now.
Wasa thinks about going for a far side armbar but bails out and retains the dominant position instead.
That's four minutes gone in the round.
Ward keeping his opponent close.
Wasa controlling from side mount.
Wasa looking for an arm triangle but it's way too loose to do anything.
Ward can't do much from the bottom here.
That's five minutes gone in the round.
Wasa trying to control the position but Ward is working away.
Wasa will need to keep those long limbs tucked in whilst he's on the ground, to prevent any submissions.
That's six minutes gone in the round.
Ward is moving his hips around well on the bottom and has managed to get back to half guard.
Wasa wants to free his trapped foot but Ward is holding on for dear life with his legs.
Wasa is looking to stall here but Ward recovers full guard.
Wasa trying to control but Ward is working from the bottom.
That's seven minutes gone in the round.
Ward wants to sweep but no luck.
Wasa is just sitting in guard, looking to avoid any submissions.
Wasa trying to control but Ward is working from the bottom.
Ward wants to improve his position but instead Wasa has moved into half guard.
Ward tries to roll over but Wasa keeps him under control.
That's eight minutes gone in the round.
Wasa seems very keen to just sit and control from half guard but Ward does not like that idea so much and is remaining active off his back.
Wasa wants to pass to mount but Ward is defending the position.
Wasa seems to be working for a kimura but Ward defends the submission attempt.
Wasa is sneakily working for an arm triangle but Ward sees it coming and defends easily.
Wasa is trying to control. Ward wants to improve his position but can't escape this time.
That's nine minutes gone in the round.
Wasa content to control rather than advance.
The fighters are battling for position here. Ward manages to regain full guard. Nice work.
Ward is looking to sweep but instead, Wasa has passed into half guard.
Wasa wants to work for an arm triangle but Ward is really keeping half guard well and defending the submission attempt.
Wasa is trying to control. Ward wants to improve his position but can't escape this time.
Ward is trying to control but can't.
That's ten minutes gone in the round.
Wasa trying to control the pace.
Wasa wants to pass to mount but Ward is defending the position.
Wasa moves into full mount! Ward won't be happy about that! Score +3 for passing guard: Wasa (16) vs (0) Ward
Ward is squirming around, avoiding Wasa's attempts to control the action.
Wasa wants to take Ward's back here but Ward is holding on to an arm, himself looking to escape.
That's eleven minutes gone in the round.
Wasa trying to control but he's not successful this time.
Wasa wants to take Ward's back but he can't do it this time.
Ward is squirming around, avoiding Wasa's attempts to control the action.
That's twelve minutes gone in the round.
Ward prevents Wasa from taking his back.
Ward working to try and regain half guard.
Ward sneaks a leg back under and regains half guard and is working straight away to try and get back to guard. He hasn't managed just yet though.
Wasa is working for a submission of some sort.
Wasa seems content to maintain position for now, rather than mounting any offense.
That's thirteen minutes gone in the round.
Wasa is looking for a kimura here.
Ward tries to roll over but Wasa keeps him under control.
Wasa is pressing down on Ward's thigh, looking to free his foot. Ward is holding on for now.
That's fourteen minutes gone in the round.
Wasa wants to control but Ward is keeping him busy.
Wasa is working for a kimura but Ward is defending it quite comfortably.
Ward is looking to control Wasa's leg but it's slowly edging free. Can Ward avoid being mounted?
The ref warns both fighters not to hold the cage as they work up against the meshing.
Boooooooooooooooooooo!!! God, this has been a terrible round. Come on you two, sort yourselves out!
Wasa looks over to his corner - he wants some instructions but his corner are not responding.
Wasa is trying to control the action in half guard but Ward is working away on the bottom, looking perhaps to get back to full guard.
And that's the end of the fight!
Wasa takes the fight on points by 16 to 0.
After winning the bout, Masa Wasa thanked all his fans and promised he'd do even better in his next fight. The crowd seemed to love his humility. |
|
|
|
Main event
|
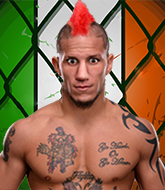
Coming up we have a featherweight Tycoon World Grappling Championship rules bout between Gaia Ky Jr (ranked 19185 p4p, 0 weight class) and Alex Coxall (ranked 1680 p4p, 86 weight class). Both fighters look fresh as a daisy as they make their way towards the cage.
This TWGC bout is 1 fifteen minute round in the featherweight division. Introducing today's competitors. In the red corner, competing out of Montreal, with a TWGC record of 2 wins and 7 losses; Gaia Ky Jr! And in the blue corner, fighting out of Tokyo, with a TWGC record of 1 wins and 4 losses; Alex Coxall!
The judges for this bout are Aafke Stam, Nard Betker and Saam Ante.
The fighters bow as they face eachother in the middle of the mat and we are under way.
Ky Jr shoots in and drives through. Coxall sprawls well.
Coxall closes the distance and pushes Ky Jr back into the cage.
Coxall is looking for a takedown up against the cage. Ky Jr gets underhooks though and prevents the takedown attempt.
Coxall gets control of Ky Jr's arms and successfully pulls guard. Coxall will no doubt be looking for submissions off his back.
Ky Jr pressing down on his opponent's thigh, looking to pass guard. Coxall is keeping the position for now.
Ky Jr will need to keep those long limbs tucked in whilst he's on the ground, to prevent any submissions.
Coxall tries to land a sweep but no joy.
Coxall wants to control here, rather than go for any submissions from the bottom. At least for now.
Ky Jr stands up and looks to throw the legs aside to pass to side control. Coxall swivels though and keeps the full guard.
Coxall is trying to keep Ky Jr in close.
We've had a slow start to the round here - hopefully the action picks up.
Ky Jr trying to pass the guard but can't manage it just yet.
Ky Jr's corner is telling him to maintain position.
Ky Jr pressing down on his opponent's thigh, looking to pass guard. Coxall is keeping the position for now.
That's one minute gone in the round.
Coxall working a defensive guard here.
Ky Jr wants to pass the guard but Coxall is keeping the position.
Ky Jr sitting in guard here, content to control.
Coxall is looking for a triangle but Ky Jr pushes his legs off easily.
Ky Jr not doing a lot at the moment. He'll have to show some more aggression or the fight will get stood up.
Coxall has a closed guard, preventing anything of note from happening. Perhaps he's looking to stall.
The ref warns both fighters not to hold the cage as they work up against the meshing.
Ky Jr advances to half guard.
Coxall has his hands clasped together around Ky Jr's back. He's all about the action.
That's two minutes gone in the round.
Ky Jr controlling the action here.
The fighters are pressed up against the cage, both looking to find a bit of space to work.
Coxall is looking to regain full guard. Not this time though.
Ky Jr trying to pass the guard but Coxall defending well.
Coxall looking for submissions from an awkward position here.
Ky Jr is controlling the pace.
Ky Jr trying to mount his opponent but Coxall defends it.
That's three minutes gone in the round.
Well, if Ky Jr is going to just lie there, perhaps we should talk about what we're having for dinner tonight
I'm having a ham and pineapple pizza
Yum. Can't wait.
Ky Jr looking to pass the half guard. Not this time.
Ky Jr is looking for a kimura but Coxall is holding onto that half guard position, so it's hard for Ky Jr to get the leverage.
Ky Jr is looking to pass the guard... He's managed it - he's now in full mount! Score +3 for passing guard: Ky Jr (3) vs (0) Coxall
Ky Jr trying to control but Coxall is having none of it.
Ky Jr controlling the position easily from mount.
That's four minutes gone in the round.
Ky Jr avoids the attempt from Coxall to control.
Ky Jr tucks in and makes sure he doesn't lose the dominant position.
Ky Jr tries to control but Coxall wriggling away.
Coxall wants to hold on but Ky Jr pushes him away.
Coxall sneaks a leg under to get to half guard.
Coxall felt the need to train up his defensive grappling in the buildup to the fight. Presumably he was expecting to be in a difficult position like this, so let's see if he can get out of it.
That's five minutes gone in the round.
Coxall trying to control from the bottom.
Ky Jr content to sit in half guard and control for a moment.
Ky Jr moves nicely into side control. Score +3 for passing guard: Ky Jr (6) vs (0) Coxall
Coxall is trying to control Ky Jr's posture but Ky Jr avoids it.
Ky Jr controls the position from side control.
Coxall sneaks a leg under to get back to half guard.
That's six minutes gone in the round.
Ky Jr is just content to waste time from the top position. Coxall takes advantage of the situation and regains full guard.
Coxall trying to keep a closed guard but Ky Jr is proving a slippery customer.
Ky Jr looking to control the position here, rather than advance.
Ky Jr wants to control from the top but Coxall keeps moving.
Ky Jr seems content to control from guard here. He's going to have to remain active though if he doesn't want to get stood back up.
Ky Jr advances position into side control! Score +3 for passing guard: Ky Jr (9) vs (0) Coxall
That's seven minutes gone in the round.
Ky Jr tries to advance to mount but can't.
Coxall is not content to let Ky Jr control the position.
Coxall is looking for a sweep.
Ky Jr is looking to take a break and control but Coxall is keeping him honest, looking to work from the bottom.
Coxall can't do much from the bottom here.
That's eight minutes gone in the round.
The referee asks Ky Jr politely if he wouldn't mind getting on with it and actually doing something. Ky Jr prefers to stall for the moment though.
Coxall manages to get back to half guard.
Ky Jr has freed up his trapped foot and advances to mount. Score +3 for passing guard: Ky Jr (12) vs (0) Coxall
Ky Jr trying to control but Coxall is having none of it.
Ky Jr tucks in and makes sure he doesn't lose the dominant position.
Coxall is squirming around, avoiding Ky Jr's attempts to control the action.
That's nine minutes gone in the round.
Ky Jr avoids the attempt from Coxall to control.
Ky Jr trying to control but he's not successful this time.
Ky Jr looking to control and managing it successfully.
Coxall keeping his composure momentarily, calmly looking to get back to half guard.
Ky Jr controlling the pace for now.
That's ten minutes gone in the round.
Coxall tries to lock up and control but Ky Jr gives him a forearm to the face and pushes him away.
Coxall working to try and regain half guard.
Coxall slips a leg in and gets back to half guard.
Coxall won't allow Ky Jr to pass to mount.
Ky Jr works his way into side control. Score +3 for passing guard: Ky Jr (15) vs (0) Coxall
Ky Jr tries for an arm triangle. That looks pretty tight to me. Is this one over!?! Possibly, maybe, no Ky Jr has let go of the choke. Obviously it wasn't as tight as we thought!
Ky Jr looking to control but instead Coxall has slipped a leg in, to regain half guard.
Ky Jr is trying to control. Coxall wants to improve his position but can't escape this time.
Ky Jr content to control rather than advance.
That's eleven minutes gone in the round.
Coxall trying to hold on to Ky Jr's head to control him but Ky Jr postures up.
Coxall is trying to avoid being dragged into an even worse position than he's already in but Ky Jr is staying active.
Neither fighter is being very active at the moment, with Ky Jr in particular looking to stall.
Ky Jr seems to have a rather negative gameplan on the ground. He seems keen to just score the takedown and hold down Coxall for as long as he can get away with.
Ky Jr looking to pass the half guard. Not this time.
Coxall keeping hold of Ky Jr's head, controlling as best he can.
That's twelve minutes gone in the round.
Coxall trying to control but Ky Jr postures up.
The referee calls for the fighters to work.
Coxall trying to control here.
Ky Jr trying to control the action but Coxall is working from the bottom.
Coxall is trying to get back to full guard.
Coxall wants to control but Ky Jr is keeping busy and won't allow it.
That's thirteen minutes gone in the round.
Ky Jr sitting and controlling from the half guard.
Coxall wants to control but Ky Jr is keeping busy and won't allow it.
Ky Jr content to sit in half guard and control for a moment.
Ky Jr tries to pass to full mount but Coxall defends it.
Coxall is staying active underneath Ky Jr, who seems content to just control the action from this position.
Ky Jr trying to advance position but Coxall counters by regaining guard.
Ky Jr is taking a break and basically stalling. The referee will not allow him to do that for long.
Coxall has his hands on Ky Jr's head, controlling the position.
That's fourteen minutes gone in the round.
Ky Jr tries to free his leg and advance position but Coxall is retaining full guard.
Coxall being controlled here, momentarily.
Ky Jr works a leg free and moves into half guard.
Coxall wants to control but Ky Jr is keeping busy and won't allow it.
Ky Jr is taking a breather. Coxall says something to him but it's hard to make out. Perhaps he's telling him to get on with it and actually do something.
Boooooooooooooooooooo!!! God, this has been a terrible round. Come on you two, sort yourselves out!
Coxall wants to control but Ky Jr is keeping busy.
And that's the end of the fight!
Ky Jr takes the fight on points by 15 to 0.
In his post fight interview, Gaia Ky Jr started talking himself up. Luckily his charisma kept the crowd on side and gave him a good reception. |
|
|
|
|
|
|