 |
IXF 16 PBP Commentary |
Undercard bout
|
|
|
|
Undercard bout
|
|
|
|
Undercard bout
|
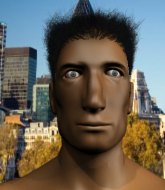
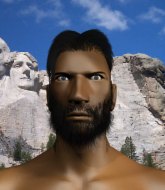
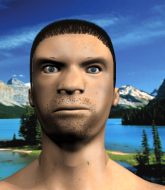
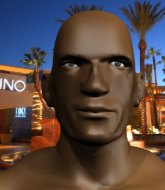
Coming up we have a super heavyweight MMA rules bout between Mortimer Bob Holley (ranked 3894 p4p, 144 weight class) and Android Twenty (ranked 5490 p4p, 193 weight class). Holley's ring entrance music is that housewives' favourite, Grillmasters - Sizzling. Mortimer Bob Holley has the better chin. Will he look to stand and bang today?
 |
|
 |
| 182 cm
25
289 lbs
2 - 1 - 0 |
|
225 cm
25
300 lbs
2 - 1 - 0 |
Good wrestling
Decent elbows
Granite chin |
|
Dangerous GnP
Excellent boxer
Powerful |
|
| |
|
Ladies and gentlemen. This fight is 3 rounds, in the super heavyweight division.
Introducing the fighter to my left, fighting out of the red corner.
With a record of
2 - 1 - 0, fighting out of The Island, Mortimer Bob Holley!
And introducing the fighter to my right, fighting out of the blue corner.
With a record of
2 - 1 - 0, fighting out of The Island, Android Twenty !
The judges for this bout are Daniel Franklin, Sandra Marshall and Santiago Holmes.

The bell rings for round one and we are underway!
Holley swings and misses with a hook to the body.
Holley with a jab.
Holley has been working on his boxing with his coaches at Island Safe Space in the buildup to the fight.
Holley ducks down and throws a hook to the body but Twenty moves away.
Holley with a hook.
Holley avoids a punch combination nicely.
Twenty throws a jab but it's blocked by Holley.
Holley seemed to be looking to counter by closing the distance.
Twenty throws a right and a left that both miss.
Twenty throws a body shot but no joy.
Holley just misses with a punch to the body.
Holley lands an overhand left. A wild punch that just about connected.
Twenty misses with the combination.
Twenty throws a body punch but Holley moves out of range.
Holley jabs Twenty to the body, keeping him at a distance.
Holley moves his head to the side to avoid a jab but walks straight into a cross.
This has been an exciting period of action!
Twenty lands a jab.

It looks like Mortimer Bob Holley has been cut.
Holley works the jab nicely.

That's one minute gone in the round.
Twenty pivots, looking for a leg kick but Holley is out of range and Twenty settles back down.
Twenty scores with the left hand. Holley knows he should have avoided that one.
A shot to the liver by Holley. Beautiful body shot.
Holley ducks down and throws a hook to the body but Twenty moves away.
Twenty looks to score with a jab to the body but Holley is just out of range.
Twenty misses with a hook
and Holley counters with a quick right hand to the jaw.
Holley dips down and scores with a jab to the body.
Holley is looking to wear down Twenty with body shots, infact he's throwing more body shots than head shots at the moment.
Holley looks to score with a jab to the body but Twenty is just out of range.
Twenty dips down and scores with a jab to the body.
Twenty takes a solid shot to the body. That one hurt him but he's trying not to show it.
Holley throws a hard body shot but it just misses.
Twenty feints the counter takedown.
Twenty throws a body shot but no joy.
Holley listening to his corner there, landing a nice uppercut.
The crowd cheering loudly, showing their appreciation for the quality fight we're seeing here.
Twenty throws a hard body shot but it just misses.
A telegraphed right hand from Twenty misses the target.
Twenty tries to land with a swinging hook to the body but Holley was well out of range. Poor timing from Twenty .
Twenty takes a shot to the body in his stride.
Holley throws a hook to the body but it doesn't connect.

That's two minutes gone in the round.
Holley fakes and then throws a beautiful body shot. Twenty looks a bit winded and takes a step backwards to take a breath.
Holley scores with a shot to the body.
Twenty looks to land a combination but Holley avoids it well.
Twenty misses with a hook. Holley ducked under it nicely.
Holley takes a swing at Twenty 's ribcage but misses.
Nice shot by Twenty .
Twenty misses with a combination
and Holley counters with a nice jab to the body that keeps Twenty thinking.
Twenty looks winded!
Good shot there by Holley.
Holley lands a jab to Twenty 's midsection.
Twenty swings away with a leg kick that misses.
Decent striking displayed by Holley there.
Holley lands a right hook to the body.
Twenty ducks down and throws a hook to the body but Holley moves away.
Holley wants to take advantage of his opponent's missed offense by moving into the clinch.
Holley throws a hard body shot but it just misses.
Twenty swings away with a counter right hand but no contact made.
Holley throws a body punch but Twenty moves out of range.
Holley just misses with a punch to the body.

That's three minutes gone in the round.
Holley scores with a reasonable looking shot to the body. Twenty doesn't seem bothered though.
Holley swings for the body but Twenty moves out of range.
Twenty throws a combination but comes up with nothing but fresh air.

Holley gets in close and instigates a clinch.
Holley lands with a short head shot on the inside.
Holley lands a nice elbow from the clinch.
Holley works on Twenty 's body with a couple of short punches.
Holley tries to land knees in the clinch but Twenty avoids the damage to the body.
Knees in the clinch landing for Holley.
Knees to the body from Holley.
Holley lands a short shot on the inside that snaps the head of Twenty backwards.
With the fighters clinched against the cage, Holley creates a bit of distance for himself and scores with a nice uppercut.
The crowd cheering loudly, showing their appreciation for the quality fight we're seeing here.
Holley lands punches inside but they're not really causing much damage.

Twenty is rocked!
An uppercut to the body lands inside from Holley.
Twenty is still on wobbly legs! Can Holley finish him?
Holley gets an overhook and lands an elbow to the side of the head.
Holley lands a big right hand that drops Twenty ! The killer instinct kicks in and Holley finishes his opponent with a series of strikes from mount. A dominating finish by Holley!
Ladies and gentlemen, after 3:58 of round 1, we have a winner by way of TKO (Strikes). Mortimer Bob Holley!
Post fight, Mortimer Bob Holley took to the microphone: 'Come on, now give me food and fast. Im starving!
Hi mom!'.
|
|
|
|
|
|
|
|
|
|
|
|
|
|
|
|
|
|
|
|
|
|
|
| S |
C
A |
G |
S |
C
B |
G |
|
S |
C |
G |
|
energy
A | B |
|
hype
A | B |
|
pop
A | B |
|
mgr
A | B |
|
FIGHT
RATING
67% |
|
|
|
|
|
|
|
Undercard bout
|
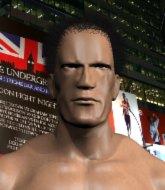
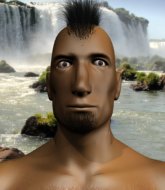
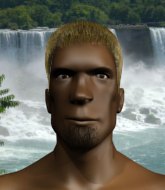
Coming up we have a super heavyweight MMA rules bout between Cheese Daddy (ranked 2864 p4p, 114 weight class) and Candy Routure (ranked 4804 p4p, 173 weight class). Both fighters look pumped up here. Let's hope this is a good fight!
 |
|
 |
| 191 cm
25
300 lbs
3 - 1 - 0 |
|
195 cm
25
300 lbs
1 - 1 - 0 |
Good wrestling
Basic striking
Very quick |
|
BJJ White Belt
Good kicks
Granite chin |
|
| |
|
Ladies and gentlemen. This fight is 3 rounds, in the super heavyweight division.
Introducing the fighter to my left, fighting out of the red corner.
With a record of
3 - 1 - 0, fighting out of The Island, Cheese Daddy!
And introducing the fighter to my right, fighting out of the blue corner.
With a record of
1 - 1 - 0, fighting out of The Island, Candy Routure!
The judges for this bout are David Hoff, Daniel Franklin and Winston Alpacca.
The bell rings for round one and we are underway!
Daddy takes a punch to the jaw and another one to the bread basket.
Routure misses with a body shot.
A solid body kick from Routure.
Daddy will have to do better than that with his takedown attempts.
Routure scores with a push kick.
Routure gets off balance looking for a body kick

and Daddy counters with a takedown into side control.
Routure tries to get back to his feet but has found himself mounted instead. Damn, that's gotta suck.
We could do with one of the fighters taking the initiative a bit more on the ground - they're both waiting to capitalize on a mistake.
This has been an exciting period of action!

Routure is flailing around, obviously not happy about being mounted. Daddy locks hold of one of his arms and spins for an armbar. He's got it! Routure is forced to tap!
Ladies and gentlemen, after 0:41 of round 1, we have a winner by way of Submission (Armbar). Cheese Daddy!
|
|
|
|
|
|
|
|
|
|
|
|
|
|
|
|
|
|
|
|
|
|
|
| S |
C
A |
G |
S |
C
B |
G |
|
S |
C |
G |
|
energy
A | B |
|
hype
A | B |
|
pop
A | B |
|
mgr
A | B |
|
FIGHT
RATING
100% |
|
|
|
|
|
|
|
Undercard bout
|
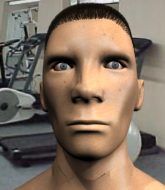
Coming up we have a light heavyweight MMA rules bout between Maunu Tua (ranked 2886 p4p, 373 weight class) and Sam Langford (ranked 3824 p4p, 466 weight class). Sam Langford will no doubt be trying to keep this one on the feet, where he has a distinct advantage.
 |
|
 |
| 182 cm
25
210 lbs
4 - 0 - 0 |
|
178 cm
23
220 lbs
2 - 0 - 0 |
BJJ Blue Belt
Solid boxing
Good chin |
|
BJJ White Belt
Excellent MT
Determined |
|
| |
|
Ladies and gentlemen. This fight is 3 rounds, in the light heavyweight division.
Introducing the fighter to my left, fighting out of the red corner.
With a record of
4 - 0 - 0, fighting out of The Island, Maunu Tua!
And introducing the fighter to my right, fighting out of the blue corner.
With a record of
2 - 0 - 0, fighting out of The Island, Sam Langford!
The judges for this bout are Michael Johnstone, Daniel Franklin and Bart Greer.
The bell rings for round one and we are underway!
Langford scores with a hook.
Langford lands with an overhand left.
Langford just misses with a punch to the body.
Good standup being displayed there by Langford as he connects with a hook.
Langford fails with an attempt to clinch.
Tua is looking to counter with a shot to the body.
Tua has his hands up protecting his head but a hook from Langford finds it's way round the side to connect with Tua's head.

Langford gets a clinch.
A short right from Langford on the inside.
Tua gets the body lock takedown. After a quick scramble, Langford regains guard.
Wooooo! Give it up for these two warriors! They are putting on a show!

Langford escapes his hips to the side and looks to be working for an armbar. Tua gives him a little smile and shakes his head. No chance.
Langford is working from a closed guard but he's struggling to control his opponent.
Tua stays in close to Langford's body and controls the position.
Langford had isolated an arm as going for a kimura. Tua defends it easily.
The fighters are pressed up against the cage, both looking to find a bit of space to work.
Tua trying to control the position from guard on top but Langford is wriggling around, looking for whatever he can.
That's one minute gone in the round.
Tua is pushing down on Langford's leg trying to pass to half guard. Langford is fighting to maintain full guard but Tua has managed to sneak the leg through.
Langford has hold of Tua's hands but Tua slips his arm to the side and lands an elbow.
Tua content to sit in half guard and control for a moment.
Langford tries to roll over but Tua keeps him under control.
Langford is looking to sinch up a guillotine here but Tua pulls his head out easily.
Langford really doesn't want to stay on the ground with Tua. If he can't get it back to his feet, it's only a matter of time before he'll be tapping out.
Tua is just sitting in half guard, waiting for something to happen.
Tua passes to full mount!
We get told so often about how wrestlers don't like to be on their backs. Let's see if Langford can do anything to dispel that myth.
Langford is desperately trying to improve his position but Tua has a good base and remains in mount.
That's two minutes gone in the round.
Tua wants to control the pace but Langford is squirming around nicely.
Langford swinging wildly from the bottom but he's not landing.
Tua controlling from the full mount.
Langford is desperately trying to get back to half guard.
Tua raining down hammerfists from mount.
Langford is desperately trying to improve his position but Tua has a good base and remains in mount.
Tua breaks from Langford's wrist control and lands an elbow.
Langford tries to reverse the position but Tua maintains control.
Tua looking to finish Langford with some ground and pound. This is bad for Langford!
Langford can't escape the position.
The crowd cheering loudly, showing their appreciation for the quality fight we're seeing here.
Tua is landing with some decent strikes but Langford is trying to advance his position so the referee is letting the fight continue.
Langford tries to get back to half guard but can't.
That's three minutes gone in the round.
Tua landing strikes, looking to finish!
Langford tries to get back to half guard but can't.
Tua working for a submission but Langford is keeping him at bay.
Langford is in all sorts of trouble here.
Tua landing strikes from the mount.
Langford is trying desperately to improve position.
Tua controlling from mount.
Tua punishing his opponent with strikes.
Tua dominating with strikes here.
Tua raining down hammerfists from mount.

That's four minutes gone in the round.
This has been an exciting period of action!
Tua looking to control and managing it successfully.
Langford tries to reverse the position but Tua maintains control.
Tua trying to control but he's not successful this time.
Tua lands with some strikes.
Tua avoids the attempt from Langford to control.
Tua looks to be in better condition than last time we saw him fight. Obviously he's been working hard on his cardio.
Tua can't quite control the action as he would like just now, as Langford is looking to escape.
Tua landing punches.
Langford tries to reverse the position but Tua maintains control.
Tua with good strikes from the mount here!
Tua pausing momentarily but resumes with a couple of decent strikes that do a bit of damage.
And thats the end of the round the fighters go back to their corners.
Maunu Tua dominated that round.
The fighters' corners scream their final instructions, as the referee calls time. Here we go, back to the action!

Langford looks to land a combination but Tua avoids it well.
Tua shoots in and gets a takedown into Langford's guard.
Tua stands and throws Langford's legs to the side, diving into side control.
Langford is looking to reverse the position.
Tua happy to just control the position for now.
Langford tries to improve position but can't.
Langford is not in a great position here, taking some shots.
The referee tells the fighters to keep busy.
We've had a slow start to the round here - hopefully the action picks up.
Tua working the ground and pound.
Langford trying to control but Tua flips him over like a cheap hooker and has his back!
Langford has hold of Tua's leg, trying to break free but it's let Tua lock up a rear naked choke! This could be big trouble! Langford is turning an unusual color here
he's out! Tua throws him to one side and jumps onto the cage to celebrate with his fans.
Ladies and gentlemen, after 1:58 of round 2, we have a winner by way of Submission (RNC). Maunu Tua!
After winning the bout, Maunu Tua thanked all his fans and promised he'd do even better in his next fight. The crowd seemed to love his humility.
|
|
|
|
|
|
|
|
|
|
|
|
|
|
|
|
|
|
|
|
|
|
|
| S |
C
A |
G |
S |
C
B |
G |
|
S |
C |
G |
|
energy
A | B |
|
hype
A | B |
|
pop
A | B |
|
mgr
A | B |
|
FIGHT
RATING
53% |
|
|
|
|
|
|
|
Undercard bout
|
Coming up we have a heavyweight MMA rules bout between Rick Roller (ranked 3831 p4p, 385 weight class) and Heavy HeavyWeight (ranked 3966 p4p, 395 weight class). Heavy HeavyWeight is staring across the cage at his opponent, tweaking his nipples.
 |
|
 |
| 198 cm
25
285 lbs
3 - 3 - 0 |
|
185 cm
25
280 lbs
2 - 1 - 0 |
Decent wrestler
Solid Muay Thai
Granite chin |
|
Good wrestler
Brawler
Powerful |
|
| |
|
Ladies and gentlemen. This fight is 3 rounds, in the heavyweight division.
Introducing the fighter to my left, fighting out of the red corner.
With a record of
3 - 3 - 0, fighting out of The Island, Rick Roller!
And introducing the fighter to my right, fighting out of the blue corner.
With a record of
2 - 1 - 0, fighting out of The Island, Heavy HeavyWeight!
The judges for this bout are Sandra Marshall, Peter Branson and Dirk Anderson.
The bell rings for round one and we are underway!
HeavyWeight looks to land a combination but Roller avoids it well.
HeavyWeight lunges at Roller with a hook that half lands and is half blocked by Roller's hand.
Roller tries to keep at a distance but HeavyWeight has taken the fight into the clinch.
HeavyWeight blocking some punches.
An uppercut on the inside fails to land for Roller.
Roller lands an uppercut.

It looks like Heavy HeavyWeight has been cut.
HeavyWeight's head jolts backwards as he takes an uppercut right on the button!
Roller doesn't land with the attempted body shot.
Roller tries to throw a body punch but HeavyWeight avoids it by throwing Roller back against the cage.
Roller tries to work over HeavyWeight's body with a swooping hook but it only glances the target.
HeavyWeight tries to work over Roller's body with a swooping hook but it only glances the target.
We've had a slow start to the round here - hopefully the action picks up.
Roller misses with a short punch on the inside.
A head punch blocked on the inside by HeavyWeight.
Roller definitely looks more muscular than last time we saw him fight.
HeavyWeight doesn't land with the attempted body shot.
Roller tries to land a shot to the body but it's blocked.
HeavyWeight struggles to land a body shot inside as Roller controls his hands.
Roller struggles to land a body shot inside as HeavyWeight controls his hands.
That's one minute gone in the round.
An uppercut to the body lands inside from HeavyWeight.
Roller misses with a body punch.
Roller misses with a shot to the kidneys.
HeavyWeight presses Roller against the cage and delivers a mid-strength body shot.
HeavyWeight lands a hook that snaps the head of Roller backwards.
A short right from HeavyWeight on the inside.
A body shot lands from HeavyWeight.
Roller is breathing heavily.
HeavyWeight blocking some punches.
A head punch on the inside from Roller fails to land.
HeavyWeight lands a hook to the side of the head.
HeavyWeight struggles to land a body shot inside as Roller controls his hands.
Roller swings away with an uppercut that misses.
Roller misses with a short punch on the inside.
HeavyWeight pushes Roller back against the cage and lands a hook to the side of the head.
HeavyWeight blocking some punches.
HeavyWeight misses with the head strike.
HeavyWeight lands a body shot.
A short right hand to the side of the head by HeavyWeight.
HeavyWeight looks more muscular than last time we saw him. He must have been on the weights.
That's two minutes gone in the round.
The crowd are loving this. Great action here.
Roller prevents a body shot from HeavyWeight.
A short uppercut from HeavyWeight.
Roller's head jolts backwards as he takes an uppercut right on the button!
Roller misses with a shot to the kidneys.
Roller fails to land with a short punch on the inside.
HeavyWeight lands with a light punch inside.
It looks like Rick Roller has been cut.
HeavyWeight prevents Roller from breaking the clinch.
A hook to the body from HeavyWeight.
HeavyWeight scores with a shot to the side of Roller's head.
HeavyWeight makes some space for himself and lands an uppercut.

Roller is rocked!
HeavyWeight is working Roller over against the cage.
An uppercut to the body lands inside from HeavyWeight.
HeavyWeight lands a right hand.
Oh Roller is still all over the place! His legs are completely gone! Will he be able to recover?!!
A right hook to the body lands for HeavyWeight.
HeavyWeight lands an uppercut in the clinch that drops Roller to his knees! HeavyWeight keeps firing more shots against his stricken opponent and the referee jumps in to save him!
Ladies and gentlemen, after 2:53 of round 1, we have a winner by way of TKO (Strikes). Heavy HeavyWeight!
During a confident post fight interview, Heavy HeavyWeight thanked all his fans. He seemed very genuine when describing how motivated his fans keep him.
|
|
|
|
|
|
|
|
|
|
|
|
|
|
|
|
|
|
|
|
|
|
|
| S |
C
A |
G |
S |
C
B |
G |
|
S |
C |
G |
|
energy
A | B |
|
hype
A | B |
|
pop
A | B |
|
mgr
A | B |
|
FIGHT
RATING
52% |
|
|
|
|
|
|
|
Undercard bout
|
Coming up we have a middleweight MMA rules bout between Eric Alequin (ranked 3146 p4p, 357 weight class) and Romulo Nascimento (ranked 3538 p4p, 402 weight class). Both fighters really staring each other down here, as Romulo Nascimento enters the cage!
 |
|
 |
| 181 cm
25
188 lbs
2 - 1 - 0 |
|
188 cm
25
191 lbs
2 - 1 - 0 |
Powerful takedowns
Basic striking
KO power |
|
BJJ Brown Belt
Counter fighter
Powerful |
|
| |
|
Ladies and gentlemen. This fight is 3 rounds, in the middleweight division.
Introducing the fighter to my left, fighting out of the red corner.
With a record of
2 - 1 - 0, fighting out of The Island, Eric Alequin!
And introducing the fighter to my right, fighting out of the blue corner.
With a record of
2 - 1 - 0, fighting out of The Island, Romulo Nascimento!
The judges for this bout are Bart Greer, Daniel Franklin and Peter Branson.
The bell rings for round one and we are underway!
Alequin misses with an uppercut. Nascimento saw that one coming.
Alequin tries to clinch there but Nascimento circles away.
Alequin swings widly with a right hand
and Nascimento counters by moving into the clinch. Good anticipation by Nascimento.
Nascimento blocks an uppercut.
Alequin throws a head punch that misses.
Nascimento throws a punch but it's blocked by Alequin.

Nascimento has Alequin pressed up against the cage. He's trying to work for a single leg takedown. Nascimento pulls back from the cage and twists to the side, sending Alequin tumbling to the mat - Nascimento dives into Alequin's guard.
Nascimento seems content to control from guard here. He's going to have to remain active though if he doesn't want to get stood back up.
Alequin looking for submissions from the bottom here. Moving his hips around, possibly looking for an armbar.
We've had a slow start to the round here - hopefully the action picks up.
Nascimento drops back looking for a leg! Alequin is in trouble here! The fighters roll with the hold and Alequin manages to kick Nascimento off! Nascimento jumps back into Alequin's guard.
Nascimento slips effortlessly into side control - very nice.
The fighters are pressed up against the cage, both looking to find a bit of space to work.
That's one minute gone in the round.
Alequin is looking to regain half guard here but Nascimento keeps moving and retains side control.
Nascimento controlling from side mount.
Nascimento working away.
Alequin is looking for a sweep.
Nascimento is trying to get an arm triangle but Alequin is defending well.
Nascimento tries to cartwheel into mount but he doesn't manage it.
Alequin's coaches at ELITE Island Gym - 19 Elite Coaches have been working on his defensive grappling in preparation for this fight so let's see if he can get out of this tricky position.
Nascimento takes a little break here. Alequin wants to take advantage but he is being controlled well.
That's two minutes gone in the round.
The crowd are hurling abuse towards the fighters... You can hardly blame them though because there isn't a lot going on in the fight.
Alequin tries to bench press Nascimento off him but Nascimento keeps the position.
Nascimento has knee on belly and moves into mount.
Alequin really trying hard to get back to half guard here.
Alequin is working hard here to advance position.
Nascimento tries to control but Alequin wriggling away.
Nascimento looks more muscular than last time we saw him. He must have been on the weights.
Alequin tries to hold on but Nascimento pushes him away.
Nascimento working for a submission here. He's tucked his head under his opponent's arm, looking for an arm triangle. He's hopped off into side control, looking to tighten the submission... is it going to work? He's given up a good position looking for it. Alequin looks OK. Oh, I spoke too soon, he's out! That must have been tighter than I thought! Excellent work there by Nascimento! Submission of the night perhaps?
Ladies and gentlemen, after 3:59 of round 1, we have a winner by way of Submission (Arm Triangle). Romulo Nascimento!
Romulo Nascimento spent the whole post fight interview bigging himself up. It didn't go down that well with the fans after a while as they thought it was a bit arrogant.
|
|
|
|
|
|
|
|
|
|
|
|
|
|
|
|
|
|
|
|
|
|
|
| S |
C
A |
G |
S |
C
B |
G |
|
S |
C |
G |
|
energy
A | B |
|
hype
A | B |
|
pop
A | B |
|
mgr
A | B |
|
FIGHT
RATING
32% |
|
|
|
|
|
|
|
Undercard bout
|
Coming up we have a middleweight MMA rules bout between Thomas Turbano (ranked 2390 p4p, 291 weight class) and La Requis (ranked 2813 p4p, 330 weight class). Over to our ring announcer for the fighter introductions!
 |
|
 |
| 188 cm
25
186 lbs
3 - 0 - 0 |
|
186 cm
25
190 lbs
3 - 0 - 0 |
BJJ White Belt
Excellent boxer
Good chin |
|
BJJ White Belt
Excellent MT
Heavy handed |
|
| |
|
Ladies and gentlemen. This fight is 3 rounds, in the middleweight division.
Introducing the fighter to my left, fighting out of the red corner.
With a record of
3 - 0 - 0, fighting out of The Island, Thomas Turbano!
And introducing the fighter to my right, fighting out of the blue corner.
With a record of
3 - 0 - 0, fighting out of The Island, La Requis!
The judges for this bout are Michael Johnstone, Bart Greer and Daniel Franklin.
The bell rings for round one and we are underway!
Turbano misses the shot to the body.
Turbano avoids the clinch attempt nicely.
Turbano dips down and scores with a jab to the body.
Requis looks shocked there as he takes a right hand to the temple.
Requis ducks under a wild hook from Turbano.
Turbano throws a nice hook to the body that draws an oooh from the crowd.
Thomas Turbano seems to be the more aggressive standup fighter in this bout.
Turbano ducks low and lands a nice hook to the body of his opponent.
Requis closes the distance and clinches.
Turbano tries a shoulder strike but it doesn't do any damage.
Turbano gets through Requis's defenses to land a nice punch to the side of the head.
It looks like La Requis has been cut.
Requis's coach down at Island Safe Space was telling us pre-fight that they have been working on Requis's balance. Obviously they view that as a key factor in the outcome of this fight.
Requis fails to land with a short punch on the inside.
Requis misses with a hook from the clinch.
Requis lands a nice looking hook to the body, against the cage.
Turbano lands a left hand that snaps the head of Requis backwards.
This is a great period of action - very entertaining stuff!
Turbano working on landing some head shots here - that one got through nicely.
Turbano is leaning against Requis and scores with a nice uppercut to the body.
That's one minute gone in the round.
Requis swings wildly with an uppercut but Turbano uses good head movement to avoid it.
Turbano working aggressively here.
Turbano is trying to force a seperation but Requis has the dominant position.
A nice left hand lands by Turbano.
Turbano blocks a couple of punches on the inside.
A short uppercut from Requis.
Turbano goes for a body shot but it's blocked.
Turbano softening up his opponent with strikes, against the cage.
Requis has a couple of punches blocked by Turbano.
Turbano goes for a body shot but it's blocked.
Requis tries a shoulder strike but it doesn't do any damage.
Requis tries a shoulder strike but it doesn't do any damage.
Requis misses with some punches.
Requis misses with a punch on the inside.
Turbano scores with a nice hook to the head.
A head punch blocked on the inside by Turbano.
That's two minutes gone in the round.
A head punch blocked on the inside by Requis.
Turbano throws a punch but it's blocked by Requis.
Come on Requis - let's have some action - none of this stalling nonsense.
Turbano lands a shoulder strike.
This has been an exciting period of action!
A head punch blocked on the inside by Turbano.
A head punch blocked on the inside by Turbano.
Turbano working aggressively here.
Requis fails to land with a short punch on the inside.
Requis blocks a punch to the side of the head.
Turbano working some nice short punches in the clinch.
Requis goes for a body shot but it's blocked.
Turbano softening up his opponent with strikes, against the cage.
Requis misses with a short punch on the inside.
Requis misses with a body punch.
Requis takes a shot to the head.
Requis blocks a punch to the side of the head.
Good anti-grappling being displayed by Turbano as Requis tries to tie him up.
That's three minutes gone in the round.
Requis misses with a hook to the ribs.
Turbano lands a left hand that snaps the head of Requis backwards.
Turbano lands a hook that snaps the head of Requis backwards.
Turbano misses with some punches.
Requis lands a hook that snaps the head of Turbano backwards.
Still in the clinch, Requis scores with a nice short uppercut.
Turbano lands a body punch.
Turbano throws a head punch that misses.
Turbano fails to land with a short punch on the inside.
Requis doesn't land with the attempted body shot.
Turbano scores with a shot to the side of Requis's head.
Requis can't find room to land a body shot as Turbano controls the action.
With the fighters clinched against the cage, Turbano creates a bit of distance for himself and scores with a nice uppercut.
Turbano working on landing some head shots here - that one got through nicely.
Requis swings wildly with an uppercut but Turbano uses good head movement to avoid it.
The crowd cheering loudly, showing their appreciation for the quality fight we're seeing here.
Requis blocks a punch to the side of the head.
That's four minutes gone in the round.
Turbano blocks a punch to the side of the head.
Requis misses with a punch on the inside.
Requis blocks a punch to the side of the head.
Turbano misses with a shot to the kidneys.
Turbano makes some space for himself and lands an uppercut.
Turbano tries to break the clinch but Requis is controlling the position.
Requis throws a punch but it's blocked by Turbano.
Turbano tries to land a shot to the body but it's blocked.
Turbano lands a nice looking hook to the body, against the cage.
Turbano scores with a shoulder strike.

Turbano escapes the clinch and we're back to striking.
Turbano seems to be moving with more speed, compared to his last bout. He must have been working on that in the gym.
Turbano swings for the body but Requis moves out of range.
Requis tries to clinch but is not successful on this occasion.
Turbano looks to score with a jab to the body but Requis is just out of range.
Requis clinches up with Turbano and pushes him back against the cage.
Still in the clinch, Turbano scores with a nice short uppercut.
And thats the end of the round the fighters go back to their corners.
Thomas Turbano dominated that round.
The cut man is working on La Requis's cut.
The fighters' corners scream their final instructions, as the referee calls time. Here we go, back to the action!
Requis takes one to the chin there.
Turbano connects with a crisp jab.
Requis moves into range and clinches up with Turbano.
A short right from Requis.
Requis misses with a punch on the inside.
The fighters are starting to get sweaty, which will make takedowns a bit more tricky.
Turbano working on landing some head shots here - that one got through nicely.
Requis tried to land a shot to the body but connects with Turbano's elbow.
A head punch on the inside from Turbano fails to land.
Turbano prevents a body shot from Requis.
Turbano misses with a shot to the kidneys.
Turbano lands a body shot.
We've had a slow start to the round here - hopefully the action picks up.
A short left from Turbano.
A head punch blocked on the inside by Requis.
A short uppercut from Turbano.
That has opened up La Requis's cut even more.
This is a great period of action - very entertaining stuff!
Turbano lands a nice shot to the body.
Turbano lands with a short head shot on the inside.
Requis takes a shot to the head.
Requis is rocked!
That's one minute gone in the round.
Requis misses with a hook from the clinch.
We are yet to see a takedown attempt from Requis in the fight. On paper you would think he is the more dominant ground fighter so let's see if these unusual tactics pay off.
Turbano gets through Requis's defenses to land a nice punch to the side of the head.
Requis is still on wobbly legs! Can Turbano finish him?
Thomas Turbano has scored more points in the clinch so far.
Requis misses with a short punch on the inside.
Requis seems to have recovered his senses.
A head punch blocked on the inside by Turbano.
Turbano lands a right hand that snaps the head of Requis backwards.
Turbano fails to land with a short punch on the inside.
Requis lands with a short head shot on the inside.
Requis misses with a punch to the body.
Turbano lands with a light punch inside.
A head punch on the inside from Requis fails to land.
Turbano scores with a shoulder strike.
Turbano is really dominating this fight. Is there anything that Requis can do to turn this around?
Requis throws a head punch that misses.
Turbano tries to work over Requis's body with a swooping hook but it only glances the target.
A head punch blocked on the inside by Requis.
Turbano works on Requis's body with a couple of short punches.
Turbano blocks a punch to the side of the head.
Requis tries a shoulder strike but it doesn't do any damage.
Requis tries to work over Turbano's body with a swooping hook but it only glances the target.
That's two minutes gone in the round.
Turbano working aggressively here.
This has been an exciting period of action!
A head punch on the inside from Requis fails to land.
A head punch blocked on the inside by Turbano.
Requis misses with a punch on the inside.
Turbano swings wildly with an uppercut but Requis uses good head movement to avoid it.
Turbano lands a shoulder strike that jolts his opponent's head backwards.
Nice body punch from Turbano.
Turbano makes some space for himself and lands an uppercut.
Requis blocks a body shot from Turbano.
Turbano prevents a body shot from Requis.
Turbano blocks a couple of punches on the inside.
A head punch on the inside from Requis fails to land.
Turbano lands punches inside but they're not really causing much damage.
Turbano pushes Requis back against the cage and unloads with a body punch.
Turbano working aggressively here.
An uppercut on the inside fails to land for Turbano.
That's three minutes gone in the round.
Still in the clinch, Turbano scores with a nice short uppercut.
Turbano lands a nice uppercut.
Turbano lands a right hand.
Turbano scores with a shoulder strike.
Requis misses with a short punch on the inside.
Requis misses with a hook from the clinch.
Requis misses with a punch on the inside.
Turbano lands a nice shot to the body.
Requis is breathing heavily.
Turbano lands a right uppercut that snaps the head of Requis backwards.
Turbano lands a right hand that snaps the head of Requis backwards.
Turbano tries a shoulder strike but it doesn't do any damage.
Requis swings wildly with an uppercut but Turbano uses good head movement to avoid it.
Turbano works for underhooks and lands a body shot in the process.
Requis is working hard here but doesn't seem to be able to control effectively, up against the cage.
Turbano blocks an uppercut.
A hook to the body from Turbano.
That's four minutes gone in the round.
This is a great period of action - very entertaining stuff!
Turbano wants to push off and get back to the center of the mat but Requis has him pressed against the cage.
Turbano lands with a short punch from the clinch.
Turbano lands a big right hand that drops Requis! The killer instinct kicks in and Turbano finishes his opponent with a series of strikes from mount. A dominating finish by Turbano!
Ladies and gentlemen, after 4:19 of round 2, we have a winner by way of TKO (Strikes). Thomas Turbano!
|
|
|
|
|
|
|
|
|
|
|
|
|
|
|
|
|
|
|
|
|
|
|
| S |
C
A |
G |
S |
C
B |
G |
|
S |
C |
G |
|
energy
A | B |
|
hype
A | B |
|
pop
A | B |
|
mgr
A | B |
|
FIGHT
RATING
68% |
|
|
|
|
|
|
|
Co-main event
|
Coming up we have a light heavyweight MMA rules bout between Berry Mycokiner (ranked 1952 p4p, 260 weight class) and Little Tony (ranked 2114 p4p, 282 weight class). Man, I cannot wait for this one!
 |
|
 |
| 194 cm
25
215 lbs
4 - 0 - 0 |
|
193 cm
25
205 lbs
4 - 2 - 0 |
BJJ White Belt
Excellent MT
Big heart |
|
Decent wrestler
Solid Muay Thai
Granite chin |
|
| |
|
Ladies and gentlemen. This fight is 3 rounds, in the light heavyweight division.
Introducing the fighter to my left, fighting out of the red corner.
With a record of
4 - 0 - 0, fighting out of The Island, Berry Mycokiner!
And introducing the fighter to my right, fighting out of the blue corner.
With a record of
4 - 2 - 0, fighting out of The Island, Little Tony!
The judges for this bout are Bart Greer, Peter Branson and Sandra Marshall.
The bell rings for round one and we are underway!
Tony avoids the body shot from Mycokiner.
Mycokiner slips a jab from Tony.
Mycokiner throws a jab when Tony was well out of range.
Mycokiner lands with a nice body punch.
Tony ducks under a wild hook from Mycokiner.
Tony throws a nice looking combination but Mycokiner bobs and weaves to avoid any damage.
Mycokiner tries to counter by moving into the clinch but Tony manages to circle out of the way.
Mycokiner looks to throw the jab but Tony is out of range.
Tony looks more muscular than last time we saw him. He must have been on the weights.
Mycokiner misses with a shot to the body
and Tony counters with a quick right hand to the jaw.
Tony gets cracked there but stands up to it.
Mycokiner throws a hook to the body but it doesn't connect.
Mycokiner misses with a straight right.
Mycokiner has been working on his boxing with his coaches at Island Safe Space in the buildup to the fight.
Tony pushing out the jab but it's not landing.
Mycokiner throws a jab when Tony was well out of range.
Mycokiner looks to score with a jab to the body but Tony is just out of range.
Tony swings away with a counter right hand but no contact made.
Mycokiner loads up on a big right hand but Tony slips the punch.
As Mycokiner backs off Tony throws a huge counter combo but Mycokiner manages to avoid it all.
Mycokiner keeps his opponent at a distance with a nice jab.
This is a great period of action - very entertaining stuff!
Mycokiner throws a monster uppercut resembling something out of street fighter but it doesn't land.
The crowd cheers as Mycokiner lands an impressive looking overhand right. Tony doesn't seem phased though.
That's one minute gone in the round.
Mycokiner ducks under a wild hook from Tony.
Tony misses with a body shot.
Mycokiner throws a right hand that misses
and Tony counters with a shot to the ribs. That looked like it hurt.
Nice defenses there by Tony.
Tony uses decent footwork to sidestep a right hand from Mycokiner.
Tony ducks under a wild hook from Mycokiner.
Tony shakes his hands off, looking to compose himself, but takes a jab to the jaw whilst he does it.
Mycokiner throws a hard body shot but it just misses.
Tony fakes high and swings low for a body shot but Mycokiner manages to avoid it.
Tony takes a solid shot to the body. That one hurt him but he's trying not to show it.
Mycokiner throws a monster uppercut resembling something out of street fighter but it doesn't land.
Tony tries to land with a swinging hook to the body but Mycokiner was well out of range. Poor timing from Tony.
Mycokiner is looking to counter the offense by Tony and move into the clinch.
Tony connects with a body shot that sends Mycokiner's belly button to the back.
Tony lands with an overhand left.
Mycokiner throws a jab but it's blocked by Tony.
Mycokiner steps to the side to avoid the strikes from Tony.
That's two minutes gone in the round.
Mycokiner throws a wild combination but nothing lands.
We've seen a great period of action over the last minute or so - credit to both fighters for going all out!
Tony ducks under an overhand right and circles away with a smile on his face.
A big right from Mycokiner misses.
A punch combination from Tony misses.
Tony throws out a token jab with nothing on it.
Tony avoids a lazy jab quite easily.
Tony waving his hands out in front of him, looking to distract Mycokiner.
Mycokiner lands a straight punch to the body, keeping Tony at a distance.
Tony misses the shot to the body.
Tony misses with a body shot. Nice footwork from Mycokiner.
Tony throws a hook but Mycokiner avoids it easily.
This fight brought to you by 5M nutrition - it's mmmmm tasty. Nice jab by Mycokiner.
Sloppy strikes from Tony. Those never looked like landing.
Mycokiner takes a body punch that cleary hurt but he's trying not to show any weakness.
Tony avoids the body shot from Mycokiner.
Tony with poor footwork there. He got himself in a bit of a tangle, enabling Mycokiner to score with a decent uppercut.
That's three minutes gone in the round.
Tony walks straight into an uppercut. Luckily it didn't land flush.
Mycokiner throws out a token jab with nothing on it.
Tony pushing out the jab but it's not landing.
Mycokiner scores with a hook to the body. Tony takes a step back and tries to catch his breath.
Tony dips down and scores with a jab to the body.
Tony keeping his hands up high there, blocking the jab from Mycokiner.
Mycokiner rushes in with a sloppy looking punch
and Tony counters with a lovely straight right hand!
Mycokiner takes a punch right to his stomach. That took the wind out of him momentarily.
Mycokiner throws a combination but comes up with nothing but fresh air.
Tony fakes high and swings low for a body shot but Mycokiner manages to avoid it.
Tony pushes forward with a 1-2 combination that forces Mycokiner back to the cage. Tony follows up with a solid lead hook to the liver.
Mycokiner changes levels and scores with a jab to the body.
Fantastic stuff here - a very entertaining period of action, which has drawn cheers from the crowd.
Tony dips down and scores with a jab to the body.
Mycokiner scores with a hook to the body. Tony takes a step back and tries to catch his breath.
Mycokiner thows a left - swing and a miss!
Mycokiner blocks a jab.
That's four minutes gone in the round.
Mycokiner rushes Tony and presses him up against the cage.
Mycokiner throws a head punch that misses.
Tony tried to land a shot to the body but connects with Mycokiner's elbow.
Mycokiner blocks a body shot from Tony.
Mycokiner lands a nice uppercut.
A quick uppercut on the inside from Tony.
Tony scores with a shot to the side of Mycokiner's head.
Tony tries to work over Mycokiner's body with a swooping hook but it only glances the target.
Mycokiner being controlled against the cage.
With the fighters clinched against the cage, Mycokiner creates a bit of distance for himself and scores with a nice uppercut.
Tony swings away with an uppercut that misses.
The crowd applaud the fighters' efforts here as the round comes to an end.
Tony misses with a short punch on the inside.
Tony blocking some punches.
Mycokiner lands a body shot.
Mycokiner misses with a shot to the kidneys.
Tony presses Mycokiner against the cage and delivers a mid-strength body shot.
And thats the end of the round the fighters go back to their corners.
Berry Mycokiner dominated that round.
The corners get their ten second warning. Both fighters stand from their stools and stare eachother down, ready to get back to the action.
Tony keeps the fight on the outside.
A punch combination from Mycokiner misses.
Mycokiner dodges the punch combination from Tony.
Mycokiner misses with a jab to the body
and Tony connects with a straight left hand counter down the middle.
Tony jabbing away but nothing is landing.
Tony fails to land with the punch combination there - jab, cross, hook, miss, miss, miss.
Mycokiner pushes forward with a 1-2 combination that forces Tony back to the cage. Mycokiner follows up with a solid lead hook to the liver.
A left lands for Mycokiner.
A jab from Mycokiner misses.
Tony lands a vicious shot with the stealth of a sniper and the strength of a viper. Are vipers that strong? I can think of lots of things that are stronger than a viper - not many rhyme with sniper though.
Tony works Mycokiner's body with a nice hook.
Fantastic stuff here - a very entertaining period of action, which has drawn cheers from the crowd.
Tony tests Mycokiner's chin there with a solid looking shot.
Mycokiner moves away from the strike by Tony.
Danga de danga de dang - Mycokiner scores with a four punch combination!
Tony works Mycokiner's body with a nice hook.
That's one minute gone in the round.
Tony uses good footwork to avoid the strikes from Mycokiner.
A little jabbing left from Tony on the counter but it doesn't find it's target.
Mycokiner scores with a hook to the body. Tony takes a step back and tries to catch his breath.
Tony stooping low to avoid any incoming strikes and then lunges in with an uppercut come cross that lands flush.
Mycokiner rushes forward with a series of wild hooks but Tony moves out of range and avoids them all easily.
Tony misses with a wild body shot.
A big right from Mycokiner misses.
Tony fakes and then throws a beautiful body shot. Mycokiner looks a bit winded and takes a step backwards to take a breath.
Tony fakes high and swings low for a body shot but Mycokiner manages to avoid it.
Mycokiner missing with a left hand there. Tony was out of range so wasted energy throwing that one.
Tony cracks a nice hook into Mycokiner's ribs.
Tony wants to clinch up but Mycokiner keeps it at a distance.
Tony loads up on a big right hand but Mycokiner slips the punch.
Mycokiner loads up on a big right hand but Tony slips the punch.
Tony ducks under a wild hook from Mycokiner.
Mycokiner moves into the clinch.
Mycokiner scores with a shot to the side of Tony's head.
That's two minutes gone in the round.
This has been an exciting period of action!
Tony misses with a short punch on the inside.
Tony is trying to break free.
Mycokiner misses with a hook from the clinch.
Tony throws a head punch that misses.
Mycokiner cracks Tony with a nice body shot.
Tony's head jolts backwards as he takes an uppercut right on the button!
The fighters are going at a pretty good pace and they're both starting to sweat now.
Tony misses with a body punch.
Tony lands with a short head shot on the inside.
Tony blocking some punches.
Tony tries a shoulder strike but it doesn't do any damage.
A short body shot lands from Mycokiner as the two fighters clinch.
Tony is breathing heavily.
Mycokiner is working Tony over against the cage.
A short left from Mycokiner.
Mycokiner tried to land a shot to the body but connects with Tony's elbow.
Mycokiner misses with the head strike.
Mycokiner throws a blind hook that connects with the side of Tonys head.
Mycokiner lands a body shot.
That's three minutes gone in the round.
Tony fails to land with a short punch on the inside.
Mycokiner tried to land a shot to the body but connects with Tony's elbow.
A head punch on the inside from Mycokiner fails to land.
Berry Mycokiner has scored more points in the clinch so far.
Mycokiner blocks a punch to the side of the head.
Tony misses with a shot to the kidneys.
A head punch on the inside from Tony fails to land.
Mycokiner blocks a couple of punches on the inside.
Mycokiner lands on the inside with an uppercut.
Mycokiner misses with a short punch on the inside.
Mycokiner doesn't land with the attempted body shot.
Mycokiner blocking some punches.
Tony blocking some punches.
Mycokiner misses with some punches.
Tony can't find room to land a body shot as Mycokiner controls the action.

Tony breaks the clinch and we're back to striking at distance.
Mycokiner scores with a nice looking left hook and follows it up with an uppercut!
Tony misses with a wild body shot.
Tony throws a monster uppercut resembling something out of street fighter but it doesn't land.
That's four minutes gone in the round.
Mycokiner uses some good footwork to avoid the body shot by Tony.
Mycokiner scores with a jab to the body.
Mycokiner is really dominating this fight. Is there anything that Tony can do to turn this around?
Tony keeping a good distance there, avoiding the body shot.
Tony swings away with a counter right hand but no contact made.
Wooooo! Give it up for these two warriors! They are putting on a show!
Mycokiner moves into range and clinches up with Tony.
Tony's head jolts backwards as he takes an uppercut right on the button!
Mycokiner struggles to land a body shot inside as Tony controls his hands.
Mycokiner gets through Tony's defenses to land a nice punch to the side of the head.
Good body shot from Tony.
Mycokiner swings away with an uppercut that misses.
Tony prevents a body shot from Mycokiner.
Tony presses Mycokiner against the cage and delivers a mid-strength body shot.
Tony fails to land with a short punch on the inside.
Mycokiner scores with a shoulder strike.
Tony blocking some punches.
Tony wants to stall.
Tony fails to land with a short punch on the inside.
And thats the end of the round the fighters go back to their corners.
Berry Mycokiner dominated that second round.
OK. That's time! The bell goes and we're back to the action. And we move into the final round!

Tony throws a lazy right hand but Mycokiner sees it coming a mile off and sidesteps it easily.
Tony rushes in with a sloppy looking punch
and Mycokiner holds on and brings the fighters into a clinch.
Tony breaks from the clinch.
Tony gets his head snapped back by a nice shot there.
Tony uses good footwork to avoid the strikes from Mycokiner.
Tony throws out a counter right but Mycokiner avoids it with no problem.
Mycokiner defending well as Tony loads up on a big left hand.
Mycokiner uses good head movement to avoid the hook from Tony.
Mycokiner throws an overhand right that lands on Tony's shoulder, as Tony tries to avoid the shot.
Tony swings for the body but Mycokiner moves out of range.
Tony looks to land a combination but Mycokiner avoids it well.
Mycokiner pushing out the jab but it's not landing.
We've had a slow start to the round here - hopefully the action picks up.
Mycokiner swings and misses with a hook to the body.
Mycokiner tries to land with a swinging hook to the body but Tony was well out of range. Poor timing from Mycokiner.
Mycokiner misses with a hook.
Some wild striking there from Tony.
That's one minute gone in the round.
Tony throws a shot from downtown. Mycokiner moves away and avoids it.
Tony connects with a good right hand that stumbles Mycokiner. Mycokiner circles away out of range and recomposes himself.
Tony ducks under an overhand right and circles away with a smile on his face.
Tony misses with a wild body shot.
Tony misses with a wild combination.
Mycokiner throws a looping overhand right but Tony ducks down to avoid it.
Tony on the wrong end of a decent looking cross there.
Tony lands a jab to the head.
Tony clobbers Mycokiner with an overhand right that has the crowd gasping. That made a horrendous noise.
Mycokiner throws a hard body shot but it just misses.
Tony tests Mycokiner's chin there with a solid looking shot.
Mycokiner scores with a crisp jab that stopped Tony in his tracks.
Mycokiner throws a hook but Tony blocks it.
Mycokiner uses some good footwork to avoid the body shot by Tony.
Little Tony has stepped it up - he knows he needs a finish here!
That's two minutes gone in the round.
Tony throws a hook but Mycokiner blocks it.
This is a great period of action - very entertaining stuff!
Mycokiner throws a hook to the side of Tony's head but Tony sees it coming and ducks under it beautifully.
Mycokiner ducks down and throws a hook to the body but Tony moves away.
Mycokiner misses with a hook.
Tony moves away from the strike by Mycokiner.
Mycokiner misses with a straight right.
Mycokiner throws out a loose jab but Tony uses good head movement to avoid it.
Tony connects with a body shot.
Mycokiner connects with a right hand. Tony shakes it off.
Mycokiner takes a swing at Tony's ribcage but misses.
Mycokiner throws a looping overhand right but Tony ducks down to avoid it.
Tony uses some good footwork to avoid the body shot by Mycokiner.
Tony lands a nice hook to Mycokiner's body. Mycokiner takes it in his stride and looks to land his own strikes.
Mycokiner scores with a big left there. The judges will like that one.
Berry Mycokiner is winning the standup battle so far.
Tony gets his head snapped back by a nice shot there.
That's three minutes gone in the round.
Tony tries to land with a swinging hook to the body but Mycokiner was well out of range. Poor timing from Tony.
Mycokiner looks to land a right hand but Tony moved out of range.
Mycokiner slips under a jab.
Mycokiner lands with a two punch combination before moving back out of range.
Tony swings wildly with a right hand that was never going to find it's target.
Tony misses with a hook.
A big left from Mycokiner misses.
Berry Mycokiner is fighting for a decision here - he's started to take the cautious approach.
A swing and a miss from Tony.
Mycokiner connects with a crisp jab.
Sloppy strikes from Tony. Those never looked like landing.
Tony takes a big intake of breath there - he's definitely tired.
Mycokiner fakes a head shot and lands one to the body.
Mycokiner dips down and scores with a jab to the body.
Tony takes a swing at Mycokiner's ribcage but misses.
Mycokiner showing good head movement there, avoiding the strikes from Tony.
That's four minutes gone in the round.
Tony is pinned up against the cage taking some big shots here. The referee is looking closely deciding whether he should stop the fight.
Fantastic stuff here - a very entertaining period of action, which has drawn cheers from the crowd.
Mycokiner lands with a nice body punch.
Mycokiner thuds a left hand into Tony's body.
Mycokiner scores with a shot to the body.
Mycokiner scores with a jab to the body.
Mycokiner shoots in for a double leg but Tony sprawls well. That's going to sap some energy.
A nice side step and Tony releases a counter shot to the body, but it doesn't find it's home.
Tony takes a swing at Mycokiner's ribcage but misses.
Tony throws an overhand right that lands on Mycokiner's shoulder, as Mycokiner tries to avoid the shot.
Tony jabbing away but nothing is landing.
Tony moves his head to the side to avoid a jab but walks straight into a cross.
Tony throws a hard body shot but it just misses.
Tony throws a looping overhand right but Mycokiner ducks down to avoid it.
Tony has a pretty nasty looking mouse under his right eye.
Mycokiner scores with a jab to the body.
And that's the end of the fight!
Berry Mycokiner showed his dominance in that final round.
Well Mycokiner has outscored his opponent in every aspect of the fight today. Only a scarily incompetent judge or two will keep him from a well deserved win... Over to the ring announcer for the scorecards.
Ladies and gentlemen, after 3 rounds of action, we go to the scorecards for a decision.
Judge Bart Greer scores the fight 30:27
Judge Peter Branson scores the fight 30:27
Judge Sandra Marshall scores the fight 30:27
In favor of your winner, by unanimous decision... Berry Mycokiner!
A relieved looking Berry Mycokiner thanked the fans for their support and gave the usual line about them being amazing. They seemed to believe that he actually meant it.
|
|
|
|
|
|
|
|
|
|
|
|
|
|
|
|
|
|
|
|
|
|
|
| S |
C
A |
G |
S |
C
B |
G |
|
S |
C |
G |
|
energy
A | B |
|
hype
A | B |
|
pop
A | B |
|
mgr
A | B |
|
FIGHT
RATING
74% |
|
|
|
|
|
|
|
Main event
|
Coming up we have a super heavyweight MMA rules bout between Mark Lesnar (ranked 1057 p4p, 42 weight class) and Rene Duchene (ranked 2018 p4p, 82 weight class). Rene Duchene will no doubt be trying to keep this one on the feet, where he has a distinct advantage.
 |
|
 |
| 185 cm
25
285 lbs
4 - 0 - 0 |
|
198 cm
25
273 lbs
3 - 0 - 0 |
Good wrestling
Counter fighter
Very strong |
|
BJJ White Belt
Excellent boxer
Heavy handed |
|
| |
|
Ladies and gentlemen. This fight is 5 rounds, for the super heavyweight championship of the world!
Introducing the champion to my left, fighting out of the red corner.
With a record of
4 - 0 - 0, fighting out of The Island, Mark Lesnar!
And introducing the challenger to my right, fighting out of the blue corner.
With a record of
3 - 0 - 0, fighting out of The Island, Rene Duchene!
The judges for this bout are Dirk Anderson, Sandra Marshall and Winston Alpacca.
The bell rings for round one and we are underway!
Lesnar drops his hands and takes a jab to the jaw for his troubles.
Duchene is looking to take this fight into the clinch.
A right-left combo lands from Duchene.
It looks like Mark Lesnar has been cut.
Lesnar gets in close and instigates a clinch.
Duchene has a couple of punches blocked by Lesnar.
Duchene looks more muscular than last time we saw him. He must have been on the weights.
Duchene digs a right hand underneath Lesnar's ribcage. Lesnar let out a lung full of air as it connected.
Lesnar breaks the clinch and we're back to striking at distance.
Duchene is the aggressor but that punch slipped nicely by Lesnar.
Lesnar half commits to a counter takedown before pushing away, out of range.
Duchene misses with a lunging right hand
so Lesnar counters with a double leg into guard. Good agility.
The crowd cheering loudly, showing their appreciation for the quality fight we're seeing here.
Duchene throwing strikes off his back to little effect.
Duchene looking for subs off his back but Lesnar has passed one foot through into half guard.
Lesnar working the head and body with strikes.
That's one minute gone in the round.
Lesnar performing his best blanket impression for a moment.
Duchene wants to improve his position but Lesnar is controlling well.
Lesnar has been looking to land a fair amount of strikes on the ground. He might be looking to soften his opponent up in order to work for a submission.
Lesnar is nestled in close to Duchene, controlling him well. He's worked in a nice elbow to the side of the head as well, for good measure.
Lesnar is keeping good posture, landing some ground and pound.
Duchene wants to improve his position but Lesnar is controlling well.
Lesnar keeping composed on the top, looking to control the action.
Duchene tries to roll over but Lesnar keeps him under control.
Duchene throws a strike from the bottom that misses.
Duchene is looking to regain full guard. Not this time though.
Duchene wants to sweep but Lesnar has passed to side control!
Lesnar taking a breather here.
Lesnar scoring with punches and elbows.
That's two minutes gone in the round.
Duchene is not in a great position here, taking some shots.
Check out the look on Lesnar's face as he threw that strike - that's one determined fighter!
Duchene takes a big shot right to the temple there but he's taken it well.
Duchene tries to bench press Lesnar off him but Lesnar keeps the position.
Lesnar lands a decent elbow from side control.
It looks like Rene Duchene has been cut.
Duchene is trying to get back to half guard.
Lesnar lands a decent elbow from side control.
We've seen a great period of action over the last minute or so - credit to both fighters for going all out!
The fighters are going at a pretty good pace and they're both starting to sweat now.
Lesnar working the ground and pound.
Lesnar scoring with punches and elbows.
Lesnar content to control the pace. The referee will try and keep them active though.
Lesnar trying to control the action but Duchene is working from the bottom.
Duchene taking a bit of punishment here - Lesnar scoring with strikes.
That's three minutes gone in the round.
Duchene tries to bench press Lesnar off him but Lesnar keeps the position.
Duchene is not in a great position here, taking some shots.
Lesnar lands a few punches from side control.
Lesnar working the head and body with strikes.
We get told so often about how wrestlers don't like to be on their backs. Let's see if Duchene can do anything to dispel that myth.
Duchene takes an elbow right on the bridge of the nose and winces in pain.
Lesnar in side control, just content to control the action for now.
Lesnar landing strikes.
Lesnar works a knee to the body and follows up with a nice elbow to the head.
Lesnar scores with a couple of nice shots to the head there. The referee takes a look at Duchene to see if he's OK.
Duchene is looking to regain half guard here but Lesnar keeps moving and retains side control.
Lesnar works a knee to the body and follows up with a nice elbow to the head.
That has opened up Rene Duchene's cut even more.
Duchene really doesn't want to stay on the ground with Lesnar. If he can't get it back to his feet, it's only a matter of time before he'll be tapping out.
Lesnar grinds an elbow into Duchene's temple.
Duchene takes a couple of big shots there - the referee warns him that he has to defend himself better.
The cut above Rene Duchene's eye is starting to cause him problems now.
The referee calls the doctor in to look at Rene Duchene's cut. Oh no, the doctor has called an end to the bout!
Ladies and gentlemen, after 4:18 of round 1, we have a winner by way of TKO (Cut). Mark Lesnar!
Mark Lesnar retains his super heavyweight title!
A less than humble Mark Lesnar misjudged his post fight interview somewhat and came across a little too arrogant whilst trying to hype up his own abilities.
|
|
|
|
|
|
|
|
|
|
|
|
|
|
|
|
|
|
|
|
|
|
|
| S |
C
A |
G |
S |
C
B |
G |
|
S |
C |
G |
|
energy
A | B |
|
hype
A | B |
|
pop
A | B |
|
mgr
A | B |
|
FIGHT
RATING
30% |
|
|
|
|
|
|
|
|
|
|
