 |
KING Tournament Rd 2 PBP Commentary |
Undercard bout
|
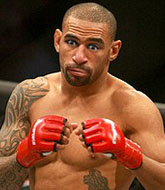
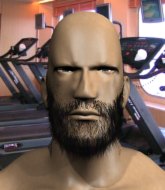
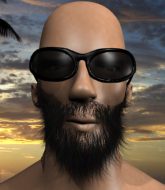
Coming up we have a light heavyweight MMA rules bout between Sean Flynn (ranked 5989 p4p, 614 weight class) and Caitlyn Jenner (ranked 5263 p4p, 566 weight class). Sean Flynn could well score a knockout today. He has the power to get to Caitlyn Jenner's chin.
 |
|
 |
| 182 cm
18
208 lbs
1 - 0 - 0 |
|
180 cm
18
207 lbs
2 - 0 - 0 |
Decent wrestler
Brawler
Good chin |
|
BJJ Blue Belt
Brawler
Powerful |
|
| |
|
Ladies and gentlemen. This fight is 3 rounds, in the light heavyweight division.
Introducing the fighter to my left, fighting out of the red corner.
With a record of
1 - 0 - 0, fighting out of Amsterdam, Sean Flynn!
And introducing the fighter to my right, fighting out of the blue corner.
With a record of
2 - 0 - 0, fighting out of New York, Caitlyn Jenner!
The judges for this bout are Frank Dennis, Stewart Dunkirk and Robert Twigg.

The bell rings for round one and we are underway!
Jenner takes an uppercut right on the button but keeps his composure.
Flynn definitely looks more muscular than last time we saw him fight.
Flynn with a nice cross.
Flynn avoids the clinch attempt nicely.
Jenner tries to close the distance and clinch up but Flynn swats him away and circles back towards the center.

Jenner moves into the clinch successfully.

Jenner manages to pull guard.
Jenner controls Flynn momentarily but Flynn frees himself.

Jenner throwing his legs up looking for a triangle.
The ref warns both fighters not to hold the cage as they work up against the meshing.
Flynn passes easily into side control. Nice work.
Jenner wants to control but Flynn postures up.
Jenner manages to work his way to half guard, despite Flynn's best efforts.
Jenner looks more muscular than last time we saw him. He must have been on the weights.
Flynn trying to control from half guard but Jenner is working away.
Flynn seems to be taking a bit of a break to think of his next move. He lands a short punch in the meantime.
Jenner moves into full guard.

That's one minute gone in the round.
Flynn is posturing up here but Jenner has hold of an arm and he's gone for an armbar! Flynn tries to roll out but it's too tight and Flynn has to tap! Slick submission there by Jenner!
Ladies and gentlemen, after 1:20 of round 1, we have a winner by way of Submission (Armbar). Caitlyn Jenner!
Our winner, Caitlyn Jenner, made sure he spent some time buttering up the crowd during his post fight interview, which will no doubt bring him a few more fans.
|
|
|
|
|
|
|
|
|
|
|
|
|
|
|
|
|
|
|
|
|
|
|
| S |
C
A |
G |
S |
C
B |
G |
|
S |
C |
G |
|
energy
A | B |
|
hype
A | B |
|
pop
A | B |
|
mgr
A | B |
|
FIGHT
RATING
67% |
|
|
|
|
|
|
|
Undercard bout
|
Coming up we have a featherweight MMA rules bout between Terry McCallum (ranked 6640 p4p, 421 weight class) and Nathaniel Fredo (ranked 5820 p4p, 400 weight class). Terry McCallum has the better chin. Will he look to stand and bang today?
 |
|
 |
| 175 cm
18
153 lbs
1 - 0 - 0 |
|
176 cm
18
153 lbs
1 - 0 - 0 |
Good takedowns
Counter fighter
Granite chin |
|
Good takedowns
Basic striking
Tends to cut |
|
| |
|
Ladies and gentlemen. This fight is 3 rounds, in the featherweight division.
Introducing the fighter to my left, fighting out of the red corner.
With a record of
1 - 0 - 0, fighting out of Los Angeles, Terry McCallum!
And introducing the fighter to my right, fighting out of the blue corner.
With a record of
1 - 0 - 0, fighting out of St Petersburg, Nathaniel Fredo!
The judges for this bout are Frank Dennis, Chris Downing and Tiny Johnson.
The bell rings for round one and we are underway!
Fredo throws out a token jab with nothing on it.
Fredo stuffs the takedown.
Fredo misses with a jab to the body

and McCallum counters with a nice double leg into half guard.
Fredo looking for submissions from an awkward position here.

McCallum seems to be looking for submissions.
Fredo has no desire to be mounted, so is trying to control. McCallum is working away from the top position though.
Fredo regains full guard. Nicely done.
McCallum is trying to work a guillotine from the top, or something like that? Don't know how he thinks he's going to get a finish from there.
Fredo looking for submissions from the bottom here. Moving his hips around, possibly looking for an armbar.
We've had a slow start to the round here - hopefully the action picks up.
Fredo not looking particularly offensive just at the moment.
Fredo looking for submissions off his back, moving his hips, looking for an opening.
McCallum drops back looking for a heel hook - he quickly realises he's not going to get it but Fredo manages to dive on top of him before he can escape and now McCallum has Fredo in his guard.

That's one minute gone in the round.
Fredo wants to control from the top but McCallum keeps moving.
McCallum working for a triangle but Fredo defends it easily.
Fredo pushing down on McCallum's thigh, trying to pass to half guard. He's managed it... Nice work.
Fredo stalling.
McCallum looking for submissions from an awkward position here.
The fighters are pressed up against the cage, both looking to find a bit of space to work.
Fredo maintaining the dominant position here and is working for a kimura. He's locked it up! McCallum could be in real trouble here! He's trying to wriggle out but Fredo has cracked it and McCallum is screaming in pain - he's tapped out! Great finish by Fredo!
Ladies and gentlemen, after 2:56 of round 1, we have a winner by way of Submission (Kimura). Nathaniel Fredo!
After winning the bout, Nathaniel Fredo thanked all his fans and promised he'd do even better in his next fight. The crowd seemed to love his humility.
|
|
|
|
|
|
|
|
|
|
|
|
|
|
|
|
|
|
|
|
|
|
|
| S |
C
A |
G |
S |
C
B |
G |
|
S |
C |
G |
|
energy
A | B |
|
hype
A | B |
|
pop
A | B |
|
mgr
A | B |
|
FIGHT
RATING
42% |
|
|
|
|
|
|
|
Undercard bout
|
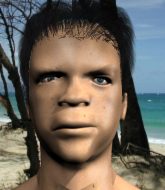
Coming up we have a light heavyweight MMA rules bout between Hiroaki Hidaka (ranked 5570 p4p, 586 weight class) and John C Reilly (ranked 5633 p4p, 592 weight class). Reilly comes into a darkened arena with his song building. John C. Reilly Funniest Moments kicks in, the lights come on and the crowd goes wild! What a showman! John C Reilly is the more experienced fighter, so let's see if that makes a difference tonight.
 |
|
 |
| 187 cm
18
209 lbs
1 - 0 - 0 |
|
187 cm
18
203 lbs
2 - 0 - 0 |
BJJ White Belt
Solid Muay Thai
Granite chin |
|
BJJ White Belt
Basic striking
Granite chin |
|
| |
|
Ladies and gentlemen. This fight is 3 rounds, in the light heavyweight division.
Introducing the fighter to my left, fighting out of the red corner.
With a record of
1 - 0 - 0, fighting out of Tokyo, Hiroaki Hidaka!
And introducing the fighter to my right, fighting out of the blue corner.
With a record of
2 - 0 - 0, fighting out of Hilo, John C Reilly!
The judges for this bout are Cecil Peabody, Chris Downing and George Francis.
The bell rings for round one and we are underway!
Hidaka looks to land a right hand but Reilly moved out of range.
A jab from Reilly misses.
Reilly staying out of range there.
Reilly thuds his right hand into Hidaka's forehead from close range. That could be painful for both fighters.

It looks like Hiroaki Hidaka has been cut.
Reilly looks to score with a jab to the body but Hidaka is just out of range.
Reilly throws a monster uppercut resembling something out of street fighter but it doesn't land.
A bone on bone clash there as Hidaka blocks the leg kick.
Hidaka looked to counter that last move with a leg kick but didn't pull the trigger.
Reilly listening to his corner there, landing a nice uppercut.
A jab from Hidaka does it's job there.

It looks like John C Reilly has been cut.
Hidaka throws a looping overhand right but Reilly ducks down to avoid it.
Hidaka connects with a jab.
Reilly blocks a jab.
Reilly swings for the body but Hidaka moves out of range.
Reilly fakes with the hands and throws a leg kick but Hidaka is out of range.
Reilly scores with a straight right hand, right through his opponent's guard.
The fans in attendance giving it up for the two fighters, who have really let it all hang out in the last minute or so!
Reilly closes the distance and clinches.
Hidaka wants to break free. God knows he wants to breaaaak freeee.
Reilly keeps control of Hidaka as he tries to wriggle out of the double underhooks.
Reilly jumps guard and drags Hidaka to the mat. He's obviously going to be looking for submissions off his back.
Reilly is trying to control the position from the bottom.
Reilly controlling the position.
That's one minute gone in the round.
Hidaka postures up to throw the ground and pound strikes but they don't connect.
Reilly is working actively off his back, looking to secure an arm or perhaps work for a triangle.
Hidaka trying to control the position from guard on top but Reilly is wriggling around, looking for whatever he can.
Hidaka tries to stand but Reilly is controlling from the bottom.
Reilly working for a triangle but Hidaka defends it easily.
Reilly working for a triangle but Hidaka defends it easily.
Reilly throwing his legs up looking for a triangle.
Hidaka knows he needs to get back to his feet asap. He's simply no match for Reilly on the ground.
Hidaka trying to control but Reilly is working from the bottom.
Reilly pulls Hidaka in to control the position.

That's two minutes gone in the round.
Well. There's a bit of a lull in the action here and the crowd are starting to get restless.
Reilly keeping moving, preventing Hidaka from controlling successfully.
Reilly looking to sweep here. No luck so far.
Hidaka wants to get up but he can't break Reilly's closed guard. He needs to be careful trying to break the legs open, as he's open to submissions here.

The referee has decided to stand the fighters back up, so we'll restart on the feet.
Hidaka scores with a slapping inside leg kick.
Hidaka takes a jab right on the nose. That must have hurt but he shrugs his shoulders and looks to return the favor.
Hidaka gets tackled into the cage by Reilly. Reilly maintains the clinch.
Reilly lands an uppercut.
I was talking to Hidaka's coach per-fight and he was telling me that they'd been working on the clinch in the runup to this fight.
Still in the clinch, Reilly scores with a nice short uppercut.
The pace really dropping off here, momentarily.
Reilly misses with a hook to the ribs.
A frustrated look appears on Hidaka's face as he tries to break the clinch.
Hidaka gets through Reilly's defenses to land a nice punch to the side of the head.

Hidaka's corner calls for him to break the clinch, which he does.

That's three minutes gone in the round.
Hidaka throws a body shot but no joy.
A telegraphed right hand from Hidaka misses the target.
Hidaka throws the left hand but Reilly avoids the punch easily.
Hidaka dips down and scores with a jab to the body.
John C Reilly seems to be the more aggressive standup fighter in this bout.
Hidaka throws a jab when Reilly was well out of range.
Hidaka lands an overhand left. A wild punch that just about connected.
Hidaka lands a nice shot that snaps Reilly's head back.
That has opened up John C Reilly's cut even more.
Reilly misses with a hook to the body
letting Hidaka counter with a right hand.
Reilly looks more muscular than last time we saw him. He must have been on the weights.
Hidaka lands a nice shot to the body.
Hidaka fakes a head shot and lands one to the body.
Reilly looks winded!
Hidaka throws a push kick but Reilly slaps the foot to one side.
Reilly darts in and out, connecting with a jab.
This is a great period of action - very entertaining stuff!
Reilly fakes low and throws an overhand right that catches Hidaka on the side of the head.
Hidaka lands a really nice looking cross but Reilly seems unphased.
The cut above John C Reilly's eye is starting to cause him problems now.
Hidaka cracks Reilly with a big right hand that sees him stumbling back against the cage! Reilly falls to his knees and Hidaka doesn't need a second invitatation - he rushes in and fires off several unanswered shots that force the referee to stop the fight! This one is all over!
Ladies and gentlemen, after 3:51 of round 1, we have a winner by way of TKO (Strikes). Hiroaki Hidaka!
|
|
|
|
|
|
|
|
|
|
|
|
|
|
|
|
|
|
|
|
|
|
|
| S |
C
A |
G |
S |
C
B |
G |
|
S |
C |
G |
|
energy
A | B |
|
hype
A | B |
|
pop
A | B |
|
mgr
A | B |
|
FIGHT
RATING
51% |
|
|
|
|
|
|
|
Undercard bout
|
Coming up we have a featherweight MMA rules bout between Joe Jennings (ranked 6073 p4p, 409 weight class) and Kaito Kazuma (ranked 5396 p4p, 380 weight class). Over to our ring announcer for the fighter introductions!
 |
|
 |
| 176 cm
18
145 lbs
1 - 0 - 0 |
|
170 cm
18
145 lbs
1 - 0 - 0 |
BJJ Blue Belt
Counter fighter
Cuts easily |
|
BJJ White Belt
Solid Muay Thai
Powerful |
|
| |
|
Ladies and gentlemen. This fight is 3 rounds, in the featherweight division.
Introducing the fighter to my left, fighting out of the red corner.
With a record of
1 - 0 - 0, fighting out of Hilo, Joe Jennings!
And introducing the fighter to my right, fighting out of the blue corner.
With a record of
1 - 0 - 0, fighting out of Tokyo, Kaito Kazuma!
The judges for this bout are George Francis, Wesley Smith and Frank Dennis.
The bell rings for round one and we are underway!
Nice uppercut there from Kazuma.
Jennings throws a low kick but Kazuma moves out of range easily.
Kazuma lands a glancing blow to the side of Jennings's head.
Kazuma scores with a jab.
Jennings looks for the body kick but Kazuma saw that one coming.
Jennings wants to slow Kazuma down by chopping away at his legs.
Nice jab there from Kazuma.
Kazuma connects with a body shot that sends Jennings's belly button to the back.
Jennings throws a leg kick that misses.
Boom, another hit is landed. "You're gunna get knocked out" taunts Kazuma, as that shot connected.
Jab by Kazuma.
Good exchange - Kazuma coming out on top.
This has been an exciting period of action!
Kazuma's corner calls for a 1-2. Kazuma obliges with the 1 part as he scores the single shot and moves back out of range.
Jennings definitely looks more muscular than last time we saw him fight.
Kazuma lands with a cross.
Kazuma cracks Jennings with a good jab.
Kazuma fakes and then throws a beautiful body shot. Jennings looks a bit winded and takes a step backwards to take a breath.
Jennings throws a leg kick but Kazuma sees it coming and moves out of range.
That's one minute gone in the round.
Jennings on the wrong end of a decent looking cross there.
Jennings drops his hands and takes a jab to the jaw for his troubles.
Kazuma lands a nice looking body shot.
Kazuma lands with a hook. Jennings tried to avoid it but it clipped the top of his head.
Kazuma scores with a jab to the head.
Jab from Kazuma.
Kazuma's coach down at MMA Dojo was telling us pre-fight that they have been working on Kazuma's balance. Obviously they view that as a key factor in the outcome of this fight.

Jennings clinches up against the cage.
Jennings jumps guard but his hands slip and he falls flat on his back. Well, he's made himself look a right mug there, as Kazuma walks away with a smile on his face. Jennings gets slowly back to his feet and shakes his head.
Kazuma lands a glancing blow to the side of Jennings's head.
Jennings takes a hook to the side of the head. I wonder if that's got his ears ringing.
The crowd cheering loudly, showing their appreciation for the quality fight we're seeing here.
Jennings gets to the clinch - let's see what his plan is here.
Kazuma tries to circle away but Jennings has him pinned against the cage.
Kazuma misses with a punch to the body.
Kazuma misses with a short punch on the inside.
Jennings is trying to pull guard but Kazuma has him pressed against the cage.
That's two minutes gone in the round.
A head punch blocked on the inside by Jennings.
Jennings prevents a body shot from Kazuma.
Kazuma decides to pull guard.
Kazuma wants to sweep here but Jennings controlling him for the moment.
Jennings trying to control the position from guard on top but Kazuma is wriggling around, looking for whatever he can.
Kazuma wants to control here, rather than go for any submissions from the bottom. At least for now.
Jennings wants to control from the top but Kazuma keeps moving.
Jennings looking to pass the guard.
Jennings passes Kazuma's left leg - he's now in half guard.
That's three minutes gone in the round.
Kazuma is looking to regain full guard. Not this time though.
Jennings seems to be working for a kimura but Kazuma defends the submission attempt.
Jennings wants to take a breather but Kazuma is having none of it.
Jennings is working for a submission of some sort.
Kazuma has no desire to be mounted, so is trying to control. Jennings is working away from the top position though.
The fighters are going at a pretty good pace and they're both starting to sweat now.
Jennings wants to pass the guard but Kazuma is defending well.
Kazuma wants to get back to full guard.
Kazuma really doesn't want to stay on the ground with Jennings. If he can't get it back to his feet, it's only a matter of time before he'll be tapping out.

That's four minutes gone in the round.
The crowd are getting on the fighters' backs, as the pace has dropped off in the last minute or so.
Jennings is trying to work for a kimura. This could be trouble! No, Kazuma has managed to free his arm - good work.
Kazuma tries to get to full guard but Jennings has control of the leg.
Jennings wants to lay and pray for a moment but Kazuma keeps working.
Kazuma gets back to full guard.
The fighters are pressed up against the cage, both looking to find a bit of space to work.
Jennings works a leg free and moves into half guard.
Jennings looking for a kimura but he'll have to free his other leg if he wants to finish that. Perhaps he's just using it as a distraction technique.
Jennings is trying a forearm choke
I don't think that's going to do much at this level of the game.
And thats the end of the round the fighters go back to their corners.
Kaito Kazuma dominated that round.
The fighters' corners scream their final instructions, as the referee calls time. Here we go, back to the action!

Kazuma connects with a right hand. Jennings shakes it off.
Kazuma scores with a nice right hand.
Kazuma lands a slapping body shot.
Kazuma connects with a crisp jab.
Jennings drops his hands and takes a jab to the jaw for his troubles.
Kazuma thuds his right hand into Jennings's forehead from close range. That could be painful for both fighters.
Jennings tries to clinch up but Kazuma circles away and keeps his distance.
We've had a slow start to the round here - hopefully the action picks up.
Jab from Kazuma.
Kazuma tests Jennings's chin there with a solid looking shot.
Nice jab there from Kazuma.
This is a great period of action - very entertaining stuff!
A low kick from Jennings is predictable there
and Kazuma cracks him with a counter punch right on the button.
Jennings looks like he's developed a pretty tasty lump over his left eye. He'll need to avoid taking much more damage to that.
That's one minute gone in the round.
Kazuma lands with a cross.
Jennings walks into a stiff left hand from Kazuma.
Jennings tries to close the distance and clinch up against the cage but Kazuma paws at him with a jab and circles away.
Kazuma connects with a right hand. Jennings shakes it off.
Kazuma will need to tighten up his combinations if he doesn't want to gas himself out, swinging at thin air.
Kazuma might want to mix his strikes up a bit more. He's just going for head shots at the moment and that can become a bit predictable.
Kazuma jabs Jennings right on the nose. Jennings blinks but takes it well.
Jennings has managed to clinch.
Kazuma misses with a hook to the ribs.
Jennings pulls guard effortlessly.
Jennings not looking particularly offensive just at the moment.
Kazuma trying to control but Jennings is working from the bottom.
Jennings is trying to control the position from the bottom.
That's two minutes gone in the round.
Kazuma trying to control but Jennings is working from the bottom.
Jennings is trying to control the position from the bottom.
Kazuma pressing down on his opponent's thigh, looking to pass guard. Jennings is keeping the position for now.
Jennings had isolated an arm as going for a kimura. Kazuma defends it easily.
Jennings looking to control.
Joe Jennings overall seems to be getting the better of the ground position in the fight so far.
The crowd are loving this. Great action here.
Kazuma passes into half guard.
Kazuma wants to take a breather but Jennings is having none of it.
Kazuma wants to free his trapped foot but Jennings is holding on for dear life with his legs.
The ref warns both fighters not to hold the cage as they work up against the meshing.
That's three minutes gone in the round.
Jennings has no desire to be mounted, so is trying to control. Kazuma is working away from the top position though.
Kazuma seems very keen to just sit and control from half guard but Jennings does not like that idea so much and is remaining active off his back.
Jennings won't allow Kazuma to pass to mount.
Kazuma is trying to control the action in half guard but Jennings is working away on the bottom, looking perhaps to get back to full guard.
The referee walks around the fighters to get a better view of the action. Kazuma lands a nice short elbow.
Jennings looking to work for a kimura from the bottom.
Jennings gets full guard.
Jennings is throwing his legs up, looking for submissions. Kazuma is aware though and is defending well.
Kazuma stands up and looks to throw the legs aside to pass to side control. Jennings swivels though and keeps the full guard.
Kazuma has been the more effective fighter overall so far.
Jennings is looking for a triangle but Kazuma pushes his legs off easily.
Kazuma trying to control the position from guard on top but Jennings is wriggling around, looking for whatever he can.
That's four minutes gone in the round.
Jennings has his feet on Kazuma's thighs here. He's pushed Kazuma off and worked for a very quick armbar from the bottom! He's flipped onto his stomach and he's cranking hard on the arm! Kazuma screams in pain and taps out! This one is all over!
Ladies and gentlemen, after 4:25 of round 2, we have a winner by way of Submission (Armbar). Joe Jennings!
|
|
|
|
|
|
|
|
|
|
|
|
|
|
|
|
|
|
|
|
|
|
|
| S |
C
A |
G |
S |
C
B |
G |
|
S |
C |
G |
|
energy
A | B |
|
hype
A | B |
|
pop
A | B |
|
mgr
A | B |
|
FIGHT
RATING
52% |
|
|
|
|
|
|
|
Undercard bout
|
Coming up we have a featherweight MMA rules bout between Some Dude (ranked 5655 p4p, 392 weight class) and Koby Horder (ranked 5480 p4p, 383 weight class). Over to our ring announcer for the fighter introductions!
 |
|
 |
| 168 cm
18
152 lbs
2 - 0 - 0 |
|
174 cm
18
145 lbs
1 - 0 - 0 |
BJJ White Belt
Excellent boxer
Granite chin |
|
Good wrestler
Counter fighter
Solid chin |
|
| |
|
Ladies and gentlemen. This fight is 3 rounds, in the featherweight division.
Introducing the fighter to my left, fighting out of the red corner.
With a record of
2 - 0 - 0, fighting out of Amsterdam, Some Dude!
And introducing the fighter to my right, fighting out of the blue corner.
With a record of
1 - 0 - 0, fighting out of Amsterdam, Koby Horder!
The judges for this bout are Frank Dennis, Robert Twigg and Stewart Dunkirk.
The bell rings for round one and we are underway!
A looping hook to the body misses from Dude. Horder does a little dance to reset his feet.
Horder changes levels for a counter takedown but doesn't follow through with his attempt.
Dude lands a slapping body shot.
Dude displays good takedown defense there as he swats away a double leg from Horder.
Horder shoots in looking for a takedown. Dude tries to sprawl out of it but Horder keeps driving through. The fighters are pinned against the cage. Dude manages to get underhooks and after a bit of a struggle, circles away and we're back to standing.
We've had a slow start to the round here - hopefully the action picks up.
Horder closes the distance, clinches up and gets a nice trip takedown into side control. Very smooth.
That's one minute gone in the round.
Horder has hold of Dude's arm here. He's working for an Americana. It looks like he might have it! Dude tries to escape but he's just digging himself in deeper - Horder cranks the arm and Dude screams in pain! The ref makes a decision and ends the fight before the tap - no complains from Dude, who is just happy to have his arm attached to his body.
Ladies and gentlemen, after 1:28 of round 1, we have a winner by way of Submission (Americana). Koby Horder!
In defeat, Some Dude stepped up to the mic, saying 'Kicked in the balls, Blinded, Dryhumped...
I felt your boner dude, not cool!
'.
|
|
|
|
|
|
|
|
|
|
|
|
|
|
|
|
|
|
|
|
|
|
|
| S |
C
A |
G |
S |
C
B |
G |
|
S |
C |
G |
|
energy
A | B |
|
hype
A | B |
|
pop
A | B |
|
mgr
A | B |
|
FIGHT
RATING
50% |
|
|
|
|
|
|
|
Undercard bout
|
Coming up we have a light heavyweight MMA rules bout between Axel Rampage (ranked 5627 p4p, 591 weight class) and Robert Kortig (ranked 5446 p4p, 577 weight class). Over to our ring announcer for the fighter introductions!
 |
|
 |
| 186 cm
18
222 lbs
1 - 0 - 0 |
|
183 cm
18
205 lbs
1 - 0 - 0 |
Good wrestling
Basic striking
KO power |
|
BJJ White Belt
Excellent boxer
Very confident |
|
| |
|
Ladies and gentlemen. This fight is 3 rounds, in the light heavyweight division.
Introducing the fighter to my left, fighting out of the red corner.
With a record of
1 - 0 - 0, fighting out of London, Axel Rampage !
And introducing the fighter to my right, fighting out of the blue corner.
With a record of
1 - 0 - 0, fighting out of Amsterdam, Robert Kortig !
The judges for this bout are Cecil Peabody, Stewart Dunkirk and Wesley Smith.
The bell rings for round one and we are underway!
Kortig wings a very wild body shot but it does the job and lands to the midsection.
Kortig changes levels and scores with a jab to the body.
Rampage with a lazy takedown attempt
and Kortig connects with a straight left hand counter down the middle.
It looks like Axel Rampage has been cut.
Rampage shoots in but doesn't get the takedown
and Kortig counters with a straight right hand.
Kortig lands with a nice body punch.
Rampage is breathing heavily.

Kortig sends Rampage crashing to the mat with a devastating uppercut! Kortig is motioning to the referee to let Rampage up. He wants to try and finish this one on the feet!
This has been an exciting period of action!
Kortig stuns Rampage with a nice body shot, before stepping back out of range.
Kortig cracks Rampage 's jaw with two stiff jabs then ducks low and throws a soul-severing right uppercut to the mouth!! Rampage slumps to the ground with blood on his lips. The referee steps in before Kortig can do further damage! This one is done, son!
Ladies and gentlemen, after 0:31 of round 1, we have a winner by way of KO (Punch). Robert Kortig !
|
|
|
|
|
|
|
|
|
|
|
|
|
|
|
|
|
|
|
|
|
|
|
| S |
C
A |
G |
S |
C
B |
G |
|
S |
C |
G |
|
energy
A | B |
|
hype
A | B |
|
pop
A | B |
|
mgr
A | B |
|
FIGHT
RATING
100% |
|
|
|
|
|
|
|
Undercard bout
|
Coming up we have a light heavyweight MMA rules bout between Rei Steinberg (ranked 6219 p4p, 634 weight class) and Cornelius Burns (ranked 4767 p4p, 541 weight class). The key to victory for Rei Steinberg has got to be keeping the fight on the feet.
 |
|
 |
| 190 cm
18
210 lbs
1 - 0 - 0 |
|
189 cm
18
209 lbs
1 - 0 - 0 |
BJJ White Belt
Excellent MT
Big right hand |
|
BJJ White Belt
Counter fighter
Heavy handed |
|
| |
|
Ladies and gentlemen. This fight is 3 rounds, in the light heavyweight division.
Introducing the fighter to my left, fighting out of the red corner.
With a record of
1 - 0 - 0, fighting out of Sydney, Rei Steinberg!
And introducing the fighter to my right, fighting out of the blue corner.
With a record of
1 - 0 - 0, fighting out of Las Vegas, Cornelius Burns!
The judges for this bout are Daniel Franklin, George Francis and Cecil Peabody.
The bell rings for round one and we are underway!
Steinberg misses the shot to the body.
Burns let fly with a counter punch to the body but it didn't land.
Steinberg misses with a telegraphed body shot
and Burns counters with a crisp hook to the side of the head.
Steinberg blocks a jab.
Steinberg throws a hard body shot but it just misses.
Steinberg throws a hook but Burns avoids it easily.
Steinberg pushes forward with a 1-2 combination that forces Burns back to the cage. Steinberg follows up with a solid lead hook to the liver.
It looks like Cornelius Burns has been cut.
Burns throws a combination but it was largely blocked by Steinberg.
Steinberg misses with an uppercut
and Burns counters with a quick right hand to the jaw.
Burns swings and misses with a hook to the body.
Burns fakes and then throws a beautiful body shot. Steinberg looks a bit winded and takes a step backwards to take a breath.
Steinberg lands an overhand right.
Wooooo! Give it up for these two warriors! They are putting on a show!
Burns avoids the body shot from Steinberg.
Burns throws a big shot that misses.
Burns throws a shot to the body.
That's one minute gone in the round.
Burns walks into a left hand.
Steinberg scores with a body shot.
Steinberg throws a right hand that Burns ducks under and follows up with a left that Burns also avoids with ease.
Steinberg rushes in with a sloppy looking punch
letting Burns counter with a right hand.
Burns throws a body punch but Steinberg moves out of range.
Steinberg misses with a lunging right hand
and Burns counters with a quick right hand to the jaw.
Burns needs to keep his hands up - Steinberg had a free shot at his head there.
Burns throws a jab, cross combination which is slipped
and Steinberg counters with a lovely straight right hand!

Steinberg sends Burns crashing to the mat with a devastating uppercut! Steinberg is motioning to the referee to let Burns up. He wants to try and finish this one on the feet!

Burns is rocked!
The fans in attendance giving it up for the two fighters, who have really let it all hang out in the last minute or so!
Steinberg throws a hook to the body but it doesn't connect.
A little jabbing left from Burns on the counter but it doesn't find it's target.
Burns is still on wobbly legs! Can Steinberg finish him?
Steinberg ducks low and lands a nice hook to the body of his opponent.
Steinberg lands with a good body shot.
Steinberg jabs at Burns's body.
Burns seems to have recovered his senses.
Burns looks winded!
Steinberg misses with a hook.
And an attempted straight right on the counter from Burns! But no joy.
That's two minutes gone in the round.
Steinberg scores with a body shot.
Steinberg throws a good cross that connects.
Steinberg drops a shoulder and throws an uppercut that cracks Burns right on the button. Burns goes down! Steinberg follows him to the mat and finishes the job with more strikes! Steinberg gets the win via TKO!
Ladies and gentlemen, after 2:18 of round 1, we have a winner by way of TKO (Strikes). Rei Steinberg!
During a confident post fight interview, Rei Steinberg thanked all his fans. He seemed very genuine when describing how motivated his fans keep him.
|
|
|
|
|
|
|
|
|
|
|
|
|
|
|
|
|
|
|
|
|
|
|
| S |
C
A |
G |
S |
C
B |
G |
|
S |
C |
G |
|
energy
A | B |
|
hype
A | B |
|
pop
A | B |
|
mgr
A | B |
|
FIGHT
RATING
71% |
|
|
|
|
|
|
|
Undercard bout
|
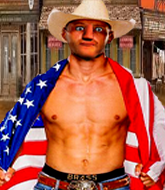
Coming up we have a welterweight MMA rules bout between Leo Cooper (ranked 4286 p4p, 430 weight class) and Eliezer Kubanza (ranked 25465 p4p, 694 weight class). Cooper comes to the cage accompanied by Survivor - Eye Of The Tiger. Leo Cooper has the better chin. Will he look to stand and bang today?
 |
|
 |
| 187 cm
25
170 lbs
2 - 0 - 0 |
|
183 cm
25
158 lbs
0 - 5 - 1 |
BJJ Blue Belt
Solid boxing
KO power |
|
BJJ Blue Belt
Excellent boxer
Determined |
|
| |
|
Ladies and gentlemen. This fight is 3 rounds, in the welterweight division.
Introducing the fighter to my left, fighting out of the red corner.
With a record of
2 - 0 - 0, fighting out of New York, Leo Cooper!
And introducing the fighter to my right, fighting out of the blue corner.
With a record of
0 - 5 - 1, fighting out of Sydney, Eliezer Kubanza!
The judges for this bout are Gwen Towbar, George Francis and Stewart Dunkirk.
The bell rings for round one and we are underway!
Cooper scores a trip takedown into side control. Nice.
Cooper throwing strikes but missing, from side control.
Kubanza wants to get back to his feet but Cooper drags him back down.
Cooper in side control, throwing shots but Kubanza defends.
Kubanza is trying to control Cooper's posture but Cooper avoids it.
Kubanza is looking for a sweep.
Cooper working away.
Cooper definitely looks more muscular than last time we saw him fight.

Cooper has had enough of the ground for now and decides to stand.
Cooper looking to shoot here. He's gone for it and he's landed a takedown into side control! Oh, that's bad for Kubanza!
Cooper is looking to finish here, going for an Americana. Kubanza knows the correct defense though, so he's OK.
The crowd are loving this. Great action here.
Kubanza is not in a great position here, taking some shots.
That's one minute gone in the round.
Cooper throws a knee to the body but it doesn't do much damage.
Kubanza is not in a great position here, taking some shots.
Cooper working the body and head with strikes.
Kubanza is rocked!
Kubanza tries to buck Cooper off but Cooper is having none of it.
Kubanza is not in a great position here, taking some shots.
Kubanza is still in real trouble! Can Cooper finish him?
The fighters are pressed up against the cage, both looking to find a bit of space to work.
Cooper is looking to take a break and control but Kubanza is keeping him honest, looking to work from the bottom.
Cooper wants to stand but Kubanza has his arm trapped.
Kubanza seems to have recovered his senses.
Kubanza misses with a strike from the bottom.
That's two minutes gone in the round.
Cooper wants to stand but Kubanza is controlling his arm.
Cooper misses with the ground and pound.
Cooper trying to control the position but Kubanza is working away.
Kubanza tries to bench press Cooper off him but Cooper keeps the position.
Cooper lands a nice forearm strike.
Cooper working the ground and pound but he's contacting the mat, not the fighter.
Kubanza sneaks back into half guard.
The ref warns both fighters not to hold the cage as they work up against the meshing.
Cooper stands up from half guard... He's had enough of that ground malarky for the time being.
Cooper shoots in for a takedown. "I don't think so" says Kubanza as he avoids it easily.
Cooper shoots in for a takedown! He's got it and he's managed to land in side control! That's better than Cooper was expecting from the takedown attempt, I'm sure!
That's three minutes gone in the round.
Cooper sitting in side control, looking to soften his opponent up with elbows and hammerfists but Kubanza is avoiding damage well and looking to escape the position.
Cooper thinks about going for a far side armbar but bails out and retains the dominant position instead.
Cooper is trying to land an Americana. He has the arm isolated but Kubanza is keeping cool and he's avoided the danger for now.
Cooper tries to land with some ground and pound but misses.
Cooper stands up and we're back to a striking position.
Cooper manages to get an easy takedown there - catching Kubanza on his heels. He'll look to pass Kubanza's guard now, I'm sure.
That's four minutes gone in the round.
Kubanza is trying to control the position but Cooper postures up.
Cooper trying to land body shots but he keeps hitting the mat.
Cooper lands a couple of digs.
Cooper in full guard, throwing the ground and pound. No damage this time.
Cooper won't allow Kubanza to get back to his feet.
Kubanza has momentary wrist control but Cooper slips an elbow through the middle.
Cooper stands and throws Kubanza's legs to the side, diving into side control.
Kubanza looks winded!
You can see the frustration on Kubanza's face, being in this tough position on the bottom.
Cooper stands up.
Kubanza is looking to clinch but Cooper is avoiding it.
And thats the end of the round the fighters go back to their corners.
Leo Cooper dominated that round.
That's the end of the interval. I'm sure that seemed a lot quicker than a minute for our two fighters! Back to the action.
Well, he's not going to score with shots like that. A lazy body kick attempt from Cooper.
Kubanza shoots in for a takedown but Cooper shows good takedown defense.
Kubanza looks frustrated there after his takedown attempt is stuffed easily.
Kubanza swings and misses with a hook to the body.
Kubanza fails in his attempt to clinch.
Cooper half commits to a counter takedown before pushing away, out of range.
Horrible takedown attempt by Kubanza or perhaps it was just good defense by Cooper, which made it look bad.
Leo Cooper has stuffed three takedown attempts in the round now. That's going to take a lot out of Eliezer Kubanza.
Cooper pulls out of a head kick attempt.
No luck for Cooper with that takedown attempt.
Leo Cooper seems to be the more aggressive standup fighter in this bout.
We've had a slow start to the round here - hopefully the action picks up.
Kubanza tries to sprawl but Cooper drives through with a takedown into half guard.
Kubanza is breathing heavily.
Cooper throwing shots but Kubanza is blocking nicely.
That's one minute gone in the round.
Cooper seems to be taking a bit of a break to think of his next move. He lands a short punch in the meantime.
Ground and pound from Cooper.
Cooper is trying for a guillotine from the top but the pressure isn't in the right place so Kubanza is just riding it out for now. Cooper eventually gives up the hold.
Still in half guard, Cooper seems content to control.
Leo Cooper overall seems to be getting the better of the ground position in the fight so far.
Kubanza tries to get to full guard but Cooper has control of the leg.
Kubanza avoiding damage under a succession of punches from Cooper.
Cooper gets to his feet - back to striking we go!
That's two minutes gone in the round.
Cooper throws a combination but it was largely blocked by Kubanza.
Kubanza shoots in for a takedown. "I don't think so" says Cooper as he avoids it easily.
Kubanza uses some good footwork to avoid the body shot by Cooper.
Kubanza shoots in looking for a takedown. Cooper tries to sprawl out of it but Kubanza keeps driving through. The fighters are pinned against the cage. Cooper manages to get underhooks and after a bit of a struggle, circles away and we're back to standing.
Cooper tried to counter with a leg kick but Kubanza avoided it.
Cooper gets a takedown into half guard.
Kubanza wants to control but Cooper is keeping busy and won't allow it.
Cooper is trying to get back to his feet now but his leg is trapped.
That's three minutes gone in the round.
Cooper is looking for submissions but instead, Kubanza has regained full guard.
Cooper working some strikes from top position.
Cooper trying to control but Kubanza is working from the bottom.
Cooper decides to stand up and beckons his opponent to follow.
Cooper is looking for a takedown here. He's shot in and has managed to get it, finishing up in Kubanza's half guard.
Cooper is really dominating this fight. Is there anything that Kubanza can do to turn this around?
Cooper missing with the ground and pound from half guard.
Cooper throwing shots but Kubanza is blocking nicely.
That's four minutes gone in the round.
Cooper drops an elbow to the side of Kubanza's head.
Cooper looks towards his corner to check for any instructions. The corner give him nothing to work with, so he cracks Kubanza with a short hammerfist. I guess that's as good as any advice he could get in this position.
Cooper is trying to control. Kubanza wants to improve his position but can't escape this time.
Cooper decides to stand up.
Cooper throws the overhand right but ducks down into a quick takedown attempt. Kubanza was covering up waiting for the punch and Cooper finishes the takedown easily into guard.
Cooper postures up and scores with a shot to the body and a follow up elbow to the head.
The crowd thankful this round is nearly over.
Cooper looking to control the position here, rather than advance.
Cooper is working the ground and pound from guard. He might want to try advancing position though to get more of an impact.
And thats the end of the round the fighters go back to their corners.
Leo Cooper dominated that second round.
OK. That's time! The bell goes and we're back to the action. Let's get this one finished - here comes the final round!

Kubanza dives in and grabs Cooper's left leg, looking for a takedown. Cooper pushes down on Kubanza's head and hops out.
Cooper throws a sloppy head kick and Kubanza moves out of range easily.
Kubanza throws a counter combo.
Kubanza tries to sprawl but Cooper drives through with a takedown into half guard.
Cooper seems to have lost interest with the ground game and is thinking about standing back up.
Kubanza trying to get back to full guard but Cooper takes advantage of the position and moves to full mount!
Cooper in mount throwing good strikes here, bouncing his opponent's head off the canvas.
Cooper has hold of Kubanza's left arm, perhaps looking for a submission. The two fighters tussle over control of the isolated limb and Kubanza manages to get his arm back to his side and away from danger.
Cooper is still in mount, landing shots to his trapped opponent. Kubanza can't stay in a position like this for much longer.
Kubanza takes a big intake of breath there - he's definitely tired.
Cooper looking to finish Kubanza with some ground and pound. This is bad for Kubanza!
This is a great period of action - very entertaining stuff!
Kubanza tries to hold on but Cooper pushes him away.
That's one minute gone in the round.
Cooper is still in mount, landing shots to his trapped opponent. Kubanza can't stay in a position like this for much longer.
Cooper looking for an armbar but decides to keep the dominant position instead.
Cooper can't quite control the action as he would like just now, as Kubanza is looking to escape.
Cooper has been looking to land a fair amount of strikes on the ground. He might be looking to soften his opponent up in order to work for a submission.
Kubanza taking shots to the head.
Cooper scoring with strikes but Kubanza is staying in there.
Kubanza swinging wildly from the bottom but he's not landing.
Cooper controlling from the full mount.
Cooper lands a heavy shot. That's hurt Kubanza! Cooper sees the opportunity and turns up the heat - strike after strike land to the defenseless Kubanza and the ref dives in to save him! This one is all over!
Ladies and gentlemen, after 2:56 of round 3, we have a winner by way of KO (Strikes). Leo Cooper!
Leo Cooper looked relieved post fight as he said the following; 'I personally think after this performance, I should be consider as the face of this promotion. '.
|
|
|
|
|
|
|
|
|
|
|
|
|
|
|
|
|
|
|
|
|
|
|
| S |
C
A |
G |
S |
C
B |
G |
|
S |
C |
G |
|
energy
A | B |
|
hype
A | B |
|
pop
A | B |
|
mgr
A | B |
|
FIGHT
RATING
51% |
|
|
|
|
|
|
|
Co-main event
|
Coming up we have a featherweight MMA rules bout between Hoddy McNeal (ranked 4960 p4p, 366 weight class) and Ogre King (ranked 5539 p4p, 385 weight class). Both fighters really staring each other down here, as Ogre King enters the cage!
 |
|
 |
| 169 cm
18
150 lbs
1 - 0 - 0 |
|
170 cm
18
146 lbs
1 - 0 - 0 |
BJJ White Belt
Counter fighter
Good chin |
|
Good wrestler
Counter fighter
Tends to cut |
|
| |
|
Ladies and gentlemen. This fight is 3 rounds, in the featherweight division.
Introducing the fighter to my left, fighting out of the red corner.
With a record of
1 - 0 - 0, fighting out of Las Vegas, Hoddy McNeal!
And introducing the fighter to my right, fighting out of the blue corner.
With a record of
1 - 0 - 0, fighting out of Helsinki, Ogre King!
The judges for this bout are Alan Glass, Stewart Dunkirk and Daniel Franklin.
The bell rings for round one and we are underway!
McNeal lands with a cross to side of his opponent's head.
McNeal digs a good hook to King's body.
McNeal lands a jab to the head.
King shoots in from a long way out. He's driving through with the takedown attempt and he eventually gets it, landing in McNeal's guard.
The ref warns both fighters not to hold the cage as they work up against the meshing.
McNeal avoiding any damage from the ground and pound.
McNeal definitely looks more muscular than last time we saw him fight.
King prevents McNeal from getting back to his feet.
McNeal wants to sweep here but King controlling him for the moment.
McNeal is trying to stand up but he's not managed so far.
We've had a slow start to the round here - hopefully the action picks up.
King trying to control the position from guard on top but McNeal is wriggling around, looking for whatever he can.
King controls the pace of the fight for a moment.
King won't allow McNeal to get back to his feet.
We may be looking at a referee standup if the pace doesn't pick up soon.
King throwing strikes but missing.
The ref stands the fighters back up due to a lack of activity.
That's one minute gone in the round.
King throws a leg kick but McNeal sees it coming and moves out of range.
King misses with a takedown
and McNeal counters with a three punch combination, finished off with a leg kick. Nice work.
A lazy body kick from King
and McNeal counters with a quick right hand to the jaw.
McNeal misses with a hook.
McNeal with a hook.
King has his takedown stuffed
and McNeal cracks him with a counter punch right on the button.
King is rocked!
King has his takedown stuffed
and McNeal counters with a good right hand that lands right on the jaw.
King is still on wobbly legs! Can McNeal finish him?
It looks like Ogre King has been cut.
King has tried to improve his agility in the runup to this fight.
Hoddy McNeal has stuffed three takedown attempts in the round now. That's going to take a lot out of Ogre King.
That's two minutes gone in the round.
McNeal throws a looping overhand right but King ducks down to avoid it.
King with the counter takedown but McNeal avoids it easily.
McNeal moving in and out of range nicely, whilst landing the scoring shot.
King shoots and misses
and McNeal counters with a nice uppercut.
The fans in attendance giving it up for the two fighters, who have really let it all hang out in the last minute or so!
McNeal drops King with a straight right hand, right on the button! McNeal follows him down to the mat and pounds him out with hammerfists until the referee jumps in to end the fight!
Ladies and gentlemen, after 2:24 of round 1, we have a winner by way of TKO (Strikes). Hoddy McNeal!
Hoddy McNeal thanked the fans post fight for their support.
|
|
|
|
|
|
|
|
|
|
|
|
|
|
|
|
|
|
|
|
|
|
|
| S |
C
A |
G |
S |
C
B |
G |
|
S |
C |
G |
|
energy
A | B |
|
hype
A | B |
|
pop
A | B |
|
mgr
A | B |
|
FIGHT
RATING
44% |
|
|
|
|
|
|
|
Main event
|
Coming up we have a middleweight MMA rules bout between Chew Kok (ranked 3701 p4p, 414 weight class) and Hardis Camaz (ranked 5554 p4p, 554 weight class). Hardis Camaz told me before the fight that he's been watching a lot of DVDs so let's see if that helps him in this one! I can't wait to find out!
 |
|
 |
| 185 cm
25
185 lbs
2 - 0 - 0 |
|
190 cm
24
194 lbs
1 - 0 - 0 |
Good wrestling
Basic striking
Big right hand |
|
BJJ Blue Belt
Decent boxing
Solid chin |
|
| |
|
Ladies and gentlemen. This fight is 3 rounds, in the middleweight division.
Introducing the fighter to my left, fighting out of the red corner.
With a record of
2 - 0 - 0, fighting out of London, Chew Kok!
And introducing the fighter to my right, fighting out of the blue corner.
With a record of
1 - 0 - 0, fighting out of St Petersburg, Hardis Camaz!
The judges for this bout are Wesley Smith, Stewart Dunkirk and Chris Downing.
The bell rings for round one and we are underway!
Camaz fails to land with a series of punches.
Kok moves in looking to clinch but Camaz pushes him off.
Kok ducks under a wild hook from Camaz.
Camaz swats away the attempt to clinch by Kok.
Kok ducks under an overhand right and circles away with a smile on his face.
Camaz swats away the attempt to clinch by Kok.
Kok clinches up with Camaz and pushes him back against the cage.
Kok lands a shoulder strike.
Camaz will no doubt start fighting again in a minute but for now he's just having a little rest, leaning Kok up against the cage.
We've had a slow start to the round here - hopefully the action picks up.
Camaz taking a breather.
Kok swings away with an uppercut that misses.
Camaz tries to stall but Kok uses the opportunity to gain a better position.
That's one minute gone in the round.
Camaz wants to strike at distance but he can't break free of the clinch.
Camaz tries to break free but Kok pushes him back against the cage.
Kok scores with a nice hook to the head.
Camaz drops to a knee looking for a takedown but Kok gets the underhooks and prevents it.
Camaz tries to stall but Kok uses the opportunity to gain a better position.
Camaz has had enough of the clinch but Kok keeps him there for the moment.
Kok lands a hook that snaps the head of Camaz backwards.
A shot in the inside from Kok.
Kok prevents Camaz from breaking the clinch.
Camaz working hard to break the clinch.
Camaz wants to strike at distance but he can't break free of the clinch.
Kok definitely looks more muscular than last time we saw him fight.
Kok prevents Camaz from breaking the clinch.
That's two minutes gone in the round.
A frustrated look appears on Camaz's face as he tries to break the clinch.
Camaz is trying to force a seperation but Kok has the dominant position.
Kok scores with a nice hook to the head.
Camaz is working hard here but doesn't seem to be able to control effectively, up against the cage.
A short left from Kok.
Kok lands a left hand that snaps the head of Camaz backwards.
A quick uppercut on the inside from Kok.
Camaz is trying to break the clinch but Kok has him pressed against the cage.
Kok blocking some punches.
Kok lands with a short shot to the head.
Camaz wants a takedown but no success here.
Fantastic stuff here - a very entertaining period of action, which has drawn cheers from the crowd.
Camaz wants to break the clinch but can't.
Camaz struggles to land a body shot inside as Kok controls his hands.
That's three minutes gone in the round.
Camaz blocks a punch to the side of the head.
Kok lands a nice uppercut.
Kok lands a shoulder strike that jolts his opponent's head backwards.
Camaz wants to break the clinch but can't.
Camaz stalling here - the referee won't stand for too much of that.

Camaz breaks from the clinch.
Camaz has been working on his striking defense in training and it's paying off as Kok is landing a low percentage of strikes.
Kok has closed the distance and engaged Camaz in a clinch.
Camaz is trying to break free.
A real battle for position is taking place between these two warriors.
Kok gets through Camaz's defenses to land a nice punch to the side of the head.
Camaz is looking for a takedown up against the cage. Kok gets underhooks though and prevents the takedown attempt.
Chew Kok has stuffed three takedown attempts in the round now. That's going to take a lot out of Hardis Camaz.
The pace slowing considerably in the clinch, as Camaz takes a break from that fighting nonsense to think about the finer things in life.
Kok lands a shoulder strike that jolts his opponent's head backwards.
That's four minutes gone in the round.
Camaz tries to circle away but Kok has him pinned against the cage.
Kok makes some space for himself and lands an uppercut.
Kok scores with an uppercut up the middle.
Camaz tries to score a body lock takedown but Kok shows good agility there to stay on his feet.
Kok keeps the fight in the clinch, despite Camaz's efforts to push away.
Kok scores with a nice hook to the head.
The crowd cheering loudly, showing their appreciation for the quality fight we're seeing here.
The referee calls for Kok to work.
Camaz escapes the clinch and we're back to striking.
Camaz throws a hook to the body but it doesn't connect.
Kok tries to clinch there but Camaz circles away.
A big right from Camaz misses.
Camaz fakes high and swings low for a body shot but Kok manages to avoid it.
Kok is looking to counter with a shot to the body.
And thats the end of the round the fighters go back to their corners.
Chew Kok dominated that round.
That's the end of the round. The referee orders the cornermen out of the cage so we can get back down to business.
Left hook, right uppercut from Camaz.
Kok instigates a clinch.
Kok softening up his opponent with strikes, against the cage.
Camaz's corner calls for him to break the clinch, which he does.
Camaz throws an overhand right that lands on Kok's shoulder, as Kok tries to avoid the shot.
Camaz avoids the clinch attempt nicely.
Kok is really dominating this fight. Is there anything that Camaz can do to turn this around?
Camaz tries to land with a swinging hook to the body but Kok was well out of range. Poor timing from Camaz.
Camaz keeps the fight on the outside.
Kok tries to clinch up.
Camaz closes this distance looking for a takedown but Kok circles away.
Kok tries to close the distance and clinch but Camaz swats him to one side with an open hand palm strike and circles away.
Kok closes the distance and clinches.
A battle for position here, against the cage.
Camaz wants to get back to striking at distance but Kok won't allow it.
Camaz's corner calls for him to break the clinch, which he does.
Kok gets to the clinch - let's see what his plan is here.
That's one minute gone in the round.
Camaz wants to push off and get back to the center of the mat but Kok has him pressed against the cage.
Camaz trying to stall but Kok improves his position.
Camaz breaks the clinch and we're back to striking at distance.
Hardis Camaz is looking to throw some combinations by the looks of things.
Camaz misses with a wild body shot.
It looked like Kok was trying to counter with a body shot coming off that last attack from Camaz.
Camaz misses with a body shot. Nice footwork from Kok.
Kok moves into the clinch successfully.
A hook to the body from Camaz.
Camaz's head jolts backwards as he takes an uppercut right on the button!
Camaz is trying to work for a single leg takedown but Kok pulls him back up using the underhooks.
The pace really dropping off here, momentarily.
Kok prevents Camaz from breaking the clinch.
Both fighters working to control the clinch.
That's two minutes gone in the round.
A short right from Kok on the inside.
Kok lands with a short head shot on the inside.
Kok working aggressively here.
Camaz stalling the fight.
Kok lands with a good tight uppercut to the head.
Camaz wants to strike at distance but he can't break free of the clinch.
A battle for position here, against the cage.
A short right hand to the side of the head by Kok.
Camaz working hard to break the clinch.
Kok has Camaz pressed against the cage, preventing Camaz from circling away and getting back to striking at range.
Camaz breaks the clinch and we return to the middle of the mat.
Camaz misses with a wild body shot.
Wooooo! Give it up for these two warriors! They are putting on a show!
Kok tries to clinch but Camaz is having none of it.
That's three minutes gone in the round.
Kok tries to clinch there but Camaz circles away.
Camaz falls off balance throwing a combination
and Kok moves into the clinch.
Camaz looking to stall.
Kok effectively controlling the action here.
With the fighters clinched against the cage, Kok creates a bit of distance for himself and scores with a nice uppercut.
Kok lands a hook that snaps the head of Camaz backwards.
With the fighters clinched against the cage, Kok creates a bit of distance for himself and scores with a nice uppercut.
Kok prevents Camaz from breaking the clinch.
Kok prevents the takedown attempt.
Chew Kok has stuffed three takedown attempts in the round now. That's going to take a lot out of Hardis Camaz.
A nice right hand lands inside from Kok.
Camaz fails to land with a short punch on the inside.
Chew Kok has scored more points in the clinch so far.
Camaz is working hard here but doesn't seem to be able to control effectively, up against the cage.
That's four minutes gone in the round.
Kok slowing the pace effectively.
Kok lands a nice uppercut.
Camaz is looking to control Kok's arms but Kok gets an underhook and turns him. Now Camaz has his back to the cage.
Kok scores with a shoulder strike.
Camaz trying to stall but Kok improves his position.
Camaz tries to circle away but Kok has him pinned against the cage.
Camaz tries to circle away but Kok has him pinned against the cage.
Kok lands a right uppercut that snaps the head of Camaz backwards.
The crowd cheering loudly, showing their appreciation for the quality fight we're seeing here.
A short right from Kok.
Kok lands a right uppercut that snaps the head of Camaz backwards.
Kok scores with an uppercut up the middle.
Camaz is trying to work out of this bad position, with his back against the cage.
And thats the end of the round the fighters go back to their corners.
Chew Kok dominated that second round.
That's time! Kok's corner gives him a slap on the ass as he gets ready to fight. So, we enter the final round. Let's see if either fighter can bring us a finish, or whether we're going to the judges scorecards.
Camaz misses with a lunging right hand
and Kok holds on and brings the fighters into a clinch.
Camaz blocking some punches.
Kok prevents Camaz from breaking the clinch.
Camaz working hard to break the clinch.
Camaz is trying to break the clinch but Kok has him pressed against the cage.
Both guys are working to get underhooks.
Camaz letting Kok take a breather here.
Camaz tries to circle away but Kok has him pinned against the cage.
Camaz tries to break the clinch but Kok is controlling the position.
We've had a slow start to the round here - hopefully the action picks up.
Camaz is trying to break free.
Camaz has had enough of the clinch and is looking to separate.
Camaz is trying to slow down the pace in the clinch, to catch his breath.
Camaz avoiding damage.
That's one minute gone in the round.
Camaz stalling the fight.
The crowd are getting on Camaz's back here. They're not happy about his lack of aggression in the clinch.
Camaz tries to score a body lock takedown but Kok shows good agility there to stay on his feet.
The fighters are pressed against the cage, as the pace of the fight slows.
A nice right hand lands inside from Kok.
Camaz is trying to work out of this bad position, with his back against the cage.
Kok lands a right uppercut that snaps the head of Camaz backwards.
A nice left hand lands by Kok.
Camaz is looking to control Kok's arms but Kok gets an underhook and turns him. Now Camaz has his back to the cage.
Camaz is trying to break the clinch but Kok has him pressed against the cage.
An uppercut on the inside fails to land for Camaz.
That's two minutes gone in the round.
Camaz is trying to force a seperation but Kok has the dominant position.
Kok lands a left hand that snaps the head of Camaz backwards.
Camaz tries a shoulder strike but it doesn't do any damage.
Camaz looks like he'd prefer to be striking at range right now.
Camaz is trying to break the clinch but Kok is controlling him.
Kok lands with a left to the head.
Kok lands a nice uppercut.
Camaz misses with a punch to the body.
Camaz wants to push off and get back to the center of the mat but Kok has him pressed against the cage.
Camaz is looking to control Kok's arms but Kok gets an underhook and turns him. Now Camaz has his back to the cage.
Camaz looking to slow down the pace here.
Camaz takes a big intake of breath there - he's definitely tired.
Kok stalling in the clinch.
Camaz has had enough of the clinch and is looking to separate.
That's three minutes gone in the round.
Kok working on landing some head shots here - that one got through nicely.
Kok lands a hook to the side of the head.
Camaz is rocked!
Kok scores with a shot to the side of Camaz's head.
Camaz is still on wobbly legs! Can Kok finish him?
Camaz is trying to slow down the pace of the fight but Kok is keeping busy.
Kok has Camaz pressed against the cage, preventing Camaz from circling away and getting back to striking at range.
Camaz seems to have recovered his senses.
Camaz wants to get back to striking at distance but Kok won't allow it.
Kok drops Camaz onto one knee with a big uppercut from the clinch! Camaz is propped up by the cage and works his way back to his feet!
Hardis Camaz has stepped it up - he knows he needs a finish here!
Camaz is trying to maintain a safe position but Kok gets an underhook and turns Camaz into the cage.
A frustrated look appears on Camaz's face as he tries to break the clinch.
Camaz has a body lock and is looking for a takedown. Kok is bouncing around trying to prevent the takedown and somehow he has indeed managed to stay on his feet.
Camaz is trying to maintain a safe position but Kok gets an underhook and turns Camaz into the cage.
Kok lands a hook that snaps the head of Camaz backwards.
That's four minutes gone in the round.
The fans in attendance giving it up for the two fighters, who have really let it all hang out in the last minute or so!
Camaz wants to push off and get back to the center of the mat but Kok has him pressed against the cage.
Camaz has had enough of the clinch but Kok keeps him there for the moment.
Still in the clinch, Kok scores with a nice short uppercut.
Kok drops Camaz onto one knee with a big uppercut from the clinch! Camaz is propped up by the cage and works his way back to his feet!
Kok creates a bit of space for himself and rocks Camaz with a big uppercut! Camaz tries to clinch up but Kok pushes him back against the cage and lands another monster strike that crumples Camaz to the mat! Camaz covers up and Kok unloads with more strikes until the referee steps in to end the bout!
Ladies and gentlemen, after 4:26 of round 3, we have a winner by way of TKO (Punches). Chew Kok!
|
|
|
|
|
|
|
|
|
|
|
|
|
|
|
|
|
|
|
|
|
|
|
| S |
C
A |
G |
S |
C
B |
G |
|
S |
C |
G |
|
energy
A | B |
|
hype
A | B |
|
pop
A | B |
|
mgr
A | B |
|
FIGHT
RATING
58% |
|
|
|
|
|
|
|
|
|
|
