|
TWGC 21 (205lbs, D1): Finals - Round 1 PBP Commentary |
Undercard bout
|
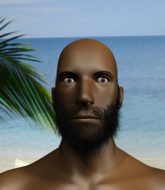
Coming up we have a light heavyweight Tycoon World Grappling Championship rules bout between Greco Roman (ranked 9477 p4p, 767 weight class) and Aloysius Martin Thesz (ranked 3257 p4p, 429 weight class). The atmosphere really building for this one as we go over to our ring announcer for the fighter introductions!
This TWGC bout is 1 fifteen minute round in the light heavyweight division. Introducing today's competitors. In the red corner, competing out of London, with a TWGC record of 17 wins and 13 losses; Greco Roman! And in the blue corner, fighting out of Rio de Janeiro, with a TWGC record of 13 wins and 10 losses; Aloysius Martin Thesz!
The judges for this bout are Paul Tew, William Gold and Donald Grub.
Let's get this grappling contest under way! Who will be victorious?

Thesz drives through and clinches with Roman against the cage.

Thesz gets a nice trip takedown into half guard. Score +2 for takedown into guard / half guard: Roman (0) vs (2) Thesz
Thesz wants to control but Roman is keeping him busy.

Thesz is trying a forearm choke
I don't think that's going to do much at this level of the game.
Neither fighter is being very active at the moment, with Thesz in particular looking to stall.
Roman might be looking to lock onto one of his opponent's long limbs for a submission, whilst we're on the ground.
Thesz is looking to advance position but Roman won't allow it.
Thesz frees up his trapped foot and advances to mount. Score +3 for passing guard: Roman (0) vs (5) Thesz
We've had a slow start to the round here - hopefully the action picks up.
Roman wants to hold on but Thesz pushes him away.
Roman is squirming around, avoiding Thesz's attempts to control the action.

That's one minute gone in the round.
Thesz controlling his opponent.
Thesz can't quite control the action as he would like just now, as Roman is looking to escape.
Thesz looking for an armbar but decides to keep the dominant position instead.
Roman regains half guard.
Roman controlling the position well.
Thesz tries to pass to full mount but Roman defends it.

That's two minutes gone in the round.
Thesz not doing much here.
The ref warns both fighters not to hold the cage as they work up against the meshing.
Thesz is pressing down on Roman's thigh, looking to free his foot. Roman is holding on for now.
Thesz is thwarting Roman's attempts to control the position.

That's three minutes gone in the round.
Thesz is pressing down on Roman's thigh, looking to free his foot. Roman is holding on for now.
Thesz trying to control from half guard but Roman is working away.
Thesz trying to control from Roman's half guard. Roman has other ideas though and has regained full guard.
Roman wants to sweep but no luck.
Thesz content to stall in guard here.
Roman bucks up whilst keeping hold of a body lock, managing to reverse the position. Now he's in top in Thesz's guard. Score +2 for sweep to guard / half guard: Roman (2) vs (5) Thesz
Thesz trying to keep a closed guard but Roman is proving a slippery customer.

That's four minutes gone in the round.
Thesz seems keen to control rather than go for a submission, at least for now.
Thesz wants to sweep but no luck.
Thesz has his hands on Roman's head, controlling the position.
Our spies down at at Brazilian Elite Team inform us that Thesz has really been working on his submissions in the buildup to this fight. Will it pay off?
Roman stands and throws Thesz's legs to the side, diving into side control. Score +3 for passing guard: Roman (5) vs (5) Thesz
Thesz tries to get back to half guard but can't.
Roman wants to control but Thesz is keeping him busy.
Thesz tries to improve position but can't.

That's five minutes gone in the round.
Roman slows the pace down.
Roman trying to control the position but Thesz is working away.
Roman is going to have to think about doing something other than just controlling because Thesz is managing to avoid having the position dictated to him.
Thesz can't do much from the bottom here.
Roman controls the position.

That's six minutes gone in the round.
Roman wants to control for a moment but Thesz uses the opportunity to move back to half guard.
Thesz is trying to get back to full guard.
Thesz trying to control from the bottom.
Roman wants to take a breather but Thesz is having none of it.
Thesz wants to control but Roman is keeping busy and won't allow it.
Thesz wants to get back to full guard.
Roman is working hard to pass the guard. He's done it - he's now in full mount! Trouble for Thesz! Score +3 for passing guard: Roman (8) vs (5) Thesz
Thesz is trying desperately to improve position.

That's seven minutes gone in the round.
Roman with some aggressive grappling here, looking for the finish.

Roman quickly switches position and commits to an armbar! It's a big risk for Roman but it's paid off an Thesz is forced to tap! Nice work by Roman.
Ladies and gentlemen, after 7:41 of round 1, we have a winner by way of Submission (Armbar). Greco Roman!
Greco Roman bigged himself up after the win. The crowd seemed to love it. |
|
|
|
Undercard bout
|
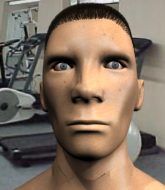
Coming up we have a light heavyweight Tycoon World Grappling Championship rules bout between Kostas Mytilinaios (ranked 799 p4p, 107 weight class) and Indigo Starseed (ranked 12798 p4p, 787 weight class). Mytilinaios comes to the cage accompanied by Sanitarium. Both fighters look fresh as a daisy as they make their way towards the cage.
This TWGC bout is 1 fifteen minute round in the light heavyweight division. Introducing today's competitors. In the red corner, competing out of New York, with a TWGC record of 7 wins and 6 losses; Kostas Mytilinaios! And in the blue corner, fighting out of London, with a TWGC record of 5 wins and 5 losses; Indigo Starseed!
The judges for this bout are Colin Fotheringham, Andrew Berry and Sam Margolis.
The fighters bow as they face eachother in the middle of the mat and we are under way.

Mytilinaios throws a loose over hand right and dives in with a double leg takedown. Starseed tries to sprawl but it's too late and the fighters hit the mat. Mytilinaios is in Starseed's guard. Score +2 for takedown into guard / half guard: Mytilinaios (2) vs (0) Starseed
Mytilinaios slows down the pace of the fight, as he sits in guard.
Mytilinaios stands up and looks to throw the legs aside to pass to side control. Starseed swivels though and keeps the full guard.
Mytilinaios wants to control from the top but Starseed keeps moving.
The fighters are pressed up against the cage, both looking to find a bit of space to work.
We've had a slow start to the round here - hopefully the action picks up.
Starseed tries to land a sweep but no joy.
Mytilinaios controls the pace of the fight for a moment.
That's one minute gone in the round.
Starseed controlling Mytilinaios's posture.
Mytilinaios won't allow Starseed to sweep him here.
Mytilinaios trying to control but Starseed is working from the bottom.
The ref warns both fighters not to hold the cage as they work up against the meshing.
Mytilinaios trying to pass the guard but can't manage it just yet.
Starseed seems keen to control Mytilinaios's posture.
Mytilinaios tries to free his leg and advance position but Starseed is retaining full guard.
Mytilinaios trying to control the position from guard on top but Starseed is wriggling around, looking for whatever he can.
That's two minutes gone in the round.
Mytilinaios is going to have to think about doing something other than just controlling because Starseed is managing to avoid having the position dictated to him.
Mytilinaios tries to free his leg and advance position but Starseed is retaining full guard.
Mytilinaios trying to control the position from guard on top but Starseed is wriggling around, looking for whatever he can.
Starseed keeping full guard, as Mytilinaios tries to pass.
That's three minutes gone in the round.
Mytilinaios pushing down on Starseed's thigh, trying to pass to half guard. He's managed it... Nice work.
Mytilinaios is keen to just control but Starseed is a slippery customer.
Starseed is trying to get back to full guard.
Mytilinaios is trying to work for a kimura but Starseed is defending well.
That's four minutes gone in the round.
Mytilinaios is trying to advance to mount but he's lost his balance and Starseed reverses the position - he's now on top in Mytilinaios's guard. Score +2 for sweep to guard / half guard: Mytilinaios (2) vs (2) Starseed
Mytilinaios seems to have improved his submission grappling technique since last time we saw him. Let's see if he can pull off a submission.
Mytilinaios is working an open guard here, looking to improve his position. No doubt that will leave him open to counters but at least he's being more offensive.
Starseed postures up.
Mytilinaios tries to land a sweep but no joy.
That's five minutes gone in the round.
Mytilinaios had isolated an arm as going for a kimura. Starseed defends it easily.
Mytilinaios controls Starseed momentarily but Starseed frees himself.
Mytilinaios tries to land a sweep but no joy.
Starseed's corner is telling him to maintain position.
My spies in AREA 51 inform me that Starseed has been getting involved in the gym's BJJ sparring sessions. Let's see whether that pays dividends!
Starseed won't allow Mytilinaios to sweep him here.
That's six minutes gone in the round.
Mytilinaios has his foot on Starseed's thigh. He's trying to push off and get in position for a triangle, I think. Starseed works his way back into a safe position though.
Mytilinaios wants to hit a switch here but Starseed passes into full mount! Oh no, disaster for Mytilinaios there! Score +3 for passing guard: Mytilinaios (2) vs (5) Starseed
Mytilinaios is hanging on here. He's in a desperate position.
Starseed content just to control the position here.
That's seven minutes gone in the round.
Mytilinaios is wriggling around trying to escape.
Mytilinaios wants to improve position but instead he's given up his back. Score +3 for taking back: Mytilinaios (2) vs (8) Starseed
Mytilinaios tries to roll but Starseed sticks to his back.
Mytilinaios is working hard here to advance position.

That's eight minutes gone in the round.
Starseed has the hooks sunk in and you can see the will to fight slowly draining out of Mytilinaios's body.
Mytilinaios is really stuck here.
Starseed is riding his opponent, not letting Mytilinaios buck him off.
Starseed is hanging on to Mytilinaios's back as he tries to escape.

That's nine minutes gone in the round.
Mytilinaios wants to control his opponent's hands but Starseed gets his hands free.
Mytilinaios tries to escape but Starseed has the hooks in and won't let him break free.
Starseed avoiding Mytilinaios 's attempts to control his hands.
Mytilinaios tries to escape the position.
Starseed trying to secure his dominant position for a moment - making sure Mytilinaios doesn't escape.

That's ten minutes gone in the round.
Mytilinaios is defending well here and trying to improve his position.
Mytilinaios trying to control the position but Starseed manages to sink in the hooks.
Mytilinaios is being controlled on the ground here - he must escape this position otherwise surely the end is near.

That's eleven minutes gone in the round.
You can see the frustration on Mytilinaios's face
He knows he is in trouble unless he improves his position sooner rather than later.
Mytilinaios turns into Starseed and is now in his guard.
Score +2 for sweep to guard / half guard: Mytilinaios (4) vs (8) Starseed
Mytilinaios trying to control but Starseed is working from the bottom.
Mytilinaios pressing down on his opponent's thigh, looking to pass guard. Starseed is keeping the position for now.

That's twelve minutes gone in the round.
Starseed seems keen to control rather than go for a submission, at least for now.
Mytilinaios is looking to advance position but Starseed has hit a scissor sweep - now he's on top in mount! Score +4 for clean sweep to past guard: Mytilinaios (4) vs (12) Starseed
Starseed takes a little breather and maintains the position. The referee will be looking for him to stay active from such a dominant position though.
Mytilinaios is trying to escape the mount.

That's thirteen minutes gone in the round.
Mytilinaios is trying to reverse the position but instead Starseed has taken his back - oops! Score +3 for taking back: Mytilinaios (4) vs (15) Starseed
Starseed controlling well, preventing Mytilinaios from escaping the position.
Starseed controlling the position well here. Mytilinaios rolled but Starseed kept the hooks locked in and stayed in the dominant position.
Mytilinaios trying to control the action but Starseed just sinks the hooks in.
I would not like to be Mytilinaios right now.

That's fourteen minutes gone in the round.
Mytilinaios rolls, trying to escape but Starseed keeps control of the position.
Boooooooooooooooooooo!!! God, this has been a terrible round. Come on you two, sort yourselves out!
Starseed biding his time, controlling Mytilinaios.
And that's the end of the fight!
Starseed wins on points by 15 to 4.
As Indigo Starseed got his breath back, he grabbed the microphone and managed to blurt out the following: Man first off I want to say thank you to the creator for allowing me to show you all my true potential tonight, and then I would like to thank Broken Halo Pride! You are my blood and my family! I also want to say Garfield, your a a beast man, if you would have just laced off the lasagna I might no'. |
|
|
|
Co-main event
|
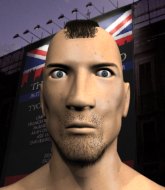
Coming up we have a light heavyweight Tycoon World Grappling Championship rules bout between Hughtavious Mingo (ranked 1811 p4p, 263 weight class) and Aito Lager (ranked 20124 p4p, 0 weight class). Lager has chosen Army Of The Pharaohs - Seven as his entrance music. Fingers crossed for an exciting fight - I'm sure both fighters are looking for a nice under the table bonus!
This TWGC bout is 1 fifteen minute round in the light heavyweight division. Introducing today's competitors. In the red corner, competing out of Rio de Janeiro, with a TWGC record of 6 wins and 1 losses; Hughtavious Mingo! And in the blue corner, fighting out of Las Vegas, with a TWGC record of 6 wins and 4 losses; Aito Lager!
The judges for this bout are William Gold, Daniel Bishop and James Atkins.
The official calls the fighters to the middle and the contest is under way.

Mingo has taken the fight to the clinch.
Mingo gets a nice trip takedown into half guard. Score +2 for takedown into guard / half guard: Mingo (2) vs (0) Lager
Lager regains full guard. Nicely done.
Lager looking for a sweep. Not yet Lager, not yet.
Lager wants to control here, rather than go for any submissions from the bottom. At least for now.
Mingo wants to pass the guard but Lager is keeping the position.
Mingo has to be careful here, sitting in the guard of a superior BJJ player.
We've had a slow start to the round here - hopefully the action picks up.
Lager wants to sweep but no luck.
Mingo forces his way into half guard.
That's one minute gone in the round.
Lager moves into full guard.
Mingo pressing down on his opponent's thigh, looking to pass guard. Lager is keeping the position for now.
Lager is working from a closed guard but he's struggling to control his opponent.
Mingo forces his way into half guard.
Lager has found himself in a tricky position here. He's been working his transitions in training so let's see if he can work his way out of it.
Mingo is pressing down on Lager's thigh, looking to free his foot. Lager is holding on for now.
Lager is pressing down on Mingo's left leg trying to get back to full guard. He's managed it.
Lager is working the butterfly guard. He manages to land a nice scissor sweep and is now in half guard on the top. Nice move. Score +2 for sweep to guard / half guard: Mingo (2) vs (2) Lager
Mingo actively working from the bottom here.
Lager trying to control the action but Mingo is working from the bottom.
That's two minutes gone in the round.
Lager is looking for a kimura but Mingo is holding onto that half guard position, so it's hard for Lager to get the leverage.
Mingo is not content to let Lager control the position.
Mingo won't allow Lager to pass to mount.
Lager is trying to advance to mount but he's lost his balance and Mingo reverses the position - he's now on top in Lager's guard. Score +2 for sweep to guard / half guard: Mingo (4) vs (2) Lager
Lager working a defensive guard here.
Mingo tries to free his leg and advance position but Lager is retaining full guard.
Lager tries to land a sweep but no joy.
That's three minutes gone in the round.
Mingo pressing down on his opponent's thigh, looking to pass guard. Lager is keeping the position for now.
Mingo is working hard here to advance position.
Lager manages to sweep nicely, so he's now on top. Mingo manages to get himself to full guard.
Score +2 for sweep to guard / half guard: Mingo (4) vs (4) Lager
Mingo keeping moving, preventing Lager from controlling successfully.
Lager slips nicely into half guard.
Lager trying to control the action but Mingo is working from the bottom.
Lager is working for submissions here but there's nothing on.
That's four minutes gone in the round.
Lager is looking for the mount but instead finds himself back in full guard.
Lager passes Mingo's left leg - he's now in half guard.
Lager is looking for a kimura but he's never going to get it from there.
Mingo wants to get back to full guard.
Lager wants to advance to full mount but Mingo doesn't think that's going to happen and regains full guard instead.
Mingo wants to sweep but no luck.
Lager slips effortlessly into side control - very nice. Score +3 for passing guard: Mingo (4) vs (7) Lager
That's five minutes gone in the round.
Lager is looking to take a break and control but Mingo is keeping him honest, looking to work from the bottom.
Lager tries to move to full mount but Mingo actually manages to regain half guard.
Lager frees up his trapped foot and advances to mount. Score +3 for passing guard: Mingo (4) vs (10) Lager
Mingo regains half guard.
Lager is looking to pass the guard... He's managed it - he's now in full mount! Score +3 for passing guard: Mingo (4) vs (13) Lager
Lager sitting in mount, just looking to control for the moment.
Lager wants to control the pace but Mingo is squirming around nicely.
That's six minutes gone in the round.
Lager is in a good position here but he's just trying to control... And he's not even managing to do that successfully.
Lager wants to control but Mingo has made it back to half guard. Nice work.
Mingo won't allow Lager to pass to mount.
Lager is looking to take a break and control but Mingo is keeping him honest, looking to work from the bottom.
The ref warns both fighters not to hold the cage as they work up against the meshing.
Lager is looking for a kimura but he's never going to get it from there.
Mingo keeping control of the position.
That's seven minutes gone in the round.
Lager trying to mount his opponent but Mingo defends it.
Lager is stalling here. Mingo is in no mood to hang around though. He's locked up a kimura from the bottom! Lager seems to be keeping calm but he's forced to roll out of the hold and Mingo has ended up in side control on the top. Nice work. Score +4 for clean sweep to past guard: Mingo (8) vs (13) Lager
Lager is moving his hips around well on the bottom and has managed to get back to half guard.
Lager is looking for a sweep. Mingo is wise to his cunning plan and keeps the top position.
Lager trying to hold on to Mingo's head to control him but Mingo postures up.
Mingo tries to pass to full mount but Lager defends it.
Lager is looking for a sweep. Mingo is wise to his cunning plan and keeps the top position.
That's eight minutes gone in the round.
Mingo is looking for a kimura here.
Mingo will need to keep those long limbs tucked in whilst he's on the ground, to prevent any submissions.
Mingo trying to control from half guard but Lager is working away.
Lager tries to roll over but Mingo keeps him under control.
Mingo is looking for a kimura here.
Mingo wants to control but Lager is keeping him busy.
That's nine minutes gone in the round.
Lager wants to get back to full guard.
Lager manages to get to full guard.
Mingo content to stall in guard here.
Mingo stopping the sweep attempt from Lager.
Mingo passes easily into side control. Nice work. Score +3 for passing guard: Mingo (11) vs (13) Lager
Lager gets one leg under and gets the fight to half guard.
Lager trying to control but Mingo postures up.
That's ten minutes gone in the round.
Lager wants to improve his position but Mingo is controlling well.
Mingo takes a deep breath and rests his weight momentarily on top of his opponent, to control the position.
Lager trying to control from the bottom.
Lager is looking to improve his position.
Lager moves his hips nicely and gets into full guard.
Lager tries to land a sweep but no joy.
Lager looking for submissions from the bottom but instead Mingo passes into side control.
Score +3 for passing guard: Mingo (14) vs (13) Lager
Lager tries to improve position but can't.
That's eleven minutes gone in the round.
Mingo working away.
Lager sneaks back into half guard.
Lager wants to get back to full guard.
Mingo wants to work for an arm triangle but Lager is really keeping half guard well and defending the submission attempt.
Lager tries to get to full guard but Mingo has control of the leg.
Mingo wants to take a breather but Lager is having none of it.
Lager wants to improve his position but Mingo is controlling well.
That's twelve minutes gone in the round.
Lager is staying active underneath Mingo, who seems content to just control the action from this position.
Lager moves into full guard.
Mingo stopping the sweep attempt from Lager.
Lager trying to keep a closed guard but Mingo is proving a slippery customer.
Mingo trying to control but Lager is working from the bottom.
Mingo slips effortlessly into side control - very nice. Score +3 for passing guard: Mingo (17) vs (13) Lager
Lager manages to land a sweep and he's now on top! Lovely Jiu Jitsu! Score +2 for sweep to guard / half guard: Mingo (17) vs (15) Lager
That's thirteen minutes gone in the round.
Lager is looking for a kimura here.
Lager is looking to take a break and control but Mingo is keeping him honest, looking to work from the bottom.
Lager is looking to advance position but Mingo won't allow it.
Lager moves into full mount! Mingo won't be happy about that! Score +3 for passing guard: Mingo (17) vs (18) Lager
Mingo is desperately trying to improve his position but Lager has a good base and remains in mount.
Lager goes for an armbar but he's fallen flat on his backside there and now Mingo is on top in guard.
Score +2 for sweep to guard / half guard: Mingo (19) vs (18) Lager
Lager controlling Mingo's posture.
That's fourteen minutes gone in the round.
Lager is looking for a triangle here but Mingo uses the submission attempt to pass into side control.
Score +3 for passing guard: Mingo (22) vs (18) Lager
Lager is positioning himself to get back to half guard.
Mingo is looking for a kimura. He might have it! No, Lager has escaped the position, nice work there.
Boooooooooooooooooooo!!! God, this has been a terrible round. Come on you two, sort yourselves out!
Lager is trying to get back to half guard. He's pushing on Mingo's leg. He's managed it. Nice work.
The fighters are pressed up against the cage, both looking to find a bit of space to work.
Lager is looking for a sweep. Mingo is wise to his cunning plan and keeps the top position.
And that's the end of the fight!
Mingo takes the fight on points by 22 to 18.
Hughtavious Mingo spent the whole post fight interview bigging himself up. It didn't go down that well with the fans after a while as they thought it was a bit arrogant. |
|
|
|
Main event
|
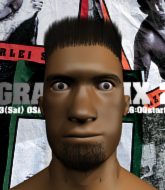
Coming up we have a light heavyweight Tycoon World Grappling Championship rules bout between Michael Blake (ranked 4142 p4p, 418 weight class) and TJ Hearts (ranked 1865 p4p, 267 weight class). Over to our ring announcer for the fighter introductions!
This TWGC bout is 1 fifteen minute round in the light heavyweight division. Introducing today's competitors. In the red corner, competing out of Amsterdam, with a TWGC record of 22 wins and 7 losses; Michael Blake! And in the blue corner, fighting out of Amsterdam, with a TWGC record of 2 wins and 0 losses; TJ Hearts!
The judges for this bout are Phil Schofield, Richard Clark and Paul Tew.
Let's get this grappling contest under way! Who will be victorious?
Hearts closes the distance and pushes Blake back into the cage.
Blake wants to take the fight to the mat but Hearts manages to get underhooks and keep the fight in the clinch.
Hearts has Blake pressed up against the cage and is working for takedown. Blake manages to improve position though and keeps the fight standing.
Hearts has picked Blake up - he's going for a ride! Hearts dumps his opponent to the mat with a thud and settles into half guard. Score +2 for takedown into guard / half guard: Blake (0) vs (2) Hearts
Hearts performing his best blanket impression for a moment.
Blake is trying is best to control the position here.
Hearts wants to pass the guard but Blake is defending well.
We've had a slow start to the round here - hopefully the action picks up.
Hearts is working for a kimura but Blake is defending it quite comfortably.
Hearts is taking a breather. Blake says something to him but it's hard to make out. Perhaps he's telling him to get on with it and actually do something.
The fighters are pressed up against the cage, both looking to find a bit of space to work.
That's one minute gone in the round.
Blake wants to get back to full guard.
Blake has been talking about how he's improved his wrestling in the run up to the fight so let's see if that's enough to sway the balance.
Blake tries to regain full guard. Instead though, Hearts has advanced to mount. Uh oh. Score +3 for passing guard: Blake (0) vs (5) Hearts
That's two minutes gone in the round.
Blake regains half guard.
Blake tries to get to full guard but Hearts has control of the leg.
Hearts trying to control the action but Blake is working from the bottom.
Hearts trying to mount his opponent but Blake defends it.
That's three minutes gone in the round.
Hearts is looking for a kimura. It's pretty deep but Blake still has the half guard so he's probably OK. Oh, Blake has exploded into a beautiful escape there and after a quick scramble, he's ended up in side control on top! Nice work! Score +4 for clean sweep to past guard: Blake (4) vs (5) Hearts
Blake taking a breather here.
Hearts is positioning himself to get back to half guard.
That's four minutes gone in the round.
Blake wants to work for a kimura but he's foiled early by Hearts, who protects the arm well.
Hearts is looking for a sweep.
Blake trying to control the action but Hearts is working from the bottom.
That's five minutes gone in the round.
Blake is trying to get an arm triangle but Hearts is defending well.
Blake trying to control the position but Hearts is working away.
Hearts is looking for a sweep.
That's six minutes gone in the round.
Blake laying and praying for a moment but Hearts takes advantage and regains half guard.
Hearts trying to control from the bottom.
Blake wants to lay and pray for a moment but Hearts keeps working.
Hearts trying to control but Blake postures up.
We could do with one of the fighters taking the initiative a bit more on the ground - they're both waiting to capitalize on a mistake.
Blake seems very keen to just sit and control from half guard but Hearts does not like that idea so much and is remaining active off his back.
That's seven minutes gone in the round.
Hearts trying to control here.
Hearts wants to improve his position but Blake is controlling well.
Hearts wants to control but Blake is keeping busy and won't allow it.
Blake is trying for a guillotine from the top but the pressure isn't in the right place so Hearts is just riding it out for now. Blake eventually gives up the hold.
Blake is looking to pass the guard... He's managed it - he's now in full mount! Score +3 for passing guard: Blake (7) vs (5) Hearts
That's eight minutes gone in the round.
Blake is looking to work his way around to Hearts's back. He needs to be careful though, as he's in danger of losing this dominant position.
Blake looking to control but Hearts is working nicely, looking to advance position himself.
Blake takes a little breather and maintains the position. The referee will be looking for him to stay active from such a dominant position though.
That's nine minutes gone in the round.
Blake wants to take his opponent's back but Hearts doesn't allow it.
Blake moves to the back position. Score +3 for taking back: Blake (10) vs (5) Hearts
Hearts trying to control the hands but Blake breaks the grip.
The crowd hopeful of a finish here - Blake's supporters are on their feet, screaming for him to go for the rear naked choke.
Hearts defending nicely against the rear naked choke attempt.
That's ten minutes gone in the round.
Blake biding his time, controlling Hearts.
Blake keeps control of the position as Hearts tries to break free.
Blake is looking to control Hearts but Hearts is wriggling around and keeping busy.
That's eleven minutes gone in the round.
Blake is trying to stick to Hearts's back but Hearts is turning into Blake. He's managed to reverse the position - now he's in Blake's guard. Polite applause from the crowd in appreciation of some nice Jiu Jitsu by Hearts. Score +2 for sweep to guard / half guard: Blake (10) vs (7) Hearts
Blake has a butterfly guard looking to sweep but Hearts has passed into side control.
Score +3 for passing guard: Blake (10) vs (10) Hearts
Hearts tries for a kimura. Not really close to a finish though.
Blake is looking to regain half guard here but Hearts keeps moving and retains side control.
That's twelve minutes gone in the round.
Blake is working hard here to advance position.
Hearts tries for a kimura but Blake is defending well.
Blake looks to move to half guard but instead Hearts has passed into mount! Damn! Score +2 for reaching mount: Blake (10) vs (12) Hearts
That's thirteen minutes gone in the round.
Hearts wants to control the action but instead Blake gets a body lock and reverses into Hearts's guard! Nice work! Score +2 for sweep to guard / half guard: Blake (12) vs (12) Hearts
Hearts wants to control but Blake passes easily into half guard.
Blake is thwarting Hearts's attempts to control the position.
Hearts wants to improve his position but Blake is controlling well.
That's fourteen minutes gone in the round.
Hearts regains full guard. Nicely done.
Blake passes easily into side control. Nice work. Score +3 for passing guard: Blake (15) vs (12) Hearts
Hearts sneaks a leg under to get back to half guard.
Hearts tries to get to full guard but Blake has control of the leg.
Boooooooooooooooooooo!!! God, this has been a terrible round. Come on you two, sort yourselves out!
Hearts moves into full guard.
And that's the end of the fight!
Blake takes the fight on points by 15 to 12.
Our winner, Michael Blake, made sure he spent some time buttering up the crowd during his post fight interview, which will no doubt bring him a few more fans. |
|
|
|
|
|
|