 |
EFL 5 - Claremont v Matthews PBP Commentary |
Undercard bout
|
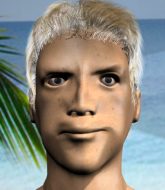
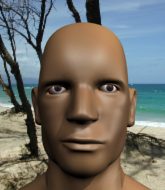
Coming up we have a middleweight MMA rules bout between Shane Murphy (ranked 3899 p4p, 430 weight class) and Jacob McWilliam (ranked 4616 p4p, 490 weight class). Shane Murphy has the better chin. Will he look to stand and bang today?
 |
|
 |
| 185 cm
25
190 lbs
2 - 0 - 0 |
|
181 cm
25
187 lbs
2 - 1 - 0 |
BJJ Purple Belt
Dangerous knees
Good chin |
|
BJJ White Belt
Excellent MT
Powerful |
|
| |
|
Ladies and gentlemen. This fight is 3 rounds, in the middleweight division.
Introducing the fighter to my left, fighting out of the red corner.
With a record of
2 - 0 - 0, fighting out of Sydney, Shane Murphy!
And introducing the fighter to my right, fighting out of the blue corner.
With a record of
2 - 1 - 0, fighting out of Las Vegas, Jacob McWilliam!
The judges for this bout are Lou da Vinci, Bruno Lombardi and David Schapiro.

The bell rings for round one and we are underway!
Murphy shoots in for a takedown but McWilliam shows good takedown defense.
Murphy shoots in for a takedown. "I don't think so" says McWilliam as he avoids it easily.

Murphy closes the distance and presses his opponent up against the ropes.
Murphy trying to stall but McWilliam improves his position.

Murphy jumps guard and drags McWilliam to the mat. He's obviously going to be looking for submissions off his back.
We could do with one of the fighters taking the initiative a bit more on the ground - they're both waiting to capitalize on a mistake.
McWilliam has decided he wants to stand but the closed guard of Murphy is proving hard to escape from.
Murphy is trying to control the position from the bottom.

Murphy is actively looking for submissions from his back. He's worked himself a little space on the bottom and seems to be going for a triangle. No, he's switched into an armbar! That was slick! McWilliam rolls with it to try and escape but Murphy cranks on the arm and McWilliam is forced to tap out! This one is aaaaaaaaall over!
Ladies and gentlemen, after 0:50 of round 1, we have a winner by way of Submission (Armbar). Shane Murphy!
After the fight, Shane Murphy was humble in paying tribute to his opponent but made it clear he wants to go on to bigger and better things. It seemed to go down well with the crowd who cheered him loudly.
|
|
|
|
|
|
|
|
|
|
|
|
|
|
|
|
|
|
|
|
|
|
|
| S |
C
A |
G |
S |
C
B |
G |
|
S |
C |
G |
|
energy
A | B |
|
hype
A | B |
|
pop
A | B |
|
mgr
A | B |
|
FIGHT
RATING
83% |
|
|
|
|
|
|
|
Undercard bout
|
Coming up we have a welterweight MMA rules bout between Nick Diaz (ranked 4588 p4p, 447 weight class) and Hank Raps (ranked 4412 p4p, 426 weight class). Both fighters look fresh as a daisy as they make their way towards the ring.
 |
|
 |
| 185 cm
25
168 lbs
2 - 0 - 0 |
|
188 cm
25
180 lbs
3 - 1 - 0 |
Dangerous GnP
Counter fighter
Very quick |
|
BJJ Blue Belt
Decent boxing
Intelligent |
|
| |
|
Ladies and gentlemen. This fight is 3 rounds, in the welterweight division.
Introducing the fighter to my left, fighting out of the red corner.
With a record of
2 - 0 - 0, fighting out of New York, Nick Diaz!
And introducing the fighter to my right, fighting out of the blue corner.
With a record of
3 - 1 - 0, fighting out of New York, Hank Raps!
The judges for this bout are Alyssa Summers, Columbo Gatti and Reed Andrews.
The bell rings for round one and we are underway!
We've got one fighter who appears to only be looking to counter and the other not looking particularly aggressive either, so we could be in for a dull fight.
Danga de danga de dang - Raps scores with a four punch combination!
Raps moves into range and connects with a jab.
Raps fails to land with a series of punches.
Diaz feinted with a counter takedown.
Raps throws a combination but comes up with nothing but fresh air.
Raps lands a jab. Then a cross. Then finally a nice hook to the body. Good work there by Raps.
Diaz takes one to the chin there.
Raps works over Diaz's head and body with a nice combination.
Fantastic stuff here - a very entertaining period of action, which has drawn cheers from the crowd.
Jab from Raps.

That's one minute gone in the round.
Jab from Raps.
Hank Raps seems to be the more aggressive standup fighter in this bout.
Raps throws a right hand that Diaz ducks under and follows up with a left that Diaz also avoids with ease.
Raps throws an off balance right hand
and Diaz counters with a shoot takedown. Raps fights it but they end up in guard.
Diaz scoring with some ground and pound.
Diaz is working the ground and pound from guard. He might want to try advancing position though to get more of an impact.
Diaz makes a bit of distance and scores with some ground and pound, still in guard.
Diaz wants to pass the guard but Raps is keeping the position.
Raps utilising some decent striking defenses from the guard, preventing the ground and pound.
Diaz throwing strikes from guard but Raps blocks nicely.
Diaz drops back looking for a leg! Raps is in trouble here! The fighters roll with the hold and Raps manages to kick Diaz off! Diaz jumps back into Raps's guard.

That's two minutes gone in the round.
Diaz landing with the ground and pound.
Hammerfist, elbow! yells Diaz's corner. There ya go! There ya go!
The fans in attendance giving it up for the two fighters, who have really let it all hang out in the last minute or so!
Diaz passes easily into side control. Nice work.
Raps is working hard to escape and get back to his feet. After a battle for position, Diaz asserts his dominance and retains side control.
Diaz scoring with punches and elbows.
Raps on the wrong end of some ground and pound.
Diaz grinds an elbow into Raps's temple.
Diaz postures up a little and throws a couple of hammerfists but they don't connect properly.
Diaz scores with a couple of short elbows.

Raps is rocked!
Raps taking a bit of punishment here - Diaz scoring with strikes.
Raps is still in real trouble! Can Diaz finish him?
Diaz scores with a big shot from side control... and another... and another! Oh Raps is done here - save him referee! More strikes land and eventually the ref does step in and Diaz can finally stop beating on his defenseless opponent!
Ladies and gentlemen, after 3:56 of round 1, we have a winner by way of TKO (Strikes). Nick Diaz!
Nick Diaz decided to thank the fans in attendance for making a great atmosphere. It seemed to go down pretty well.
|
|
|
|
|
|
|
|
|
|
|
|
|
|
|
|
|
|
|
|
|
|
|
| S |
C
A |
G |
S |
C
B |
G |
|
S |
C |
G |
|
energy
A | B |
|
hype
A | B |
|
pop
A | B |
|
mgr
A | B |
|
FIGHT
RATING
56% |
|
|
|
|
|
|
|
Undercard bout
|
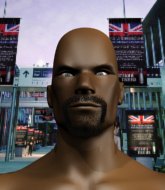
Coming up we have a lightweight MMA rules bout between Pablito Gomez (ranked 5287 p4p, 529 weight class) and Conor Martin (ranked 25290 p4p, 708 weight class). Pablito Gomez had a look across the ring there at his opponent. He definitely means business
 |
|
 |
| 190 cm
25
155 lbs
1 - 0 - 0 |
|
190 cm
18
150 lbs
2 - 2 - 0 |
BJJ Purple Belt
Brawler
Self confident |
|
BJJ Purple Belt
Brawler
Very confident |
|
| |
|
Ladies and gentlemen. This fight is 3 rounds, in the lightweight division.
Introducing the fighter to my left, fighting out of the red corner.
With a record of
1 - 0 - 0, fighting out of New York, Pablito Gomez!
And introducing the fighter to my right, fighting out of the blue corner.
With a record of
2 - 2 - 0, fighting out of New York, Conor Martin!
The judges for this bout are Alyssa Summers, Steve Montenegro and Dean Styles.
The bell rings for round one and we are underway!
Gomez closes the distance and gets a double leg, slamming Martin to the mat! Martin manages to get full guard.
Gomez engaging in some classic timewasting tactics.
Gomez trying to control the position from guard on top but Martin is wriggling around, looking for whatever he can.
Gomez is in close to Martin's body, working some short punches and elbows.
Martin wants to control the position but Gomez says "no thanks buddy" and passes to half guard.
Gomez moves into full mount! Martin won't be happy about that!
We've had a slow start to the round here - hopefully the action picks up.
Martin tries to hold on but Gomez postures up.
Martin tries to reverse the position but Gomez maintains control.
That's one minute gone in the round.
Gomez tries to control but Martin wriggling away.
Gomez is really struggling to control Martin but he's trying to hold on to the position.
Martin is desperately trying to improve his position but Gomez has a good base and remains in mount.
Gomez looking to finish Martin with some ground and pound. This is bad for Martin!
Gomez wants to control the pace but Martin is squirming around nicely.
Martin tries to lock up and control but Gomez gives him a forearm to the face and pushes him away.
That's two minutes gone in the round.
Gomez wants to control the pace but Martin is squirming around nicely.
Gomez is trying to take his opponent's back.
Gomez wants to control the pace but Martin is squirming around nicely.
The fighters are trapped in the ropes so we're going to have a reposition here. The ref calls for a break and repositions the fighters in the center of the ring.
Martin really trying hard to get back to half guard here.

That's three minutes gone in the round.
Gomez trying to control but he's not successful this time.
Gomez scores with a couple of good head shots there.
Gomez lands a big elbow.
Gomez controlling his opponent.
Martin can't escape the position.
Martin tries to improve his position but instead Gomez has taken his back!
Gomez is hanging on to Martin's back as he tries to escape.
Gomez looking to break Martin's wrist control so he can sink in the choke. Martin remaining controlled and patient though - he really has to keep calm otherwise Gomez will wrap this one up with the rear naked choke!

That's four minutes gone in the round.
Martin tries to escape but Gomez has the hooks in and won't let him break free.
Gomez is controlling his opponent, waiting for an opportunity to finish.
Gomez seems to have a rather negative gameplan on the ground. He seems keen to just score the takedown and hold down Martin for as long as he can get away with.
Martin tries to escape but Gomez has the hooks in and won't let him break free.
The crowd thankful this round is nearly over.
Gomez is looking to control Martin but Martin is wriggling around and keeping busy.
And thats the end of the round the fighters go back to their corners.
Pablito Gomez dominated that round.
That's the end of the interval. I'm sure that seemed a lot quicker than a minute for our two fighters! Back to the action.

Nice takedown defense from Martin. No joy for Gomez on that attempt.
Gomez fails with a takedown attempt.

Martin feints and as Gomez raises his hands in defense, Martin changes levels and drives through with a takedown into guard.

Gomez kicks Martin off and gets to his feet.
Martin tries to clinch up against the ropes, rushing in to close the distance. Gomez manages to break the clinch and circles back to the middle of the mat.
Gomez really does look like a pencil wearing a pair of gloves. Let's hope he has a gameplan to suit that ridiculous body shape.
Gomez clinches with his opponent.

Martin escapes the clinch and we're back to striking.
Martin shoots in from a long way out. He's driving through with the takedown attempt and he eventually gets it, landing in Gomez's guard.
Gomez is really dominating this fight. Is there anything that Martin can do to turn this around?
This has been an exciting period of action!
Gomez is active off his back here, looking for submissions.
Gomez manages to wriggle out and sneak his way back up to his feet, so the fighters are now clinched up against the ropes.
That's one minute gone in the round.
Martin tries to take the fight to the ground by pulling guard but can't manage it.
Gomez's corner are urging him to control the action in the clinch for a moment, rather than mount any serious offense. I'm sure the crowd appreciate those instructions... not.
Gomez has dropped down and is working for a takedown. Martin is trying to keep an underhook but Gomez manages to get the takedown into half guard.
Gomez wants to free his trapped foot but Martin is holding on for dear life with his legs.
Martin keeping hold of Gomez's head, controlling as best he can.
Pablito Gomez overall seems to be getting the better of the ground position in the fight so far.
Gomez is looking to take a break and control but Martin is keeping him honest, looking to work from the bottom.
That's two minutes gone in the round.
Gomez throwing shots but they're hitting the canvas more than the man.
We've been informed that Martin has been working hard on his conditioning in the buildup to the fight.
Martin trying to control but Gomez postures up.
Martin is not content to let Gomez control the position.
Gomez trying to control the pace.
The referee looks like he's ready to step in and stand the fighters back up.
Gomez is trying to work for a kimura but Martin is defending well.
That's three minutes gone in the round.
Gomez trying to mount his opponent but Martin defends it.

The referee has motioned to the fighters to stand back up. He just wasn't happy with the level of activity.
Martin gets a double leg takedown into Gomez's guard.
Gomez pushes Martin off for just long enough to get back to his feet. Very athletic spring there.
Gomez throws a hook to the side of Martin's head but Martin sees it coming and ducks under it beautifully.
Martin tries a head kick but it misses.
Gomez tries a head kick but it misses.
Gomez misses with a low kick.
Martin stuffs the takedown attempt from Gomez. Gomez gets slowly back to his feet.
That's three failed takedown attempts in the round for Pablito Gomez. That's going to take a lot out of him.
Both fighters are absolutely exhausted here.
That's four minutes gone in the round.
Martin avoids the body shot from Gomez.
Martin shoots in for a takedown. "Ole!" shouts Gomez as he jumps to the side.
Martin throws a low kick but his opponent is out of range.
Martin tries to clinch but Gomez moves out of range.
Gomez feinted with a counter takedown.
Gomez shoots in for a takedown - he's clinched up with Martin but Martin pushes him off and we're back to square one.
Gomez closes this distance looking for a takedown but Martin circles away.
We've seen a great period of action over the last minute or so - credit to both fighters for going all out!

Martin closes the distance and pushes Gomez back into the ropes.
Gomez lands a takedown into guard.

Martin has his foot on Gomez's thigh. He's trying to push off and get in position for a triangle, I think. Gomez works his way back into a safe position though.
And thats the end of the round the fighters go back to their corners.
Pablito Gomez dominated that second round.
The minute break is over - no more time for sponges and pep talks - back to the action! This is the final round!

Gomez goes for a double leg but Martin avoids the attempt and the two fighters end up clinched against the ropes as Martin continues to drive forward.
Martin fails to land with a series of punches.
Martin throws a combination but it was largely blocked by Gomez.
Gomez tries to drive through with a takedown attempt but Martin defends well and Gomez ends up having to push Martin into the ropes where they will battle it out in the clinch.
Martin misses with a wild body shot.
Gomez clinches up with Martin and pushes him back against the ropes.
Gomez has dropped down and is working for a takedown. Martin is trying to keep an underhook but Gomez manages to get the takedown into half guard.
Gomez trying to advance position but Martin counters by regaining guard.
We've had a slow start to the round here - hopefully the action picks up.
Martin wants to stand but Gomez is controlling the position.
The fighters are tangled up in the ropes here. We might need a restart if the fighters can't break free themselves.
Martin tries to land a sweep but no joy.
Both fighters are breathing heavily.
That's one minute gone in the round.
Gomez drops back, looking for a kneebar! Martin looks panicked! The fighters roll across the mat, one looking to finish, one looking to escape. Martin looks to have wriggled free... Yes, he's got his leg free and he's dived into side control! Good work there from Martin!

Martin wants to lay and pray for a moment but Gomez keeps working.
Gomez is looking to regain half guard here but Martin keeps moving and retains side control.
Gomez wants to control but Martin postures up.
That's two minutes gone in the round.
Martin tries for an arm triangle. That looks pretty tight to me. Is this one over!?! Possibly, maybe, no Martin has let go of the choke. Obviously it wasn't as tight as we thought!
Martin working the ground and pound but Gomez is defending the strikes.
Gomez is trying to control Martin's posture but Martin avoids it.
Martin wants to stand but Gomez has his arm trapped.
Martin swings around for an armbar but Gomez sees it coming a mile off and turns beautifully into Martin's guard.
That's three minutes gone in the round.
Martin keeping moving, preventing Gomez from controlling successfully.
Martin looking to sweep using the butterfly guard but Gomez puts pay to that idea as he passes nicely into half guard.
Martin regains full guard. Nicely done.
Gomez trying to pass the guard but can't manage it just yet.
Martin trying to punch from his back but it's not doing any damage.
Martin looking to hit a scissor sweep but Gomez is one step ahead there.
That's four minutes gone in the round.
The crowd are starting to boo a lack of action.
Martin is trying to keep Gomez in close.
Gomez stands up over Martin, holding his feet. He dives back in and lands a decent shot to the head.
Gomez works a leg free and moves into half guard.
Gomez wants to control but Martin is keeping him busy.
Martin is trying to get back to full guard.
Boooooooooooooooooooo!!! God, this has been a terrible round. Come on you two, sort yourselves out!
Gomez looking for a kimura but he'll have to free his other leg if he wants to finish that. Perhaps he's just using it as a distraction technique.
Conor Martin has stepped it up - he knows he needs a finish here!
Pablito Gomez is fighting for a decision here - he's started to take the cautious approach.
Martin looking for submissions off his back.
And that's the end of the fight!
I would just about give that final round to Conor Martin.
I think Gomez has won this one but let's see what the judges have to say. Over to the ring announcer for the scorecards.
Ladies and gentlemen, after 3 rounds of action, we go to the scorecards for a decision.
Judge Alyssa Summers scores the fight 29:28
Judge Steve Montenegro scores the fight 29:28
Judge Dean Styles scores the fight 29:28
In favor of your winner, by unanimous decision... Pablito Gomez!
The defeated Conor Martin had this to say: 'Was I doing it right? I have to return strong again.'.
|
|
|
|
|
|
|
|
|
|
|
|
|
|
|
|
|
|
|
|
|
|
|
| S |
C
A |
G |
S |
C
B |
G |
|
S |
C |
G |
|
energy
A | B |
|
hype
A | B |
|
pop
A | B |
|
mgr
A | B |
|
FIGHT
RATING
35% |
|
|
|
|
|
|
|
Undercard bout
|
Coming up we have a featherweight MMA rules bout between Amir Taake (ranked 6436 p4p, 441 weight class) and Kazuo Koizumi (ranked 8432 p4p, 490 weight class). Kazuo Koizumi is the more experienced fighter, so let's see if that makes a difference tonight.
 |
|
 |
| 166 cm
18
145 lbs
1 - 0 - 0 |
|
168 cm
20
142 lbs
2 - 2 - 0 |
BJJ White Belt
Solid boxing
Good chin |
|
BJJ Blue Belt
Counter fighter
Tends to cut |
|
| |
|
Ladies and gentlemen. This fight is 3 rounds, in the featherweight division.
Introducing the fighter to my left, fighting out of the red corner.
With a record of
1 - 0 - 0, fighting out of New York, Amir Taake!
And introducing the fighter to my right, fighting out of the blue corner.
With a record of
2 - 2 - 0, fighting out of New York, Kazuo Koizumi!
The judges for this bout are John Roberts, Anthony Taglia and Dean Styles.
The bell rings for round one and we are underway!
Taake closes the distance and gets a trip takedown into side control. Koizumi quickly recovers to half guard.
Koizumi throws a strike from the bottom that misses.
The fighters are trapped in the ropes so we're going to have a reposition here. The ref calls for a break and repositions the fighters in the center of the ring.
Taake wants to take a breather but Koizumi is having none of it.
Koizumi misses with some strikes from the bottom.
Koizumi tries to strike from the bottom but it doesn't land.
Taake prevents Koizumi from improving his position.
Koizumi slips a foot under and gets full guard. Nice work.
Koizumi tries to strike from the bottom.
Koizumi managing to control the position.
We've had a slow start to the round here - hopefully the action picks up.
Koizumi throwing his legs up looking for a triangle.
Koizumi throws some sloppy strikes off his back.
That's one minute gone in the round.
Taake trying to stand up but can't free himself from Koizumi's guard.
Koizumi keeping moving, preventing Taake from controlling successfully.
Koizumi looking to sweep here. No luck so far.
Koizumi throwing some rather feeble looking strikes off his back.
Koizumi tries to strike from the bottom.
The referee has decided to stand the fighters back up, so we'll restart on the feet.
Taake throws a leg kick
and Koizumi counters into the clinch. Nicely done.
Taake takes a knee to the side of the body.
Koizumi is trying to pull guard but Taake has him pressed against the ropes.
Taake is working hard here but doesn't seem to be able to control effectively, up against the ropes.
Koizumi has had enough of the clinch and is looking to separate.
That's two minutes gone in the round.
Koizumi fails to pull the fight into his guard.
A battle for position here, against the ropes.
Koizumi is looking to control Taake's arms but Taake gets an underhook and turns him. Now Koizumi has his back to the ropes.
Koizumi jumps into guard, dragging Taake to the mat.
Taake trying to control but Koizumi is working from the bottom.
Koizumi wants to sweep but no luck.
Koizumi has the superior BJJ but he's also working some ground strikes into his gameplan.
Taake wanted to stand there but Koizumi had control of the position.
Koizumi keeping full guard, as Taake tries to pass.
Koizumi trying to strike off his back.
The fighters are tangled up in the ropes here. We might need a restart if the fighters can't break free themselves.
Taake wants to control from the top but Koizumi keeps moving.
We may be looking at a referee standup if the pace doesn't pick up soon.
That's three minutes gone in the round.
Koizumi will have to put a bit more behind his punches if he's going to do any damage from this position.
The referee has stepped in and called for a break in the action. We'll restart on the feet.
Amir Taake seems to be the more aggressive standup fighter in this bout.
A momentary lapse in concentration from Koizumi enables Taake to shoot in and score with a neat double leg. Koizumi manages to secure a closed guard as the fighters hit the mat.
Taake with a nice head shot there.
Taake working some strikes from top position.
Koizumi keeping moving, preventing Taake from controlling successfully.
Taake won't allow Koizumi to sweep him here.
Taake trying to control but Koizumi is working from the bottom.
Koizumi looking for a sweep. Not yet Koizumi, not yet.
Koizumi looking for submissions off his back, moving his hips, looking for an opening.
That's four minutes gone in the round.
Koizumi trying to strike off his back.
Taake trying to control but Koizumi is working from the bottom.

Koizumi has his feet on Taake's hips. He pushes off and gets to his feet. Nice work.
Taake feints and then dives in with a takedown. That was a long way out but the feint bought him enough time to close the distance and complete the takedown. Now we'll play guard for a bit and see who can get the better of that position.
Koizumi trying to keep a closed guard but Taake is proving a slippery customer.
Taake stands up and looks to throw the legs aside to pass to side control. Koizumi swivels though and keeps the full guard.
The fans in attendance giving it up for the two fighters, who have really let it all hang out in the last minute or so!
The crowd thankful this round is nearly over.
Koizumi wants to stand but Taake is controlling the position.
And thats the end of the round the fighters go back to their corners.
A close round but Kazuo Koizumi will probably get the nod.
The fighters' corners scream their final instructions, as the referee calls time. Here we go, back to the action!
Koizumi tries to clinch but fails miserably
and Taake counters with a three punch combo that has Koizumi backing up. Koizumi nods at Taake to acknowledge the strikes.
Koizumi looking to score a takedown here. Taake is defending well but Koizumi drives through and ends up in Taake's guard.
Koizumi trying to control but Taake is working from the bottom.
Koizumi postures up as if he's going to throw some strikes but drops back for an ankle! Taake is in big trouble! He looks ready to tap! But no, he's escaped and dives on top of Koizumi, into his guard.

Koizumi will have to put a bit more behind his punches if he's going to do any damage from this position.
We've had a slow start to the round here - hopefully the action picks up.
Koizumi wants to get back to his feet but Taake is in a dominant position and won't allow it.
Taake drops back for a leg! It's a sloppy attempt though and Taake jumps back into guard quickly, to retain the dominant position.
That's one minute gone in the round.
Koizumi throws some sloppy strikes off his back.
Taake slows down the pace of the fight for a moment. He'll need to remain active if he doesn't want to see the fight stood back up.
Koizumi striking off his back but it's not causing Taake any problems.
Koizumi looks more muscular than last time we saw him. He must have been on the weights.
Taake lands a couple of digs.
Koizumi tries to strike from the bottom.
Taake trying to control but Koizumi is working from the bottom.
Koizumi manages to sweep nicely, so he's now on top. Taake manages to get himself to full guard.
Taake keeping moving, preventing Koizumi from controlling successfully.
That's two minutes gone in the round.
Taake on his back here. We all know that wrestlers don't like being on their back so let's see if Taake tries to get out of the position.
Koizumi throws a big elbow that misses.
Koizumi loading up with the ground and pound but he's missing more than he's landing in this flurry.
Taake is controlling Koizumi's posture.
Koizumi lands a couple of elbows.
Koizumi wants to control from the top but Taake keeps moving.
Taake wants to get back to his feet but Koizumi is in a dominant position and won't allow it.
Taake trying to control the position.
The referee decides to stand the fighters back up.
Amir Taake is looking to throw some combinations by the looks of things.
Taake shoots in for a takedown and gets it. Let's see what he's got on the mat.
That's three minutes gone in the round.
Koizumi tries to strike from the bottom.
Koizumi throwing some rather feeble looking strikes off his back.
Taake won't allow Koizumi to sweep him here.
Koizumi throwing strikes off his back to little effect.
Taake has to be careful here, sitting in the guard of a superior BJJ player.
Koizumi is looking for a triangle but Taake pushes his legs off easily.
Taake trying to pass the guard but can't manage it just yet.
Koizumi keeping moving, preventing Taake from controlling successfully.
Koizumi wants to sweep here but Taake controlling him for the moment.
Koizumi is looking to get back to his feet but can't, whilst Taake is controlling him.
If this pace continues, the referee will definitely step in and force a standup.
That's four minutes gone in the round.
A few boos can be heard. I'm sure they will multiply if the fighters don't pick up the pace.
The fighters are working up against the ropes. Koizumi manages to wriggle his way back to his feet, so the fighters are now clinched against the ropes.

Taake pushes off and circles away, back to the middle of the mat.
A really sloppy takedown attempt there from Koizumi.
Koizumi is breathing heavily.
Taake tries to sprawl but Koizumi drives through with a takedown into half guard.
The crowd thankful this round is nearly over.
Taake is trying to maintain the position but Koizumi is very close to passing his half guard.
Taake is trying to stand back up but Koizumi is controlling him
Koizumi looking for a kimura but he'll have to free his other leg if he wants to finish that. Perhaps he's just using it as a distraction technique.
And thats the end of the round the fighters go back to their corners.
A close second round but Kazuo Koizumi will probably get the nod - 10:9.
The corners get their ten second warning. Both fighters stand from their stools and stare eachother down, ready to get back to the action. And we move into the final round!
Taake shoots in and gets a takedown into Koizumi's guard.
Koizumi striking off his back but it's not causing Taake any problems.
We've had a slow start to the round here - hopefully the action picks up.
Taake avoids a guillotine attempt easily.
Taake would like to get this fight back to the feet but can't get free from the closed guard.
Taake wants to pass the guard but Koizumi is keeping the position.
That's one minute gone in the round.
Koizumi has his foot on Taake's thigh. He's trying to push off and get in position for a triangle, I think. Taake works his way back into a safe position though.
Koizumi is working an open guard here, looking to improve his position. No doubt that will leave him open to counters but at least he's being more offensive.
Kazuo Koizumi has got the better of the ground game so far.
Taake trying to control the position from guard on top but Koizumi is wriggling around, looking for whatever he can.
Taake stands up and looks to throw the legs aside to pass to side control. Koizumi swivels though and keeps the full guard.
Taake throwing shots from guard but he's hitting more mat than opponent.
Taake knows he needs to get back to his feet asap. He's simply no match for Koizumi on the ground.
Koizumi working a defensive guard here.
Koizumi throws some sloppy strikes off his back.
That's two minutes gone in the round.
The crowd are getting on the fighters' backs, as the pace has dropped off in the last minute or so.
Koizumi looking for a sweep. Not yet Koizumi, not yet.
Koizumi has momentary wrist control but Taake slips an elbow through the middle.
Koizumi is active off his back here, looking for submissions.
Koizumi takes a big intake of breath there - he's definitely tired.
Taake scoring with some ground and pound.
Koizumi working a defensive guard here.
Koizumi trying to strike from the bottom but really, it's not the best position to be doing that from!
Koizumi keeping full guard, as Taake tries to pass.
Koizumi wants to sweep but no luck.
The ref stands the fighters back up due to a lack of activity.
Koizumi shoots in looking for a takedown. Taake tries to sprawl out of it but Koizumi keeps driving through. The fighters are pinned against the ropes. Taake manages to get underhooks and after a bit of a struggle, circles away and we're back to standing.
That's three minutes gone in the round.
Koizumi gets caught flat footed, as Taake shoots in with a quick takedown into guard.
Koizumi keeping full guard, as Taake tries to pass.
Taake working in close now, lands a nice elbow to the side of Koizumi's head.
Koizumi doesn't do any damage with a couple of strikes from the bottom.
Koizumi throws a couple of shots from the bottom but they don't land.
Taake tries to free his leg and advance position but Koizumi is retaining full guard.
Kazuo Koizumi is fighting for a decision - hopefully he's judged it right and he's actually winning the fight.
Koizumi is trying to control the position but Taake postures up.
That's four minutes gone in the round.
Taake trying to control but Koizumi is working from the bottom.
We've had a lack of effective grappling in the last minute or so, which could well see a referee standup.
Taake trying to pass the guard but can't manage it just yet.
The referee has decided to stand the fighters back up, so we'll restart on the feet.
Taake scores with a takedown into Koizumi's guard.
Taake trying to control the position from guard on top but Koizumi is wriggling around, looking for whatever he can.
Koizumi is trying to control the position from the bottom.
Boooooooooooooooooooo!!! God, this has been a terrible round. Come on you two, sort yourselves out!
And that's the end of the fight!
Amir Taake showed his dominance in that final round.
I think Koizumi has won this one but let's see whether the judges agree with me. Over to the ring announcer for the scorecards.
Ladies and gentlemen, after 3 rounds of action, we go to the scorecards for a decision.
Judge John Roberts scores the fight 28:29
Judge Anthony Taglia scores the fight 28:29
Judge Dean Styles scores the fight 28:29
In favor of your winner, by unanimous decision... Kazuo Koizumi!
|
|
|
|
|
|
|
|
|
|
|
|
|
|
|
|
|
|
|
|
|
|
|
| S |
C
A |
G |
S |
C
B |
G |
|
S |
C |
G |
|
energy
A | B |
|
hype
A | B |
|
pop
A | B |
|
mgr
A | B |
|
FIGHT
RATING
29% |
|
|
|
|
|
|
|
Co-main event
|
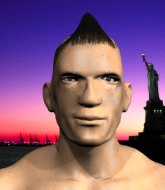
Coming up we have a lightweight MMA rules bout between Casey Jones (ranked 7980 p4p, 652 weight class) and Tim St John (ranked 5804 p4p, 559 weight class). Jones's entrance music is Turtle Power. A fine choice. St John has chosen Machine gun Kelly - Till I Die as his entrance music. Both fighters really staring each other down here, as Tim St John enters the ring!
 |
|
 |
| 182 cm
18
160 lbs
2 - 1 - 0 |
|
185 cm
23
165 lbs
2 - 1 - 0 |
BJJ White Belt
Solid Muay Thai
Granite chin |
|
BJJ White Belt
Basic striking
Determined |
|
| |
|
Ladies and gentlemen. This fight is 3 rounds, in the lightweight division.
Introducing the fighter to my left, fighting out of the red corner.
With a record of
2 - 1 - 0, fighting out of New York, Casey Jones!
And introducing the fighter to my right, fighting out of the blue corner.
With a record of
2 - 1 - 0, fighting out of New York, Tim St John!
The judges for this bout are Reed Andrews, Jorge Garcia and Franklyn Lucas.
The bell rings for round one and we are underway!
St John slaps away a takedown attempt from Jones, before circling back to the center of the mat.
St John swinging wildly here.
Jones avoids a punch combination nicely.
Jones fires out a quick counter leg kick but St John just manages to avoid it.
We've been told by Jones's head coaches at Bullet Proof Dungeon that he's been working on his takedown defense in preparation for this fight.
Jones scores with a jab to the body.
We've had a slow start to the round here - hopefully the action picks up.
St John throws an overhand right that lands on Jones's shoulder, as Jones tries to avoid the shot.
Jones shoots in for a takedown - he's clinched up with St John but St John pushes him off and we're back to square one.
St John misses with an uppercut. Jones saw that one coming.
That's one minute gone in the round.
Jones tries to clinch up against the ropes, rushing in to close the distance. St John manages to break the clinch and circles back to the middle of the mat.
A looping hook to the body misses from St John. Jones does a little dance to reset his feet.
Jones swung with a counter right hand that didn't connect.
St John lands with an overhand left.
Jones pushes St John up against the ropes in a clinch.
Jones misses with a punch to the body.
St John tries to pull guard but Jones holds him up against the ropes and eventually St John drops back down to his feet.
Jones drops to a knee looking for a takedown but St John gets the underhooks and prevents it.
That's three failed takedown attempts in the round for Casey Jones. That's going to take a lot out of him.
Jones prevents St John from breaking the clinch.
Jones escapes the clinch and we're back to striking.
St John throws out a leg kick but Jones moves out of range and St John only half commits.
Jones keeping a good distance there, avoiding the body shot.
That's two minutes gone in the round.
St John falls off balance throwing a combination
and Jones counters with a shot to the ribs. That looked like it hurt.
St John throws a looping left and ducks down for a takedown. He's got his arms around Jones's waist but Jones gets an underhook and avoids the takedown by throwing St John off to one side.
A little feinted left hand from Jones on the counter but he doesn't commit to it.
St John defends well against a solid takedown attempt from Jones.
St John lands a jab followed by a nice looking cross.
Jones jabbing away but nothing is landing.
St John just misses with a punch to the body.
Jones slips in close and lands a nice hook before moving back out of range.
This is a great period of action - very entertaining stuff!
St John throws a lazy head kick
and Jones connects with a straight left hand counter down the middle.
Jones keeping his hands up high there, blocking the jab from St John.
Jones is looking to counter punch.
St John throws a looping overhand right but Jones ducks down to avoid it.
That's three minutes gone in the round.
St John looks to land a right hand but Jones moved out of range.
St John jabbing away but nothing is landing.
Jones looks for a takedown but St John sprawls well.
St John is loading up here, looking for a big counter of his own.
St John tries a head kick but it misses.
St John fails to land with a series of punches.
St John on the wrong end of a vicious looking body shot.
St John misses with a left hand
and Jones counters with a good right hand that lands right on the jaw.
Jones avoids a punch combination nicely.
That's four minutes gone in the round.
St John scores with a nice one two combo and darts back out of range to avoid anything coming in the opposite direction.
Jones fakes high and shoots in for a takedown but St John avoids it really well and circles away.
St John throws an ugly left hook that misses
and Jones connects with a straight left hand counter down the middle.
St John throws a jab when Jones was well out of range.
Jones fires out a quick counter leg kick but St John just manages to avoid it.
St John fails with the takedown.
The crowd are loving this. Great action here.
St John jabbing away but nothing is landing.
And thats the end of the round the fighters go back to their corners.
Tim St John dominated that round.
That's time! Jones's corner gives him a slap on the ass as he gets ready to fight.
St John misses with a lunging right hand
and Jones counters with a quick right hand to the jaw.
No joy there for St John, who threw a few shots but didn't land.
Jones tries to counter by moving into the clinch but St John manages to circle out of the way.
Jones slips under a jab.
St John attempts a low kick but it misses it's target.
Jones throwing a counter right hand but St John manages to avoid it.
St John lands a jab.
St John fails to land with a series of punches.
Tim St John is looking to throw some combinations by the looks of things.
St John misses with a left hand
and Jones counters with a good right hand that lands right on the jaw.
Some bone on bone action there as Jones checks a low kick. Luckily it wasn't a particularly hard one.
We've had a slow start to the round here - hopefully the action picks up.
St John with poor footwork there. He got himself in a bit of a tangle, enabling Jones to score with a decent uppercut.
Jones blocks a jab.
Jones uses some good footwork to avoid the body shot by St John.
Jones tries to counter by moving into the clinch but St John manages to circle out of the way.
That's one minute gone in the round.
A left lands for St John.
Jones changes levels and looks for a double leg takedown. St John tries to avoid it but Jones manages to keep hold of a leg and drag St John to the ground. St John escapes though and pops straight back up to his feet.
Jones scores with a punch to the head.
St John throws a lazy right hand but Jones sees it coming a mile off and sidesteps it easily.
A little feinted left hand from Jones on the counter but he doesn't commit to it.
Jones closes this distance looking for a takedown but St John circles away.
St John scores with a slapping inside leg kick.
Jones keeping at a good range here, avoiding a leg kick.
Jones dives in for a single leg takedown but St John sprawls and the fighters end up clinched against the ropes.
That's three failed takedown attempts in the round for Casey Jones. That's going to take a lot out of him.
Jones blocks a leg kick.
St John throws a left and a right that both miss
and Jones counters with a lovely straight right hand!
That's two minutes gone in the round.
St John tries for a takedown but Jones circles away easily
and Jones counters with a crisp hook to the side of the head.
St John misses with a double jab
and Jones counters nicely by changing levels and landing a hook to the body.
Tim St John seems to be the more aggressive standup fighter in this bout.
St John is breathing heavily.
St John misses with a combination
and Jones counters with a straight right hand.
This has been an exciting period of action!
Jones shoots in for a takedown. "I don't think so" says St John as he avoids it easily.
Jones dives in and grabs St John's left leg, looking for a takedown. St John pushes down on Jones's head and hops out.
Tim St John seems to be getting the better of the standup.
St John misses with a low kick.
It looked like Jones wanted to counter with a hook but didn't fully commit.
Jones uses decent footwork to sidestep a right hand from St John.
Jones is looking to counter punch.
That's three minutes gone in the round.
Jones slips a jab and a cross from St John.
St John throws a body shot but no joy.
Jones tries to counter by clinching up but St John breaks away and moves out of range.
St John misses with a left hand
letting Jones counter with a right hand.
St John misses with a double jab.
A low kick from St John misses
and Jones counters with a quick right hand to the jaw.
Jones looks shocked there as he takes a right hand to the temple.
St John throws a left and a right that both miss
and Jones counters with a good right hand that lands right on the jaw.
St John is rocked!
St John ducks down and throws a hook to the body.
St John is still on wobbly legs! Can Jones finish him?
St John misses with a jab and misses with a cross straight after too.
St John misses with a body shot
and Jones counters with a nice uppercut.
That's four minutes gone in the round.
St John gets caught by a big overhand right and goes down! Jones gets on top of him and starts throwing some serious punches until the ref intervenes and stops the fight!
Ladies and gentlemen, after 4:09 of round 2, we have a winner by way of TKO (Strikes). Casey Jones!
|
|
|
|
|
|
|
|
|
|
|
|
|
|
|
|
|
|
|
|
|
|
|
| S |
C
A |
G |
S |
C
B |
G |
|
S |
C |
G |
|
energy
A | B |
|
hype
A | B |
|
pop
A | B |
|
mgr
A | B |
|
FIGHT
RATING
47% |
|
|
|
|
|
|
|
Main event
|
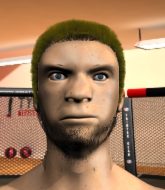
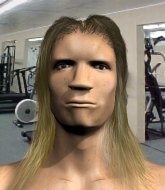
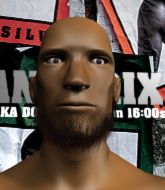
Coming up we have a featherweight MMA rules bout between Brian Claremont (ranked 3186 p4p, 281 weight class) and Jackson Matthews (ranked 2061 p4p, 212 weight class). Both these guys have solid standup skills and neither is particularly fantastic on the ground, so let's hope for a nice standup war!
 |
|
 |
| 178 cm
20
145 lbs
2 - 1 - 0 |
|
170 cm
25
145 lbs
4 - 0 - 0 |
BJJ Blue Belt
Excellent MT
Granite chin |
|
BJJ White Belt
Excellent MT
Tends to cut |
|
| |
|
Ladies and gentlemen. This fight is 3 rounds, for the featherweight championship of the world!
Introducing the champion to my left, fighting out of the red corner.
With a record of
2 - 1 - 0, fighting out of Los Angeles, Brian Claremont!
And introducing the challenger to my right, fighting out of the blue corner.
With a record of
4 - 0 - 0, fighting out of New York, Jackson Matthews!
The judges for this bout are Eddie Farnsworth, David Schapiro and Chad Campbell.
The bell rings for round one and we are underway!
Nice uppercut lands for Claremont. That snapped Matthews's head back.
Claremont works the jab nicely.
Claremont misses with a looping left.
Matthews fakes high and swings low for a body shot but Claremont manages to avoid it.
Claremont moves into range and connects with a jab.
A left and a right from Matthews both land. Nice combination.
Claremont definitely looks more muscular than last time we saw him fight.
Matthews tries to close the distance and clinch up but Claremont swats him away and circles back towards the center.
Jackson Matthews seems to be the more aggressive standup fighter in this bout.
Matthews scores with a jab to the jaw.
Matthews fails to land with a series of punches.
Claremont appears to be looking for a counter punch to the body.
Claremont misses with an attempted mid kick.
Fantastic stuff here - a very entertaining period of action, which has drawn cheers from the crowd.
Matthews scores with a reasonable looking shot to the body. Claremont doesn't seem bothered though.
Matthews will need to tighten up his combinations if he doesn't want to gas himself out, swinging at thin air.
Matthews darts in and clinches Claremont up against the ropes.
Matthews looks more muscular than last time we saw him. He must have been on the weights.
Claremont doesn't land with the attempted body shot.
That's one minute gone in the round.
Claremont lands a shoulder strike that jolts his opponent's head backwards.
Claremont displaying some good clinch control by pressing Matthews up against the ropes.
Matthews misses with some punches.
Claremont tried to land a shot to the body but connects with Matthews's elbow.
Claremont tries to throw a body punch but Matthews avoids it by throwing Claremont back against the ropes.
A nice left hand lands by Matthews.
Good body shot from Claremont.
Stalling in the clinch from Claremont.
A quick uppercut on the inside from Claremont.
Matthews has a couple of punches blocked by Claremont.
Claremont doesn't land with the attempted body shot.
Claremont presses Matthews against the ropes and delivers a mid-strength body shot.
Matthews lands on the inside with an uppercut.
Claremont working aggressively here.
Nice body punch from Matthews - that landed with a thud.
A head punch on the inside from Matthews fails to land.
A head punch on the inside from Claremont fails to land.
Matthews can't find room to land a body shot as Claremont controls the action.
Matthews fails to land with a short punch on the inside.
That's two minutes gone in the round.
A short right from Claremont.
The fans in attendance giving it up for the two fighters, who have really let it all hang out in the last minute or so!
Matthews's head jolts backwards as he takes an uppercut right on the button!
A head punch blocked on the inside by Matthews.
Claremont misses with a punch to the body.
The two fighters are working to gain dominance in the clinch.
Claremont tries to land a shot to the body but it's blocked.
Claremont misses with a shot to the kidneys.
Matthews blocks an uppercut.
Matthews blocks an uppercut.
Claremont misses with a hook from the clinch.
Claremont swings wildly with an uppercut but Matthews uses good head movement to avoid it.
A head punch blocked on the inside by Matthews.
Matthews blocks an uppercut.
Good anti-grappling being displayed by Claremont as Matthews tries to tie him up.
Claremont makes some space for himself and lands an uppercut.
Claremont working aggressively here.
Claremont tries to work over Matthews's body with a swooping hook but it only glances the target.
Claremont blocks an uppercut.
Matthews prevents a body shot from Claremont.
That's three minutes gone in the round.
Claremont struggles to land a body shot inside as Matthews controls his hands.
Matthews tries a shoulder strike but it doesn't do any damage.
Claremont misses with a punch on the inside.
Claremont lands a body shot in the clinch.
Matthews misses with a body punch.
Claremont tries a shoulder strike but it doesn't do any damage.
Matthews lands a shoulder strike that jolts his opponent's head backwards.
Claremont lands a shoulder strike.
Matthews misses with a punch to the body.
Matthews lands a hook to the side of the head.
Matthews stalling against the ropes.
Claremont tries to break the clinch but Matthews is controlling the position.
Matthews lands with a good tight uppercut to the head.
Claremont misses with the head strike.
Claremont throws a head punch that misses.
Claremont working aggressively here.
Matthews blocks a body shot from Claremont.
A head punch on the inside from Matthews fails to land.
Matthews throws a head punch that misses.
Matthews blocks an uppercut.
That's four minutes gone in the round.
Claremont lands a right uppercut that snaps the head of Matthews backwards.
Wooooo! Give it up for these two warriors! They are putting on a show!
Claremont lands an uppercut.
Claremont tries to land a shot to the body but it's blocked.
Matthews blocks a couple of punches on the inside.
An uppercut on the inside fails to land for Matthews.
Still in the clinch, Claremont scores with a nice short uppercut.
With the fighters clinched against the ropes, Matthews creates a bit of distance for himself and scores with a nice uppercut.
A short right from Matthews.
Claremont fails to land with a short punch on the inside.
Matthews blocks a punch to the side of the head.
Matthews throws a punch but it's blocked by Claremont.
Claremont has a couple of punches blocked by Matthews.
Claremont pushes Matthews back against the ropes and lands a hook to the side of the head.
Claremont misses with some punches.
Matthews breaks the clinch.
Claremont takes the fight into the clinch.
The crowd applaud the fighters' efforts here as the round comes to an end.
Matthews misses with some punches.
Matthews tries to throw a body punch but Claremont avoids it by throwing Matthews back against the ropes.
Matthews swings wildly with an uppercut but Claremont uses good head movement to avoid it.
And thats the end of the round the fighters go back to their corners.
Brian Claremont dominated that round.
The referee calls time. The cornermen exit stage left and we're back to business.
Matthews throws a series of strikes that have Claremont backpedaling.
Matthews lands with a nice body punch.
Claremont walks into a stiff left hand from Matthews.
Claremont takes a body punch that cleary hurt but he's trying not to show any weakness.
Matthews shakes his hands off, looking to compose himself, but takes a jab to the jaw whilst he does it.
Matthews throws an ugly left hook that misses
and Claremont counters with a lovely straight right hand!
Matthews throws a predictable looking body shot
letting Claremont counter with a right hand.
Matthews swings for the body but Claremont moves out of range.
A counter left hand to the body from Claremont misses its target.
This has been an exciting period of action!
Matthews tries to check a leg kick but that clearly hurt him.
Matthews tries to clinch
enabling Claremont to counter with a crisp jab.
Claremont is using his height advantage well here, landing a good percentage of his punches.
Matthews misses with a hook
and Claremont counters with a shot to the ribs. That looked like it hurt.
Claremont circles away from the clinch attempt.
Claremont keeps the fight on the outside.
Jackson Matthews seems to be getting the better of the standup.
That's one minute gone in the round.
Matthews fakes high and swings low for a body shot but Claremont manages to avoid it.
Claremont lands a leg kick and bounces back out of range.
Ouch! a nice leg kick from Claremont, right into the meat.
Matthews moves into the clinch successfully.
Claremont tries a body shot but Matthews blocks it.
Matthews swings away with an uppercut that misses.
Claremont misses with the head strike.
Matthews trying to control the position but instead, Claremont has worked for underhooks and has pushed Matthews into the ropes.
Claremont lands a body shot.
Claremont tries to throw a body punch but Matthews avoids it by throwing Claremont back against the ropes.
Matthews lands with a good tight uppercut to the head.
Matthews blocks a body shot from Claremont.
Matthews misses with a hook to the ribs.
Claremont misses with a hook from the clinch.
Matthews lands with a short punch from the clinch.
Claremont misses with a punch to the body.
That's two minutes gone in the round.
Claremont tries to land a shot to the body but it's blocked.
Matthews misses with some punches.
Matthews doesn't land with the attempted body shot.
Claremont lands a body punch in the clinch.
Matthews blocks a couple of punches on the inside.
Claremont lands with a left to the head.
This has been an exciting period of action!
A battle for position here, against the ropes.
Matthews working aggressively here.
Claremont lands punches inside but they're not really causing much damage.
Claremont tries to work over Matthews's body with a swooping hook but it only glances the target.
Claremont blocks a punch to the side of the head.
Brian Claremont has scored more points in the clinch so far.
Claremont swings away with an uppercut that misses.
A quick uppercut on the inside from Claremont.
A head punch blocked on the inside by Matthews.
Claremont misses with some punches.
Matthews misses with a hook from the clinch.
Claremont breaks the clinch and we return to the middle of the mat.
Matthews misses with a double jab.
Claremont throws out a token jab with nothing on it.
That's three minutes gone in the round.
Claremont moves away from the strike by Matthews.
Matthews lands an overhand right.
Matthews moves to clinch but Claremont breaks away
enabling Claremont to counter with a crisp jab.
Claremont missing with a left hand there. Matthews was out of range so wasted energy throwing that one.
Claremont lands a pitter patter jab to the forehead of his opponent.
Claremont fakes a head shot and lands one to the body.
Claremont takes one on the chin but keeps coming.
Matthews scores with a reasonable looking shot to the body. Claremont doesn't seem bothered though.
Matthews throws an overhand right that lands on Claremont's shoulder, as Claremont tries to avoid the shot.
Good leg kick by Claremont there. It's the ones that make that thud noise that hurt and that was an almighty thud.
Claremont takes a punch right to his stomach. That took the wind out of him momentarily.
Wooooo! Give it up for these two warriors! They are putting on a show!
Matthews misses with a hook to the body
and Claremont counters with a stiff right hand.
That's four minutes gone in the round.
Matthews lands with a cross.
Claremont explodes with a nice body kick and back out of range. Nice work.
Matthews tries to clinch but Claremont moves away
and Claremont counters with a stiff right hand.
Claremont uses good footwork to avoid the strikes from Matthews.
A little feinted left hand from Claremont on the counter but he doesn't commit to it.
Matthews misses with a looping right.
A quick step to the side and Claremont tries to counter with a shot to the body but it doesn't connect.
Claremont lands with a shot to the body.
Claremont takes a body punch but keeps moving.
Matthews tries to close the distance and clinch but Claremont swats him to one side with an open hand palm strike and circles away.
A counter left hand to the body from Claremont misses its target.
Matthews is looking to clinch but Claremont is avoiding it.
Claremont tries to land with a swinging hook to the body but Matthews was well out of range. Poor timing from Claremont.
A left lands for Matthews.
The crowd applaud the fighters' efforts here as the round comes to an end.
Claremont lands a powerful looking uppercut that connected with his opponent's jaw.
Claremont throws a nice inside leg kick.
And thats the end of the round the fighters go back to their corners.
Brian Claremont dominated that second round.
The minute break is over - no more time for sponges and pep talks - back to the action! This is the final round!
Matthews darts in trying to clinch
and Claremont connects with a straight left hand counter down the middle.
Matthews on the wrong end of a vicious looking body shot.
Matthews looks to clinch
enabling Claremont to counter with a crisp jab.
Claremont takes a punch right to his stomach. That took the wind out of him momentarily.
Matthews tries to clinch up
and Claremont counters with a quick right hand to the jaw.
We've had a slow start to the round here - hopefully the action picks up.
Matthews misses with a shot to the body
and Claremont counters with a quick right hand to the jaw.
Claremont tries to land with a swinging hook to the body but Matthews was well out of range. Poor timing from Claremont.
Matthews looks to score with a jab to the body but Claremont is just out of range.
Matthews tries to clinch up.
Claremont turns his hip over beautifully as he lands a nice leg kick.
That's one minute gone in the round.
Claremont ducks low and lands a nice hook to the body of his opponent.
Matthews looks shocked there as he takes a right hand to the temple.
Matthews has managed to clinch.
Matthews blocking some punches.
Claremont tries to throw a body punch but Matthews avoids it by throwing Claremont back against the ropes.
A short right from Matthews on the inside.
Claremont has a couple of punches blocked by Matthews.
Claremont has Matthews pressed against the ropes, preventing Matthews from circling away and getting back to striking at range.
Matthews misses with the head strike.
Claremont misses with a shot to the kidneys.
Claremont lands a right uppercut that snaps the head of Matthews backwards.
A nice left hand lands by Claremont.
Matthews is rocked!
A short right from Claremont.
Matthews is still on wobbly legs! Can Claremont finish him?
Matthews prevents a body shot from Claremont.
Claremont misses with a body punch.
Matthews lands a short shot on the inside that snaps the head of Claremont backwards.
Matthews seems to have recovered his senses.
Wooooo! Give it up for these two warriors! They are putting on a show!
Claremont doesn't land with the attempted body shot.
Matthews blocks an uppercut.
Claremont scores with a hook to the body.
That's two minutes gone in the round.
A head punch on the inside from Claremont fails to land.
A shot in the inside from Claremont.
Claremont misses with a body punch.
Claremont escapes the clinch and we're back to striking.
Matthews swings widly with a right hand
and Claremont counters with a quick right hand to the jaw.
Claremont avoids a lazy jab quite easily.
Matthews takes an uppercut right on the button but keeps his composure.
Matthews clinches up with Claremont and pushes him back against the ropes.
Claremont lands with a quick shot inside that doesn't really do much damage.
Claremont pushes Matthews against the ropes. Claremont is working some dirty boxing. Claremont pushes off with a quick right hook! Matthews goes down! Matthews tries to stand but stumbles back to his kness! Claremont moves in to finish and the ref steps in to prevent any more damage!
Ladies and gentlemen, after 2:46 of round 3, we have a winner by way of TKO (Strikes). Brian Claremont!
Brian Claremont retains his featherweight title!
An out of breath Brian Claremont thanked his loyal fans in his post fight interview, giving them credit for his success over the course of his career.
|
|
|
|
|
|
|
|
|
|
|
|
|
|
|
|
|
|
|
|
|
|
|
| S |
C
A |
G |
S |
C
B |
G |
|
S |
C |
G |
|
energy
A | B |
|
hype
A | B |
|
pop
A | B |
|
mgr
A | B |
|
FIGHT
RATING
86% |
|
|
|
|
|
|
|
|
|
|

