 |
RFL-63 Kondo vs. Markell PBP Commentary |
Undercard bout
|
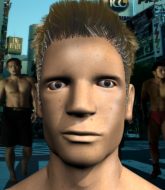
Coming up we have a light heavyweight MMA rules bout between Brendan Moker (ranked 22537 p4p, 621 weight class) and ZB Penduko (ranked 22277 p4p, 624 weight class). The atmosphere really building for this one as we go over to our ring announcer for the fighter introductions!
 |
|
 |
| 195 cm
22
210 lbs
0 - 2 - 0 |
|
176 cm
30
200 lbs
2 - 5 - 0 |
Powerful takedowns
Excellent boxer
Very quick |
|
BJJ Blue Belt
Solid Muay Thai
Knockout power |
|
| |
|
Ladies and gentlemen. This fight is 3 rounds, in the light heavyweight division.
Introducing the fighter to my left, fighting out of the red corner.
With a record of
0 - 2 - 0, fighting out of Amsterdam, Brendan Moker!
And introducing the fighter to my right, fighting out of the blue corner.
With a record of
2 - 5 - 0, fighting out of Los Angeles, ZB Penduko!
The judges for this bout are Frank Antenori, Jack Bonds and Timothy Bukovac.

The bell rings for round one and we are underway!
Penduko is looking to land body kicks.
Moker shoots in for a double leg but Penduko sprawls well. That's going to sap some energy.
Moker has a takedown stuffed.
A decent looking cross lands there for Moker.
Moker cracks Penduko with a hook to the jaw. Both fighters smile at eachother and high-five before getting back down to business.
Penduko has been spending a lot of time sparring his boxing in the run up to the fight, trying to sharpen up those hands and look for a knockout.
Moker misses with a takedown attempt. He shot from a bit too far out.
Penduko only half commits to the counter leg kick.
That's three failed takedown attempts in the round for Brendan Moker. That's going to take a lot out of him.
We've had a slow start to the round here - hopefully the action picks up.
A bone on bone clash there as Moker blocks the leg kick.
Decent striking displayed by Moker there.
Good work by Moker as he checks the leg kick.

That's one minute gone in the round.
Moker misses with a straight left.
As Moker backs off Penduko throws a huge counter combo but Moker manages to avoid it all.
ZB Penduko is looking to keep the fight on the feet at all costs.
A really sloppy takedown attempt there from Moker.
Penduko doesn't fully commit to the body shot counter.
Moker throws a wild combination but nothing lands.
Moker moves out of the way of the counter high kick fromPenduko.
Moker misses with a body shot.
Penduko throws a counter combo.

Moker scores a trip takedown into side control. Nice.
The ground and pound from Moker seems to be hitting the mat more than his opponent.
The ground and pound from Moker seems to be hitting the mat more than his opponent.
Penduko is pushing Moker's head away, looking to escape. Moker manages to hold on to the position though.
Penduko is looking to get back to his feet here but Moker is keeping cool and he's managed to take Penduko's back.
Moker has Penduko flattened out and is raining down punches.
A lull in the action here.
The fighters are pressed up against the cage, both looking to find a bit of space to work.
Penduko is trying to get back to his feet but he's not managed it yet.

That's two minutes gone in the round.
Penduko should think about turning a few of those tyres round his middle into muscle if he wants people to take him seriously as an athlete.
This has been an exciting period of action!
Moker lands a shot to the body.
Moker landing with strikes.

Penduko is rocked!
Moker lands a big punch and Penduko is covering up! Another big shot separates Penduko from consciousness and this one is all over!
Ladies and gentlemen, after 2:35 of round 1, we have a winner by way of KO (Strikes). Brendan Moker!
|
|
|
|
|
|
|
|
|
|
|
|
|
|
|
|
|
|
|
|
|
|
|
| S |
C
A |
G |
S |
C
B |
G |
|
S |
C |
G |
|
energy
A | B |
|
hype
A | B |
|
pop
A | B |
|
mgr
A | B |
|
FIGHT
RATING
49% |
|
|
|
|
|
|
|
Undercard bout
|
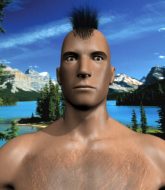
Coming up we have a welterweight MMA rules bout between Long Hung Dong (ranked 4496 p4p, 412 weight class) and Ryan Yoder (ranked 4812 p4p, 435 weight class). Fingers crossed for an exciting fight - I'm sure both fighters are looking for a nice under the table bonus!
 |
|
 |
| 188 cm
21
180 lbs
1 - 1 - 0 |
|
185 cm
21
176 lbs
2 - 4 - 0 |
BJJ Purple Belt
Excellent MT
Granite chin |
|
BJJ Blue Belt
Excellent boxer
Heavy handed |
|
| |
|
Ladies and gentlemen. This fight is 3 rounds, in the welterweight division.
Introducing the fighter to my left, fighting out of the red corner.
With a record of
1 - 1 - 0, fighting out of Rio de Janeiro, Long Hung Dong!
And introducing the fighter to my right, fighting out of the blue corner.
With a record of
2 - 4 - 0, fighting out of Hilo, Ryan Yoder!
The judges for this bout are Frank Antenori, Timothy Bukovac and .
The bell rings for round one and we are underway!
Yoder throws a left and a right that both miss
and Dong counters with an inside leg kick.
Yoder misses with a combination
and Dong counters with a solid body kick.
A punch combination from Yoder misses.
A combination from Yoder does no damage.
Yoder throws a jab, cross combination which is slipped
and Dong counters with a leg kick.
Yoder looks winded!
A nice inside leg kick there by Dong. That's going to slow Yoder down.

Dong has closed the distance and engaged Yoder in a clinch.
Dong works on Yoder's body with a couple of short punches.
Dong changes levels and goes for a takedown here. Yoder fights it off and pushes away nicely.
We've had a slow start to the round here - hopefully the action picks up.
A thudding body kick lands there by Dong!
Ryan Yoder seems to be the more aggressive standup fighter in this bout.
Dong misses with a wild body shot.
That's one minute gone in the round.
Yoder takes a head kick and shrugs it off.

It looks like Ryan Yoder has been cut.
Yoder misses with a double jab
and Dong moves into the clinch.
Dong gets control of Yoder's arms and successfully pulls guard. Dong will no doubt be looking for submissions off his back.
The ref warns both fighters not to hold the cage as they work up against the meshing.

Dong working for a triangle but Yoder defends it easily.
Yoder trying to control the position from guard on top but Dong is wriggling around, looking for whatever he can.
Dong looking to hit a scissor sweep but Yoder is one step ahead there.
Dong looking for submissions from the bottom here. Moving his hips around, possibly looking for an armbar.
Dong has a loose triangle. He'll be looking to tighten that up but Yoder can see exactly what he's planning and manages to posture up and free himself.
That's two minutes gone in the round.
Yoder wants to control from the top but Dong keeps moving.
Dong wants to sweep here but Yoder controlling him for the moment.
Dong looking for submissions off his back, moving his hips, looking for an opening.
This is a great period of action - very entertaining stuff!
Dong is looking for a guillotine. You can't force these things though and Yoder defends well.
Dong throwing his legs up looking for a triangle.
Dong is working actively from the bottom, looking for submissions. He's escaped his hips to the side and he's going for an armbar! Yoder has his hands clasped together but Dong extends and breaks Yoder's desperate grasp, forcing a tap out due to armbar! Nice BJJ displayed there by Dong.
Ladies and gentlemen, after 3:55 of round 1, we have a winner by way of Submission (Armbar). Long Hung Dong!
An out of breath Long Hung Dong thanked his loyal fans in his post fight interview, giving them credit for his success over the course of his career.
|
|
|
|
|
|
|
|
|
|
|
|
|
|
|
|
|
|
|
|
|
|
|
| S |
C
A |
G |
S |
C
B |
G |
|
S |
C |
G |
|
energy
A | B |
|
hype
A | B |
|
pop
A | B |
|
mgr
A | B |
|
FIGHT
RATING
45% |
|
|
|
|
|
|
|
Undercard bout
|
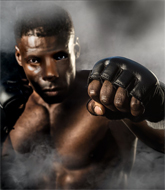
Coming up we have a heavyweight MMA rules bout between Gandolf Schmidt (ranked 4476 p4p, 409 weight class) and Raycon Figg (ranked 4604 p4p, 422 weight class). Both fighters will be looking to make this an exciting fight for the fans, I'm sure!
 |
|
 |
| 224 cm
22
286 lbs
6 - 5 - 0 |
|
200 cm
23
289 lbs
7 - 6 - 0 |
Good wrestling
Excellent boxer
Cardio machine |
|
Good wrestler
Excellent boxer
Powerful |
|
| |
|
Ladies and gentlemen. This fight is 3 rounds, in the heavyweight division.
Introducing the fighter to my left, fighting out of the red corner.
With a record of
6 - 5 - 0, fighting out of Montreal, Gandolf Schmidt!
And introducing the fighter to my right, fighting out of the blue corner.
With a record of
7 - 6 - 0, fighting out of New York, Raycon Figg!
The judges for this bout are Don Winkell, Jack Bonds and Frank Antenori.
The bell rings for round one and we are underway!
Schmidt misses with a straight left.
Figg throws a sloppy head kick and Schmidt moves out of range easily.
Schmidt misses with a jab and misses with a cross straight after too.
We've been informed that Figg has been sparring a lot of Muay Thai in the buildup to this fight so let's see if that has an impact on the result.
Figg tries to land a front kick but Schmidt steps back. That was a bit too telegraphed.
Schmidt comes forward and lands a shot to the body, then darts back out of range.
Schmidt moves out of range of the body kick.
Schmidt showing good head movement there, avoiding the strikes from Figg.
Schmidt scores with a nice looking left hook and follows it up with an uppercut!
Schmidt works over Figg's head and body with a nice combination.
Figg lands with a nice combination. Schmidt backs away looking to recover.
The crowd are loving this. Great action here.
Figg on the wrong end of a vicious looking body shot.
Schmidt lands a jab. Then a cross. Then finally a nice hook to the body. Good work there by Schmidt.
Figg misses with a body shot. Nice footwork from Schmidt.
Schmidt throws a big counter combination but Figg scrambles out of danger and avoids any damage.
Figg takes a solid shot to the body. That one hurt him but he's trying not to show it.
Figg on the wrong end of a decent looking cross there.
Schmidt looks to score with a combo but nothing lands.
Schmidt swings for the body but Figg moves out of range.
Schmidt looks to have improved his striking defense since last time we saw him fight.
Figg scores with a jab. Schmidt acknowledges it with a nod of the head.
That's one minute gone in the round.
Schmidt fakes a jab and then connects with a hook.
Figg moving in and out of range nicely, whilst landing the scoring shot.
Wow, both these guys are really going for it!
Figg uses some good footwork to avoid the body shot by Schmidt.
Schmidt slips a straight right by Figg.
Schmidt swings and misses with a hook to the body.
Schmidt pivots, looking for a leg kick but Figg is out of range and Schmidt settles back down.
Figg swinging wildly here.
Figg throws out a token jab with nothing on it.
A counter left hand to the body from Schmidt misses its target.
Gandolf Schmidt seems to be the more aggressive standup fighter in this bout.
Figg fakes a jab and throws a low kick but Schmidt checks it well.
Figg misses with a shot to the body
and Schmidt connects with a straight left hand counter down the middle.
Figg takes a body punch but keeps moving.
Schmidt avoids the body shot from Figg.
A counter left hand to the body from Schmidt misses its target.
Ooooh, nice body kick lands from Figg. Schmidt shrugs it off though.
Schmidt swings for the body but Figg moves out of range.
Figg ducks down and throws a hook to the body but Schmidt moves away.
A jab from Figg does it's job there.
This has been an exciting period of action!
Schmidt lands a nice hook to Figg's body. Figg takes it in his stride and looks to land his own strikes.
That's two minutes gone in the round.
Schmidt fakes a head punch and goes low to the body. Nicely done.
Schmidt connects with a body shot.
Figg misses with a jab, cross combination.
Figg misses with a low kick.
Figg throws a hook to the body but it doesn't connect.
Schmidt appears to be looking for a counter punch to the body.
Figg loads up on a big right hand but Schmidt slips the punch.
A counter left hand to the body from Schmidt misses its target.
Schmidt connects with a body shot that sends Figg's belly button to the back.
A shot to the liver by Schmidt. Beautiful body shot.
Schmidt getting the better of the striking in that exchange.
Schmidt swings for the body but Figg moves out of range.
Figg throws a nice looking combination but Schmidt bobs and weaves to avoid any damage.
Schmidt throws a shot to the body.
Schmidt connects with a body shot that sends Figg's belly button to the back.
Figg looks winded!
Schmidt misses the shot to the body.
Figg misses with a half-hearted attempt at a head kick.
Figg has his head snapped back a nice jab. A little nod from Figg there as he acknowledges the shot.
Schmidt is looking to wear down Figg with body shots, infact he's throwing more body shots than head shots at the moment.
Schmidt scores with a sloppy punch to the body. Not much technique there but it did the business.
Schmidt tries to land with a swinging hook to the body but Figg was well out of range. Poor timing from Schmidt.
Schmidt looks to score with a jab to the body but Figg is just out of range.

That's three minutes gone in the round.
Figg misses with a body shot.
Schmidt avoids the body shot from Figg.
Schmidt scores with a punch to the gut of his opponent.
Schmidt throws a solid leg kick but Figg takes the impact on his shin and smiles at Schmidt.
Schmidt ducks under an overhand right and circles away with a smile on his face.
Schmidt works Figg's body with a nice hook.
Schmidt throws a body shot but no joy.
Schmidt swings for the body but Figg moves out of range.
Schmidt throws a body shot but no joy.
Figg works the jab nicely.
Schmidt fakes high and swings low for a body shot but Figg manages to avoid it.
Figg throws an overhand right that lands on Schmidt's shoulder, as Schmidt tries to avoid the shot.
It appears Schmidt was looking to counter with a kick there.
Schmidt scores with a jab to the body.
Danga de danga de dang - Schmidt scores with a four punch combination!
Schmidt lands with a good body shot.
The fans in attendance giving it up for the two fighters, who have really let it all hang out in the last minute or so!
A kick lands to the mid section there for Schmidt.
Schmidt misses with a wild body shot.
Schmidt throws a head kick that misses.

That's four minutes gone in the round.
Schmidt fakes a head punch and goes low to the body. Nicely done.

Schmidt drops Figg with a beautiful combination! Figg stares up at his opponent, who ushers him back to his feet - Schmidt is looking for the KO!
Figg is rocked!
Schmidt throws a nice hook to the body that draws an oooh from the crowd.
Figg is still on wobbly legs! Can Schmidt finish him?
Schmidt throws a head kick that misses and slips in the process. He scrambles back to his feet and the fighters circle.
Schmidt throws an overhand right that has Figg reeling! Schmidt follows up with more punches and Figg is out cold! This one is all over!
Ladies and gentlemen, after 4:18 of round 1, we have a winner by way of KO (Punches). Gandolf Schmidt!
An out of breath Gandolf Schmidt thanked his loyal fans in his post fight interview, giving them credit for his success over the course of his career.
|
|
|
|
|
|
|
|
|
|
|
|
|
|
|
|
|
|
|
|
|
|
|
| S |
C
A |
G |
S |
C
B |
G |
|
S |
C |
G |
|
energy
A | B |
|
hype
A | B |
|
pop
A | B |
|
mgr
A | B |
|
FIGHT
RATING
78% |
|
|
|
|
|
|
|
Undercard bout
|
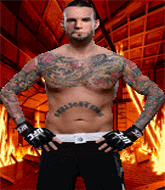
Coming up we have a heavyweight MMA rules bout between Pension Buckets (ranked 1873 p4p, 219 weight class) and Alexandru Mircea (ranked 2835 p4p, 296 weight class). Buckets's entrance music is Candyman - Knockin' Boots. A fine choice. Mircea has chosen Holy Wars...The Punishment Due as his entrance music. Alexandru Mircea has the better chin. Will he look to stand and bang today?
 |
|
 |
| 200 cm
29
265 lbs
8 - 7 - 0 |
|
190 cm
21
270 lbs
3 - 1 - 0 |
BJJ Blue Belt
Great low kicks
Very strong |
|
Good wrestler
Excellent MT
Granite chin |
|
| |
|
Ladies and gentlemen. This fight is 3 rounds, in the heavyweight division.
Introducing the fighter to my left, fighting out of the red corner.
With a record of
8 - 7 - 0, fighting out of London, Pension Buckets!
And introducing the fighter to my right, fighting out of the blue corner.
With a record of
3 - 1 - 0, fighting out of Los Angeles, Alexandru Mircea!
The judges for this bout are Frank Antenori, and Don Winkell.
The bell rings for round one and we are underway!
Buckets throws a leg kick
and he gets countered with a snapping leg kick.
Buckets throws a leg kick that is checked
and Mircea counters with a lovely straight right hand!

It looks like Pension Buckets has been cut.
Buckets pivots as if he's going to throw a leg kick but stops half way.
Buckets misses with an attempted mid kick.
Mircea is clearly trying to counter these attacks from Buckets with a body shot.
Buckets has his front leg slapped to the side - a nice low kick landing there from Mircea.
Buckets gets off balance looking for a body kick
and Mircea counters with a slapping leg kick.
Buckets thows a leg kick but Mircea checks it

and Mircea counters by clinching up.
Mircea stays in close to his opponent and throws a right hand to the body.
Nice body punch from Mircea.
Buckets is breathing heavily.
Mircea lands a body punch.
Mircea lands a nice looking hook to the body, against the cage.
Mircea lands with a right to the head.
Mircea lands a right hand.
The fans in attendance giving it up for the two fighters, who have really let it all hang out in the last minute or so!
Mircea lands a body punch.
Mircea lands a nice looking hook to the body, against the cage.
Mircea working on landing some head shots here - that one got through nicely.
Mircea softening up his opponent with strikes, against the cage.
Mircea lands a right uppercut that snaps the head of Buckets backwards.
Buckets looks like he'd prefer to be striking at range right now.
Mircea lands a right hand that snaps the head of Buckets backwards.
Pension Buckets's cut is getting worse.
That's one minute gone in the round.
Mircea lands a body punch in the clinch.
Mircea throws a hook to the body. More of an arm punch but it's all scoring with the judges.
A left hand lands to the body for Mircea.
Mircea lands a right hand.
Mircea stays in close to his opponent and throws a right hand to the body.
Mircea lands a body punch in the clinch.
Mircea lands a shoulder strike.
Mircea lands a body punch.
Mircea stays in close to his opponent and throws a right hand to the body.
Mircea throws a blind hook that connects with the side of Bucketss head.
Mircea lands a body punch.
A right hand to the body from Mircea.
Mircea lands a body punch - he's looking to wear down Buckets.
Mircea lands punches inside but they're not really causing much damage.
Mircea scores with an uppercut up the middle.
This is a great period of action - very entertaining stuff!
Mircea lands with a quick shot inside that doesn't really do much damage.
Mircea lands with a quick shot inside that doesn't really do much damage.
Mircea lands with a short punch from the clinch.

Buckets is rocked!
A hook to the body from Mircea.
Oh Buckets is still all over the place! His legs are completely gone! Will he be able to recover?!!
Nice body punch from Mircea - that landed with a thud.
Mircea lands punches inside but they're not really causing much damage.
Buckets takes a shot to the head.
Nice body punch from Mircea - that landed with a thud.
That's two minutes gone in the round.
Mircea digs a right hand into Buckets's ribs. Those have got to be taking their toll on Buckets's gas tank.
Mircea lands a shot to the body.
Mircea working on landing some head shots here - that one got through nicely.
Mircea unloads with a big right hand that wobbles Buckets! He's leaning against the cage trying to keep his feet but Mircea is unloading with more strikes now! Buckets drops to his knees and the referee stops the fight for a TKO!
Ladies and gentlemen, after 2:17 of round 1, we have a winner by way of TKO (Strikes). Alexandru Mircea!
After winning the bout, Alexandru Mircea thanked all his fans and promised he'd do even better in his next fight. The crowd seemed to love his humility.
In defeat, Pension Buckets stepped up to the mic, saying 'Oh, well that was stupid of me. Womp womp!'.
|
|
|
|
|
|
|
|
|
|
|
|
|
|
|
|
|
|
|
|
|
|
|
| S |
C
A |
G |
S |
C
B |
G |
|
S |
C |
G |
|
energy
A | B |
|
hype
A | B |
|
pop
A | B |
|
mgr
A | B |
|
FIGHT
RATING
77% |
|
|
|
|
|
|
|
Undercard bout
|
Coming up we have a welterweight MMA rules bout between Ariel At Night (ranked 1138 p4p, 132 weight class) and Meatball Destroyer (ranked 1725 p4p, 193 weight class). At Night comes to the cage accompanied by Kat Dahlia - Mirror. Meatball Destroyer will no doubt be trying to keep this one on the feet, where he has a distinct advantage.
 |
|
 |
| 179 cm
22
175 lbs
7 - 6 - 0 |
|
175 cm
30
167 lbs
9 - 6 - 0 |
Abu Dhabi Champ
Solid boxing
Cardio machine |
|
BJJ Purple Belt
Excellent boxer
Good gas tank |
|
| |
|
Ladies and gentlemen. This fight is 3 rounds, in the welterweight division.
Introducing the fighter to my left, fighting out of the red corner.
With a record of
7 - 6 - 0, fighting out of Sydney, Ariel At Night!
And introducing the fighter to my right, fighting out of the blue corner.
With a record of
9 - 6 - 0, fighting out of St Petersburg, Meatball Destroyer!
The judges for this bout are Frank Antenori, Jack Bonds and Don Winkell.
The bell rings for round one and we are underway!
Destroyer lands with a hook. At Night tried to avoid it but it clipped the top of his head.
At Night keeping his hands up high there, blocking the jab from Destroyer.
A little feinted left hand from At Night on the counter but he doesn't commit to it.
Destroyer lands a slapping body shot.
At Night seems to be moving with more speed, compared to his last bout. He must have been working on that in the gym.
At Night cracks Destroyer with a nice right hand that draws applause from the crowd.
Destroyer lands with an overhand left.
Some wild striking there from Destroyer.
Destroyer fails to land with the punch combination there - jab, cross, hook, miss, miss, miss.
At Night tries to counter by clinching up but Destroyer breaks away and moves out of range.
Destroyer misses with a jab and misses with a cross straight after too.
Donk. Destroyer catches At Night right on the button with a cross.
At Night moves in looking to clinch but Destroyer pushes him off.
Destroyer rushes forward with a series of wild hooks but At Night moves out of range and avoids them all easily.
It looked like At Night was looking amped, ready to throw a big counter but didn't commit.
Destroyer throws a good cross that connects.
We've seen a great period of action over the last minute or so - credit to both fighters for going all out!
Destroyer fakes a jab and then connects with a hook.
Destroyer misses with a double jab
and At Night counters with a crisp hook to the side of the head.
Destroyer works over At Night's head and body with a nice combination.
That's one minute gone in the round.
At Night ducks low and lands a nice hook to the body of his opponent.
Destroyer pushing out the jab but it's not landing.
Destroyer lands a nice shot to the body.
Destroyer looks to score with a combo but nothing lands.
At Night feinted with a counter takedown.
A big left from Destroyer misses.
Destroyer lands with a good body shot.
Destroyer throws a hard body shot but it just misses.
At Night went nuts there looking for a big combo counter but none of the flurry connected.
Destroyer thuds his right hand into At Night's forehead from close range. That could be painful for both fighters.
Destroyer misses with an uppercut
and At Night counters with a quick right hand to the jaw.
Meatball Destroyer is looking to keep the fight on the feet at all costs.
At Night takes one to the side of the head.
Destroyer looks to score with a jab to the body but At Night is just out of range.
Destroyer scores with a hook.
The crowd cheering loudly, showing their appreciation for the quality fight we're seeing here.
Destroyer cracks At Night with a hook to the jaw. Both fighters smile at eachother and high-five before getting back down to business.
At Night throws a nice looking combination but Destroyer bobs and weaves to avoid any damage.
Destroyer slips in close and lands a nice hook before moving back out of range.
That's two minutes gone in the round.
Destroyer throws a combination but it was largely blocked by At Night.
At Night attempts a counter takedown but Destroyer avoids it well and moves away.
Destroyer closes the distance and lands a one-two.
Destroyer misses with a straight left.
Some wild striking there from Destroyer.
At Night was looking to counter that last move with a shot to the body but he didn't commit.
Destroyer misses with a left hand
and At Night counters with a lovely shot to the body.
Destroyer is landing a lot of head punches in this opening round! At Night had better start moving his head a bit unless he wants his face to turn into pâté.
Destroyer swings wildly with a right hand that was never going to find it's target.
An attempted straight right counter from At Night misses the target.
At Night showing good head movement there, avoiding the strikes from Destroyer.
At Night swung with a counter right hand that didn't connect.
At Night slips a straight right by Destroyer.
Destroyer throws a nice looking combination but At Night bobs and weaves to avoid any damage.
Destroyer scores with a nice strike.
At Night takes a body punch that cleary hurt but he's trying not to show any weakness.
Destroyer misses with a left hand
and At Night connects with a straight left hand counter down the middle.
Destroyer swings for the body but At Night moves out of range.
That's three minutes gone in the round.
Destroyer works his jab well there, keeping his opponent at a distance.
Destroyer fakes high and swings low for a body shot but At Night manages to avoid it.
At Night swung with a counter right hand that didn't connect.
At Night on the wrong end of a nice hook.
At Night throws out a token jab with nothing on it.
Destroyer throws a hook but At Night avoids it easily.
An attempted straight right counter from At Night misses the target.
Destroyer throws a jab when At Night was well out of range.
At Night is looking to counter punch.
Destroyer moving in and out of range nicely, whilst landing the scoring shot.
At Night blocks a jab.
Destroyer with a jab.
Destroyer fails to land with the punch combination there - jab, cross, hook, miss, miss, miss.
At Night takes an uppercut right on the jaw but it doesn't phase him.
Destroyer misses with a jab and misses with a cross straight after too.
Destroyer misses with a body shot. Nice footwork from At Night.
Destroyer scores with a sloppy punch to the body. Not much technique there but it did the business.
The fans in attendance giving it up for the two fighters, who have really let it all hang out in the last minute or so!
Destroyer scores with a punch to the head.
That's four minutes gone in the round.
At Night uses good head movement to avoid the hook from Destroyer.
At Night changes levels looking for a counter takedown but doesn't commit.
At Night needs to keep his hands up - Destroyer had a free shot at his head there.
Destroyer tries to bum rush At Night with a series of wild strikes but At Night uses good footwork to avoid the assault.
At Night slips a jab from Destroyer.
At Night is looking for a counter combo.
Destroyer stalks At Night and leaps in with a furious combination of punches. Uppercuts and crosses smash into At Night's face. At Night staggers backwards, shaken.
At Night drops his hands momentarily and Destroyer takes advantage with a crisp shot to the head.
Destroyer lets the fists fly and connects with a left straight followed by a right hook.
At Night is rocked!
Destroyer falls off balance throwing a combination
and At Night counters with a lovely straight right hand!
At Night waving his hands out in front of him, looking to distract Destroyer.
The fighters circling - Destroyer throws out the jab but it was never going to land.
The crowd applaud the fighters' efforts here as the round comes to an end.
Destroyer throws a lazy uppercut
and At Night counters with a single leg into guard. Destroyer didn't expect that.
At Night is working the ground and pound from guard. He might want to try advancing position though to get more of an impact.
At Night works over Destroyer with some ground and pound from guard.
At Night lands a nice shot whilst sitting in his opponent's guard.
And thats the end of the round the fighters go back to their corners.
Meatball Destroyer dominated that round.
That's the end of the interval. I'm sure that seemed a lot quicker than a minute for our two fighters! Back to the action.

Destroyer throws a hook but At Night avoids it easily.
Meatball Destroyer seems to be the more aggressive standup fighter in this bout.
Destroyer connects with a hook to the side of his opponent's head.
Destroyer lands a lovely overhand right.
Destroyer jabs At Night to the body, keeping him at a distance.
Destroyer misses with a wild body shot.
At Night half commits to a counter takedown before pushing away, out of range.
Meatball Destroyer is looking to throw some combinations by the looks of things.
Destroyer ducks down and throws a hook to the body but At Night moves away.
At Night is looking to counter with a shot to the body.
Destroyer misses with the combination.
A swing and a miss from Destroyer.
At Night keeping his hands up high there, blocking the jab from Destroyer.
At Night seem to be loading up, looking for a big counter.
We've had a slow start to the round here - hopefully the action picks up.
At Night ducks under a wild hook from Destroyer.
At Night looks shocked there as he takes a right hand to the temple.
At Night gets cracked with a nice right hand there by Destroyer.
Donk. Destroyer catches At Night right on the button with a cross.
Sloppy strikes from Destroyer. Those never looked like landing.
At Night appears to be looking for a counter takedown.
That's one minute gone in the round.
Destroyer throws a monster uppercut resembling something out of street fighter but it doesn't land.
It looked like At Night was looking amped, ready to throw a big counter but didn't commit.
At Night needs to keep his hands up - Destroyer had a free shot at his head there.
Destroyer looks to score with a jab to the body but At Night is just out of range.
Destroyer throws out a loose jab but At Night uses good head movement to avoid it.
At Night looks to land a combination. Destroyer sees it coming but can only parry a couple of the shots.
At Night is the aggressor but that punch slipped nicely by Destroyer.
Destroyer scores with a three punch combo!
Destroyer swings widly with a right hand
and At Night cracks him with a counter punch right on the button.
Destroyer swings away but doesn't land with a series of punches.
Destroyer misses with a hook.
Destroyer misses with a straight right.
The fans in attendance giving it up for the two fighters, who have really let it all hang out in the last minute or so!
At Night shoots in for a takedown from distance. He catches Destroyer napping and manages to drive through into side control!
At Night has been looking to land a fair amount of strikes on the ground. He might be looking to soften his opponent up in order to work for a submission.
Destroyer is letting At Night control him for a moment.
Destroyer struggling a bit here.
That's two minutes gone in the round.
At Night controls the position.
A bit of a lull in the action here.
Destroyer is positioning himself to get back to half guard.
Destroyer is still trying to improve position.
Destroyer takes a couple of big shots there - the referee warns him that he has to defend himself better.
At Night is looking to take a break and control but Destroyer is keeping him honest, looking to work from the bottom.
The fighters are starting to perspire pretty heavily.
At Night working the head with strikes.
At Night wants to lay and pray for a moment but Destroyer keeps working.
Destroyer tries to work a leg under to get back to half guard but At Night wriggles his own leg back out and remains in side control.
Destroyer is trying to control At Night's posture but At Night avoids it.
Destroyer has been the more effective fighter overall so far.
That's three minutes gone in the round.
At Night works a knee to the body and follows up with a nice elbow to the head.
At Night grinds an elbow into Destroyer's temple.
Destroyer is looking to regain half guard here but At Night keeps moving and retains side control.
Destroyer takes a big shot right to the temple there but he's taken it well.
Destroyer tries to work a leg under to get back to half guard but At Night wriggles his own leg back out and remains in side control.
Destroyer wants to control but At Night postures up.
At Night lands a decent elbow from side control.
At Night has control of an arm but Destroyer manages to advance to At Night's back!
At Night is trying to break free.
Destroyer is looking to control At Night but At Night is wriggling around and keeping busy.
At Night trying to control the action but Destroyer just sinks the hooks in.
Destroyer really doesn't want to stay on the ground with At Night. If he can't get it back to his feet, it's only a matter of time before he'll be tapping out.

Destroyer working for the choke.
Ariel At Night overall seems to be getting the better of the ground position in the fight so far.
Destroyer doesn't have the hooks in and At Night manages to turn into his guard.
That's four minutes gone in the round.
At Night lands a couple of decent looking shots.
Fantastic stuff here - a very entertaining period of action, which has drawn cheers from the crowd.
At Night wants to control from the top but Destroyer keeps moving.
The fighters are pressed up against the cage, both looking to find a bit of space to work.
Destroyer looking to sweep using the butterfly guard but At Night puts pay to that idea as he passes nicely into half guard.
At Night looks to score some points with some ground and pound.
Destroyer trying to control here.
At Night looks over to his corner - he wants some instructions but his corner are not responding.
Destroyer throws a strike from the bottom that misses.
Destroyer is looking to improve his position.
At Night content to control rather than advance.
The two fighters exchange a few words. I couldn't hear what they were saying but maybe it's more fun if you make it up yourself. At Night connects with a nice short shot to Destroyer's temple.
At Night is keen to just control but Destroyer is a slippery customer.
And thats the end of the round the fighters go back to their corners.
A close second round but Meatball Destroyer will probably get the nod - 10:9.
That's time! At Night's corner gives him a slap on the ass as he gets ready to fight. The crowd applaud as we get ready to start the final round!

At Night on the wrong end of a nice jab.
Destroyer throws a combination but it was largely blocked by At Night.
At Night throws a big counter combination but Destroyer scrambles out of danger and avoids any damage.
Destroyer looks to throw the jab but At Night is out of range.
At Night tries to counter with a takedown but Destroyer is quick to defend against it.
Destroyer missing with a left hand there. At Night was out of range so wasted energy throwing that one.
A little feinted left hand from At Night on the counter but he doesn't commit to it.
At Night looks to score with a jab to the body but Destroyer is just out of range.
Destroyer ducks down and throws a hook to the body but At Night moves away.
At Night is looking to counter punch.
At Night loads up on a big right hand but Destroyer slips the punch.
At Night takes a jab right on the nose. That must have hurt but he shrugs his shoulders and looks to return the favor.
At Night ducks right into an uppercut from Destroyer.
Destroyer goes to the watering hole and comes back with a big thumbs up from the judges as he scores a three punch combo.
Destroyer throws a hook to the body but it doesn't connect.
Destroyer tries to land with a swinging hook to the body but At Night was well out of range. Poor timing from Destroyer.
Nice body punch from Destroyer.
At Night takes a swing at Destroyer's ribcage but misses.
This is a great period of action - very entertaining stuff!
Destroyer tries to land with a swinging hook to the body but At Night was well out of range. Poor timing from Destroyer.
That's one minute gone in the round.
A right-left combo lands from Destroyer.
Destroyer throws a monster uppercut resembling something out of street fighter but it doesn't land.
At Night slips under a jab from Destroyer.
As Destroyer tries to get set, At Night tries to push him back and clinch up but Destroyer manages to avoid the attempt.
Destroyer just misses with a punch to the body.
Destroyer darts in and out, connecting with a jab.
Destroyer just misses with a punch to the body.
At Night appears to be looking for a big counter.
Destroyer throws a combination but comes up with nothing but fresh air.
At Night walks into a stiff left hand from Destroyer.
A combination from Destroyer does no damage.
Destroyer takes a big intake of breath there - he's definitely tired.
Destroyer misses with a wild combination.
A little feinted left hand from At Night on the counter but he doesn't commit to it.
At Night looks to throw the jab but Destroyer is out of range.
Destroyer throws out a token jab with nothing on it.
A little feinted left hand from At Night on the counter but he doesn't commit to it.
Destroyer throws an ugly left hook that misses
and At Night counters with a two punch combo.
That's two minutes gone in the round.
Wooooo! Give it up for these two warriors! They are putting on a show!
Destroyer fails to land with a series of punches.
Destroyer throws a one two combo.
Meatball Destroyer seems to be getting the better of the standup.
Destroyer scores with a one two! At Night had his feet all tangled up there and couldn't avoid the strikes.
Destroyer misses with a wild combination.
Destroyer connects with a lovely right hand, straight down the pipe.
Destroyer throws a sloppy body shot
and At Night counters with a good right hand that lands right on the jaw.
Destroyer connects with a body shot.
Good shot there by At Night.
At Night looks like he's developed a pretty tasty lump over his left eye. He'll need to avoid taking much more damage to that.
At Night avoids the body shot from Destroyer.
An attempted straight right counter from At Night misses the target.
Destroyer throws an off balance right hand
and At Night counters with a quick right hand to the jaw.
Destroyer is rocked!
At Night cracks Destroyer with a nasty uppercut that draws ooohs from the crowd and sends Destroyer tumbling backwards onto the mat. He tries to recover but At Night pounces and lands a hail of unanswered strikes that forces the referee to step in to end the fight! Destroyer is not happy but he gave the referee no choice!
Ladies and gentlemen, after 3:55 of round 3, we have a winner by way of TKO (Strikes). Ariel At Night!
Ariel At Night thanked the fans post fight for their support.
The defeated Meatball Destroyer had this to say: 'Organic Nutrition all the way'.
|
|
|
|
|
|
|
|
|
|
|
|
|
|
|
|
|
|
|
|
|
|
|
| S |
C
A |
G |
S |
C
B |
G |
|
S |
C |
G |
|
energy
A | B |
|
hype
A | B |
|
pop
A | B |
|
mgr
A | B |
|
FIGHT
RATING
92% |
|
|
|
|
|
|
|
Undercard bout
|
Coming up we have a light heavyweight MMA rules bout between Chief Wolf (ranked 902 p4p, 142 weight class) and Joosep Lõhmus (ranked 1633 p4p, 241 weight class). Well, I have no idea who's going to take this one!
 |
|
 |
| 190 cm
29
199 lbs
9 - 5 - 0 |
|
190 cm
23
210 lbs
5 - 1 - 0 |
Good wrestling
Brawler
Very quick |
|
Good wrestler
Excellent MT
Granite chin |
|
| |
|
Ladies and gentlemen. This fight is 3 rounds, in the light heavyweight division.
Introducing the fighter to my left, fighting out of the red corner.
With a record of
9 - 5 - 0, fighting out of Las Vegas, Chief Wolf!
And introducing the fighter to my right, fighting out of the blue corner.
With a record of
5 - 1 - 0, fighting out of St Petersburg, Joosep Lõhmus!
The judges for this bout are Frank Antenori, Timothy Bukovac and Don Winkell.
The bell rings for round one and we are underway!
Lõhmus keeps the fight standing with a nice sprawl.
Wolf has his takedown stuffed
enabling Lõhmus to counter with a crisp jab.
Wolf tries for a takedown but Lõhmus circles away easily
letting Lõhmus counter with a right hand.
That's three failed takedown attempts in the round for Chief Wolf. That's going to take a lot out of him.
Lõhmus leaves Wolf with his face pressed against the mat as he sprawls beautifully, defending against a solid takedown attempt.
Wolf takes a solid shot to the body. That one hurt him but he's trying not to show it.
We've had a slow start to the round here - hopefully the action picks up.
Wolf has his takedown stuffed
and Lõhmus cracks him with a counter punch right on the button.
Wolf with a lazy takedown attempt
and Lõhmus counters with a huge left! Wolf is in big trouble! He's backing up but Lõhmus isn't giving him chance to recover. Under a barage of punches the ref has to step in to save Wolf from any more damage. A dominating finish by Lõhmus!
Ladies and gentlemen, after 0:57 of round 1, we have a winner by way of TKO (Strikes). Joosep Lõhmus!
|
|
|
|
|
|
|
|
|
|
|
|
|
|
|
|
|
|
|
|
|
|
|
| S |
C
A |
G |
S |
C
B |
G |
|
S |
C |
G |
|
energy
A | B |
|
hype
A | B |
|
pop
A | B |
|
mgr
A | B |
|
FIGHT
RATING
62% |
|
|
|
|
|
|
|
Undercard bout
|
Coming up we have a super heavyweight MMA rules bout between Fu Leng (ranked 3745 p4p, 105 weight class) and Bwana Mkubwa (ranked 300 p4p, 11 weight class). Leng comes to the cage accompanied by System Of A Down - Spiders. Mkubwa has chosen You're Going Down as his entrance music. Fu Leng could well score a knockout today. He has the power to get to Bwana Mkubwa's chin.
 |
|
 |
| 225 cm
22
300 lbs
2 - 1 - 0 |
|
198 cm
22
290 lbs
10 - 4 - 0 |
Great wrestler
World class boxer
Granite chin |
|
Good wrestler
Excellent boxer
Good gas tank |
|
| |
|
Ladies and gentlemen. This fight is 3 rounds, in the super heavyweight division.
Introducing the fighter to my left, fighting out of the red corner.
With a record of
2 - 1 - 0, fighting out of Tokyo, Fu Leng!
And introducing the fighter to my right, fighting out of the blue corner.
With a record of
10 - 4 - 0, fighting out of New York, Bwana Mkubwa!
The judges for this bout are , Don Winkell and Jack Bonds.
The bell rings for round one and we are underway!
Mkubwa throws a body shot but no joy.
Leng throws out a loose jab but Mkubwa uses good head movement to avoid it.
Mkubwa connects with the punch.
Mkubwa scores with a nice right hand.
It looks like Fu Leng has been cut.
Mkubwa throws out a token jab with nothing on it.
Leng fakes with an overhand right and moves in to clinch with Mkubwa, pushing him back against the cage.
Mkubwa blocks an uppercut.
Leng swings away with an uppercut that misses.
Leng gets through Mkubwa's defenses to land a nice punch to the side of the head.
Leng misses with a hook from the clinch.
Leng working aggressively here.
Mkubwa is trying to force a seperation but Leng has the dominant position.
Leng tries to throw a body punch but Mkubwa avoids it by throwing Leng back against the cage.
We've had a slow start to the round here - hopefully the action picks up.
Leng misses with a punch on the inside.
Mkubwa looks like he'd prefer to be striking at range right now.
Leng working aggressively here.
Leng lands a hook that snaps the head of Mkubwa backwards.
A head punch blocked on the inside by Mkubwa.
A short right from Leng on the inside.
That's one minute gone in the round.
Mkubwa tries a shoulder strike but it doesn't do any damage.
Leng misses with a shot to the kidneys.
With the fighters clinched against the cage, Mkubwa creates a bit of distance for himself and scores with a nice uppercut.
Leng has Mkubwa pushed against the cage.
Leng misses with a hook to the ribs.
Nice body punch from Leng - that landed with a thud.
Mkubwa wants to push off and get back to the center of the mat but Leng has him pressed against the cage.
Mkubwa looks like he'd prefer to be striking at range right now.
Leng prevents a body shot from Mkubwa.
Mkubwa swings wildly with an uppercut but Leng uses good head movement to avoid it.
A nice left hand lands by Mkubwa.
A short right from Leng.
Nice body punch from Leng - that landed with a thud.

Mkubwa's corner calls for him to break the clinch, which he does.
Leng sends Mkubwa crashing to the mat with a devastating uppercut! Leng is motioning to the referee to let Mkubwa up. He wants to try and finish this one on the feet!
Bwana Mkubwa seems to be the more aggressive standup fighter in this bout.
The crowd cheering loudly, showing their appreciation for the quality fight we're seeing here.
Leng is looking to take this fight into the clinch.
That's two minutes gone in the round.
Leng on the wrong end of a vicious looking body shot.
Leng thows a left - swing and a miss!
Leng chopped to the floor by a nice leg kick but he springs right back up before Mkubwa can pounce on him.
Leng looks to score with a jab to the body but Mkubwa is just out of range.
Leng fakes a head shot and lands one to the body.
Mkubwa fakes a head shot and lands one to the body.
Leng cracks Mkubwa with a big right hand that sends him crashing to the floor. Leng has the opportunity to follow him to the ground but instead he's beckoning Mkubwa to stand back up!
Mkubwa is rocked!
Mkubwa leaves his chin hanging out and Leng seizes the opportunity with an uppercut! Mkubwa crumbles to the floor in a heap! The referee steps in and tends to the downed fighter! What a knockout!
Ladies and gentlemen, after 2:39 of round 1, we have a winner by way of KO (Punch). Fu Leng!
Fu Leng thanked the fans post fight for their support.
Bwana Mkubwa was interviewed post fight and said 'This loss shows that I need to address some serious holes in my game.'.
|
|
|
|
|
|
|
|
|
|
|
|
|
|
|
|
|
|
|
|
|
|
|
| S |
C
A |
G |
S |
C
B |
G |
|
S |
C |
G |
|
energy
A | B |
|
hype
A | B |
|
pop
A | B |
|
mgr
A | B |
|
FIGHT
RATING
66% |
|
|
|
|
|
|
|
Undercard bout
|
Coming up we have a middleweight MMA rules bout between Torcadall Sailcirc (ranked 537 p4p, 70 weight class) and Cody Brinks (ranked 669 p4p, 91 weight class). Buckle up people - heeeeeeeeeere we go!
 |
|
 |
| 190 cm
22
186 lbs
9 - 4 - 0 |
|
185 cm
22
196 lbs
8 - 3 - 0 |
Abu Dhabi Champ
Solid boxing
Cardio machine |
|
BJJ Purple Belt
Excellent MT
Good gas tank |
|
| |
|
Ladies and gentlemen. This fight is 3 rounds, in the middleweight division.
Introducing the fighter to my left, fighting out of the red corner.
With a record of
9 - 4 - 0, fighting out of Los Angeles, Torcadall Sailcirc!
And introducing the fighter to my right, fighting out of the blue corner.
With a record of
8 - 3 - 0, fighting out of Las Vegas, Cody Brinks!
The judges for this bout are Jack Bonds, Don Winkell and Frank Antenori.
The bell rings for round one and we are underway!
Brinks is looking to take this fight into the clinch.
Sailcirc attempts a counter takedown but Brinks avoids it well and moves away.
Brinks misses the jab.
A big right from Brinks misses.
Brinks works the jab nicely.
Cody Brinks seems to be the more aggressive standup fighter in this bout.
A shot to the liver by Brinks. Beautiful body shot.
Brinks with a nice cross.
Brinks connects with a hook to the side of his opponent's head.
Brinks lands with a thumping leg kick.
Sailcirc keeps the fight on the outside.
Sailcirc half commits to a counter takedown before pushing away, out of range.
Brinks misses with an attempted mid kick.
Brinks moves away from the strike by Sailcirc.
Sailcirc chopped to the floor by a nice leg kick but he springs right back up before Brinks can pounce on him.
That's a knee to de groin and it's over and out! Sailcirc crumples to the ground after an illegal strike from Brinks - the referee stops the clock and Sailcirc gets 5 minutes to recover from that one. "I'm sorry" says Brinks. Sailcirc manages to get back to his feet and the fight resumes.
The fans in attendance giving it up for the two fighters, who have really let it all hang out in the last minute or so!
Brinks throws a shot from downtown. Sailcirc moves away and avoids it.
A looping hook to the body misses from Sailcirc. Brinks does a little dance to reset his feet.
That's one minute gone in the round.
A nice inside leg kick there by Brinks. That's going to slow Sailcirc down.
Sailcirc throws a series of punches but Brinks moves out of range.
Brinks gets off balance looking for a body kick
and Sailcirc counters with a driving takedown into guard. Nice work there by Sailcirc.
Sailcirc trying to pass the guard but can't manage it just yet.
The ref warns both fighters not to hold the cage as they work up against the meshing.
Brinks wants to stand and escape but Sailcirc is having none of it.
Sailcirc passes easily into side control. Nice work.
Brinks is trying to get back to his feet.
Sailcirc wants to work for a kimura but he's foiled early by Brinks, who protects the arm well.

Brinks explodes and escapes back to his feet! Nice escape there!
Brinks fakes high and swings low for a body shot but Sailcirc manages to avoid it.
Sailcirc tries to counter with a takedown but Brinks is quick to defend against it.
Brinks lands a leg kick that knocks Sailcirc off balance momentarily.
That's two minutes gone in the round.
This has been an exciting period of action!
Brinks throws a low kick but it's checked well by Sailcirc.
The fighters circling - Brinks throws out the jab but it was never going to land.
Brinks has taken the fight to the clinch.
A right hand to the body from Brinks.
Sailcirc takes a shot to the head.
Sailcirc misses with the head strike.
With the fighters up against the cage, Brinks throws an elbow but misses.
Sailcirc lands with a light punch inside.
Brinks lands punches inside but they're not really causing much damage.
Sailcirc blocks an elbow strike.
Sailcirc tries a shoulder strike but it doesn't do any damage.
Brinks is working Sailcirc over against the cage.
Sailcirc swings away with an uppercut that misses.
Brinks struggles to land a body shot inside as Sailcirc controls his hands.
Brinks throws a blind hook that connects with the side of Sailcircs head.
Nice body punch from Brinks - that landed with a thud.
Brinks tries a body shot but Sailcirc blocks it.
Brinks tries to land a shot to the body but it's blocked.
Brinks lands a right uppercut that snaps the head of Sailcirc backwards.
That's three minutes gone in the round.
Brinks lands a body shot in the clinch.
Brinks lands a short shot on the inside that snaps the head of Sailcirc backwards.
Brinks tries a body shot but Sailcirc blocks it.
Sailcirc struggles to land a body shot inside as Brinks controls his hands.
A quick uppercut on the inside from Brinks.
Sailcirc fails to land with a short punch on the inside.
Brinks misses with a body punch.
Brinks has been looking to improve his clinch game in recent weeks. Sailcirc seems to have the measure of him in the clinch so far, so let's see if Brinks can turn it around.
Brinks throws an elbow but it misses.
Sailcirc tries a body shot but Brinks blocks it.
Brinks misses with a hook from the clinch.
Brinks lands with a left to the head.
A head punch blocked on the inside by Brinks.
A nice left hand lands by Brinks.
Sailcirc misses with the head strike.
Brinks lands a body punch.
Sailcirc is breathing heavily.
Brinks misses with a shot to the kidneys.
Brinks misses with a knee strike.
Brinks prevents a takedown attempt there.
Brinks with the Thai clinch. He's looking to land a big knee but he's not managed it this time.
Brinks lands with a good tight uppercut to the head.
This is a great period of action - very entertaining stuff!
Brinks lands with a quick shot inside that doesn't really do much damage.
That's four minutes gone in the round.
Brinks lands an uppercut.
Brinks scores with a shoulder strike.
Brinks misses with a punch to the body.
Brinks lands a shoulder strike.
A quick uppercut on the inside from Brinks.
Sailcirc blocks an elbow strike from Brinks.
Sailcirc fails to land with a short punch on the inside.
Brinks goes for a body shot but it's blocked.
I was talking to Sailcirc's coach per-fight and he was telling me that they'd been working on the clinch in the runup to this fight.
Sailcirc struggles to land a body shot inside as Brinks controls his hands.
Brinks lands with a good tight uppercut to the head.
Brinks working on landing some head shots here - that one got through nicely.
Sailcirc tries a shoulder strike but it doesn't do any damage.
Brinks lands with a left to the head.
Brinks misses with a punch to the body.
Good body shot from Brinks.
Brinks throws an elbow but it's blocked.
The crowd applaud the fighters' efforts here as the round comes to an end.
Brinks is pressed up against the cage. Sailcirc has hold of a leg and is looking to drag Brinks down to the mat. Brinks avoids the attempt though and has circled away. We're back to striking at a distance.
Brinks misses the jab.
Sailcirc drops down looking for a counter takedown but Brinks sprawls and moves away.
Brinks fakes with the hands and throws a leg kick but Sailcirc is out of range.
Sailcirc misses with a hook. Brinks ducked under it nicely.
And thats the end of the round the fighters go back to their corners.
Cody Brinks dominated that round.
That's the end of the interval. I'm sure that seemed a lot quicker than a minute for our two fighters! Back to the action.
Brinks displaying good standup as he scores with a three punch combination.
Brinks misses with a low kick.
Brinks throws a wild body kick that Sailcirc sees coming a mile off.
Sailcirc ducks under a wild hook from Brinks.
Sailcirc walks into a stiff left hand from Brinks.
Brinks takes the fight into the clinch.
Sailcirc blocks a body shot from Brinks.
Sailcirc can't get the takedown.
Sailcirc tries to work over Brinks's body with a swooping hook but it only glances the target.
Brinks lands with a left to the head.
Sailcirc tries for a takedown but Brinks manages to get underhooks.
Brinks has been the more effective fighter overall so far.
We've had a slow start to the round here - hopefully the action picks up.
Brinks goes for a body shot but it's blocked.
Brinks digs a right hand into Sailcirc's ribs. Those have got to be taking their toll on Sailcirc's gas tank.
Brinks blocks a couple of punches on the inside.
A right hand to the body from Brinks.
Brinks lands a body punch - he's looking to wear down Sailcirc.
Both fighters are absolutely exhausted here.
The crowd are loving this. Great action here.
Nice body punch from Brinks.
Brinks digs a right hand into Sailcirc's ribs. Those have got to be taking their toll on Sailcirc's gas tank.
That's one minute gone in the round.
Brinks gets through Sailcirc's defenses to land a nice punch to the side of the head.
A right hook to the body lands for Brinks.
Brinks lands a nice shot to the body.
Brinks lands a nice looking hook to the body, against the cage.
A nice left hand lands by Brinks.
Sailcirc misses with a body punch.
Sailcirc swings wildly with an uppercut but Brinks uses good head movement to avoid it.
Brinks scores with a nice hook to the head.
Brinks tries to land a knee to the head but Sailcirc blocks with his arms.
Brinks lands a hook to the side of the head.
Brinks looks to throw an elbow but misses.
Brinks makes some space for himself and lands an uppercut.
Sailcirc goes for a takedown attempt but Brinks pushes him away and we're back to fighting at a distance.
That's three failed takedown attempts in the round for Torcadall Sailcirc. That's going to take a lot out of him.
Brinks lands a nice looking body shot.
Brinks works Sailcirc's body with a nice hook.
Wooooo! Give it up for these two warriors! They are putting on a show!
Brinks looks to land a left hand but Sailcirc moved out of range nicely.
That's two minutes gone in the round.
Brinks looks to score with a jab to the body but Sailcirc is just out of range.
Sailcirc uses good footwork to avoid the strikes from Brinks.
Brinks clinches up against the cage.
Come on Sailcirc - let's have some action - none of this stalling nonsense.
Sailcirc tries to score a body lock takedown but Brinks shows good agility there to stay on his feet.
Sailcirc is trying to pull guard but Brinks has him pressed against the cage.
Brinks lands a nice elbow from the clinch.
Brinks is working Sailcirc over against the cage.
Brinks lands an elbow inside that Sailcirc shrugs off.
Brinks lands a body punch.
Brinks looks to throw an elbow but misses.
With the fighters clinched against the cage, Brinks creates a bit of distance for himself and scores with a nice uppercut.
Sailcirc blocks an elbow strike from Brinks.
A right handed body shot lands from Brinks.
Nice elbow from Brinks.
Sailcirc avoids a wild elbow strike from Brinks.
Sailcirc tries for a takedown. No joy.
That's three minutes gone in the round.
Brinks lands a body shot in the clinch.
Sailcirc's head jolts backwards as he takes an uppercut right on the button!
Brinks throws a hook to the body. More of an arm punch but it's all scoring with the judges.
Brinks lands with a short punch from the clinch.
Brinks lands a short shot on the inside that snaps the head of Sailcirc backwards.
Brinks lands a body punch - he's looking to wear down Sailcirc.
Brinks comes over the top with an elbow. That landed flush.
It looks like Torcadall Sailcirc has been cut.
Brinks works for underhooks and lands a body shot in the process.
Brinks scores with a hook to the body.
Brinks digs a right hand into Sailcirc's ribs. Those have got to be taking their toll on Sailcirc's gas tank.
Still in the clinch, Brinks scores with a nice short uppercut.
Brinks throws an elbow that misses.
Brinks cracks Sailcirc with a nice body shot.
Brinks lands a shoulder strike that jolts his opponent's head backwards.
Fantastic stuff here - a very entertaining period of action, which has drawn cheers from the crowd.
Brinks digs a right hand underneath Sailcirc's ribcage. Sailcirc let out a lung full of air as it connected.
Brinks scores with a hook to the body.
Sailcirc takes a shot to the head.
A short body shot lands from Brinks as the two fighters clinch.
Nice body punch from Brinks - that landed with a thud.
Brinks lands with a good tight uppercut to the head.
Brinks lands with a good tight uppercut to the head.
That's four minutes gone in the round.
A left hand lands to the body for Brinks.
Brinks is working Sailcirc over against the cage.
Brinks scores with a hook to the body.
Brinks misses with a knee strike.
Sailcirc blocks the elbow strike.
A head punch on the inside from Sailcirc fails to land.
Brinks blocks a couple of punches on the inside.
Brinks can't find room to land a body shot as Sailcirc controls the action.
Sailcirc doesn't land with the attempted body shot.
A left hand lands to the body for Brinks.
Brinks misses with a body punch.
An uppercut on the inside fails to land for Sailcirc.
Sailcirc cracks Brinks with a nice body shot.
Brinks throws a blind hook that connects with the side of Sailcircs head.
Sailcirc scores with an uppercut up the middle.
The crowd applaud the fighters' efforts here as the round comes to an end.
Sailcirc prevents a body shot from Brinks.
A short left from Brinks.
A nice left hand lands by Brinks.
A head punch blocked on the inside by Brinks.
Brinks tried to land a shot to the body but connects with Sailcirc's elbow.
And thats the end of the round the fighters go back to their corners.
Cody Brinks showed his class in that round. I'd imagine he'll take it on all the scorecards.
The cut man is working on Torcadall Sailcirc's cut.
That's the end of the interval. I'm sure that seemed a lot quicker than a minute for our two fighters! Back to the action. This is the final round!
Brinks throws a jab when Sailcirc was well out of range.
Sailcirc appears to be looking for a counter takedown.
Brinks delivers a nice body kick.
Brinks just misses with a punch to the body.
Sailcirc tries to counter with a takedown but Brinks is quick to defend against it.
Sailcirc avoids the clinch attempt nicely.
Brinks loads up on a big right hand but Sailcirc slips the punch.
Brinks lands a nice hook to Sailcirc's body. Sailcirc takes it in his stride and looks to land his own strikes.
Brinks fakes with the hands and throws a leg kick but Sailcirc is out of range.
Brinks fakes the leg kick and cracks Sailcirc in the body.
Sailcirc takes a punch right to his stomach. That took the wind out of him momentarily.
We've had a slow start to the round here - hopefully the action picks up.
Brinks scores with a jab to the body.
Both fighters are breathing heavily.
Donk. Brinks catches Sailcirc right on the button with a cross.
Sailcirc gets caught by a big overhand right and goes down! Brinks gets on top of him and starts throwing some serious punches until the ref intervenes and stops the fight!
Ladies and gentlemen, after 0:55 of round 3, we have a winner by way of TKO (Strikes). Cody Brinks!
After winning the bout, Cody Brinks thanked all his fans and promised he'd do even better in his next fight. The crowd seemed to love his humility.
|
|
|
|
|
|
|
|
|
|
|
|
|
|
|
|
|
|
|
|
|
|
|
| S |
C
A |
G |
S |
C
B |
G |
|
S |
C |
G |
|
energy
A | B |
|
hype
A | B |
|
pop
A | B |
|
mgr
A | B |
|
FIGHT
RATING
85% |
|
|
|
|
|
|
|
Co-main event
|
Coming up we have a light heavyweight MMA rules bout between Petr Antonovich (ranked 291 p4p, 42 weight class) and Daniel Orndorf (ranked 500 p4p, 77 weight class). Orndorf has chosen Wrecking Ball - Andrew Baena as his entrance music, which hasn't gone down very well with the crowd. These two fighters really are very evenly matched on the feet - it will be fascinating to see who can assert themselves in that aspect of the fight.
 |
|
 |
| 190 cm
22
213 lbs
9 - 2 - 0 |
|
185 cm
23
226 lbs
10 - 3 - 0 |
BJJ Blue Belt
Excellent boxer
Cardio machine |
|
Good wrestler
Excellent boxer
Good gas tank |
|
| |
|
Ladies and gentlemen. This fight is 5 rounds, for the light heavyweight championship of the world!
Introducing the champion to my left, fighting out of the red corner.
With a record of
9 - 2 - 0, fighting out of Las Vegas, Petr Antonovich!
And introducing the challenger to my right, fighting out of the blue corner.
With a record of
10 - 3 - 0, fighting out of New York, Daniel Orndorf!
The judges for this bout are Don Winkell, Jack Bonds and Timothy Bukovac.
The bell rings for round one and we are underway!
Orndorf lands a jab followed by a nice looking cross.
Orndorf slips a jab from Antonovich.
Antonovich will need to tighten up his combinations if he doesn't want to gas himself out, swinging at thin air.
Antonovich uses good footwork to avoid the strikes from Orndorf.
Antonovich comes forward and lands a shot to the body, then darts back out of range.
Antonovich swinging wildly here.
Orndorf feints a counter leg kick.
Antonovich lands with an uppercut that bounces Orndorf off the cage and back into range.
A slow jab from Antonovich misses its intended target.
Orndorf now looks to counter with a shot at the body.
Decent striking displayed by Orndorf there.
Antonovich looks shocked there as he takes a right hand to the temple.
The fans in attendance giving it up for the two fighters, who have really let it all hang out in the last minute or so!
Antonovich throws a combination but comes up with nothing but fresh air.

Orndorf feints and then winds up with a huge right hand that connects perfectly and sends Antonovich sprawling to the canvas! Antonovich rolls over backwards and springs off the cage and manages to regain his footing - how acrobatic! Oh, he's still wobbly - can Orndorf finish him?!
Antonovich is rocked!
Antonovich uses good head movement to avoid the hook from Orndorf.
Orndorf connects with a right hand. Antonovich shakes it off.
Oh Antonovich is still all over the place! His legs are completely gone! Will he be able to recover?!!
Daniel Orndorf seems to be the more aggressive standup fighter in this bout.
Antonovich slips a jab from Orndorf.
Orndorf steps into range and unloads a brutal right left combo! Antonovich is out on his feet! Orndorf sets himself and nearly takes Antonovich's head off with a straight right, sending him crashing to the mat! Wow, that was nasty... but awesome! Wooo!
Ladies and gentlemen, after 1:57 of round 1, we have a winner by way of KO (Strikes). Daniel Orndorf!
Daniel Orndorf is the new light heavyweight champion!
Daniel Orndorf decided to hype himself up post fight. It was going well but he went on about it a bit too long and the crowd turned on him a little.
|
|
|
|
|
|
|
|
|
|
|
|
|
|
|
|
|
|
|
|
|
|
|
| S |
C
A |
G |
S |
C
B |
G |
|
S |
C |
G |
|
energy
A | B |
|
hype
A | B |
|
pop
A | B |
|
mgr
A | B |
|
FIGHT
RATING
100% |
|
|
|
|
|
|
|
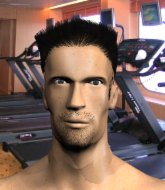
Main event
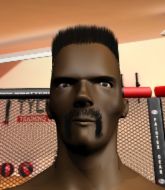
|
Coming up we have a welterweight MMA rules bout between Mosi Kondo (ranked 220 p4p, 32 weight class) and Jhin Markell (ranked 1702 p4p, 190 weight class). The key to victory for Mosi Kondo has got to be keeping the fight on the feet.
 |
|
 |
| 178 cm
22
172 lbs
10 - 1 - 0 |
|
182 cm
30
182 lbs
12 - 6 - 0 |
Decent wrestler
World class MT
Granite chin |
|
Good wrestler
Basic striking
Good gas tank |
|
| |
|
Ladies and gentlemen. This fight is 3 rounds, in the welterweight division.
Introducing the fighter to my left, fighting out of the red corner.
With a record of
10 - 1 - 0, fighting out of Las Vegas, Mosi Kondo!
And introducing the fighter to my right, fighting out of the blue corner.
With a record of
12 - 6 - 0, fighting out of New York, Jhin Markell!
The judges for this bout are Jack Bonds, Don Winkell and .
The bell rings for round one and we are underway!
Kondo scores with a hook to the body. Markell takes a step back and tries to catch his breath.
Markell throws a combination but comes up with nothing but fresh air.
Kondo moves into range and connects with a jab.
Kondo tries to land a leg kick but Markell saw it coming and moves away.
We can't be sure of the tactics at this early stage but we have heard that Markell has been working on his takedowns a lot in the buildup to the fight and we can only assume he's going to look to take this to the mat.
Kondo scores with a hook to the body. Markell takes a step back and tries to catch his breath.

Markell shoots in and scores a nice double leg takedown into half guard.
Markell is keen to just control but Kondo is a slippery customer.
Kondo is looking to escape.
Kondo is not content to let Markell control the position.
Markell is nestled in close to Kondo, controlling him well. He's worked in a nice elbow to the side of the head as well, for good measure.
Kondo tries to kick Markell off but Markell keeps his base steady and stays in half guard.
Markell is looking to take a break and control but Kondo is keeping him honest, looking to work from the bottom.
Markell controlling the pace.
Markell stops Kondo from getting back to his feet.
That's one minute gone in the round.
Markell not throwing his punches with enough precision this time.
Markell stops Kondo from getting back to his feet.
Kondo is trying to defend against the ground and pound but Markell scores with a couple of nice shots.
Markell takes a deep breath and rests his weight momentarily on top of his opponent, to control the position.
Kondo keeping his head moving to avoid the ground and pound.
Markell is looking for a kimura. It's going to be difficult to finish that from half guard though and Kondo defends it well.
Markell not throwing his punches with enough precision this time.
Still in half guard, Markell seems content to control.
Markell thumps the canvas. Not on purpose obviously - he just missed Kondo's head.
Markell seems like he's working for an arm triangle here. He's freed his trapped foot and he's rotating nicely. Kondo is in big trouble! He's tapping out! This one is aaaaaaaaaaaall over!
Ladies and gentlemen, after 2:59 of round 1, we have a winner by way of Submission (Arm Triangle). Jhin Markell!
Jhin Markell thanked the fans post fight for their support.
|
|
|
|
|
|
|
|
|
|
|
|
|
|
|
|
|
|
|
|
|
|
|
| S |
C
A |
G |
S |
C
B |
G |
|
S |
C |
G |
|
energy
A | B |
|
hype
A | B |
|
pop
A | B |
|
mgr
A | B |
|
FIGHT
RATING
45% |
|
|
|
|
|
|
|
|
|
|

