|
|
PBP Commentary |
Coming up we have a lightweight MMA rules bout between Dayton Montana (ranked 0 p4p, 0 weight class) and Daizu Mitsusada (ranked 0 p4p, 0 weight class). Mitsusada has chosen A-Punk as his entrance music. I can't wait for this one - let's get the fighter introductions out of the way and get this one started!
 |
|
 |
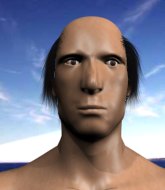
| 175 cm
20
165 lbs
5 - 1 - 0 |
|
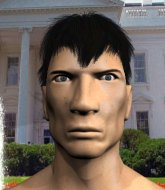
167 cm
25
163 lbs
7 - 4 - 0 |
Powerful takedowns
Solid boxing
Very quick |
|
BJJ Brown Belt
Decent boxing
Powerful |
|
| |
|
Ladies and gentlemen. This fight is 5 rounds, for the lightweight championship of the world!
Introducing the champion to my left, fighting out of the red corner.
With a record of
5 - 1 - 0, fighting out of Montreal, Dayton Montana!
And introducing the challenger to my right, fighting out of the blue corner.
With a record of
7 - 4 - 0, fighting out of New York, Daizu Mitsusada!
The judges for this bout are Ian Loll, Alec Ball and Trevor Gratis.

The bell rings for round one and we are underway!
Montana throws a hook to the body but it doesn't connect.
Mitsusada ducks right into an uppercut from Montana.
Mitsusada connects nicely with a jab. Noted by the judges no doubt.
Daizu Mitsusada seems to be the more aggressive standup fighter in this bout.
Mitsusada throws out a loose jab but Montana uses good head movement to avoid it.
Montana moves away from the strike by Mitsusada.
Montana listening to his corner there, landing a nice uppercut.
Mitsusada misses with an uppercut.
Montana uses good head movement to avoid the hook from Mitsusada.
Jab, jab by Montana - just one landing.
Mitsusada punishes Montana's body with a nice straight punch.

Montana closes the distance and gets a double leg, slamming Mitsusada to the mat! Mitsusada manages to get full guard.
The crowd cheering loudly, showing their appreciation for the quality fight we're seeing here.
Mitsusada looking to control.
Montana stops Mitsusada from standing up.

Mitsusada working from the bottom, still in full guard. He's managed to get a loose triangle. Montana doesn't seem to be doing much to defend here, obviously he feels comfortable in the position. Montana manages to throw the legs off his shoulder and he's back into guard - no problem.
Montana tries to free his leg and advance position but Mitsusada is retaining full guard.

That's one minute gone in the round.
Mitsusada working a defensive guard here.
The ref warns both fighters not to hold the cage as they work up against the meshing.
Montana pressing down on his opponent's thigh, looking to pass guard. Mitsusada is keeping the position for now.
Montana controlling from the top position.
Mitsusada working for a triangle but Montana defends it easily.
Montana wants to control from the top but Mitsusada keeps moving.

That's two minutes gone in the round.
A lull in the action here being met with boos from the crowd.
Mitsusada not looking particularly offensive just at the moment.
Mitsusada wants to control here, rather than go for any submissions from the bottom. At least for now.
Mitsusada working the defensive guard well to avoid strikes from Montana.
Montana loading up with the ground and pound but he's missing more than he's landing in this flurry.
Montana lands a couple of elbows.
Mitsusada avoiding any damage from the ground and pound.
Montana throwing strikes but missing.
Mitsusada wants to sweep but no luck.
Montana looking to sit in guard and control but Mitsusada gets the butterfly guard and sweeps. He's now in the guard on the top.
The fighters are pressed up against the cage, both looking to find a bit of space to work.

That's three minutes gone in the round.
Mitsusada stopping the sweep attempt from Montana.
Mitsusada postures up to throw the ground and pound strikes but they don't connect.
Mitsusada missing there with some ground and pound from the guard.

It looks like we're going to have a standup here. Neither fighter is doing enough on the ground.
Montana just misses with a punch to the body.
Mitsusada swings away with a leg kick that misses.
Mitsusada throws a hook but Montana avoids it easily.

That's four minutes gone in the round.
The crowd are getting on the fighters' backs, as the pace has dropped off in the last minute or so.
Mitsusada doesn't manage to clinch there - Montana circles away.
Mitsusada jabs at Montana's body.
Montana dips down and scores with a jab to the body.
Montana dips down and scores with a jab to the body.
A telegraphed right hand from Mitsusada misses the target.
Mitsusada misses with a takedown attempt. He shot from a bit too far out.
Montana scores to the head and body with a nice combination!
Montana lands a nice hook to Mitsusada's body. Mitsusada takes it in his stride and looks to land his own strikes.
A really sloppy takedown attempt there from Montana.
Mitsusada tries to land with a swinging hook to the body but Montana was well out of range. Poor timing from Mitsusada.
Excellent takedown into side control there by Montana.
The crowd applaud the fighters efforts here as the round comes to an end.
Montana trying to control the position but Mitsusada is working away.
And thats the end of the round the fighters go back to their corners.
That was a close round but I would say that Dayton Montana will probably get the nod.
Well, the break between rounds is over. Let's get back to the scrappin!

Montana lands a right hook to the body.
Mitsusada closes the distance and gets a double leg, slamming Montana to the mat! Montana manages to get full guard.
Mitsusada postures up to throw the ground and pound strikes but they don't connect.
Mitsusada trying to pass the guard. He's being very persistent here but Montana manages to land a sweep and now he's on top!
Mitsusada looking to hit a scissor sweep but Montana is one step ahead there.
Montana wants to control from the top but Mitsusada keeps moving.
Montana trying to pass the guard but can't manage it just yet.
That's one minute gone in the round.
Mitsusada manages to sweep nicely, so he's now on top. Montana manages to get himself to full guard.
Montana controlling the position.
Mitsusada with a flurry of punches that miss.
Montana keeping moving, preventing Mitsusada from controlling successfully.
Mitsusada throwing shots from guard but he's hitting more mat than opponent.
Mitsusada is trying to work a guillotine from the top, or something like that? Don't know how he thinks he's going to get a finish from there.
That's two minutes gone in the round.
My god... these two guys really need to pick up the pace or everyone will leave to go get a beer.
Montana wants to improve his position but instead Mitsusada has moved into half guard.
Montana tries to roll over but Mitsusada keeps him under control.
It looks like we're going to have a standup here. Neither fighter is doing enough on the ground.
Mitsusada takes a solid shot to the body. That one hurt him but he's trying not to show it.
Montana misses with a double jab.
Montana takes a swing at Mitsusada's ribcage but misses.
Montana cracks Mitsusada with a right hand to the side of the head.
Mitsusada lands a body shot.
Montana scores with a decent looking hook.
Montana is looking to wear down Mitsusada with body shots, infact he's throwing more body shots than head shots at the moment.
Mitsusada wants to clinch.
That's three minutes gone in the round.
Mitsusada cracks Montana with a good shot that sees him stumbling back into the cage.
Mitsusada scores with a reasonable looking shot to the body. Montana doesn't seem bothered though.
The fight stays on the outside here - Mitsusada looks like he's thinking about clinching though.
Mitsusada tries to score with a leg kick but it misses it's target.
Montana throws a couple of head shots and lands with the final one - a decent hook, which struck Mitsusada on the side of the head.
Montana throws a series of punches but Mitsusada moves out of range.
Daizu Mitsusada seems to be getting the better of the standup.
Mitsusada closes the distance, clinches up and gets a nice trip takedown into side control. Very smooth.
Mitsusada throwing shots but missing, from side control.
Montana tries to bench press Mitsusada off him but Mitsusada keeps the position.
Mitsusada tries to score with some ground and pound. Montana controls his posture well this time though and the shots don't do any damage.
That's four minutes gone in the round.
Mitsusada throws a strike aimed at the side of Montana's head but Montana avoids it well.
Montana gets back to half guard.
Mitsusada is looking to pass the guard... He's managed it - he's now in full mount!
Both fighters are absolutely exhausted here.
Montana tries to hold on but Mitsusada pushes him away.
Mitsusada throwing strikes but Montana bucks up and reverses the position. He's now in guard on top.
Montana is trying to keep Mitsusada in close.
Mitsusada throwing shots from guard but he's hitting more mat than opponent.
And thats the end of the round the fighters go back to their corners.
Daizu Mitsusada showed his class in that round. I'd imagine he'll take it on all the scorecards.
The fighters' corners scream their final instructions, as the referee calls time. Here we go, back to the action!

Montana scores with a body shot.
Montana ducks down and throws a hook to the body.
Montana connects with a single shot there.
Montana tries for a takedown but Mitsusada sees it coming a mile off and avoids it easily.
Montana lands with a shot to the body.
Nice cross by Montana.
Mitsusada tries to land with a swinging hook to the body but Montana was well out of range. Poor timing from Mitsusada.

Mitsusada closes the distance and clinches.
Mitsusada throws a head punch that misses.
Mitsusada throws a head punch that misses.
Mitsusada misses with a hook from the clinch.
A body shot lands from Mitsusada.
Montana is using his height advantage well here, landing a good percentage of his punches.
Mitsusada throws a punch but it's blocked by Montana.
The two fighters are working to gain dominance in the clinch.
Mitsusada throws a hook to the body. More of an arm punch but it's all scoring with the judges.
Mitsusada stops a takedown attempt from Montana.
Both fighters are breathing heavily.
That's one minute gone in the round.
Mitsusada lands a hook to the side of the head.
Mitsusada controlling the action here for a moment.
Montana wants a takedown.
That's three failed takedown attempts in the round for Dayton Montana. That's going to take a lot out of him.
Mitsusada digs a right hand underneath Montana's ribcage. Montana let out a lung full of air as it connected.
Mitsusada lands a nice looking hook to the body, against the cage.
Mitsusada working some nice short punches in the clinch.
Mitsusada lands a right hand that snaps the head of Montana backwards.
Montana blocks a couple of punches on the inside.
A shot in the inside from Mitsusada.
A nice left hand lands by Mitsusada.
Nice body punch from Mitsusada - that landed with a thud.
Mitsusada has a couple of punches blocked by Montana.
Montana is trying to drag Mitsusada to the mat but Mitsusada just about manages to keep his footing. He used the cage to his advantage there.
Mitsusada throws a punch but it's blocked by Montana.
That's two minutes gone in the round.
Stalling in the clinch from Mitsusada.
Mitsusada lands a body shot.
Mitsusada misses with a hook from the clinch.
Mitsusada lands a shot to the body.
Mitsusada lands a shoulder strike.
Mitsusada has Montana pressed against the cage.
Mitsusada is pressed up against the cage. Montana has hold of a leg and is looking to drag Mitsusada down to the mat. Mitsusada avoids the attempt though and has circled away. We're back to striking at a distance.
Montana looks to score with a jab to the body but Mitsusada is just out of range.
Well, he's not going to score with shots like that. A lazy body kick attempt from Mitsusada.
Mitsusada scores with a decent looking hook.
That's three minutes gone in the round.
Montana thows a body shot but no joy.
Mitsusada throws a low kick but his opponent is out of range.
Mitsusada lands the left hand.
Mitsusada tries to close the distance and clinch up but Montana swats him away and circles back towards the center.
Mitsusada loads up on a big right hand but Montana slips the punch.
Montana avoids the clinch attempt nicely.
Mitsusada lands a nice leg kick that just misses Montana's sensitive parts.
Montana lands a two punch combo.
Montana throws a hook to the body but it doesn't connect.
Montana ducks down and throws a hook to the body but Mitsusada moves away.
Mitsusada looking to shoot here. He's gone for it and he's landed a takedown into mount! Oh, that's bad for Montana!
Mitsusada thuds his fist into the canvas! Oooouch!
That's four minutes gone in the round.
Mitsusada throwing sloppy strikes, which aren't doing any damage.
Montana is squirming around, avoiding Mitsusada's attempts to control the action.
Montana is desperately trying to get back to half guard.
Mitsusada thowing shots but they're missing.
Mitsusada punching from mount but Montana doing a good job of avoiding damage.
Montana is wriggling around trying to escape.
And thats the end of the round the fighters go back to their corners.
Daizu Mitsusada really dominated that round.
The fighters' corners scream their final instructions, as the referee calls time. Here we go, back to the action!

Mitsusada tries to land with a swinging hook to the body but Montana was well out of range. Poor timing from Mitsusada.
Mitsusada throws out a loose jab but Montana uses good head movement to avoid it.
Boom, another hit is landed. "You're gunna get knocked out" taunts Montana, as that shot connected.
Mitsusada tries a low kick but Montana avoids it.
Mitsusada blocks a jab.
Montana misses with a jab, cross combination.
A jab from Mitsusada misses.
Montana misses with a wild body shot.
A shot to the body from Mitsusada misses
and Montana counters nicely by changing levels and landing a hook to the body.
A punch lands to the side of Mitsusada 's head but he takes it in his stride.
We've had a slow start to the round here - hopefully the action picks up.
Mitsusada misses with a low kick.
Mitsusada uses decent footwork to sidestep a right hand from Montana.
Mitsusada closes this distance looking for a takedown but Montana circles away.
Mitsusada keeping a good distance there, avoiding the body shot.
Montana stuns Mitsusada with a nice body shot, before stepping back out of range.
That's one minute gone in the round.
Montana keeping his hands up high there, blocking the jab from Mitsusada.
Montana fakes high and swings low for a body shot but Mitsusada manages to avoid it.
Nice shot by Montana.
Mitsusada wants to clinch.
A swing and a miss from Montana.
Montana bobs and weaves and unloads with a good uppercut.
Mitsusada moves away from the strike by Montana.
Montana connects with a hook to the side of his opponent's head.
Montana throws an uppercut from half a mile away. Mitsusada sees it coming and avoids it easily.
Mitsusada ducks down and throws a hook to the body but Montana moves away.
Montana blocks a jab.
That's two minutes gone in the round.
The crowd are getting on the fighters' backs, as the pace has dropped off in the last minute or so.
Mitsusada misses with a shot to the body
and Montana counters with a right hand to the body.
Mitsusada tries to clinch up but Montana circles away and keeps his distance.
Montana staying out of range there.
Montana swings away but doesn't land with a series of punches.
Mitsusada takes one on the chin but seems OK.
Mitsusada scores to the head and body with a nice combination!
Montana avoids the head kick by Mitsusada.
Montana slips under a jab from Mitsusada.
Mitsusada misses with a two punch combination.
Montana dips down and scores with a jab to the body.
Mitsusada is absolutely dripping with sweat - he looks exhausted.
Mitsusada tries to clinch there but Montana circles away.
A nice combination there by Montana.
Montana drives through with a really nice takedown into side control.
Mitsusada is trying to control Montana's posture but Montana avoids it.
That's three minutes gone in the round.
Mitsusada tries to bench press Montana off him but Montana keeps the position.
Mitsusada looks to move to half guard but instead Montana has passed into mount! Damn!
Montana unloading with bombs!
Montana avoids the attempt from Mitsusada to control.
Montana working away from the top, dropping strikes.
That's four minutes gone in the round.
Montana fakes a shot to the body and cracks his opponent in the head. Nice ground and pound there!
Montana cracks Mitsusada with a nasty head shot there - the crowd let out an audible gasp there, as the noise reverberated around the arena.
Mitsusada is wriggling around trying to escape.
Montana trying to control but Mitsusada is having none of it.
Mitsusada is writhing around trying to get back to his feet.
Montana connects with a couple of good shots from mount.
Montana controlling the pace for now.
Montana landing strikes from the mount.
And thats the end of the round the fighters go back to their corners.
Dayton Montana had his way with Daizu Mitsusada in that round.
The corners get their ten second warning. Both fighters stand from their stools and stare eachother down, ready to get back to the action. This is the final round!

Mitsusada uses some good footwork to avoid the body shot by Montana.
Mitsusada throws a half hearted mid kick.
Mitsusada throws an uppercut from half a mile away. Montana sees it coming and avoids it easily.
Montana digs a good body shot into Mitsusada's ribs.
Mitsusada misses with a hook.
Montana misses with a takedown attempt - Mitsusada sprawls well and throws a nice strike on the way out which just misses.
Montana lands a powerful looking uppercut that connected with his opponent's jaw.
Montana throws a hook but Mitsusada blocks it.
We've had a slow start to the round here - hopefully the action picks up.
Montana swings and misses with a shot to the body
and Mitsusada counters with a quick right hand to the jaw.
Mitsusada fakes with the hands and throws a leg kick but Montana is out of range.
Montana slips under a jab from Mitsusada.
Montana lands with a straight right. Mitsusada didn't see that one coming.
Montana with a jab.
That's one minute gone in the round.
Mitsusada slaps away a takedown attempt from Montana, before circling back to the center of the mat.
Nice shot by Montana.
Both of our modern day gladiators look out of it here - an gruelling 5 rounds of action taking it's toll on them, no doubt.
Mitsusada moves into the clinch.
A short uppercut from Mitsusada.
A bit of stalling here from Mitsusada.
Montana drops down looking for an ankle pick but Mitsusada pulls his leg out and moves away.
That's three failed takedown attempts in the round for Dayton Montana. That's going to take a lot out of him.
Some bone on bone action there as Montana checks a low kick. Luckily it wasn't a particularly hard one.
Mitsusada throws a jab but it's blocked by Montana.
Mitsusada lands with a kick to the ribs.
Mitsusada forces Montana back against the cage and clinches.
Mitsusada gets through Montana's defenses to land a nice punch to the side of the head.
That's two minutes gone in the round.
Mitsusada presses Montana against the cage and delivers a mid-strength body shot.
Mitsusada misses with a short punch on the inside.
Montana goes for a takedown attempt but Mitsusada pushes him away and we're back to fighting at a distance.
Mitsusada misses the body punch
and Montana counters with a driving takedown into guard. Nice work there by Montana.
Montana has to be careful here, sitting in the guard of a superior BJJ player.

Mitsusada uses the cage to get back to his feet.
Mitsusada works Montana's body with a nice hook.
Wooooo! Give it up for these two warriors! They are putting on a show!
Montana avoids a lazy jab quite easily.
Montana moves away from the strike by Mitsusada.
Mitsusada scores a trip takedown into side control. Nice.
Montana is positioning himself to get back to half guard.
Montana wants to control but Mitsusada postures up.
That's three minutes gone in the round.
Mitsusada fails to land a wild elbow strike.
Mitsusada blocks the strikes from Montana.
Montana is looking for a sweep.
Mitsusada is trying to get an arm triangle but Montana is defending well.
Montana defending against the ground and pound.
Mitsusada creates some space and throws a big elbow, but Montana sees it coming and moves his head just enough to avoid the strike.
That's four minutes gone in the round.
The crowd are starting to boo a lack of action.
The referee decides to stand the fighters back up.
Mitsusada misses the body punch
letting Montana counter with a right hand.
Montana scores with a nice right hand.
Mitsusada takes an uppercut right on the button but keeps his composure.
Montana drives through with a takedown into guard.
Montana stands up over Mitsusada, holding his feet. He dives back in and lands a decent shot to the head.
Montana not doing a lot at the moment. He'll have to show some more aggression or the fight will get stood up.
Montana with a flurry of punches that miss.
Mitsusada is trying to control the position but Montana postures up.
Dayton Montana overall seems to be getting the better of the ground position in the fight so far.
The crowd applaud the fighters efforts here as the round comes to an end.
Mitsusada looking to hit a scissor sweep but Montana is one step ahead there.
Montana postures up.
And that's the end of the fight!
I would just about give that final round to Daizu Mitsusada.
I think Mitsusada has won this one but let's see whether the judges agree with me. Over to the ring announcer for the scorecards.
Ladies and gentlemen, after 5 rounds of action, we go to the scorecards for a decision.
Judge Ian Loll scores the fight 47:48
Judge Alec Ball scores the fight 48:48
Judge Trevor Gratis scores the fight 48:48
The fight is ruled a majority draw!
Dayton Montana retains his title. It's always disappointing when a championship fight ends as a draw but that's what happens when you leave the fight in the judges hands!
|
|
|
|
|
|
|
|
|
|
|
|
|
|
|
|
|
|
|
|
|
|
|
| S |
C
A |
G |
S |
C
B |
G |
|
S |
C |
G |
|
energy
A | B |
|
hype
A | B |
|
pop
A | B |
|
mgr
A | B |
|
FIGHT
RATING
93% |
|
|
|
|
|
|

