|
|
PBP Commentary |
Coming up we have a lightweight MMA rules bout between Forrest Loveladdy (ranked 0 p4p, 0 weight class) and John Strife (ranked 0 p4p, 0 weight class). Loveladdy comes to the cage accompanied by PANTERA - F*CKING HOSTILE. Both fighters look fresh as a daisy as they make their way towards the cage.
 |
|
 |
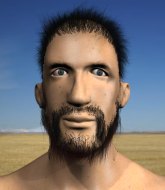
| 180 cm
21
164 lbs
1 - 1 - 0 |
|
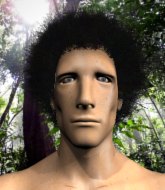
180 cm
28
165 lbs
13 - 8 - 0 |
Abu Dhabi Champ
Solid boxing
Granite chin |
|
Good wrestler
Good kicks
Powerful |
|
| |
|
Ladies and gentlemen. This fight is 3 rounds, in the lightweight division.
Introducing the fighter to my left, fighting out of the red corner.
With a record of
1 - 1 - 0, fighting out of Los Angeles, Forrest Loveladdy!
And introducing the fighter to my right, fighting out of the blue corner.
With a record of
13 - 8 - 0, fighting out of Los Angeles, John Strife!
The judges for this bout are , Jack Bonds and Timothy Bukovac.

The bell rings for round one and we are underway!
Strife looks to throw the jab but Loveladdy is out of range.
Strife misses with a jab, cross combination.
Loveladdy misses with a wild combination.
Strife throws a decent looking leg kick but it doesn't land clean.

Strife clinches.
A body shot lands from Loveladdy.
Strife leaning against his opponent.
Loveladdy has hold of a leg and is looking for a trip takedown. Strife avoids it nicely though and we remain in the clinch.
Strife works on Loveladdy's body with a couple of short punches.
Strife looking to throw knees to the head but Loveladdy is blocking nicely.
Loveladdy lands a body shot in the clinch.
Nice body punch from Strife - that landed with a thud.
Strife tries to land a knee to the body but he is off balance and Loveladdy avoids it.
Strife tries to stall but Loveladdy uses the opportunity to gain a better position.
Loveladdy tries to pull guard but Strife holds him up against the cage and eventually Loveladdy drops back down to his feet.
Strife dictating the pace here, as the fighters clinch against the cage.
Strife missing with knees to the body.
Strife gets underhooks to prevent Loveladdy's takedown attempt.
That's three failed takedown attempts in the round for Forrest Loveladdy. That's going to take a lot out of him.
Strife scores with an uppercut up the middle.
Strife misses with a knee to the head.
Loveladdy misses with a body punch.

That's one minute gone in the round.
Strife manages to get underhooks and slows down the pace for a moment.
A hook to the body from Loveladdy.
Loveladdy tries to score a body lock takedown but Strife shows good agility there to stay on his feet.
Strife landing knees to the body.
Strife lands a right uppercut that snaps the head of Loveladdy backwards.
Loveladdy managing to block the knees to the body from Strife.
Strife misses with a knee strike.
Loveladdy is working for a takedown up against the cage. He can't get it on this occasion though.
Strife landing knees to the head.
Good anti-grappling being displayed by Loveladdy as Strife tries to tie him up.

Loveladdy ties up his opponent against the cage and manages to drag the fight down to the ground. Loveladdy no doubt will be looking to work submissions from his guard.
Strife wants to stand but Loveladdy has a closed guard, so he can't escape.
Strife must be cautious of submissions here, given that his opponent has the superior Jiu Jitsu.
Loveladdy looking to sweep here. No luck so far.
Strife wanted to stand there but Loveladdy had control of the position.
Loveladdy tries to land a sweep but no joy.

That's two minutes gone in the round.
Strife postures up.

Strife stands up from guard. Let's bang!
Strife throws a nice inside leg kick.
Strife tries a head kick but it misses.
Strife comes forward and lands a shot to the body, then darts back out of range.
Strife throws a nice looking combination but Loveladdy bobs and weaves to avoid any damage.
John Strife is looking to keep the fight on the feet at all costs.
Nice takedown defense from Strife. No joy for Loveladdy on that attempt.
Strife turns his hip over beautifully as he lands a nice leg kick.
Strife lands with an uppercut that bounces Loveladdy off the cage and back into rage.
Loveladdy shoots in for a takedown and gets it.
This has been an exciting period of action!
Loveladdy thows a wild elbow that connects with the canvas.

That's three minutes gone in the round.
Loveladdy stalling away here and it's allowed Strife to slip out his trapped foot and regain full guard.
Loveladdy makes a bit of distance and scores with some ground and pound, still in guard.
Strife looking to sweep here. No luck so far.
Loveladdy trying to move into half guard but instead Strife has managed to sweep!
Strife is looking to stand up but Loveladdy won't let him.
The ref warns both fighters not to hold the cage as they work up against the meshing.
Loveladdy is working an open guard here, looking to improve his position. No doubt that will leave him open to counters but at least he's being more offensive.
Strife wanted to stand there but Loveladdy had control of the position.
Loveladdy is trying to keep Strife in close.

That's four minutes gone in the round.
The crowd are getting on the fighters' backs, as the pace has dropped off in the last minute or so.
Strife preventing the sweep.
Strife stands up from Loveladdy's guard - Strife perhaps looking for a knockout.
Loveladdy falls off balance throwing a combination
and Loveladdy takes a counter punch right on the button for his troubles.
Strife misses with a wild body shot.
Strife is looking to chop away at Loveladdy's legs.
Loveladdy circles away from the clinch attempt.
Strife fakes with the hands and throws a leg kick but Loveladdy is out of range.
Loveladdy tries to clinch
and Strife counters with a right hand to the body.
Loveladdy doesn't succeed with the takedown
and Strife cracks him with a counter punch right on the button.
The crowd applaud the fighters efforts here as the round comes to an end.
Strife jabbing away but nothing is landing.
And thats the end of the round the fighters go back to their corners.
John Strife dominated that round.
The fighters' corners scream their final instructions, as the referee calls time. Here we go, back to the action!

Strife lands a nice looking kick to the body. Loveladdy takes a step back to recover.
Strife pulls out of a head kick attempt.
A head kick misses from Strife.
Loveladdy darts in and lands a nice takedown into half guard.
Loveladdy wants to pass the guard but Strife is defending well.
Strife keeping his head moving to avoid the ground and pound.
Strife is looking to regain full guard. Not this time though.
Strife is trying to control but can't.
That's one minute gone in the round.
Loveladdy with a momentary lay and pray from half guard.
Loveladdy throwing punches and elbows but they're not doing any damage.
Loveladdy is looking to pass Strife's guard but actually Strife recovers to full guard.
Strife working a defensive guard here.
Loveladdy in full guard, throwing the ground and pound. No damage this time.
Loveladdy looking to sit in guard and control but Strife gets the butterfly guard and sweeps. He's now in the guard on the top.
Loveladdy looking for a sweep. Not yet Loveladdy, not yet.
That's two minutes gone in the round.
A few boos can be heard. I'm sure they will multiply if the fighters don't pick up the pace.
Strife wants to stand but Loveladdy has a closed guard, so he can't escape.
Loveladdy is looking to get back to his feet but can't, whilst Strife is controlling him.

Loveladdy looking for submissions from the bottom here. Moving his hips around, possibly looking for an armbar.
Strife tries to stand but Loveladdy is controlling from the bottom.
Loveladdy is avoiding any damage by keeping wrist control.
Strife wants to stand but Loveladdy is controlling his posture from full guard.
That's three minutes gone in the round.
Strife stands and steps away. Loveladdy gets to his feet too and we're back to the striking game.
The crowd cheers as Strife lands an impressive looking overhand right. Loveladdy doesn't seem phased though.
Loveladdy changes levels and drives through with a really nice takedown into side control. Strife looks really pissed at himself for not defending that better.
Loveladdy content to control the pace. The referee will try and keep them active though.
Strife tries to buck Loveladdy off but Loveladdy is having none of it.
Loveladdy lands a knee to the body and follows it up with some ground and pound to the head. That will wear Strife down.
Loveladdy trying to control the action but Strife is working from the bottom.
That's four minutes gone in the round.
Loveladdy is trying to land an Americana. He has the arm isolated but Strife is keeping cool and he's avoided the danger for now.
Loveladdy goes for an armbar here - this could be all over! But no, Strife has escaped beautifully and is now on top in side control! Oh, that's unlucky for Loveladdy but great work by Strife.
Loveladdy tries to bench press Strife off him but Strife keeps the position.
Loveladdy gets back to half guard.
Strife wants to stand up but Loveladdy manages to regain full guard.
Strife wanted to stand there but Loveladdy had control of the position.
And thats the end of the round the fighters go back to their corners.
Forrest Loveladdy dominated that second round.
The fighters get back to their feet, the hooter sounds and we're back to the action! This is the final round!

Strife misses with a body shot. Nice footwork from Loveladdy.
Loveladdy misses with the combination.
Strife misses with a hook. Loveladdy ducked under it nicely.
Loveladdy changes levels and looks for a double leg takedown. Strife tries to avoid it but Loveladdy manages to keep hold of a leg and drag Strife to the ground. Strife escapes though and pops straight back up to his feet.
Strife finds nothing but air with that leg kick attempt.
Loveladdy misses with a jab, cross combination.
Strife tries to close the distance and clinch but Loveladdy swats him to one side with an open hand palm strike and circles away.
Strife lands with a nice body kick.
We've had a slow start to the round here - hopefully the action picks up.
Strife is the aggressor but that punch slipped nicely by Loveladdy.
Good leg kick by Loveladdy there. It's the ones that make that thud noise that hurt and that was an almighty thud.
Strife lands a kick to the ribs of his opponent. Nice work there - in and out in a flash.
Forrest Loveladdy is looking to throw some combinations by the looks of things.
A jab from Strife finds it's way through Loveladdy's defenses.
Strife waving his hands out in front of him, looking to distract Loveladdy.
That's one minute gone in the round.
Loveladdy moves out of range as Strife strikes.
Strife throws a half hearted mid kick.
Strife closes the distance and presses his opponent up against the cage.
Loveladdy is working for a takedown up against the cage. He can't get it on this occasion though.
Strife trying to control the position but instead, Loveladdy has worked for underhooks and has pushed Strife into the cage.
Strife is trying to push Loveladdy away but Loveladdy has him pressed against the cage, so he's going nowhere.
Strife slows down the pace here.
Loveladdy lands with a quick shot inside that doesn't really do much damage.
Strife tries to work over Loveladdy's body with a swooping hook but it only glances the target.
Loveladdy has dropped down and is working for a takedown. Strife is trying to keep an underhook but Loveladdy manages to get the takedown into half guard.
Strife gets back to full guard.
Loveladdy working some ground and pound from guard but it's not doing any damage.
That's two minutes gone in the round.
Strife utilising some decent striking defenses from the guard, preventing the ground and pound.
Strife trying to keep a closed guard but Loveladdy is proving a slippery customer.
Loveladdy sneaks a leg through and gets to half guard. That was like a knife through butter how easily he passed Strife's guard.
Strife takes a big intake of breath there - he's definitely tired.
Loveladdy stalling away here and it's allowed Strife to slip out his trapped foot and regain full guard.
Loveladdy stands up and looks to throw the legs aside to pass to side control. Strife swivels though and keeps the full guard.
Strife keeping moving, preventing Loveladdy from controlling successfully.
Strife is avoiding any damage by keeping wrist control.
Forrest Loveladdy overall seems to be getting the better of the ground position in the fight so far.
That's three minutes gone in the round.
Strife not looking particularly offensive just at the moment.
Loveladdy trying to pass the guard but can't manage it just yet.
Loveladdy scoring with some ground and pound.
Strife keeping full guard, as Loveladdy tries to pass.
Loveladdy drops back, looking for a kneebar! Strife looks panicked! The fighters roll across the mat, one looking to finish, one looking to escape. Strife looks to have wriggled free... Yes, he's got his leg free and he's dived into side control! Good work there from Strife!
Strife stands up.
Loveladdy is the aggressor but that punch slipped nicely by Strife.
That's four minutes gone in the round.
Loveladdy misses with a leg kick
and Strife counters with a nice body shot.
Loveladdy tries to clinch there but Strife circles away.
Strife wants to clinch up but Loveladdy keeps it at a distance.
Loveladdy misses with a few strikes there.
Strife misses with a wild combination.
Loveladdy connects with an inside leg kick.
Loveladdy with a lazy takedown attempt
and Strife counters with a good right hand that lands right on the jaw.
That's three failed takedown attempts in the round for Forrest Loveladdy. That's going to take a lot out of him.
Strife ducks down and throws a hook to the body.
Strife tries to land with a swinging hook to the body but Loveladdy was well out of range. Poor timing from Strife.
Loveladdy moves out of range as Strife throws a body kick.
Strife tries to land with a swinging hook to the body but Loveladdy was well out of range. Poor timing from Strife.
Loveladdy throws a solid leg kick but Strife takes the impact on his shin and smiles at Loveladdy.
And that's the end of the fight!
John Strife comfortably won the final round on my scorecard.
I think Strife has won this one but let's see whether the judges agree with me. Over to the ring announcer for the scorecards.
Ladies and gentlemen, after 3 rounds of action, we go to the scorecards for a decision.
Judge Suge Night scores the fight 28:29
Judge Jack Bonds scores the fight 28:29
Judge Timothy Bukovac scores the fight 28:29
In favor of your winner, by unanimous decision... John Strife!
|
|
|
|
|
|
|
|
|
|
|
|
|
|
|
|
|
|
|
|
|
|
|
| S |
C
A |
G |
S |
C
B |
G |
|
S |
C |
G |
|
energy
A | B |
|
hype
A | B |
|
pop
A | B |
|
mgr
A | B |
|
FIGHT
RATING
53% |
|
|
|
|
|
|

