|
|
PBP Commentary |
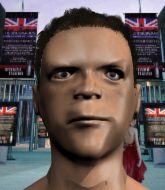
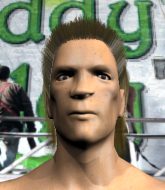
Coming up we have a light heavyweight MMA rules bout between Joey Sass (ranked 0 p4p, 0 weight class) and Dayne Carter (ranked 0 p4p, 0 weight class). Joey Sass could well score a knockout today. He has the power to get to Dayne Carter's chin.
 |
|
 |
| 192 cm
26
211 lbs
4 - 0 - 0 |
|
190 cm
23
212 lbs
4 - 1 - 0 |
BJJ Blue Belt
Excellent boxer
Big right hand |
|
BJJ White Belt
Excellent boxer
Powerful |
|
| |
|
Ladies and gentlemen. This fight is 5 rounds, for the light heavyweight championship of the world!
Introducing the champion to my left, fighting out of the red corner.
With a record of
4 - 0 - 0, fighting out of New York, Joey Sass!
And introducing the challenger to my right, fighting out of the blue corner.
With a record of
4 - 1 - 0, fighting out of New York, Dayne Carter!
The judges for this bout are Jonathan Paton, Eddie Farnsworth and John Roberts.

The bell rings for round one and we are underway!
Sass takes a hook to the side of the head. I wonder if that's got his ears ringing.
Sass lands a nice looking body shot.
Carter misses with a half-hearted attempt at a head kick.
Sass throws a wild combination but nothing lands.
Sass cracks a nice hook into Carter's ribs.
Sass misses with a double jab.
Sass looks to score with a combo but nothing lands.
Sass throws a nice looking combination but Carter bobs and weaves to avoid any damage.
Carter showing good head movement there, avoiding the strikes from Sass.

Sass decides to change it up a bit and drives through with a nice takedown into half guard.
Carter wants to get back to full guard.
Sass wants to lay and pray for a moment but Carter keeps working.
Sass is working hard to pass the guard. He's done it - he's now in full mount! Trouble for Carter!

Sass looking to secure an arm triangle but Carter defends it well.
Carter is looking to improve his position but Sass isn't that keen on the idea.
Sass can't quite control the action as he would like just now, as Carter is looking to escape.

That's one minute gone in the round.
Carter is trying desperately to improve position.
Sass controlling from mount.
Sass wants to finish this one by submission but Carter is holding onto his waist, trying to prevent any attacks from Sass.
Sass blocks Carter's feeble attempts to strike from the bottom.
Carter is trying desperately to improve position.
Sass looks like he's working for a submission but he's not found anything just yet.
Sass controlling the position easily from mount.

That's two minutes gone in the round.
The crowd are getting on the fighters' backs, as the pace has dropped off in the last minute or so.
Carter is desperately trying to get back to half guard.
Carter is persisting with the attempt to improve his position.
Sass looking for an armbar but decides to keep the dominant position instead.
Sass working for a submission but Carter is keeping him at bay.
Carter has worked his way to half guard, taking advantage of Sass's lack of action.
Carter has no desire to be mounted, so is trying to control. Sass is working away from the top position though.

That's three minutes gone in the round.
Sass is keen to just control but Carter is a slippery customer.
The fighters are battling for position here. Carter manages to regain full guard. Nice work.
Sass trying to control the position from guard on top but Carter is wriggling around, looking for whatever he can.
Sass trying to pass the guard but can't manage it just yet.
Carter keeping moving, preventing Sass from controlling successfully.
Sass looking to pass the guard.
Sass is looking to advance position but Carter has hit a scissor sweep - now he's on top in mount!
Sass slips a leg in and gets back to half guard.
Sass manages to get to full guard.

That's four minutes gone in the round.
Sass preventing the ground and pound from doing any damage.
Sass is throwing his legs up, looking for submissions. Carter is aware though and is defending well.
Carter engaging in some classic timewasting tactics.
Sass throwing his legs up looking for a triangle.
Carter throws and elbow that misses. Sass uses the momentum to reverse the position. He's now in Carter's guard. Nice move by Sass!
Carter not looking particularly offensive just at the moment.
And thats the end of the round the fighters go back to their corners.
Joey Sass dominated that round.
That's the end of the round. The referee orders the cornermen out of the ring so we can get back down to business.

Sass fails with a rather predictable takedown attempt.
Sass throws a right and a left that both miss.
Sass keeping a good distance there, avoiding the body shot.
Sass looks to land a combination but Carter avoids it well.
Sass shoots in for a takedown but Carter shows good takedown defense there and keeps this one on the feet.
Sass takes one on the chin but seems OK.
Carter keeps his opponent at a distance with a nice jab.
Sass takes a shot right to the liver - Bas would have been proud of that punch.
Sass works Carter's body with a nice hook.
Sass fails to land with a series of punches.
Sloppy strikes from Sass. Those never looked like landing.
Sass misses with a jab, cross combination.
Carter ducks down and throws a hook to the body but Sass moves away.
Sass misses with a takedown attempt - Carter sprawls well and throws a nice strike on the way out which just misses.
That's three failed takedown attempts in the round for Joey Sass. That's going to take a lot out of him.
That's a knee to de groin and it's over and out! Carter crumples to the ground after an illegal strike from Sass - the referee stops the clock and Carter gets 5 minutes to recover from that one. "I'm sorry" says Sass. Carter manages to get back to his feet and the fight resumes.
A nice combination there by Sass.
Joey Sass is looking to throw some combinations by the looks of things.
Sass fakes a head shot and lands one to the body.
That's one minute gone in the round.
Carter throws a leg kick but Sass sees it coming and checks it nicely.
This fight brought to you by 5M nutrition - it's mmmmm tasty. Nice jab by Carter.
A slow jab from Carter misses its intended target.
Carter throws a head kick that misses and slips in the process. He scrambles back to his feet and the fighters circle.
Dayne Carter is looking to keep the fight on the feet at all costs.
Carter wants to clinch.
Carter wants to clinch.
Sass just misses with a punch to the body.
A nice combination there by Sass.
Sass misses with a few strikes there.
Sass closes the distance and clinches up, looking for a takedown. He shifts his weight and gets a nice trip into half guard.
Carter is trying to maintain the position but Sass is very close to passing his half guard.
The fighters are tangled up in the ropes here. We might need a restart if the fighters can't break free themselves.
Carter is trying to control but Sass passes into side control!
Carter is looking to reverse the position.
That's two minutes gone in the round.
Sass working hard here to secure a kimura but he's not really in the right position for it.
The fighters are trapped in the ropes so we're going to have a reposition here. The ref calls for a break and repositions the fighters in the center of the ring.
Carter is looking to reverse the position.
Sass tries for a kimura. Not really close to a finish though.
Carter is trying to control Sass's posture but Sass avoids it.
Carter regains half guard.
Sass is working for a submission of some sort.
Carter missing with punches from the bottom.
That's three minutes gone in the round.
Carter wants to improve his position but Sass is controlling well.
Carter is in trouble now - Sass has advanced to mount!
Carter is trying desperately to improve position.
Sass takes a little breather and maintains the position. The referee will be looking for him to stay active from such a dominant position though.
Sass looking for a guillotine from mount but Carter is having none of it.
That's four minutes gone in the round.
Carter working to try and regain half guard.
Carter wants to hold on but Sass pushes him away.
Sass controlling from the full mount.
Carter is looking to get to half guard.
Sass tries to control but Carter wriggling away.
Sass controlling from the full mount.
And thats the end of the round the fighters go back to their corners.
Joey Sass dominated that second round.
Well, the break between rounds is over. Let's get back to the scrappin!

Sass throws a right and a left that Carter avoids nicely.
Sass pivots as if he's going to throw a leg kick but stops half way.
Sass works over Carter's head and body with a nice combination.
Carter thows a left - swing and a miss!
Carter misses with a wild body shot.
Sass lunges in with an uppercut that skims his opponent's chin.
Sass throws a series of punches but Carter avoids them all with ease.
Sass slips a straight right by Carter.
The fight stays on the outside here - Carter looks like he's thinking about clinching though.
Carter is on the wrong end of a nice combination from Sass.
Carter scores with a jab to the jaw of his opponent.
Carter throws out a token jab with nothing on it.
Sass walks into a stiff left hand from Carter.
Sass looks to score with a jab to the body but Carter is just out of range.
Sass uses good footwork to get in and out, landing a nice hook.
Sass avoids the head kick by Carter.
That's one minute gone in the round.
Sass throws a nice looking combination but Carter bobs and weaves to avoid any damage.
Sass throws a right hand that Carter ducks under and follows up with a left that Carter also avoids with ease.
Carter misses with a jab and misses with a cross straight after too.
Carter throws a head kick but Sass moves out of range.
Carter lands a pitter patter jab to the forehead of his opponent.
Sass is looking to wear down Carter with body shots, infact he's throwing more body shots than head shots at the moment.
A head kick misses from Carter.
Carter scores with a body shot.
Sass digs a good body shot into Carter's ribs.
Carter throws a jab, cross combination which is slipped
and Sass counters with a thumping low kick.
Sass throws a combination that misses
and Carter counters with a crisp hook to the side of the head.
Joey Sass seems to be the more aggressive standup fighter in this bout.
Carter swings away with a body shot that misses
and Sass makes him pay by landing a nice hook to the body before moving out of range.
Sass misses with a double jab.
Carter throws a head kick that misses and slips in the process. He scrambles back to his feet and the fighters circle.
Carter throws a body punch but Sass moves out of range.
Sass uses some good footwork to avoid the body shot by Carter.
Carter throws a jab, cross combination which is slipped
and Sass counters with a left to the body.
Carter takes a big intake of breath there - he's definitely tired.
Sass looks to land a combination but Carter avoids it well.
That's two minutes gone in the round.
Sass throws a wild combination but nothing lands.
Carter waving his hands out in front of him, looking to distract Sass.
Sass takes a swing at Carter's ribcage but misses.
Sass throws a series of punches but Carter moves out of range.
Joey Sass is winning the standup battle so far.
Carter scores with a punch to the head.
Carter takes one on the button.
Sass fakes and then throws a beautiful body shot. Carter looks a bit winded and takes a step backwards to take a breath.
No joy there for Sass, who threw a few shots but didn't land.
Sass shoots in and scores a nice double leg takedown into half guard.
Sass seems very keen to just sit and control from half guard but Carter does not like that idea so much and is remaining active off his back.
Sass passes the guard and advances to mount!
Carter throwing punches from his back but nothing is landing.
That's three minutes gone in the round.
Carter defends a decent attempt at a guillotine from Sass.
Sass is going oldschool here, as he tries to force Carter to tap using a forearm choke. This isn't 1993 though, so Carter shrugs it off.
Sass wants to finish this one by submission but Carter is holding onto his waist, trying to prevent any attacks from Sass.
Sass blocks Carter's feeble attempts to strike from the bottom.
Carter tries to lock up and control but Sass gives him a forearm to the face and pushes him away.
Carter might have to switch it up a bit here because his efforts to control Sass kaven't been going to plan, at least at the current moment in time.
Sass trying to control but he's not successful this time.
Sass moves into side control, trying to work for a kimura. That looks painful! Will he finish!!?? No, Carter has worked his arm free - good work by Carter!
That's four minutes gone in the round.
Carter throws an elbow to the body but it doesn't land.
Carter is trying to improve his position.
Carter is not content to let Sass control the position.
Sass is trying to get an arm triangle but Carter is defending well.
Carter is not content to let Sass control the position.
And thats the end of the round the fighters go back to their corners.
Joey Sass clearly takes that round.
The fighters' corners scream their final instructions, as the referee calls time. Here we go, back to the action!

Carter misses with a combination
and Sass counters with a left to the body.
Sass throws a jab, cross combination which is slipped
and Carter counters with a nice uppercut.
Carter throws a lazy head kick
and Sass makes him pay by landing a nice hook to the body before moving out of range.
Sass misses with a double jab.
Sass looks to land a combination but Carter avoids it well.
Carter throws a head kick that Sass semi-blocks.
Sass scores with a nice looking left hook and follows it up with an uppercut!
Carter takes a shot right to the bread basket.
Carter moves to clinch but Sass breaks away
and Sass counters with a left to the body.
Carter misses with a double jab
and Sass counters with a quick right hand to the jaw.
Sass misses with a combination
and Carter counters with a stiff right hand.
Sass bobs and weaves well there to avoid the strikes.
Sass throws a right hand that Carter ducks under and follows up with a left that Carter also avoids with ease.
Sass throws a combination but comes up with nothing but fresh air.
That's one minute gone in the round.
Carter misses with a head kick.
Carter scores with a slapping inside leg kick.
Carter with a nice cross.
A bone on bone clash there as Carter blocks the leg kick.
Sass blocks a head kick by Carter.
Carter tries a head kick but it misses.
Sass throws a jab, cross combination which is slipped
and Carter counters with a good right hand that lands right on the jaw.
Sass moves out of range as Carter throws a body kick.
Carter throws a sloppy head kick
and Sass counters with a straight punch to the midsection.
Sass scores with a reasonable looking shot to the body. Carter doesn't seem bothered though.
Sass misses with a two punch combination.
Carter missing with a left hand there. Sass was out of range so wasted energy throwing that one.
Sass looks to score with a combo but nothing lands.
Some wild striking there from Sass.
A looping hook to the body misses from Sass. Carter does a little dance to reset his feet.
Carter tries to clinch but Sass is having none of it.
That's two minutes gone in the round.
Sass shoots in for a takedown - he's clinched up with Carter but Carter pushes him off and we're back to square one.
Carter doesn't react quick enough there as he takes a shot to the body.
Carter lunges in with swinging rights and lefts but Sass circles away quickly and effectively.
Carter works his jab well there, keeping his opponent at a distance.
Carter lands a lovely overhand right.
Sloppy strikes from Sass. Those never looked like landing.
Sass misses with a two punch combination.
Sass swings and misses with a hook to the body.
Sass lands three nice shots there - that looked like it hurt!
Carter misses with a body shot. Nice footwork from Sass.
Carter takes a swing at Sass's ribcage but misses.
Sass walks straight into a jab right on the nose. That one stung - he's blinking and trying to clear his head.
Sass lands with a two punch combination before moving back out of range.
Carter doesn't manage to clinch there - Sass circles away.
Carter keeping a good distance there, avoiding the body shot.
Carter moves his head to the side to avoid a jab but walks straight into a cross.
That's three minutes gone in the round.
Sass falls off balance throwing a combination
and Carter counters with a right hand to the body.
Carter tries to score with an inside leg kick but telegraphs it and Sass is able to avoid easily.
Carter misses with a half-hearted attempt at a head kick.
Carter misses with a hook. Sass ducked under it nicely.
Sass takes a solid shot to the body. That one hurt him but he's trying not to show it.
Carter with a body punch. A glancing blow.
Carter scores with a jab. Sass acknowledges it with a nod of the head.
A head kick by Carter misses
and Sass counters with a nice double leg into side control. Carter won't be happy with that.
It's got to the stage where if one of these guys blows hard enough, the other might fall over.
Sass advances to mount.
Carter is working to get back to half guard.
That's four minutes gone in the round.
Carter is squirming around, avoiding Sass's attempts to control the action.
Sass looking to control and managing it successfully.
Sass trying to control but Carter is having none of it.
The crowd applaud the fighters efforts here as the round comes to an end.

Joey Sass has forced the referee to step in and bring the fight back to the feet.
Sass uses good head movement to avoid the hook from Carter.
And thats the end of the round the fighters go back to their corners.
Joey Sass had his way with Dayne Carter in that round.
The minute break is over - no more time for sponges and pep talks - back to the action! Ladies and gentlemen, this is the final round!

Carter goes to the watering hole and comes back with a big thumbs up from the judges as he scores a three punch combo.
Carter misses with a few strikes there.
A clash of legs there as Sass blocks the low kick.
Sass looks to score with a combo but nothing lands.
Sass dodges the punch combination from Carter.
Sass scores with a hook.
Sass stuns Carter with a nice body shot, before stepping back out of range.
Sass throws a head kick that misses.
Carter throws a lazy head kick
and Sass counters with a one-two to the body.
Carter throws a right hand that Sass ducks under and follows up with a left that Sass also avoids with ease.
Carter tests Sass's chin there with a solid looking shot.
No joy there for Carter, who threw a few shots but didn't land.
Sass moves out of range as Carter strikes.
Sass falls off balance throwing a combination
enabling Carter to counter with a crisp jab.
Carter misses with a looping right.
That's one minute gone in the round.
Sass scores with a nice takedown into half guard. Let's see what he's got on the ground.
Carter missing with punches from the bottom.
Sass controlling the pace.
Sass is trying to control. Carter wants to improve his position but can't escape this time.
Carter is trying to maintain the position but Sass is very close to passing his half guard.
Carter is wobbling all over the place through exhaustion. Will he make it to the final bell?
Dayne Carter has forced the referee to step in and restart the fight on the feet.
Carter tries to bum rush Sass with a series of wild strikes but Sass uses good footwork to avoid the assault.
That's two minutes gone in the round.
Sass decides to change it up a bit and drives through with a nice takedown into half guard.
Sass is stalling here. Carter is in no mood to hang around though. He's locked up a kimura from the bottom! Sass seems to be keeping calm but he's forced to roll out of the hold and Carter has ended up in side control on the top. Nice work.
Sass is trying to control Carter's posture but Carter avoids it.
Sass manages to land a sweep and he's now on top! Lovely Jiu Jitsu!
Sass is looking for a kimura here.
Carter is doing well to avoid being mounted. He's controlling the position at the moment.
Sass is working for a kimura but Carter is defending it quite comfortably.
That's three minutes gone in the round.
Sass is looking for a kimura but Carter is holding onto that half guard position, so it's hard for Sass to get the leverage.
Carter misses with some strikes from the bottom.
Sass looking for a kimura but he'll have to free his other leg if he wants to finish that. Perhaps he's just using it as a distraction technique.
Carter is trying to control but can't.
Carter is working for an escape here. He's hooked one of Sass's legs and he's managed to sneak out and take Sass's back!
Carter somehow managing to miss with a strike from the back.
That's four minutes gone in the round.
A few boos can be heard. I'm sure they will multiply if the fighters don't pick up the pace.
Sass covering up well under a barage of strikes.
Carter misses with a punch to the head.
Sass turns into Carter and is now in his guard.
Carter throws a couple of weedy looking strikes off his back.
Sass wants to pass the guard but Carter is keeping the position.
Carter wants to sweep here but Sass controlling him for the moment.
Sass wants to control from the top but Carter keeps moving.
Sass drops back looking for a submission - "I'm sorry sir, but I'm gunna break your leg" says Sass as he cranks on the unfortunate limb! Carter screams and taps out before any major damage is done! Don't mess with Sass! Nice submission victory there!
Ladies and gentlemen, after 4:55 of round 5, we have a winner by way of Submission (Kneebar). Joey Sass!
Joey Sass is the new light heavyweight champion!
|
|
|
|
|
|
|
|
|
|
|
|
|
|
|
|
|
|
|
|
|
|
|
| S |
C
A |
G |
S |
C
B |
G |
|
S |
C |
G |
|
energy
A | B |
|
hype
A | B |
|
pop
A | B |
|
mgr
A | B |
|
FIGHT
RATING
86% |
|
|
|
|
|
|
