|
|
PBP Commentary |
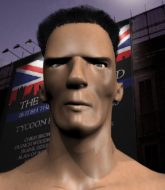
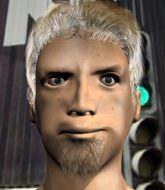
Coming up we have a middleweight MMA rules bout between Timo T A (ranked 0 p4p, 0 weight class) and Walter O Flanigan (ranked 0 p4p, 0 weight class). Walter O Flanigan has the better chin. Will he look to stand and bang today?
 |
|
 |
| 185 cm
18
191 lbs
3 - 1 - 0 |
|
184 cm
20
193 lbs
3 - 0 - 0 |
BJJ Purple Belt
Basic striking
Big heart |
|
BJJ Blue Belt
Basic striking
Solid chin |
|
| |
|
Ladies and gentlemen. This fight is 3 rounds, in the middleweight division.
Introducing the fighter to my left, fighting out of the red corner.
With a record of
3 - 1 - 0, fighting out of London, Timo T A!
And introducing the fighter to my right, fighting out of the blue corner.
With a record of
3 - 0 - 0, fighting out of London, Walter O Flanigan!
The judges for this bout are James Glass, Donald Grub and Andrew Berry.

The bell rings for round one and we are underway!
T A takes a shot right to the liver - Bas would have been proud of that punch.
No joy there for O Flanigan, who threw a few shots but didn't land.
T A looks to land a combination but O Flanigan avoids it well.

O Flanigan pushes T A up against the cage in a clinch.
O Flanigan content to slow the pace in the clinch.

O Flanigan breaks the clinch.
T A walks into a left hand.
O Flanigan fails to land with a series of punches.

O Flanigan scores with a takedown into T A's guard.

T A throws his legs up looking to secure a triangle. Oh, that looks pretty tight, I gotta say! O Flanigan escapes and throws T A's legs to the side, diving into side control!
The ref warns both fighters not to hold the cage as they work up against the meshing.
T A is looking for a sweep.

O Flanigan decides to stand back up. O Flanigan steps back and let's T A get back to his feet.
Left hook, right uppercut from T A.
T A misses with a double jab
and O Flanigan counters with a nice uppercut.
No joy there for T A, who threw a few shots but didn't land.
T A misses with the combination.
T A connects with a looping left hand that seems like it dazed O Flanigan momentarily.
O Flanigan lands a jab, followed by a cross and another cross, as T A backs up against the cage.

That's one minute gone in the round.
O Flanigan bobs and weaves well there to avoid the strikes.
O Flanigan instigates a clinch.
O Flanigan manages to break the clinch.
T A throws a left and a right that both miss
and O Flanigan counters with a single leg into guard. T A didn't expect that.
T A keeping moving, preventing O Flanigan from controlling successfully.
The fighters are pressed up against the cage, both looking to find a bit of space to work.
O Flanigan is just sitting in guard, looking to avoid any submissions.
T A looking to sweep here. No luck so far.
O Flanigan gets to his feet - T A follows without any prompting.
T A swings away but doesn't land with a series of punches.
T A swings wildly with a couple of big hooks
and O Flanigan counters by moving into the clinch. Good anticipation by O Flanigan.
T A is looking for a takedown up against the cage. O Flanigan gets underhooks though and prevents the takedown attempt.
T A is breathing heavily.
O Flanigan breaks from the clinch.
O Flanigan throws a right hand that T A ducks under and follows up with a left that T A also avoids with ease.
T A scores with a nice looking left hook and follows it up with an uppercut!
T A falls off balance throwing a combination
and O Flanigan counters into the clinch. Nicely done.
T A drops down for a takedown but doesn't get it.

That's two minutes gone in the round.
T A tries for a takedown. No joy.
That's three failed takedown attempts in the round for Timo T A. That's going to take a lot out of him.
The crowd are loving this. Great action here.
O Flanigan escapes the clinch and we're back to striking.
O Flanigan clinches up against the cage.
O Flanigan breaks the clinch and we're back to striking at distance.
O Flanigan throws a series of punches but T A moves out of range.
T A throws a jab, cross combination which is slipped
and O Flanigan counters with a shoot takedown. T A fights it but they end up in guard.
T A keeping full guard, as O Flanigan tries to pass.
O Flanigan content to stall in guard here.
T A looks to be working for a triangle here. Oh, it looks like he might have it! O Flanigan has picked T A up and slammed him! T A can't keep hold of the triangle and O Flanigan manages to pass to side control!
A lull in the action here.
T A is working to avoid the ground and pound but O Flanigan connects with a decent elbow.
T A manages to work his way to half guard, despite O Flanigan's best efforts.
O Flanigan with a momentary lay and pray from half guard.

That's three minutes gone in the round.
O Flanigan works his way into full mount!
O Flanigan controlling the position easily from mount.
O Flanigan looking to control but T A is working nicely, looking to advance position himself.
T A tries to reverse the position but O Flanigan maintains control.
T A manages to regain half guard. Good work.
O Flanigan controlling the action here.
T A regains full guard. Nicely done.

That's four minutes gone in the round.
T A tries to land a sweep but no joy.
T A looking for submissions from the bottom here. Moving his hips around, possibly looking for an armbar.
T A manages to land a sweep and now he's in mount on top!
O Flanigan is trying to escape but when you're mounted that's not too easy.
T A prevents O Flanigan from getting the reversal.
O Flanigan is trying to stand up.
O Flanigan throwing hammer fists to the chest of T A. What's that going to do exactly?
O Flanigan tries to lock up and control but T A gives him a forearm to the face and pushes him away.
As the round comes to an end the crowd are showing their appreciation for a great round of action.
O Flanigan bucks up and manages to get a nice reversal! He's in guard on the top - nicely done!
O Flanigan in full guard, throwing the ground and pound. No damage this time.
O Flanigan stands and steps away. T A gets to his feet too and we're back to the striking game.
T A throws a jab, cross combination which is slipped
and O Flanigan counters by moving into the clinch.
And thats the end of the round the fighters go back to their corners.
Walter O Flanigan dominated that round.
That's the end of the interval. I'm sure that seemed a lot quicker than a minute for our two fighters! Back to the action.

O Flanigan fails to land with the punch combination there - jab, cross, hook, miss, miss, miss.
Timo T A is looking to throw some combinations by the looks of things.
T A with a poor takedown
and O Flanigan counters with a lovely straight right hand!
T A dodges the punch combination from O Flanigan.
O Flanigan clinches.
O Flanigan breaks the clinch.
The fight moves into the clinch position.
O Flanigan breaks the clinch and we return to the middle of the mat.
O Flanigan takes a shot to the eye socket. That's gotta hurt.
O Flanigan closes the distance, clinches up and gets a nice trip takedown into side control. Very smooth.
O Flanigan stands up and beckons T A to his feet.
O Flanigan displaying good standup as he scores with a three punch combination.
T A lands a jab. Then a cross. Then finally a nice hook to the body. Good work there by T A.
The crowd cheers as T A lands an impressive looking overhand right. O Flanigan doesn't seem phased though.
T A swings wildly with a couple of big hooks
and O Flanigan counters into the clinch. Nicely done.
O Flanigan breaks from the clinch.
T A paws at his opponent with the jab and then lunges in with a straight, right on the button.
O Flanigan has T A up against the cage in a clinch.
O Flanigan breaks the clinch and we return to the middle of the mat.
T A misses with a double jab
and O Flanigan counters with a shoot takedown. T A fights it but they end up in guard.
That's one minute gone in the round.
O Flanigan wants to control from the top but T A keeps moving.
Both fighters are absolutely exhausted here.
O Flanigan gets to his feet. T A looking to butt scoot but the ref puts an end to that. On your feet son!
T A falls off balance throwing a combination
and O Flanigan counters into the clinch. Nicely done.
O Flanigan lands a nice trip takedown into half guard.
T A is looking to regain full guard. Not this time though.
O Flanigan seems very keen to just sit and control from half guard but T A does not like that idea so much and is remaining active off his back.
T A actively working from the bottom here.
O Flanigan escapes and gets back to his feet.
T A misses with the combination.
O Flanigan gets to the clinch - let's see what his plan is here.
That's two minutes gone in the round.
O Flanigan works for underhooks and lands a body shot in the process.
O Flanigan breaks the clinch and we're back to striking at distance.
Donk. O Flanigan catches T A right on the button with a cross.
T A gets taken down but at least he's managed to land in guard.
O Flanigan postures up and lands some nice ground and pound.
O Flanigan is taking a break and basically stalling. The referee will not allow him to do that for long.
O Flanigan decides he's had enough of playing guard and decides to stand. Come on T A, up you get!
Timo T A seems to be the more aggressive standup fighter in this bout.
Fantastic stuff here - a very entertaining period of action, which has drawn cheers from the crowd.
A punch combination from T A misses.
O Flanigan digs a good body shot into T A's ribs.
O Flanigan throws a right and a left that T A avoids nicely.
T A misses with a combination
and O Flanigan counters by moving into the clinch.
O Flanigan pulls guard successfully.
O Flanigan is doing well to control the posture of his opponent and prevent any damage.
T A pressing down on his opponent's thigh, looking to pass guard. O Flanigan is keeping the position for now.
O Flanigan seems keen to control T A's posture.
T A won't allow O Flanigan to sweep him here.
That's three minutes gone in the round.
T A is trying to work a guillotine from the top, or something like that? Don't know how he thinks he's going to get a finish from there.
Walter O Flanigan has got the better of the ground game so far.
T A has gone for a leg lock! O Flanigan slips out almost immediately though and dives into T A's guard.
T A keeping busy on the bottom but O Flanigan has passed one foot through into half guard.
O Flanigan not throwing his punches with enough precision this time.
T A actively working from the bottom here.
T A wants to get back to full guard.
O Flanigan throwing shots but T A is blocking nicely.
O Flanigan wants to free his trapped foot but T A is holding on for dear life with his legs.
That's four minutes gone in the round.
The crowd are getting on the fighters' backs, as the pace has dropped off in the last minute or so.
T A tries to get to full guard but O Flanigan has control of the leg.
T A looking for submissions from an awkward position here.

The referee decides to stand the fighters back up.
O Flanigan throws a right and a left that both miss.
O Flanigan ducks low and lands a nice hook to the body of his opponent.
Timo T A is looking to keep the fight on the feet at all costs.
T A tries to keep at a distance but O Flanigan has taken the fight into the clinch.
T A has O Flanigan pressed up against the cage and is working for takedown. O Flanigan manages to improve position though and keeps the fight standing.
O Flanigan has T A pressed against the cage.
O Flanigan lands a shoulder strike that jolts his opponent's head backwards.
O Flanigan breaks from the clinch.
O Flanigan clinches up against the cage.
O Flanigan lands a left hand that snaps the head of T A backwards.
As the round comes to an end the crowd are showing their appreciation for a great round of action.
O Flanigan breaks the clinch and we're back to striking at distance.
T A misses with a double jab
and O Flanigan counters with a nice uppercut.
The fight moves into the clinch position.
T A is working for takedown but O Flanigan is calmly controlling the position for now.
And thats the end of the round the fighters go back to their corners.
Walter O Flanigan showed his class in that round. I'd imagine he'll take it on all the scorecards.
The fighters get back to their feet, the hooter sounds and we're back to the action! This is the final round!

O Flanigan misses with a double jab.
O Flanigan scores with a nice one two combo and darts back out of range to avoid anything coming in the opposite direction.
T A misses with a double jab
and O Flanigan counters into the clinch. Nicely done.
T A drops to a knee looking for a takedown but O Flanigan gets the underhooks and prevents it.
T A wants a takedown.
O Flanigan prevents a takedown attempt there.
That's three failed takedown attempts in the round for Timo T A. That's going to take a lot out of him.
O Flanigan lands a body shot.
O Flanigan is working T A over against the cage.
T A goes for a takedown attempt but O Flanigan pushes him away and we're back to fighting at a distance.
T A takes a shot right to the bread basket.
T A works over O Flanigan's head and body with a nice combination.
T A throws a right hand that O Flanigan ducks under and follows up with a left that O Flanigan also avoids with ease.
O Flanigan wants to clinch.
T A falls off balance throwing a combination
and O Flanigan counters with a left and a right that stings T A.
T A connects with a good right hand that stumbles O Flanigan. O Flanigan circles away out of range and recomposes himself.
O Flanigan takes a big intake of breath there - he's definitely tired.
T A fails to land with the punch combination there - jab, cross, hook, miss, miss, miss.
O Flanigan showing good head movement there, avoiding the strikes from T A.
T A throws a two punch combo that lands nicely.
That's one minute gone in the round.
O Flanigan misses with a double jab.
T A misses with a few strikes there.
O Flanigan swinging wilding here.
O Flanigan throws a series of punches but T A avoids them all with ease.
T A showing good head movement there, avoiding the strikes from O Flanigan.
O Flanigan misses with a jab and misses with a cross straight after too.
O Flanigan throws a hook to the body but it doesn't connect.
T A misses with a jab, cross combination.
T A works over O Flanigan's head and body with a nice combination.
T A throws a combination that misses
and O Flanigan counters with a nice single leg takedown and he's in T A's guard now.
T A escapes his hips to the side and looks to be working for an armbar. O Flanigan gives him a little smile and shakes his head. No chance.
O Flanigan has a momentary lapse of concentration, allowing T A to throw up a leg and lock on what appears to be a pretty tight triangle! O Flanigan is fighting it off but it's all too little too late - T A pulls down on the head and he's put O Flanigan to sleep! This one is all over!
Ladies and gentlemen, after 1:56 of round 3, we have a winner by way of Submission (Triangle). Timo T A!
|
|
|
|
|
|
|
|
|
|
|
|
|
|
|
|
|
|
|
|
|
|
|
| S |
C
A |
G |
S |
C
B |
G |
|
S |
C |
G |
|
energy
A | B |
|
hype
A | B |
|
pop
A | B |
|
mgr
A | B |
|
FIGHT
RATING
100% |
|
|
|
|
|
|
