|
|
PBP Commentary |
Coming up we have a featherweight MMA rules bout between Alpha Dog (ranked 0 p4p, 0 weight class) and Bucky The Badger (ranked 0 p4p, 0 weight class). Bucky The Badger will no doubt be trying to keep this one on the feet, where he has a distinct advantage.
 |
|
 |
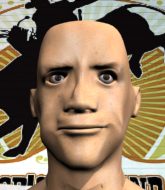
| 192 cm
23
155 lbs
6 - 2 - 0 |
|
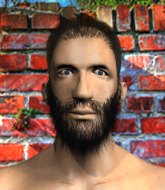
160 cm
22
149 lbs
8 - 0 - 0 |
Abu Dhabi Champ
Solid boxing
Cardio machine |
|
Good wrestler
World class MT
Granite chin |
|
| |
|
Ladies and gentlemen. This fight is 3 rounds, in the featherweight division.
Introducing the fighter to my left, fighting out of the red corner.
With a record of
6 - 2 - 0, fighting out of Sydney, Alpha Dog!
And introducing the fighter to my right, fighting out of the blue corner.
With a record of
8 - 0 - 0, fighting out of Sydney, Bucky The Badger!
The judges for this bout are Hugh Johnson, John Mangel and Winston Howard.

The bell rings for round one and we are underway!
The Badger lands a leg kick. The shin dug right into the meat of the thigh.
The Badger fails in his attempt to clinch.
No luck with that takedown attempt from Dog.
The Badger works his jab well there, keeping his opponent at a distance.
The Badger misses with an uppercut. Dog saw that one coming.

The Badger moves into the clinch.
The Badger tries to land a knee to the head but misses.
The Badger throws an elbow but it's blocked.
The Badger stops a takedown attempt from Dog.
Dog blocks the elbow strike.
The Badger lands with a light punch inside.
The Badger gets an overhook and lands an elbow to the side of the head.
The Badger lands with a short head shot on the inside.
The Badger lands a hook that snaps the head of Dog backwards.

Dog is rocked!
Dog drops to a knee looking for a takedown but The Badger gets the underhooks and prevents it.
Oh Dog is still all over the place! His legs are completely gone! Will he be able to recover?!!
That's three failed takedown attempts in the round for Alpha Dog. That's going to take a lot out of him.
Dog blocking some punches.
Good body shot from The Badger.
This is a great period of action - very entertaining stuff!
Dog tries to pull guard but The Badger won't allow it.
The Badger doesn't land with the attempted body shot.
Dog seems to have got his legs back now.
A short right from The Badger.
The Badger lands with a light punch inside.

That's one minute gone in the round.
A short right from The Badger.
Dog is looking for a takedown up against the cage. The Badger gets underhooks though and prevents the takedown attempt.

Dog tightens his grip and picks The Badger up, before dumping him to the ground. The Badger manages to land in guard.
Dog really does look like a pencil wearing a pair of gloves. Let's hope he has a gameplan to suit that ridiculous body shape.
If this pace continues, the referee will definitely step in and force a standup.
Dog won't allow The Badger to sweep him here.
The Badger working a defensive guard here.
The Badger pulls Dog in to control the position.
The Badger keeping full guard, as Dog tries to pass.
We get told so often about how wrestlers don't like to be on their backs. Let's see if The Badger can do anything to dispel that myth.
The Badger is working the butterfly guard. He manages to land a nice scissor sweep and is now in half guard on the top. Nice move.
The Badger controlling the action here.
The Badger not throwing his punches with enough precision this time.

That's two minutes gone in the round.
The Badger thumps the canvas. Not on purpose obviously - he just missed Dog's head.
This is a great period of action - very entertaining stuff!

Dog is looking to sinch up a guillotine here but The Badger pulls his head out easily.
Both fighters really going for it on the ground here!
Dog trying to control from the bottom.
The Badger sitting in half guard, looking to land shots. Dog defending well though.
The fighters are pressed up against the cage, both looking to find a bit of space to work.
Dog is not content to let The Badger control the position.
The Badger thows a huge punch but Dog dodges it nicely.
The Badger thows a huge punch but Dog dodges it nicely.
Dog avoiding damage under a succession of punches from The Badger.
The Badger thows a wild elbow that connects with the canvas.
The Badger prevents Dog from improving his position.
Dog looking for submissions off his back.
The Badger thows a wild elbow that connects with the canvas.

That's three minutes gone in the round.
The Badger thows a huge punch but Dog dodges it nicely.
The Badger throwing shots but they're hitting the canvas more than the man.
The Badger thumps the canvas. Not on purpose obviously - he just missed Dog's head.
The Badger wants to lay and pray for a moment but Dog keeps working.
The Badger throwing shots but they're hitting the canvas more than the man.
The Badger not throwing his punches with enough precision this time.
The ref warns both fighters not to hold the cage as they work up against the meshing.
The Badger trying to control from half guard but Dog is working away.
The Badger not throwing his punches with enough precision this time.
Dog avoiding damage under a succession of punches from The Badger.
The Badger not landing any meaningful shots this time.
The Badger lands strikes from half guard.
Dog avoiding damage under a succession of punches from The Badger.
The Badger seems very keen to just sit and control from half guard but Dog does not like that idea so much and is remaining active off his back.

That's four minutes gone in the round.
Dog looking for submissions from an awkward position here.
Dog keeping control of the leg, stopping his opponent passing to mount.
The Badger throwing punches and elbows but they're not doing any damage.
Dog looking for submissions off his back.
The Badger looks to land a strike but Dog avoids it nicely and regains full guard.
Dog will need to keep those long limbs tucked in whilst he's on the ground, to prevent any submissions.
We've seen a great period of action over the last minute or so - credit to both fighters for going all out!
The Badger trying to land body shots but he keeps hitting the mat.
The Badger throwing strikes from guard but Dog blocks nicely.
Dog avoiding any damage from the ground and pound.
The crowd are going absolutely nuts as the round comes to an end - what a fantastic round of action!
Dog utilising some decent striking defenses from the guard, preventing the ground and pound.
Dog working from the bottom, still in full guard. He's managed to get a loose triangle. The Badger doesn't seem to be doing much to defend here, obviously he feels comfortable in the position. The Badger manages to throw the legs off his shoulder and he's back into guard - no problem.
Dog looking to sweep here. No luck so far.
And thats the end of the round the fighters go back to their corners.
Bucky The Badger dominated that round.
Well, the break between rounds is over. Let's get back to the scrappin!

The Badger connects with a single shot there.
Dog closes the distance and clinches up with The Badger, looking for a takedown. Dog pushes The Badger against the cage but The Badger circles to the side and manages to break the clinch.
Bucky The Badger is looking to throw some combinations by the looks of things.
The Badger motions for Dog to come forward. The Badger throws a leg kick but it misses it's target.
The Badger wants to clinch up but Dog keeps it at a distance.
The Badger lands with an uppercut that bounces Dog off the cage and back into range.
Dog shoots in for a takedown - he's clinched up with The Badger but The Badger pushes him off and we're back to square one.
Alpha Dog seems to be the more aggressive standup fighter in this bout.
Dog throws a looping left and ducks down for a takedown. He's got his arms around The Badger's waist but The Badger gets an underhook and avoids the takedown by throwing Dog off to one side.
That's three failed takedown attempts in the round for Alpha Dog. That's going to take a lot out of him.
Ohhhhhhhhhh, brutal head kick from The Badger! This one is all over!
Ladies and gentlemen, after 0:28 of round 2, we have a winner by way of KO (Head Kick). Bucky The Badger!
Bucky The Badger managed to slip a mention for his sponsors, Milwaukee's Best 159's - $75, into his post fight interview.
|
|
|
|
|
|
|
|
|
|
|
|
|
|
|
|
|
|
|
|
|
|
|
| S |
C
A |
G |
S |
C
B |
G |
|
S |
C |
G |
|
energy
A | B |
|
hype
A | B |
|
pop
A | B |
|
mgr
A | B |
|
FIGHT
RATING
100% |
|
|
|
|
|
|
