|
|
PBP Commentary |
Coming up we have a middleweight MMA rules bout between Tom Haverford (ranked 0 p4p, 0 weight class) and Matt Saunders (ranked 0 p4p, 0 weight class). Haverford 's ring entrance music is that housewives' favourite, Jay-Z & Kanye West - N** In Paris. Well, I have no idea who's going to take this one!
 |
|
 |
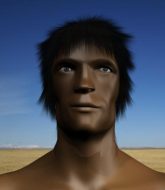
| 180 cm
24
190 lbs
1 - 0 - 0 |
|
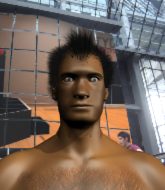
185 cm
24
185 lbs
1 - 1 - 0 |
BJJ Blue Belt
Counter striker
Good chin |
|
BJJ White Belt
Decent boxing
Tends to cut |
|
| |
|
Ladies and gentlemen. This fight is 3 rounds, in the middleweight division.
Introducing the fighter to my left, fighting out of the red corner.
With a record of
1 - 0 - 0, fighting out of Montreal, Tom Haverford !
And introducing the fighter to my right, fighting out of the blue corner.
With a record of
1 - 1 - 0, fighting out of Montreal, Matt Saunders!
The judges for this bout are Yves DeLean, William Peck and Gregory Folan.

The bell rings for round one and we are underway!
Saunders closes the distance looking to clinch
and Haverford counters with an inside leg kick.

Haverford moves into the clinch successfully.
With the fighters up against the cage, Saunders throws an elbow but misses.
Haverford content to slow the pace in the clinch.

Haverford escapes the clinch and we're back to striking.
Saunders is looking to take this fight into the clinch.
Matt Saunders seems to be the more aggressive standup fighter in this bout.
Saunders tries to clinch but Haverford is having none of it.
Saunders wants to clinch but Haverford slips to the side
and Haverford counters by clinching up.
Haverford landing knees to the head.
Saunders lands a knee to the head there! That was nasty!

It looks like Tom Haverford has been cut.
Saunders throws an elbow but it misses.
Saunders tries to land a knee to the head but Haverford blocks with his arms.
Haverford lands a knee to the body.
Saunders throws an elbow but it's blocked.

That's one minute gone in the round.
Saunders with an attempt at a knee that misses.
Haverford with the Thai clinch. He's looking to land a big knee but he's not managed it this time.
With the fighters clinched against the cage, Haverford creates a bit of distance for himself and scores with a nice uppercut.
Haverford has Saunders pressed up against the cage and is working for takedown. Saunders manages to improve position though and keeps the fight standing.
Haverford tries a knee to the head but he's missed.
Saunders tries to land a knee to the head but Haverford blocks with his arms.
A head punch blocked on the inside by Haverford .
Saunders trying to stall but Haverford improves his position.
Haverford tries for a takedown but Saunders manages to get underhooks.
A battle for position here, against the cage.
Saunders tries to land a knee to the body but he is off balance and Haverford avoids it.
The pace slowing considerably in the clinch, as Haverford takes a break from that fighting nonsense to think about the finer things in life.
Saunders is looking to control Haverford 's arms but Haverford gets an underhook and turns him. Now Saunders has his back to the cage.

That's two minutes gone in the round.
Haverford misses the knee to the body. Nice hip positioning from Saunders.
Saunders looks to throw an elbow but misses.
Haverford tries to take the fight to the ground by pulling guard but can't manage it.
That's three failed takedown attempts in the round for Tom Haverford . That's going to take a lot out of him.
Saunders has a couple of punches blocked by Haverford .
Saunders missing with knees to the body.
Saunders tries a body shot but Haverford blocks it.
Saunders has a couple of punches blocked by Haverford .
Saunders connects with a knee to the head.
Haverford unloads a knee to the mid-section. Saunders lets out a prehistoric sounding urrrrgh.
We've seen a great period of action over the last minute or so - credit to both fighters for going all out!
Saunders connects with a nasty looking knee right to Haverford 's face.
Haverford 's corner calls for him to break the clinch, which he does.
Saunders closes the distance looking to clinch
and Haverford moves into the clinch.

That's three minutes gone in the round.

Saunders pushes off and circles away, back to the middle of the mat.
Haverford blocks a jab.
Haverford lands with a slapping head kick.

It looks like Matt Saunders has been cut.
Saunders lands a high kick!
Saunders wants to clinch but Haverford slips to the side
and Haverford counters by moving into the clinch.
Haverford breaks the clinch and we return to the middle of the mat.
Saunders tries to clinch but Haverford moves out of range.
Saunders closes the distance looking to clinch

and Haverford counters with a nice double leg into side control. Saunders won't be happy with that.
This is a great period of action - very entertaining stuff!

Haverford is looking to finish here, going for an Americana. Saunders knows the correct defense though, so he's OK.
Saunders avoids any damage from the ground and pound of Haverford .

That's four minutes gone in the round.
Haverford in side control, trying to ground and pound but not landing this time.
Haverford tries to land with some ground and pound but misses.
Haverford working the strikes but Saunders uses the opportunity to regain half guard.
Haverford lands with a punch from half guard.
The crowd are going absolutely nuts as the round comes to an end - what a fantastic round of action!
Haverford frees up his trapped foot and advances to mount.
Haverford looking to secure an arm triangle but Saunders defends it well.
And thats the end of the round the fighters go back to their corners.
Tom Haverford dominated that round.
Both fighters have cut men working on them during the interval.
That's time! Back to the action!

Saunders pulls out of a head kick attempt.
Saunders is looking to take this fight into the clinch.
Saunders fails in his attempt to clinch.
Saunders tries to clinch up but Haverford circles away and keeps his distance.
Saunders darts in trying to clinch
and Haverford counters with a leg kick that reverborates around the arena.
Saunders wants to clinch
and Haverford makes him pay by landing a thudding low kick.
Haverford tries to close the distance and clinch but Saunders swats him to one side with an open hand palm strike and circles away.
Saunders closes the distance but Haverford moves to the side
and Haverford moves into the clinch.
That's one minute gone in the round.
Haverford pushes off an throws an elbow but Saunders leans to the side and avoids it. We're back to clinching against the cage.
Haverford leaning against his opponent.
Haverford keeps control of Saunders as he tries to wriggle out of the double underhooks.
With the fighters up against the cage, Haverford throws an elbow but misses.
Haverford jumps into guard, dragging Saunders to the mat.
Haverford manages to sweep nicely, so he's now on top. Saunders manages to get himself to full guard.
Haverford throwing strikes but missing.
Haverford wants to control from the top but Saunders keeps moving.
Haverford missing there with some ground and pound from the guard.
That's two minutes gone in the round.
Haverford with a nice head shot there.
Saunders utilising some decent striking defenses from the guard, preventing the ground and pound.
Haverford throws a big right hand that misses.
Haverford trying to control but Saunders is working from the bottom.
Saunders can't do much from the bottom at the moment, as Haverford controls the pace.
Haverford sneaks a leg through and gets to half guard. That was like a knife through butter how easily he passed Saunders's guard.
This has been an exciting period of action!
Saunders avoiding damage under a succession of punches from Haverford .
Haverford is keen to just control but Saunders is a slippery customer.
That's three minutes gone in the round.
Haverford is looking for a kimura here.
Neither fighter is being very active at the moment, with Haverford in particular looking to stall.
Saunders is breathing heavily.
Haverford moves nicely into side control.
Haverford controlling from side mount.
That's four minutes gone in the round.
Saunders tries to escape but Haverford is in control.
Haverford is looking to finish here, going for an Americana. Saunders knows the correct defense though, so he's OK.
Haverford tries for an arm triangle. That looks pretty tight to me. Is this one over!?! Possibly, maybe, no Haverford has let go of the choke. Obviously it wasn't as tight as we thought!
And thats the end of the round the fighters go back to their corners.
Tom Haverford dominated that second round.
Both fighters have cut men working on them during the interval.
The fighters' corners scream their final instructions, as the referee calls time. Here we go, back to the action! So, we enter the final round. Let's see if either fighter can bring us a finish, or whether we're going to the judges scorecards.

Haverford closes the distance and pushes Saunders back into the cage.
Haverford tries a knee to the head but he's missed.
Haverford is looking to score with knees to the body. Maybe he'll change it up and go body then head. Saunders is defending well for now.
Haverford softening up his opponent with strikes, against the cage.
Haverford dictating the pace here, as the fighters clinch against the cage.
Haverford misses the knee to the body. Nice hip positioning from Saunders.
Saunders tries a knee to the head but Haverford blocks it.
Haverford 's corner calls for him to break the clinch, which he does.
Haverford tries to clinch up against the cage, rushing in the close the distance. Saunders manages to break the clinch and circles back to the middle of the mat.
Saunders tries to clinch up but Haverford circles away and keeps his distance.
Saunders closes the distance looking to clinch
and Haverford counters by clinching up.
That's one minute gone in the round.

Saunders decides to pull guard.
Haverford trying to control the position from guard on top but Saunders is wriggling around, looking for whatever he can.
Tom Haverford overall seems to be getting the better of the ground position in the fight so far.
Haverford tries to free his leg and advance position but Saunders is retaining full guard.
Saunders keeping moving, preventing Haverford from controlling successfully.
Haverford is intent on slowing down the pace of the fight, simply looking to control.
The referee looks like he's ready to step in and stand the fighters back up.
Haverford trying to land body shots but he keeps hitting the mat.
That's two minutes gone in the round.
Saunders keeping moving, preventing Haverford from controlling successfully.

The referee decides to stand the fighters back up, due to lack of activity on the part of Tom Haverford .
Saunders moves to clinch but Haverford breaks away
and Haverford counters by moving into the clinch.
Haverford gets control of Saunders's arms and successfully pulls guard. Haverford will no doubt be looking for submissions off his back.
Haverford wants to control here, rather than go for any submissions from the bottom. At least for now.
Matt Saunders has stepped it up - he knows he needs a finish here!
Haverford bucks up whilst keeping hold of a body lock, managing to reverse the position. Now he's in top in Saunders's guard.
Haverford forces his way into half guard.
Haverford perhaps working for something from half guard, or maybe not. It looks like he's just sitting there.
Wooooo! Give it up for these two warriors! They are putting on a show!
That's three minutes gone in the round.
Haverford is looking for an arm triangle, whilst trying to pass to side control. Saunders doesn't seem that keen to cooperate though. No luck this time Haverford .
Haverford wants to work for an arm triangle but Saunders is really keeping half guard well and defending the submission attempt.
Haverford is sneakily working for an arm triangle but Saunders sees it coming and defends easily.
That's four minutes gone in the round.
Haverford is looking for an arm triangle, whilst trying to pass to side control. Saunders doesn't seem that keen to cooperate though. No luck this time Haverford .
Haverford trying to control from half guard but Saunders is working away.
Tom Haverford is fighting for a decision here - he's started to take the cautious approach.
The ref warns both fighters not to hold the cage as they work up against the meshing.
The crowd applaud the fighters efforts here as the round comes to an end.
Haverford perhaps working for something from half guard, or maybe not. It looks like he's just sitting there.
And that's the end of the fight!
Tom Haverford showed his dominance in that final round.
Well Haverford has outscored his opponent in every aspect of the fight today. Only a scarily incompetent judge or two will keep him from a well deserved win... Over to the ring announcer for the scorecards.
Ladies and gentlemen, after 3 rounds of action, we go to the scorecards for a decision.
Judge Yves DeLean scores the fight 30:27
Judge William Peck scores the fight 30:27
Judge Gregory Folan scores the fight 30:27
In favor of your winner, by unanimous decision... Tom Haverford !
In his post fight interview, Tom Haverford started talking himself up. Luckily his charisma kept the crowd on side and gave him a good reception.
|
|
|
|
|
|
|
|
|
|
|
|
|
|
|
|
|
|
|
|
|
|
|
| S |
C
A |
G |
S |
C
B |
G |
|
S |
C |
G |
|
energy
A | B |
|
hype
A | B |
|
pop
A | B |
|
mgr
A | B |
|
FIGHT
RATING
51% |
|
|
|
|
|
|
