|
|
PBP Commentary |
Coming up we have a light heavyweight MMA rules bout between Markus Sizemore (ranked 0 p4p, 0 weight class) and Kenny Blankenship (ranked 0 p4p, 0 weight class). Well, I have no idea who's going to take this one!
 |
|
 |
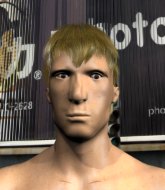
| 175 cm
18
200 lbs
6 - 4 - 0 |
|
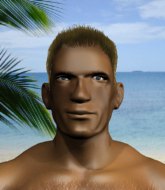
183 cm
18
210 lbs
3 - 4 - 0 |
Good wrestling
Brawler
Experienced |
|
BJJ White Belt
Brawler
Knockout power |
|
| |
|
Ladies and gentlemen. This fight is 3 rounds, in the light heavyweight division.
Introducing the fighter to my left, fighting out of the red corner.
With a record of
6 - 4 - 0, fighting out of Sydney, Markus Sizemore!
And introducing the fighter to my right, fighting out of the blue corner.
With a record of
3 - 4 - 0, fighting out of Sydney, Kenny Blankenship!
The judges for this bout are Donatello Bradman, Eliza Hachem and Bruno Hogan.

The bell rings for round one and we are underway!

Sizemore closes the distance and looks for a trip takedown... aaaand he's got it - Sizemore lands in his opponent's guard.
Sizemore slows down the pace of the fight for a moment. He'll need to remain active if he doesn't want to see the fight stood back up.
Sizemore working some strikes from top position.
Sizemore looking to control the position here, rather than advance.
Sizemore could do with losing a few pounds - he looks very soft around the mid section, to put it politely.

The ref stands the fighters back up because Markus Sizemore just wasn't active enough.
Sizemore tries to clinch but Blankenship is having none of it.

That's one minute gone in the round.
Blankenship tries to clinch there but Sizemore circles away.
Sizemore walks into a stiff left hand from Blankenship.
Blankenship doesn't succeed with the takedown
and Sizemore decides to take the opportunity to score a takedown. He's landed in Blankenship's guard.
Sizemore looking to control the position here, rather than advance.
Blankenship keeping full guard, as Sizemore tries to pass.

Sizemore drops back for a leg! It's a sloppy attempt though and Sizemore jumps back into guard quickly, to retain the dominant position.
Sizemore with a couple of shots to the head there. Not particularly brutal.

That's two minutes gone in the round.
Fantastic stuff here - a very entertaining period of action, which has drawn cheers from the crowd.

Sizemore gets to his feet and steps away from his opponent.
Sizemore tries to close the distance and clinch up but Blankenship swats him away and circles back towards the center.
Blankenship fails with a rather predictable takedown attempt.
Sizemore gets a double leg takedown into Blankenship's guard.
Sizemore is stalling in the full guard.
Blankenship looking for a sweep. Not yet Blankenship, not yet.
Sizemore has gone for a leg lock! Blankenship slips out almost immediately though and dives into Sizemore's guard.

That's three minutes gone in the round.
Sizemore has a closed guard, preventing anything of note from happening. Perhaps he's looking to stall.
Sizemore manages to escape and get back to his feet.
Sizemore keeps the fight standing with a nice sprawl.
Markus Sizemore has stuffed three takedown attempts in the round now. That's going to take a lot out of Kenny Blankenship.
Sizemore takes one on the chin but keeps coming.
Excellent takedown into side control there by Sizemore.
The fighters are starting to perspire pretty heavily.
Sizemore decides to take the fight back to the feet.

That's four minutes gone in the round.
Sizemore drives through with a really nice takedown into side control.
The crowd are loving this. Great action here.
Blankenship gives up the full mount - oops, sloppy defensive grappling there!
Sizemore controlling from the full mount.
Sizemore moves to the back position.
The crowd are going absolutely nuts as the round comes to an end - what a fantastic round of action!
Blankenship trying to control the action but Sizemore just sinks the hooks in.
And thats the end of the round the fighters go back to their corners.
Markus Sizemore dominated that round.
That's the end of the interval. I'm sure that seemed a lot quicker than a minute for our two fighters! Back to the action.

Sizemore throws a right and a left that Blankenship avoids nicely.
Sizemore misses with a jab, cross combination.
Blankenship looks for a takedown here. Will he get it? Sizemore is fending him off so far but Blankenship persists. Nope, Sizemore circles away and we're back to standing.
Blankenship fails with a takedown attempt.
Sizemore keeps the fight on the outside.
Sizemore darts in and lands a nice takedown into half guard.
The fighters are pressed up against the cage, both looking to find a bit of space to work.
Blankenship is trying to defend against the ground and pound but Sizemore scores with a couple of nice shots.
That's one minute gone in the round.
Sizemore trying to control the pace.
Sizemore decides to stand up.
Blankenship fails with a takedown attempt from distance.
Markus Sizemore has stuffed three takedown attempts in the round now. That's going to take a lot out of Kenny Blankenship.
Sizemore tries to close the distance and clinch up against the cage but Blankenship paws at him with a jab and circles away.
Sizemore shoots in looking for a single leg takedown. Blankenship is trying to defend but Sizemore finishes it well and ends up in half guard. Let's see if he can advance position further.
Neither fighter is being very active at the moment, with Sizemore in particular looking to stall.
Nice strikes from Sizemore there.
That's two minutes gone in the round.
Sizemore takes advantage of the dominant position to land a couple of big hammer fists.
Sizemore with a momentary lay and pray from half guard.
Sizemore trying to pass the guard but Blankenship defending well.
Sizemore takes a deep breath and rests his weight momentarily on top of his opponent, to control the position.
Fantastic stuff here - a very entertaining period of action, which has drawn cheers from the crowd.
Sizemore is trying to advance to mount but he's lost his balance and Blankenship reverses the position - he's now on top in Sizemore's guard.
Sizemore tries to land a sweep but no joy.
That's three minutes gone in the round.
Sizemore looking to control.
Blankenship tries to free his leg and advance position but Sizemore is retaining full guard.
Sizemore lands a beautiful switch and he's in full mount! That could spell trouble for Blankenship!
Sizemore controlling the pace for now.
Sizemore has his opponent pinned against the cage, landing some nasty ground and pound that is really making a bit of a mess out of Blankenship's face.
The crowd growing excited in anticipation of a finish here! Right on cue, Sizemore cracks his opponent with a massive right hand that draws loud cheers!
That's four minutes gone in the round.
Sizemore is still in mount, landing shots to his trapped opponent. Blankenship can't stay in a position like this for much longer.
Sizemore moves into side control, trying to work for a kimura. That looks painful! Will he finish!!?? No, Blankenship has worked his arm free - good work by Blankenship!
Markus Sizemore overall seems to be getting the better of the ground position in the fight so far.
Sizemore controls the position.
This has been an exciting period of action!
Sizemore seems to have a rather negative gameplan on the ground. He seems keen to just score the takedown and hold down Blankenship for as long as he can get away with.
Sizemore tries for a kimura but Blankenship is defending well.
As the round comes to an end the crowd are showing their appreciation for a great round of action.
Sizemore has knee on belly and now moves to full mount! Trouble for Blankenship!
And thats the end of the round the fighters go back to their corners.
Markus Sizemore dominated that second round.
OK. That's time! The bell goes and we're back to the action. This is the final round!

No luck with that takedown attempt from Blankenship.
Sizemore shoots in for a takedown and gets it. Let's see what he's got on the mat.
Sizemore showing good wrestling skills to control the position.
Sizemore trying to land body shots but he keeps hitting the mat.
Sizemore looking to pass the guard.
That's one minute gone in the round.
Sizemore wants to control from the top but Blankenship keeps moving.
The ref warns both fighters not to hold the cage as they work up against the meshing.
The referee is pacing around the two fighters - he looks like he's thinking about a standup.
The referee decides to stand the fighters back up, due to lack of activity on the part of Markus Sizemore.
Blankenship tries to clinch up but Sizemore circles away and keeps his distance.
Sizemore fakes an overhand right and shoots for a takedown. Blankenship sprawls well initially but Sizemore persists and gets the takedown into half guard.
Sizemore scoring with strikes to the body and head.
Sizemore is just sitting in half guard, waiting for something to happen.
Sizemore has controlled the position for a good 20 seconds, which will no doubt be starting to frustrate his opponent.
That's two minutes gone in the round.
The ref stands the fighters back up. Markus Sizemore wasn't doing enough on the ground.
Blankenship avoids the clinch attempt nicely.
Blankenship throws a right high kick that is partially blocked by Sizemore.
Wooooo! Give it up for these two warriors! They are putting on a show!
Sizemore scores a trip takedown into side control. Nice.
Sizemore decides to stand up, so the ref orders Blankenship to his feet.
Blankenship swings away but doesn't land with a series of punches.
That's three minutes gone in the round.
Blankenship misses with a head kick.
Blankenship takes a big intake of breath there - he's definitely tired.
Sizemore shoots in for a takedown! He's got it and he's managed to land in full mount! That's better than Sizemore was expecting from the takedown attempt, I'm sure!
Sizemore fakes a shot to the body and cracks his opponent in the head. Nice ground and pound there!
Sizemore controlling the pace for now.
Sizemore is really dominating this fight. Is there anything that Blankenship can do to turn this around?
Sizemore landing punches.
Sizemore scoring with strikes but Blankenship is staying in there.
That's four minutes gone in the round.
Sizemore looking for a guillotine from mount but Blankenship is having none of it.
Sizemore controlling the pace for now.
Blankenship bucks up and manages to get a nice reversal! He's in guard on the top - nicely done!
This is a great period of action - very entertaining stuff!
Sizemore looking for submissions from the bottom here. Moving his hips around, possibly looking for an armbar.
As the round comes to an end the crowd are showing their appreciation for a great round of action.
Sizemore bucks up whilst keeping hold of a body lock, managing to reverse the position. Now he's in top in Blankenship's guard.
And that's the end of the fight!
Markus Sizemore showed his dominance in that final round.
Well I reckon that's a shut out for Sizemore, winning every round. Will the judges agree? They are the ones who matter, even if they are often depressingly incompetent. Over to the ring announcer for the scorecards.
Ladies and gentlemen, after 3 rounds of action, we go to the scorecards for a decision.
Judge Donatello Bradman scores the fight 30:27
Judge Eliza Hachem scores the fight 30:27
Judge Bruno Hogan scores the fight 30:27
In favor of your winner, by unanimous decision... Markus Sizemore!
A loyal slave to those sponsorship dollars, Markus Sizemore made sure he mentioned Nature's Edge Nutrition, along with how happy he was to win his fight.
|
|
|
|
|
|
|
|
|
|
|
|
|
|
|
|
|
|
|
|
|
|
|
| S |
C
A |
G |
S |
C
B |
G |
|
S |
C |
G |
|
energy
A | B |
|
hype
A | B |
|
pop
A | B |
|
mgr
A | B |
|
FIGHT
RATING
55% |
|
|
|
|
|
|
