|
|
PBP Commentary |
Coming up we have a bantamweight MMA rules bout between Tony Hensball (ranked 0 p4p, 0 weight class) and Mitsuyo Maeda (ranked 0 p4p, 0 weight class). I'm sure you'll be fascinated to know that I was talking to some pointless Z list celebrity before the fight and he thought that Mitsuyo Maeda was going to win. Let's see if he was right.
 |
|
 |
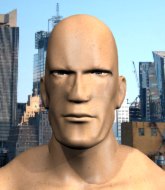
| 175 cm
21
137 lbs
7 - 4 - 0 |
|
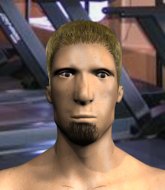
170 cm
26
142 lbs
15 - 7 - 0 |
BJJ Purple Belt
Counter striker
Very strong |
|
Powerful takedowns
Basic striking
Powerful |
|
| |
|
Ladies and gentlemen. This fight is 3 rounds, in the bantamweight division.
Introducing the fighter to my left, fighting out of the red corner.
With a record of
7 - 4 - 0, fighting out of Las Vegas, Tony Hensball!
And introducing the fighter to my right, fighting out of the blue corner.
With a record of
15 - 7 - 0, fighting out of Las Vegas, Mitsuyo Maeda!
The judges for this bout are Tiny Johnson, Frank Dennis and Cecil Peabody.

The bell rings for round one and we are underway!
Maeda shoots in but Hensball avoids the takedown attempt easily.
Mitsuyo Maeda seems to be the more aggressive standup fighter in this bout.
Hensball throws a hook to the body but it doesn't connect.
Maeda ducks right into an uppercut from Hensball.

It looks like Mitsuyo Maeda has been cut.
Hensball misses with a low kick as Maeda jumps back.
Hensball lands with a good body shot.

Maeda shoots in for a takedown from distance. He catches Hensball napping and manages to drive through into side control!
Maeda misses with a strike but at least he's keeping busy, looking to cause some damage - that will still help him when it comes to the judges scorecards.
Hensball taking a bit of punishment here - Maeda scoring with strikes.
The ref warns both fighters not to hold the cage as they work up against the meshing.
Maeda prevents Hensball from escaping the position.
Fantastic stuff here - a very entertaining period of action, which has drawn cheers from the crowd.
Maeda working the ground and pound but he's contacting the mat, not the fighter.
The ground and pound from Maeda seems to be hitting the mat more than his opponent.
Maeda passes to full mount! That's big trouble for Hensball!
BOOM! Maeda connects with a massive shot to the dome!
Hensball is looking to get to half guard.

That's one minute gone in the round.
Maeda throwing sloppy strikes here. Perhaps if he tightened up his striking from such a dominant position, he'd be able to finish easier.
Hensball in a bad spot here, taking shots to the head.
Maeda looking to control but Hensball is working nicely, looking to advance position himself.
Maeda postures up and cracks his opponent a couple of times before moving back into close ground control. Hensball looks a forlorn figure.
Maeda lands a big shot there that rocks Hensball but he's holding on and managing to survive for now.
Hensball takes a big shot to the head but keeps on trying to improve his position.
Maeda throwing shots from mount but they're not landing.
Maeda dominating with strikes here.
Maeda throws a sloppy strike and Hensball uses the opportunity to reverse the position! A bit of a scramble here and Hensball has ended up in Maeda's guard.
Wooooo! Give it up for these two warriors! They are putting on a show!

Maeda is throwing his legs up, looking for submissions. Hensball is aware though and is defending well.

That's two minutes gone in the round.
Hensball is looking to stand up but Maeda won't let him.
The fighters are pressed up against the cage, both looking to find a bit of space to work.
Hensball won't allow Maeda to sweep him here.
Maeda preventing the ground and pound from doing any damage.
Maeda escapes his hips to the side and looks to be working for an armbar. Hensball gives him a little smile and shakes his head. No chance.

Hensball has gone for a leg lock! Maeda slips out almost immediately though and dives into Hensball's guard.
Hensball avoiding any damage from the ground and pound.

That's three minutes gone in the round.
Maeda drops back looking for a heel hook - he quickly realises he's not going to get it but Hensball manages to dive on top of him before he can escape and now Maeda has Hensball in his guard.
Maeda throwing his legs up looking for a triangle.
Maeda escapes his hips to the side and looks to be working for an armbar. Hensball gives him a little smile and shakes his head. No chance.
Maeda keeping moving, preventing Hensball from controlling successfully.
Hensball postures up in Maeda's guard and throws a big left but Maeda blocks it.

That's four minutes gone in the round.
Hensball forces his way into half guard.
Maeda is trying to get back to full guard.
Hensball is trying to work for a kimura but Maeda is defending well.
The fans in attendance giving it up for the two fighters, who have really let it all hang out in the last minute or so!
Hensball is looking for a kimura but Maeda is holding onto that half guard position, so it's hard for Hensball to get the leverage.
Hensball tries to pass to full mount but Maeda defends it.
Maeda is pressing down on Hensball's left leg trying to get back to full guard. He's managed it.
The crowd are going absolutely nuts as the round comes to an end - what a fantastic round of action!
Maeda looking for submissions off his back, moving his hips, looking for an opening.
Maeda is looking to sweep but instead, Hensball has passed into half guard.
And thats the end of the round the fighters go back to their corners.
Mitsuyo Maeda dominated that round.
The cut man is working on Mitsuyo Maeda's cut.
That's time! Back to the action!

Maeda loads up on a big right hand but Hensball slips the punch.
A good leg kick by Hensball.
Hensball tries to score with a low kick but Maeda moves his leg out of the way.
Maeda circles away from the clinch attempt.
Maeda misses the shot to the body.
Hensball loads up on a big right hand but Maeda slips the punch.
Maeda moves out of range of the body kick.
Maeda misses with a straight left.
That's a knee to de groin and it's over and out! Maeda crumples to the ground after an illegal strike from Hensball - the referee stops the clock and Maeda gets 5 minutes to recover from that one. "I'm sorry" says Hensball. Maeda manages to get back to his feet and the fight resumes.
A jab from Hensball misses.
Hensball fails with an attempt to clinch.
That's one minute gone in the round.
Hensball uses good footwork to avoid the strikes from Maeda.
Hensball swings for the body but Maeda moves out of range.
Maeda scores with a punch to the head.
Hensball uses good footwork to avoid the strikes from Maeda.
Hensball lands a nice hook to Maeda's body. Maeda takes it in his stride and looks to land his own strikes.
Maeda gets a double leg takedown into Hensball's guard.

Hensball is edging up against the cage. He's using the cage to get back to his feet. Nice work there - the fighters are clinched.
Hensball gets underhooks to prevent Maeda's takedown attempt.
Maeda manages to get underhooks and slows down the pace for a moment.
That's two minutes gone in the round.
Maeda managing to block the knees to the body from Hensball.
A real battle for position is taking place between these two warriors.
Hensball landing knees to the head.
Maeda tries for a takedown. No joy.
Maeda misses with a punch to the body.

Hensball manages to break the clinch.
The fans in attendance giving it up for the two fighters, who have really let it all hang out in the last minute or so!

The fight moves into the clinch position.
Hensball drops down for a takedown but doesn't get it.
That's three minutes gone in the round.
Hensball is trying to wear down his opponent with knees to the body.
Hensball prevents the takedown attempt.
Tony Hensball has stuffed three takedown attempts in the round now. That's going to take a lot out of Mitsuyo Maeda.
Hensball scores a nice knee to the body.
Hensball struggles to land a body shot inside as Maeda controls his hands.
Hensball goes for a takedown in the clinch but Maeda prevents it.
Maeda tries for a takedown. No joy.
That's four minutes gone in the round.
Maeda tried to land a shot to the body but connects with Hensball's elbow.
Maeda tries to stall but Hensball uses the opportunity to gain a better position.
Maeda lands with a right to the head.
Hensball lands a nice looking hook to the body, against the cage.
Maeda trying to control the position but instead, Hensball has worked for underhooks and has pushed Maeda into the cage.
Hensball looks like he'd prefer to be striking at range right now.
The crowd applaud the fighters efforts here as the round comes to an end.
Hensball stalling against the cage.
Maeda effectively controlling the action here.
And thats the end of the round the fighters go back to their corners.
Tony Hensball dominated that second round.
The cut man is working on Mitsuyo Maeda's cut.
The fighters get back to their feet, the hooter sounds and we're back to the action! This is the final round!

Maeda scores with a body shot.
Maeda shoots in for a takedown and gets it. Oh and he's advanced to full mount straight away.
Maeda can't quite control the action as he would like just now, as Hensball is looking to escape.
Maeda lands with some strikes.
Maeda with shots to the head and body - Hensball looks very uncomfortable down there.
Hensball takes a big shot to the head but keeps on trying to improve his position.
Hensball is looking to improve his position but Maeda isn't that keen on the idea.
Maeda working the ground and pound effectively.
This has been an exciting period of action!
Maeda breaks from Hensball's wrist control and lands an elbow.
That's one minute gone in the round.
Hensball trying desperately to get to his feet.
Maeda looking to ground and pound but Hensball is blocking nicely.
Maeda throws an elbow from mount that misses. Lucky escape for Hensball because Maeda loaded up on that one.
Maeda landing strikes from the mount and Hensball is in trouble!
Maeda landing shots from mount.
Maeda lands an elbow that was bordering on illegal but the referee lets it go with a warning.
Maeda has the superior BJJ but he's also working some ground strikes into his gameplan.
Maeda has his opponent pinned against the cage, landing some nasty ground and pound that is really making a bit of a mess out of Hensball's face.
Maeda with shots to the head and body - Hensball looks very uncomfortable down there.

Hensball is rocked!
The crowd cheering loudly, showing their appreciation for the quality fight we're seeing here.
Maeda looking to ground and pound his opponent to a finish here.
Oh Hensball is still in real trouble! Will he be able to recover?!!
Hensball manages to regain half guard. Good work.
Maeda has hold of the far side arm. He's working for the Kimura, can Hensball defend it? Maeda steps over the head and cranks it - Hensball is tapping out! That was textbook stuff right there - nice submission victory for Maeda!
Ladies and gentlemen, after 1:56 of round 3, we have a winner by way of Submission (Kimura). Mitsuyo Maeda!
After winning the bout, Mitsuyo Maeda thanked all his fans and promised he'd do even better in his next fight. The crowd seemed to love his humility.
|
|
|
|
|
|
|
|
|
|
|
|
|
|
|
|
|
|
|
|
|
|
|
| S |
C
A |
G |
S |
C
B |
G |
|
S |
C |
G |
|
energy
A | B |
|
hype
A | B |
|
pop
A | B |
|
mgr
A | B |
|
FIGHT
RATING
100% |
|
|
|
|
|
|
