|
|
PBP Commentary |
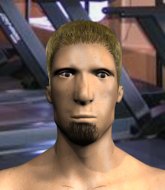
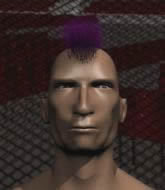
Coming up we have a bantamweight MMA rules bout between Mitsuyo Maeda (ranked 0 p4p, 0 weight class) and Gabriel Stark (ranked 0 p4p, 0 weight class). Both fighters look fresh as a daisy as they make their way towards the cage.
 |
|
 |
| 170 cm
26
142 lbs
16 - 7 - 0 |
|
165 cm
23
144 lbs
7 - 2 - 0 |
Powerful takedowns
Basic striking
Very quick |
|
Powerful takedowns
Decent boxing
Good gas tank |
|
| |
|
Ladies and gentlemen. This fight is 2 rounds, in the bantamweight division.
Introducing the fighter to my left, fighting out of the red corner.
With a record of
16 - 7 - 0, fighting out of Tokyo, Mitsuyo Maeda!
And introducing the fighter to my right, fighting out of the blue corner.
With a record of
7 - 2 - 0, fighting out of Tokyo, Gabriel Stark!
The judges for this bout are Tatsuya Matsuyama, Ren Mimura and Hirohito Nitta.

The bell rings for round one and we are underway!
Stark cracks a nice hook into Maeda's ribs.
Maeda will have to do better than that with his takedown attempts.
Gabriel Stark seems to be the more aggressive standup fighter in this bout.

Maeda shoots in for a takedown and gets it. Let's see what he's got on the mat.
Maedais looking to pass into half guard but Stark pushes him away with his feet and jumps on top - now Stark is in guard.
Stark slips effortlessly into side control - very nice.
Stark controls the position.
Stark is looking to take a break and control but Maeda is keeping him honest, looking to work from the bottom.
Maeda is looking to regain half guard here but Stark keeps moving and retains side control.
Stark wants to lay and pray for a moment but Maeda keeps working.

Stark is trying to land an Americana. He has the arm isolated but Maeda is keeping cool and he's avoided the danger for now.
The ref warns both fighters not to hold the cage as they work up against the meshing.

That's one minute gone in the round.
Maeda is looking to regain half guard here but Stark keeps moving and retains side control.
Stark tries to advance position but instead Maeda slips a leg back in to half guard.
Stark perhaps working for something from half guard, or maybe not. It looks like he's just sitting there.
Stark prevents Maeda from improving his position.
Maeda wants to get back to full guard but Stark has passed into side control.
Maeda stops Stark from passing to mount.

That's two minutes gone in the round.
Stark is persisting with the attempt to improve his position.
Stark is trying to get an arm triangle but Maeda is defending well.
Maeda can't do much from the bottom here.
Maeda is looking to reverse the position.

That's three minutes gone in the round.
Maeda is sneaking out the side here. He's bucked Stark off and has taken his back!
Maeda tries to keep control of the position but Stark is staying busy.
Stark is trying to break free.
Stark trying to control the position but Maeda manages to sink in the hooks.
Maeda keeps control of the position easily here as Stark tries to buck him off.
Maeda keeps control of the position as Stark tries to break free.
Stark turns into Maeda and is now in his guard.
Stark tries to free his leg and advance position but Maeda is retaining full guard.
Maeda is doing well to control the posture of his opponent and prevent any damage.
Maeda trying to control the position.

That's four minutes gone in the round.

Mitsuyo Maeda has forced the referee to step in and bring the fight back to the feet.
Maeda lands with a right hand.
Maeda checks a low kick from Stark.
Stark swings away with a body shot that misses
and Stark takes a counter punch right on the button for his troubles.
Stark comes forward and lands a shot to the body, then darts back out of range.
We've seen a great period of action over the last minute or so - credit to both fighters for going all out!
Maeda moves out of range as Stark strikes.
Stark fails with the takedown.
Maeda rushes in with a sloppy looking punch
and Stark connects with a straight left hand counter down the middle.
Maeda changes levels and looks for a double leg takedown. Stark tries to avoid it but Maeda manages to keep hold of a leg and drag Stark to the ground. Stark escapes though and pops straight back up to his feet.
A really sloppy takedown attempt there from Maeda.
That's three failed takedown attempts in the round for Mitsuyo Maeda. That's going to take a lot out of him.
Maeda keeping his hands up high there, blocking the jab from Stark.

That's five minutes gone in the round.
Maeda shoots in for a takedown and gets it. Oh and he's advanced to full mount straight away.
Maeda lands a shot to the body, followed up by a shot to the exposed head of his trapped opponent.
Maeda cracks Stark with a nasty head shot there - the crowd let out an audible gasp there, as the noise reverberated around the arena.
Maeda trying to control but Stark is having none of it.
Stark gets back to half guard.
Maeda missing with some ground and pound from the half guard.
Stark tries to get to full guard but Maeda has control of the leg.
Maeda missing with some ground and pound from the half guard.
Maeda is scoring with some nice ground and pound from the dominant position.
Maeda takes advantage of the dominant position to land a couple of big hammer fists.
Wooooo! Give it up for these two warriors! They are putting on a show!
Maeda is looking to stall here but Stark recovers full guard.
A big thud reverberates around the arena there as Maeda accidentally thumps the mat. Hopefully he's not broken his hand.

That's six minutes gone in the round.
Maeda wants to control from the top but Stark keeps moving.
Maeda is really struggling to control Stark but he's trying to hold on to the position.
Maeda has to be careful here, sitting in the guard of a superior BJJ player.
Maeda stays in close to Stark's body and controls the position.
Maeda wants to control from the top but Stark keeps moving.
Stark trying to keep a closed guard but Maeda is proving a slippery customer.
The referee decides to stand the fighters back up, due to lack of activity on the part of Mitsuyo Maeda.
Stark misses with a kick to the body.

That's seven minutes gone in the round.
Maeda misses with a takedown attempt - Stark sprawls well and throws a nice strike on the way out which just misses.
Stark fakes high and swings low for a body shot but Maeda manages to avoid it.
Horrible takedown by Stark or perhaps it was just good defense by Maeda which made him look bad.
Stark looks to land a right hand but Maeda moved out of range.
Stark tries for a takedown but Maeda circles away easily
and Maeda cracks him with a counter punch right on the button.
Stark has his takedown stuffed
and Maeda cracks him with a counter punch right on the button.
Stark misses with a shot to the body
and Maeda counters with a left to the body.
Maeda looking to shoot here. He's gone for it and he's landed a takedown into mount! Oh, that's bad for Stark!
Maeda wants to control the pace but Stark is squirming around nicely.

That's eight minutes gone in the round.
Stark tries to get back to half guard but can't.
Maeda sitting in mount, just looking to control for the moment.
Stark regains half guard.
Maeda is just content to waste time from the top position. Stark takes advantage of the situation and regains full guard.
Fantastic stuff here - a very entertaining period of action, which has drawn cheers from the crowd.
Maeda is just sitting in guard, looking to avoid any submissions.
Stark keeping moving, preventing Maeda from controlling successfully.
Maeda seems content to control from guard here. He's going to have to remain active though if he doesn't want to get stood back up.

That's nine minutes gone in the round.
It looks like the ref is thinking about a standup.
Stark keeping moving, preventing Maeda from controlling successfully.
Mitsuyo Maeda has forced the referee to step in and bring the fight back to the feet.
Maeda getting the better of the striking in that exchange.
Stark throws a low kick, looking for Maeda's leg but Maeda calmly moves out of range.
Maeda shoots in for a takedown. "Ole!" shouts Stark as he jumps to the side.
Stark throws a hook to the body but it doesn't connect.
Maeda cracks Stark with an open hand slap.
Stark is throwing a lot of body shots here, looking to wear down Maeda rather than just go for the knockout.
Maeda works his jab well there, keeping his opponent at a distance.
As the round comes to an end the crowd are showing their appreciation for a great round of action.
Stark uses good head movement to avoid the hook from Maeda.
Maeda shoots in from a long way out. He's driving through with the takedown attempt and he eventually gets it, landing in Stark's guard.
Maeda landing with the ground and pound.
Maeda trying to control but Stark is working from the bottom.
And thats the end of the round the fighters go back to their corners.
Mitsuyo Maeda dominated that round.
That's the end of the interval. I'm sure that seemed a lot quicker than a minute for our two fighters! Back to the action. This is the final round!

A swing and a miss from Maeda.
Stark throws a jab to the body, straight down the pipe. Boom. That sent Maeda stumbling backwards but he manages to regain his composure quickly.
Stark misses the shot to the body.
A big right from Maeda misses.
Maeda bobs and weaves well there to avoid the strikes.
Nice uppercut there from Stark.
Maeda clobbers Stark with an overhand right that has the crowd gasping. That made a horrendous noise.
Stark moves out of range of the strikes.
A telegraphed right hand from Maeda misses the target.
Stark connects with a looping right hand.
Stark shoots in looking for a takedown. Maeda tries to sprawl out of it but Stark keeps driving through. The fighters are pinned against the cage. Maeda manages to get underhooks and after a bit of a struggle, circles away and we're back to standing.
Stark looks for a takedown but Maeda sprawls well.
That's one minute gone in the round.
Stark keeping his hands up high there, blocking the jab from Maeda.
Maeda is trying hard to land a takedown here. Stark sprawls well and keeps this one on the feet.
Maeda scores with a jab. Stark acknowledges it with a nod of the head.
Stark tries for a takedown but Maeda sees it coming a mile off and avoids it easily.
Mitsuyo Maeda has stuffed three takedown attempts in the round now. That's going to take a lot out of Gabriel Stark.
Maeda scores a trip takedown into side control. Nice.
Maeda scores with a couple of nice shots to the head there. The referee takes a look at Stark to see if he's OK.
Stark tries to improve position but can't.
Maeda scores with a couple of short elbows.
Stark can't do much from the bottom here.
Maeda trying to control the position but Stark is working away.
Maeda working the body and head with strikes.
That's two minutes gone in the round.
Maeda throwing strikes but missing, from side control.
Maeda scores with a couple of short elbows.
The crowd are loving this. Great action here.
Stark is sneaking out the side here. He's bucked Maeda off and has taken his back!
Good control from Stark.
Maeda is keeping busy.
Maeda tries to escape the position.
Maeda prevents Stark from getting a body triangle.
That's three minutes gone in the round.
Maeda is really stuck here.
Stark tries to keep control of the position but Maeda is staying busy.
Maeda wants to escape the position.
Stark is riding his opponent, not letting Maeda buck him off.
Stark wants to control but Maeda is keeping busy.
Maeda turns into Stark and is now in his guard.
Maeda trying to land body shots but he keeps hitting the mat.
Maeda makes a bit of distance and scores with some ground and pound, still in guard.
That's four minutes gone in the round.
Stark keeping moving, preventing Maeda from controlling successfully.
Maeda won't allow Stark to sweep him here.
Maeda pressing down on his opponent's thigh, looking to pass guard. Stark is keeping the position for now.
Maeda looking to sit in guard and control but Stark gets the butterfly guard and sweeps. He's now in the guard on the top.
Stark trying to control the position from guard on top but Maeda is wriggling around, looking for whatever he can.
Stark is pushing down on Maeda's leg trying to pass to half guard. Maeda is fighting to maintain full guard but Stark has managed to sneak the leg through.
That's five minutes gone in the round.
Maeda is looking for a sweep. Stark is wise to his cunning plan and keeps the top position.
Stark works his way into side control.
Stark is trying to get an arm triangle but Maeda is defending well.
Maeda is looking to reverse the position.
Stark slows the pace down.
Maeda is trying to get back to half guard.
Stark is staying tight to Maeda's torso, preventing him from escaping.
That's six minutes gone in the round.
Stark has knee on belly and now moves to full mount! Trouble for Maeda!
Stark working for a guillotine from mount but Maeda is in no mood to give up.
Stark works his way to his opponent's back.
Stark controlling well, preventing Maeda from escaping the position.
Stark looking for the choke from the back.
Stark tries to get the hooks in deep but Maeda pushed the leg off.
We've seen a great period of action over the last minute or so - credit to both fighters for going all out!
Stark looking to hold on to the position here but Maeda rolls and ends up regaining guard.
That's seven minutes gone in the round.
Stark trying to control but Maeda is working from the bottom.
Maeda can't keep his opponent in guard - Stark advances to half guard, no doubt looking to mount.
Maeda is doing well to control the position and prevent Stark from advancing to side control.
Maeda slips a foot under and gets full guard. Nice work.
That's eight minutes gone in the round.
Stark stands and throws Maeda's legs to the side, diving into side control.
Maeda wants to control but Stark postures up.
Maeda is looking to regain half guard here but Stark keeps moving and retains side control.
Maeda can't do much from the bottom here.
Maeda is trying to get back to half guard.
Stark is looking to take a break and control but Maeda is keeping him honest, looking to work from the bottom.
That's nine minutes gone in the round.
Maeda is looking for a sweep.
Stark tries to advance to mount but Maeda denies him.
Stark advances to full mount.
As the round comes to an end the crowd are showing their appreciation for a great round of action.
Stark is stalling here but it's allowed Maeda to get half guard.
Maeda manages to get to full guard.
And that's the end of the fight!
I would just about give that final round to Gabriel Stark.
I have no idea who won that fight. Let's wait and see whether the judges are as confused as me! Time for a split decision perhaps?!. Over to the ring announcer for the scorecards.
Ladies and gentlemen, after 2 rounds of action, we go to the scorecards for a decision.
Judge Tatsuya Matsuyama scores the fight for Mitsuyo Maeda!
Judge Ren Mimura scores the fight for Mitsuyo Maeda!
Judge Hirohito Nitta scores the fight for Mitsuyo Maeda!
Mitsuyo Maeda wins by unanimous decision!
Mitsuyo Maeda really struggled to get his t-shirt on before his hand was raised. Making sure that - - - - - All Nutrients 160 - - - - - logo gets some air time is pretty tricky when you're all sweaty.
|
|
|
|
|
|
|
|
|
|
|
|
|
|
|
|
|
|
|
|
|
|
|
| S |
C
A |
G |
S |
C
B |
G |
|
S |
C |
G |
|
energy
A | B |
|
hype
A | B |
|
pop
A | B |
|
mgr
A | B |
|
FIGHT
RATING
33% |
|
|
|
|
|
|
