|
|
PBP Commentary |
Coming up we have a middleweight MMA rules bout between Chicken Beef (ranked 0 p4p, 0 weight class) and Hiroshi Sato (ranked 0 p4p, 0 weight class). Sato has chosen In The Morning as his entrance music. Hiroshi Sato told me before the fight that he's been watching a lot of DVDs so let's see if that helps him in this one! I can't wait to find out!
 |
|
 |
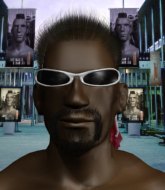
| 182 cm
27
200 lbs
15 - 9 - 0 |
|
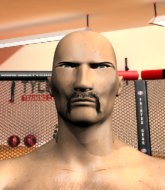
185 cm
25
200 lbs
13 - 8 - 0 |
Good wrestling
Excellent boxer
Insanely flexible |
|
Good wrestler
World class boxer
Granite chin |
|
| |
|
Ladies and gentlemen. This fight is 3 rounds, in the middleweight division.
Introducing the fighter to my left, fighting out of the red corner.
With a record of
15 - 9 - 0, fighting out of Las Vegas, Chicken Beef!
And introducing the fighter to my right, fighting out of the blue corner.
With a record of
13 - 8 - 0, fighting out of Las Vegas, Hiroshi Sato!
The judges for this bout are Daniel Franklin, Cecil Peabody and Stewart Dunkirk.

The bell rings for round one and we are underway!
A punch combination from Sato misses.
Beef ducks under a wild hook from Sato.
Beef lands a jab followed by a nice looking cross.

Sato has managed to clinch.
Beef misses with a punch to the body.
Sato looks to throw an elbow but misses.
Beef avoiding damage as Sato throws knees to the body.
Sato lands with a light punch inside.
Beef prevents the takedown attempt.
Beef misses with a hook from the clinch.
Beef throws a punch but it's blocked by Sato.
This is a great period of action - very entertaining stuff!

Beef breaks the clinch.
Beef avoids a punch combination nicely.
Beef uses good footwork to get in and out and land a nice right hand before Sato has time to react.
Beef checks a low kick from Sato.
Beef bobs and weaves well there to avoid the strikes.

Sato gets the takedown into side control.

That's one minute gone in the round.
The referee looks like he's ready to step in and stand the fighters back up.
Sato trying to control the position but Beef is working away.
Beef manages to work his way to half guard, despite Sato's best efforts.
Beef is looking to control Sato's leg but it's slowly edging free. Can Beef avoid being mounted?
Beef blocking the ground and pound attempt from Sato.
Sato is keen to just control but Beef is a slippery customer.
Beef manages to get to full guard.
Sato postures up to throw the ground and pound strikes but they don't connect.
Sato with a flurry of punches that miss.
Sato postures up in Beef's guard and throws a big left but Beef blocks it.
Beef avoiding any damage from the ground and pound.

That's two minutes gone in the round.
Beef wants to stand and escape but Sato is having none of it.
Beef utilising some decent striking defenses from the guard, preventing the ground and pound.
Sato is looking to work some ground and pound but Beef has wrist control.
Beef working the defensive guard well to avoid strikes from Sato.
Sato preventing the sweep.
Beef manages to land a sweep and now he's in mount on top!
The crowd cheering loudly, showing their appreciation for the quality fight we're seeing here.
Sato wants to hold on but Beef pushes him away.
Sato is squirming around, avoiding Beef's attempts to control the action.
Sato tries to reverse the position but Beef maintains control.
Sato is persisting with the attempt to improve his position.
Beef putting on the heat here with some good ground and pound!

That's three minutes gone in the round.
Sato really trying hard to get back to half guard here.
The fighters are pressed up against the cage, both looking to find a bit of space to work.
Sato regains half guard.
The fighters are starting to perspire pretty heavily.
Sato trying to control but Beef postures up.
Sato tries to get to full guard but Beef has control of the leg.
Beef wants to control but Sato is keeping him busy.
The ref warns both fighters not to hold the cage as they work up against the meshing.

Beef stands up and beckons Sato to join him on the feet.
Beef moves away from the strike by Sato.
Sato throws a jab but it's blocked by Beef.

That's four minutes gone in the round.
Sato looks to throw the jab but Beef is out of range.
Sato takes a head kick and shrugs it off.
Sato lands a nice looking body shot.
The crowd are loving this. Great action here.
Sato clobbers Beef with an overhand right that has the crowd gasping. That made a horrendous noise.
Beef avoids a lazy jab quite easily.
Sato getting the better of the striking in that exchange.
Sato keeping at a good range here, avoiding a leg kick.
Sato bobs and weaves well there to avoid the strikes.
Sato tests Beef's chin there with a solid looking shot.
Sato throws a hard body shot but it just misses.
The crowd are going absolutely nuts as the round comes to an end - what a fantastic round of action!
Sato shoots in looking for a double leg takedown. Beef defends it nicely.
Hiroshi Sato seems to be the more aggressive standup fighter in this bout.
Sato throws a wild combination but nothing lands.
And thats the end of the round the fighters go back to their corners.
A close round but Hiroshi Sato will probably get the nod.
OK. That's time! The bell goes and we're back to the action.

Beef defending well as Sato loads up on a big left hand.
Beef checks a low kick from Sato.
Sato takes a swing at Beef's ribcage but misses.
Sato scores with a jab.
Sato cracks Beef with a hook to the jaw. Both fighters smile at eachother and high-five before getting back down to business.

Beef closes the distance and clinches.
Sato struggles to land a body shot inside as Beef controls his hands.
Sato pushes off and fires off an elbow that misses, before clinching up again, against the cage.
Sato throws a nice elbow but it doesn't land.
Beef throws a punch but it's blocked by Sato.
Sato tries for a takedown. No joy.
Sato swings wildly with an uppercut but Beef uses good head movement to avoid it.
Sato drops to a knee looking for a takedown but Beef gets the underhooks and prevents it.
A head punch on the inside from Sato fails to land.
That's one minute gone in the round.
Sato wants a takedown but no success here.
Chicken Beef has stuffed three takedown attempts in the round now. That's going to take a lot out of Hiroshi Sato.
Beef throws a head punch that misses.
Sato creates a bit of distance and throws an elbow that only just misses.
Beef working aggressively here.
A head punch blocked on the inside by Sato.
Sato is looking to score with knees to the body. Maybe he'll change it up and go body then head. Beef is defending well for now.
Beef pushes off and circles away, back to the middle of the mat.
Beef has not gone for a single takedown so far in this fight, which seems like a very strange tactic when you consider that he has the superior wrestling and BJJ.
Beef scores with a hook.
Beef misses with a hook.
Sato looks to land a right hand but Beef moved out of range.
Beef wants to clinch.
Sato throws a predictable looking body shot
and Beef counters with a three punch combo that has Sato backing up. Sato nods at Beef to acknowledge the strikes.

It looks like Hiroshi Sato has been cut.
Wooooo! Give it up for these two warriors! They are putting on a show!
Nice body kick there by Beef.
Sato misses the shot to the body.
Sato swings and misses with a hook to the body.
Beef misses with a body kick.
That's two minutes gone in the round.
Sato scores with a decent looking hook.
Beef misses with a body shot. Nice footwork from Sato.
Sato throws a good cross that connects.
Chicken Beef is looking to keep the fight on the feet at all costs.
Sato scores with a reasonable looking shot to the body. Beef doesn't seem bothered though.
Beef connects nicely with a jab. Noted by the judges no doubt.
A punch combination from Sato misses.
Sato looks to score with a jab to the body but Beef is just out of range.
Sato fails with an attempt to clinch.
Beef scores with a reasonable looking shot to the body. Sato doesn't seem bothered though.
Sato thows a left - swing and a miss!
Sato lands with a cross to side of his opponent's head.
Sato just misses with a punch to the body.
Beef tries a head kick but it misses.
Sato misses with a looping right.
That's three minutes gone in the round.
Sato looks to score with a jab to the body but Beef is just out of range.
Beef scores with a crisp jab that stopped Sato in his tracks.
Sato throws a sloppy body shot
and Beef counters by moving into the clinch. Good anticipation by Beef.
Beef swings wildly with an uppercut but Sato uses good head movement to avoid it.
Sato tries to land a shot to the body but it's blocked.
Sato is looking for a takedown.
Sato misses with a body punch.
Beef looking to throw knees to the head but Sato is blocking nicely.
Sato throws a blind hook that connects with the side of Beefs head.
Beef blocks a punch to the side of the head.
Sato stalling in the clinch but Beef improves position.
Beef blocks a punch to the side of the head.
Beef lands with a light punch inside.
Sato is looking to take this one to the mat.
Beef prevents a takedown attempt there.
Sato is breathing heavily.
That's four minutes gone in the round.
Sato goes for a body shot but it's blocked.
Beef misses with a hook from the clinch.
Beef's head jolts backwards as he takes an uppercut right on the button!
Sato misses with a hook to the ribs.
This is a great period of action - very entertaining stuff!
A head punch blocked on the inside by Sato.
Beef lands an elbow just above Sato 's eye.
Beef working on landing some head shots here - that one got through nicely.
Beef is trying to break the clinch but Sato has him pressed against the cage.
Sato swings away with an uppercut that misses.
Sato tried to land a shot to the body but connects with Beef's elbow.
Beef lands with a left to the head.
Beef misses with a short punch on the inside.
Sato tries a body shot but Beef blocks it.
The crowd are going absolutely nuts as the round comes to an end - what a fantastic round of action!
Beef wants to strike at distance but he can't break free of the clinch.
Beef scores with a shoulder strike.
Beef pushes off an throws an elbow but Sato leans to the side and avoids it. We're back to clinching against the cage.
Beef lands on the inside with an uppercut.
And thats the end of the round the fighters go back to their corners.
Chicken Beef dominated that second round.
The cut man is working on Hiroshi Sato's cut.
That's time! Back to the action! Ladies and gentlemen, this is the final round!

Sato has his takedown stuffed
and Beef counters with a nice body kick.
Crunch! Beef slams his shin into Sato's torso.
Sato tries to close the distance and clinch up but Beef swats him away and circles back towards the center.
Sato tries to score a power double leg takedown but Beef sees that one coming and sprawls well. That will dishearten Sato somewhat.
Sato goes for a spinning back kick but it misses.
Sato throws a jab but it's blocked by Beef.
A telegraphed right hand from Sato misses the target.
Beef lands a powerful looking uppercut that connected with his opponent's jaw.
Sato misses the shot to the body.
Sato throws a hard body shot but it just misses.
Sato fakes the leg kick and cracks Beef in the body.
Sato takes a big intake of breath there - he's definitely tired.
Sato misses the shot to the body.
That's one minute gone in the round.
Like a baseball bat into the meat of his leg there - nice leg kick by Beef.
Beef misses with an attempted mid kick.
Beef lands an overhand left. A wild punch that just about connected.
Sato looking to land some kicks to the body here.
Beef keeping a good distance there, avoiding the body shot.
Beef looking to land some kicks to the body here.
Beef lands a jab. Then a cross. Then finally a nice hook to the body. Good work there by Beef.
A solid leg kick lands there for Beef.
We've seen a great period of action over the last minute or so - credit to both fighters for going all out!
Beef lands an overhand right.
Beef moves in looking to clinch but Sato pushes him off.
Beef gets cracked there but stands up to it.
Beef turns his hip over beautifully as he lands a nice leg kick.
Sato slips a jab from Beef.
That's two minutes gone in the round.
Sato will need to tighten up his combinations if he doesn't want to gas himself out, swinging at thin air.
Beef connects with a single shot there.
Sato swings and misses with a hook to the body.
Sato tries to land a front kick but Beef steps back. That was a bit too telegraphed.
Sato shoots in looking for a takedown but Beef manages to keep the fight standing, pushing Sato's face into the canvas for good measure before circling away.
Chicken Beef has stuffed three takedown attempts in the round now. That's going to take a lot out of Hiroshi Sato.
Beef is looking to clinch but Sato is avoiding it.
Sato throws a poor cross that misses
and Beef counters with a nice body kick.
Beef scores with a jab to the body.
Sato tries to clinch but Beef moves out of range.
Sato on the wrong end of a nice low kick. He's acting like it's no big deal but he doesn't want to take many more of those.
Beef tries to close the distance and clinch up but Sato swats him away and circles back towards the center.
Beef moves into range and lands a nice body kick.
Danga de danga de dang - Beef scores with a four punch combination!
That's three minutes gone in the round.
Beef scores with a reasonable looking shot to the body. Sato doesn't seem bothered though.
Beef closes the distance and pushes Sato back into the cage.
Sato throws a punch but it's blocked by Beef.
Beef misses with the head strike.
Sato tries to work over Beef's body with a swooping hook but it only glances the target.
Sato is trying to maintain a safe position but Beef gets an underhook and turns Sato into the cage.
Beef prevents a body shot from Sato.
Sato misses with a punch to the body.
Beef lands a nice elbow.
Sato is looking to control Beef's arms but Beef gets an underhook and turns him. Now Sato has his back to the cage.
Sato lands with a short shot to the head.
Beef crunches a lovely knee into Sato's ribcage.
Beef doesn't land with the attempted body shot.
Beef lands with a good tight uppercut to the head.
With the fighters up against the cage, Sato throws an elbow but misses.
Beef gets underhooks to prevent Sato's takedown attempt.
That's four minutes gone in the round.
This is a great period of action - very entertaining stuff!
Beef softening up his opponent with strikes, against the cage.
Beef dodges an elbow strike from Sato.
Beef misses with some punches.
Sato struggles to land a body shot inside as Beef controls his hands.
Beef manages to break the clinch.
Beef throws a leg kick that misses.
Sato misses with a body shot. Nice footwork from Beef.
Sato tries to score with an inside leg kick but telegraphs it and Beef is able to avoid easily.
Chicken Beef is winning the standup battle so far.
Sato misses with a body shot
and Beef counters with a lovely shot to the body.
Beef scores with a slapping inside leg kick.
Beef scores with a kick to the midsection.
The crowd are going absolutely nuts as the round comes to an end - what a fantastic round of action!
Beef lands a nice leg kick that just misses Sato's sensitive parts.
Beef scores with a decent looking hook.
Sato drops his hands momentarily and Beef takes advantage with a crisp shot to the head.
And that's the end of the fight!
Chicken Beef showed his dominance in that final round.
I think Beef has won this one but let's see what the judges have to say. Over to the ring announcer for the scorecards.
Ladies and gentlemen, after 3 rounds of action, we go to the scorecards for a decision.
Judge Daniel Franklin scores the fight 29:28
Judge Cecil Peabody scores the fight 29:28
Judge Stewart Dunkirk scores the fight 30:28
In favor of your winner, by unanimous decision... Chicken Beef!
|
|
|
|
|
|
|
|
|
|
|
|
|
|
|
|
|
|
|
|
|
|
|
| S |
C
A |
G |
S |
C
B |
G |
|
S |
C |
G |
|
energy
A | B |
|
hype
A | B |
|
pop
A | B |
|
mgr
A | B |
|
FIGHT
RATING
100% |
|
|
|
|
|
|
