|
|
PBP Commentary |
Coming up we have a light heavyweight MMA rules bout between Macka Tampi (ranked 0 p4p, 0 weight class) and Plo Koon (ranked 0 p4p, 0 weight class). We have two fighters making their debuts here, so let's see who comes out of this one with their first professional victory.
 |
|
 |
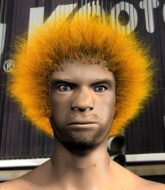
| 193 cm
18
200 lbs
0 - 0 - 0 |
|
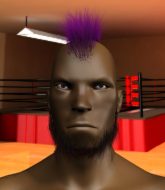
193 cm
18
222 lbs
0 - 0 - 0 |
BJJ Blue Belt
Basic striking
Good in bed |
|
BJJ Purple Belt
Good kicks
Solid chin |
|
| |
|
Ladies and gentlemen. This fight is 3 rounds, in the light heavyweight division.
Introducing the fighter to my left, fighting out of the red corner.
With a record of
0 - 0 - 0, fighting out of New York, Macka Tampi!
And introducing the fighter to my right, fighting out of the blue corner.
With a record of
0 - 0 - 0, fighting out of New York, Plo Koon!
The judges for this bout are Chad Campbell, Steve Montenegro and Joseph Jones.

The bell rings for round one and we are underway!
Koon shoots in and drives through. Tampi sprawls well.
Tampi dives in and grabs Koon's left leg, looking for a takedown. Koon pushes down on Tampi's head and hops out.
Koon looks for a takedown but Tampi sprawls well.

Tampi dives in and scores a takedown into Koon's guard.
The referee is asking the fighters to pick up the pace.

Tampi is holding a leg here, probably looking for an ankle lock - he drops back and goes for it! Koon is in trouble! Is it all over??? No! Koon has escaped and now he's on top!
Tampi keeping moving, preventing Koon from controlling successfully.
Koon stops Tampi from standing up.
Tampi knows he needs to get back to his feet asap. He's simply no match for Koon on the ground.
Koon trying to control but Tampi is working from the bottom.
Tampi pulls Koon in close to prevent any damage.
Tampi tries to land a sweep but no joy.
The ref warns both fighters not to hold the cage as they work up against the meshing.

That's one minute gone in the round.

Plo Koon has forced the referee to step in and restart the fight on the feet.
Koon shoots in and drives through. Tampi sprawls well.
Macka Tampi has stuffed three takedown attempts in the round now. That's going to take a lot out of Plo Koon.
Tampi lands with a slapping head kick.
Tampi shoots in looking for a double leg takedown. Koon defends it nicely.
Koon throws a combination but comes up with nothing but fresh air.
Tampi misses with a half-hearted attempt at a head kick.

Tampi closes the distance and pushes Koon back into the cage.
Tampi wants a takedown.
Koon will no doubt start fighting again in a minute but for now he's just having a little rest, leaning Tampi up against the cage.
Tampi looks to throw an elbow but misses.

That's two minutes gone in the round.

Koon decides to pull guard.
Tampi trying to control but Koon is working from the bottom.

Tampi stands up and waves to Koon to follow him.
Tampi is breathing heavily.
Koon shoots in for a takedown but doesn't get it.
Macka Tampi seems to be the more aggressive standup fighter in this bout.
Tampi closes this distance looking for a takedown but Koon circles away.
The fans in attendance giving it up for the two fighters, who have really let it all hang out in the last minute or so!
Koon shoots in for a takedown but Tampi shows good takedown defense.
Koon shoots in for a takedown - he's clinched up with Tampi but Tampi pushes him off and we're back to square one.
Tampi throws a head kick but Koon moves out of range.
Koon tries to close the distance and clinch up but Tampi swats him away and circles back towards the center.
Tampi steps to the side to avoid the strikes from Koon.

That's three minutes gone in the round.
Koon is looking to clinch but Tampi is avoiding it.
Tampi throws a head kick but Koon moves out of range.
Koon is looking to clinch.
Koon shoots in but no luck this time.
Koon throws a head kick that misses.
No luck for Koon with that takedown attempt.
Koon misses with a jab and misses with a cross straight after too.
Horrible takedown by Tampi or perhaps it was just good defense by Koon which made him look bad.
Koon tries to close the distance and clinch but Tampi swats him to one side with an open hand palm strike and circles away.
Koon throws a hook to the body but it doesn't connect.
No luck with that takedown attempt from Tampi.
Koon dives in and grabs Tampi's left leg, looking for a takedown. Tampi pushes down on Koon's head and hops out.

That's four minutes gone in the round.
Koon tries to close the distance and clinch up against the cage but Tampi paws at him with a jab and circles away.
Koon closes the distance and clinches up with Tampi, looking for a takedown. Koon pushes Tampi against the cage but Tampi circles to the side and manages to break the clinch.
Koon tries to shoot in for a takedown. He's got hold of a leg but Tampi swivels and escapes.
Koon connects with a high kick.
Koon fails with a takedown attempt from distance.
Tampi lands with a head kick! That's gotta hurt.
Tampi tries to clinch there but Koon circles away.
We've seen a great period of action over the last minute or so - credit to both fighters for going all out!
Koon leaves Tampi with his face pressed against the mat as he sprawls beautifully, defending against a solid takedown attempt.
Koon tries to close the distance and clinch up against the cage but Tampi paws at him with a jab and circles away.
As the round comes to an end the crowd are showing their appreciation for a great round of action.
Koon shoots in for a takedown. He's persisting with it as Tampi sprawls well. Tampi wins this battle and keeps the fight standing. Koon gets slowly back to his feet.
Koon throws a low kick, looking for Tampi's leg but Tampi calmly moves out of range.
And thats the end of the round the fighters go back to their corners.
That was a close round but I would say that Macka Tampi will probably get the nod.
The minute break is over - no more time for sponges and pep talks - back to the action!

A telegraphed takedown attempt from Tampi is defended easily by Koon.
Koon pulls out of a head kick attempt.
Tampi is looking to clinch.
Koon circles away from the clinch attempt.
Tampi misses with a body kick.
Tampi lands a nice hook to Koon's body. Koon takes it in his stride and looks to land his own strikes.
Koon throws a looping left and ducks down for a takedown. He's got his arms around Tampi's waist but Tampi gets an underhook and avoids the takedown by throwing Koon off to one side.
Tampi shoots in looking for a takedown. Koon tries to sprawl out of it but Tampi keeps driving through. The fighters are pinned against the cage. Koon manages to get underhooks and after a bit of a struggle, circles away and we're back to standing.
Koon throws a combination but it was largely blocked by Tampi.
Tampi keeps the fight standing with a nice sprawl.
Koon throws a big shot that misses.
That's one minute gone in the round.
Tampi closes the distance and clinches.
Tampi blocks a couple of punches on the inside.
Koon is trying to work for a single leg takedown but Tampi pulls him back up using the underhooks.
Macka Tampi has stuffed three takedown attempts in the round now. That's going to take a lot out of Plo Koon.
Koon tries to pull guard but Tampi holds him up against the cage and eventually Koon drops back down to his feet.
Koon tries to pull guard but Tampi won't allow it.

Tampi breaks the clinch and we return to the middle of the mat.
Koon tries to score a power double leg takedown but Tampi sees that one coming and sprawls well. That will dishearten Koon somewhat.
Macka Tampi is winning the standup battle so far.
Koon throws a head kick that misses and slips in the process. He scrambles back to his feet and the fighters circle.
Koon is breathing heavily.
Koon takes a head kick and shrugs it off.
Tampi fails with a takedown attempt.
That's two minutes gone in the round.
Tampi goes for a high kick. It partially lands.
Macka Tampi is looking to throw some combinations by the looks of things.
Tampi misses with a takedown attempt - Koon sprawls well and throws a nice strike on the way out which just misses.
Koon throws a combination but it was largely blocked by Tampi.
Tampi uses good head movement to avoid the hook from Koon.
Koon fails to land with the punch combination there - jab, cross, hook, miss, miss, miss.
Koon fakes a strike and closes the distance, dragging Tampi to the ground. Koon is now in Tampi's guard.
The fans in attendance giving it up for the two fighters, who have really let it all hang out in the last minute or so!
Tampi manages to sweep nicely, so he's now on top. Koon manages to get himself to full guard.
Tampi tries to stand but Koon is controlling from the bottom.
That's three minutes gone in the round.
Koon is trying to keep Tampi in close.
Tampi stopping the sweep attempt from Koon.
Koon not looking particularly offensive just at the moment.
The ref stands the fighters back up, due to lack of action by Plo Koon.
Koon tries to score a power double leg takedown but Tampi sees that one coming and sprawls well. That will dishearten Koon somewhat.
Tampi fails miserably with a takedown attempt.
Tampi defends well against a solid takedown attempt from Koon.
That's four minutes gone in the round.
Tampi tries to close the distance and clinch up against the cage but Koon paws at him with a jab and circles away.
Tampi throws a hard body shot but it just misses.
Tampi lands a front kick.
Tampi showing good head movement there, avoiding the strikes from Koon.
Tampi misses with a head kick.
Tampi shoots in for a takedown but Koon shows good takedown defense there and keeps this one on the feet.
Koon throws a quick inside leg kick.
Koon shoots in but no luck this time.
As the round comes to an end the crowd are showing their appreciation for a great round of action.
Koon shoots in and drives through. Tampi sprawls well.
Koon tries to score a power double leg takedown but Tampi sees that one coming and sprawls well. That will dishearten Koon somewhat.
Tampi throws a head kick but Koon moves out of range.
And thats the end of the round the fighters go back to their corners.
That was a close second round but I would say that Macka Tampi will probably get the nod.
The fighters get back to their feet, the hooter sounds and we're back to the action! This is the final round!

Koon throws a feint and then finishes with a kick to the body.
Tampi clinches.
Koon jumps guard but his hands slip and he falls flat on his back. Well, he's made himself look a right mug there, as Tampi walks away with a smile on his face. Koon gets slowly back to his feet and shakes his head.
Koon wants to slow Tampi down by chopping away at his legs.
Tampi shoots in for a takedown. He's persisting with it as Koon sprawls well. Koon wins this battle and keeps the fight standing. Tampi gets slowly back to his feet.
Tampi fakes high and shoots in for a takedown but Koon avoids it really well and circles away.
A nice leg kick lands there from Tampi.
Tampi shoots in for a takedown but Koon shows good takedown defense there and keeps this one on the feet.
That's three failed takedown attempts in the round for Macka Tampi. That's going to take a lot out of him.
Koon shoots in for a takedown - he's clinched up with Tampi but Tampi pushes him off and we're back to square one.
Koon shoots in but Tampi avoids the takedown attempt easily.
Both fighters are breathing heavily.
That's one minute gone in the round.
Tampi checks a leg kick nicely.
Tampi shoots in for a takedown but Koon shows good takedown defense there and keeps this one on the feet.
Koon takes a thudding leg kick, right into the meat of the thigh.
Koon tries to clinch up.
Koon throws a quick head kick that skims the top of Tampi's head.
Koon moves in looking to clinch but Tampi pushes him off.
Tampi tries to close the distance and clinch up against the cage but Koon paws at him with a jab and circles away.
Koon fails miserably with a takedown attempt.
Tampi lands with a two punch combination before moving back out of range.
A head kick misses from Tampi.
Koon shoots for a double leg takedown but Tampi sprawls well. He's pushed Koon's face into the mat and manages to get back to his feet relatively easily.
That's two minutes gone in the round.
Koon fakes with a right hand and throws a good leg kick, right into the thigh. That had to hurt Tampi.
A really sloppy takedown attempt there from Koon.
Koon takes a shot right to the bread basket.
Tampi throws a quick head kick that skims the top of Koon's head.
Tampi is trying hard to land a takedown here. Koon sprawls well and keeps this one on the feet.
Koon fails to land with the punch combination there - jab, cross, hook, miss, miss, miss.
A really sloppy takedown attempt there from Koon.
Tampi lands with a kick to the temple. Koon shrugs as if to say "is that all you've got?"
Wooooo! Give it up for these two warriors! They are putting on a show!
Nice takedown defense from Koon. No joy for Tampi on that attempt.
Koon shoots in but Tampi avoids the takedown attempt easily.
A looping hook to the body misses from Koon. Tampi does a little dance to reset his feet.
That's three minutes gone in the round.
Tampi throws a body punch but Koon moves out of range.
Koon tries to clinch up against the cage, rushing in the close the distance. Tampi manages to break the clinch and circles back to the middle of the mat.
Tampi keeps the fight standing with a nice sprawl.
Tampi throws a head kick but Koon moves out of range.
Koon throws a head kick that misses and slips in the process. He scrambles back to his feet and the fighters circle.
Koon takes a step back and watches a body kick go sailing past his mid section.
Koon dives in and grabs Tampi's left leg, looking for a takedown. Tampi pushes down on Koon's head and hops out.
Tampi shoots for a takedown but Koon saw that one coming a mile off and avoided it easily.
Tampi looks for a takedown but Koon sprawls well.

Koon clinches up with Tampi and pushes him back against the cage.
That's four minutes gone in the round.
Koon goes for a takedown in the clinch but Tampi prevents it.
Tampi manages to break the clinch.
Koon shoots for a takedown but Tampi saw that one coming a mile off and avoided it easily.
Koon throws a looping left and ducks down for a takedown. He's got his arms around Tampi's waist but Tampi gets an underhook and avoids the takedown by throwing Koon off to one side.
Tampi clinches up with Koon and pushes him back against the cage.
Tampi jumps guard and drags Koon to the mat. He's obviously going to be looking for submissions off his back.
Tampi keeping moving, preventing Koon from controlling successfully.
Koon won't allow Tampi to get back to his feet.
Plo Koon has stepped it up - he knows he needs a finish here!
Macka Tampi is fighting for a decision here - he's started to take the cautious approach.
We've seen a great period of action over the last minute or so - credit to both fighters for going all out!
As the round comes to an end the crowd are showing their appreciation for a great round of action.
Koon trying to land body shots but he keeps hitting the mat.
And that's the end of the fight!
That was a close round. You could make an argument for either fighter but I would give it to Macka Tampi.
Well Tampi has outscored his opponent in every aspect of the fight today. Only a scarily incompetent judge or two will keep him from a well deserved win... Over to the ring announcer for the scorecards.
Ladies and gentlemen, after 3 rounds of action, we go to the scorecards for a decision.
Judge Chad Campbell scores the fight 30:27
Judge Steve Montenegro scores the fight 30:27
Judge Joseph Jones scores the fight 30:27
In favor of your winner, by unanimous decision... Macka Tampi!
|
|
|
|
|
|
|
|
|
|
|
|
|
|
|
|
|
|
|
|
|
|
|
| S |
C
A |
G |
S |
C
B |
G |
|
S |
C |
G |
|
energy
A | B |
|
hype
A | B |
|
pop
A | B |
|
mgr
A | B |
|
FIGHT
RATING
63% |
|
|
|
|
|
|
