|
|
PBP Commentary |
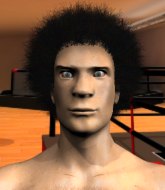
Coming up we have a middleweight MMA rules bout between Daniel Taker (ranked 0 p4p, 0 weight class) and Hayao Miyazaki (ranked 0 p4p, 0 weight class). Hayao Miyazaki acknowledges the crowd's support as he enters the cage.
 |
|
 |
| 173 cm
23
190 lbs
6 - 3 - 0 |
|
175 cm
27
197 lbs
10 - 7 - 1 |
Great wrestler
Solid boxing
Cardio machine |
|
BJJ Purple Belt
World class boxer
Good gas tank |
|
| |
|
Ladies and gentlemen. This fight is 3 rounds, in the middleweight division.
Introducing the fighter to my left, fighting out of the red corner.
With a record of
6 - 3 - 0, fighting out of Amsterdam, Daniel Taker!
And introducing the fighter to my right, fighting out of the blue corner.
With a record of
10 - 7 - 1, fighting out of Amsterdam, Hayao Miyazaki!
The judges for this bout are Radbod Blank, Paul Aken and Nard Betker.

The bell rings for round one and we are underway!
Taker swings and misses with a hook to the body.
Taker pushing out the jab but it's not landing.
Taker throws a predictable looking body shot
and Miyazaki counters with a straight punch to the midsection.
Taker thows a body shot but no joy.
Miyazaki lands with an uppercut that bounces Taker off the cage and back into range.
Taker ducks under a wild hook from Miyazaki.
Miyazaki scores with a nice one two combo and darts back out of range to avoid anything coming in the opposite direction.

Miyazaki tries to keep at a distance but Taker has taken the fight into the clinch.
Taker lands a shoulder strike.
Miyazaki blocks a body shot from Taker.
Taker is looking to score with knees to the body. Maybe he'll change it up and go body then head. Miyazaki is defending well for now.
Miyazaki tries a body shot but Taker blocks it.
Taker with an attempt at a knee that misses.
Taker lands with a good tight uppercut to the head.

It looks like Hayao Miyazaki has been cut.
The crowd cheering loudly, showing their appreciation for the quality fight we're seeing here.
Miyazaki misses with a hook from the clinch.
Taker lands with a light punch inside.

Taker gets a trip takedown into half guard.
If this pace continues, the referee will definitely step in and force a standup.
Taker looking to pass the half guard. Not this time.
We get told so often about how wrestlers don't like to be on their backs. Let's see if Miyazaki can do anything to dispel that myth.
Miyazaki is looking to regain full guard. Not this time though.

That's one minute gone in the round.
Miyazaki keeping his head moving to avoid the ground and pound.
Miyazaki wants to improve his position but Taker is controlling well.
Miyazaki has hold of Taker's hands but Taker slips his arm to the side and lands an elbow.
Miyazaki is trying to maintain the position but Taker is very close to passing his half guard.
Taker wants to take a breather but Miyazaki is having none of it.
Taker slips a nice elbow through Miyazaki's hands, connecting with Miyazaki's forehead.
Miyazaki trying to hold on to Taker's head to control him but Taker postures up.

Taker gets to his feet - back to striking we go!
Some wild striking there from Taker.
Miyazaki uses good head movement to avoid the hook from Taker.

That's two minutes gone in the round.
Taker has taken the fight to the clinch.
Taker throws a punch but it's blocked by Miyazaki.
Miyazaki is working Taker over against the cage.
This is a great period of action - very entertaining stuff!
A short body shot lands from Miyazaki as the two fighters clinch.
Miyazaki lands an uppercut.
Some stalling of biblical proportions here from Miyazaki.
Taker throws a punch but it's blocked by Miyazaki.
Taker swings wildly with an uppercut but Miyazaki uses good head movement to avoid it.
Taker tries a knee to the head but Miyazaki blocks it.
Miyazaki lands a left hand that snaps the head of Taker backwards.
Miyazaki lands with a short punch from the clinch.
A hook to the body from Miyazaki.
Miyazaki working some nice short punches in the clinch.
With the fighters clinched against the cage, Miyazaki creates a bit of distance for himself and scores with a nice uppercut.
Miyazaki looking to slow down the pace here.

Taker breaks from the clinch.

That's three minutes gone in the round.
Miyazaki avoids the body shot from Taker.
Taker gets a clinch.
Taker lands a shoulder strike.
Taker lands a right hand that snaps the head of Miyazaki backwards.
Miyazaki lands a nice looking hook to the body, against the cage.
Miyazaki is stalling here. The referee will be looking to step in if he doesn't pick up the pace.
Miyazaki has Taker pressed against the cage, preventing Taker from circling away and getting back to striking at range.
Miyazaki lands with a light punch inside.
Taker pushes off and circles away, back to the middle of the mat.
Miyazaki throws a nice inside leg kick.
The crowd are loving this. Great action here.
Taker has managed to clinch.
Miyazaki misses with a body punch.
Miyazaki fails to land with a short punch on the inside.
Taker prevents a body shot from Miyazaki.
A shot in the inside from Miyazaki.
A short right hand to the side of the head by Miyazaki.
Miyazaki lands with a good tight uppercut to the head.
Taker swings away with an uppercut that misses.

That's four minutes gone in the round.
Taker tries a shoulder strike but it doesn't do any damage.
Miyazaki effectively controlling the action here.
Taker lands a right hand that snaps the head of Miyazaki backwards.
Miyazaki throws a blind hook that connects with the side of Takers head.
Miyazaki lands a hook to the body. It's hard to tell if that hurt Taker or not.
A frustrated look appears on Taker's face as he tries to break the clinch.
A battle for position here, against the cage.
Taker lands a knee to the head there! That was nasty!
Taker missing with knees to the body.
Miyazaki presses Taker against the cage and delivers a mid-strength body shot.
Taker tried to land a shot to the body but connects with Miyazaki's elbow.
Miyazaki throws a blind hook that connects with the side of Takers head.
Miyazaki wants to stall.
The crowd are going absolutely nuts as the round comes to an end - what a fantastic round of action!
Taker breaks the clinch.
Miyazaki lunges at Taker with a hook that half lands and is half blocked by Taker's hand.
Taker misses with a left hand
and Miyazaki counters with a huge left! Taker is in big trouble! He's backing up but Miyazaki isn't giving him chance to recover. Under a barage of punches the ref has to step in to save Taker from any more damage. A dominating finish by Miyazaki!
Ladies and gentlemen, after 4:55 of round 1, we have a winner by way of TKO (Strikes). Hayao Miyazaki!
An out of breath Hayao Miyazaki thanked his loyal fans in his post fight interview, giving them credit for his success over the course of his career.
|
|
|
|
|
|
|
|
|
|
|
|
|
|
|
|
|
|
|
|
|
|
|
| S |
C
A |
G |
S |
C
B |
G |
|
S |
C |
G |
|
energy
A | B |
|
hype
A | B |
|
pop
A | B |
|
mgr
A | B |
|
FIGHT
RATING
74% |
|
|
|
|
|
|
