|
|
PBP Commentary |
Coming up we have a middleweight MMA rules bout between Tom Haverford (ranked 0 p4p, 0 weight class) and Kiser Sosa (ranked 0 p4p, 0 weight class). Haverford comes into the arena with Jay-Z & Kanye West - N** In Paris blaring out of the sound system. Sosa has chosen Fantasy as his entrance music, which hasn't gone down very well with the crowd. These two fighters really are very evenly matched on the feet - it will be fascinating to see who can assert themselves in that aspect of the fight.
 |
|
 |
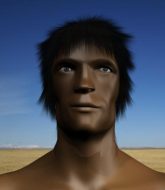
| 180 cm
26
190 lbs
4 - 2 - 0 |
|
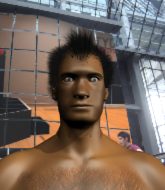
178 cm
25
187 lbs
4 - 2 - 0 |
BJJ Purple Belt
Solid Muay Thai
Good chin |
|
BJJ Purple Belt
Brawler
Powerful |
|
| |
|
Ladies and gentlemen. This fight is 3 rounds, in the middleweight division.
Introducing the fighter to my left, fighting out of the red corner.
With a record of
4 - 2 - 0, fighting out of Las Vegas, Tom Haverford !
And introducing the fighter to my right, fighting out of the blue corner.
With a record of
4 - 2 - 0, fighting out of Las Vegas, Kiser Sosa!
The judges for this bout are Robert Twigg, Chris Downing and Frank Dennis.

The bell rings for round one and we are underway!
The fighters circling - Haverford throws out the jab but it was never going to land.
Crunch! Haverford slams his shin into Sosa's torso.
Haverford moves in looking to clinch but Sosa pushes him off.
Sosa shoots in for a takedown. "Ole!" shouts Haverford as he jumps to the side.
Haverford lands a nice looking kick to the body. Sosa takes a step back to recover.
Sosa throws out a token jab with nothing on it.
Well, he's not going to score with shots like that. A lazy body kick attempt from Haverford .
Haverford loads up on a big right hand but Sosa slips the punch.
Haverford throws a half hearted mid kick.
Haverford pivots, looking for a leg kick but Sosa is out of range and Haverford settles back down.
Haverford lets loose with a powerful body kick. Sosa will feel that in the morning.
Haverford throws a nice looking combination but Sosa bobs and weaves to avoid any damage.
Haverford tries to clinch up but Sosa circles away and keeps his distance.
A combination from Haverford does no damage.
Haverford stuffs the takedown attempt from Sosa. Sosa gets slowly back to his feet.

Sosa gets a double leg takedown into Haverford 's guard.
This has been an exciting period of action!
Haverford keeping moving, preventing Sosa from controlling successfully.

Sosa drops back looking for a leg! Haverford is in trouble here! The fighters roll with the hold and Haverford manages to kick Sosa off! Sosa jumps back into Haverford 's guard.

That's one minute gone in the round.
Sosa won't allow Haverford to sweep him here.
Sosa is looking to advance position but Haverford has hit a scissor sweep - now he's on top in mount!

Haverford goes for an armbar but Sosa turns quickly into his guard - lovely anticipation from Sosa.
Sosa drops back, looking for a kneebar! Haverford looks panicked! The fighters roll across the mat, one looking to finish, one looking to escape. Haverford looks to have wriggled free... Yes, he's got his leg free and he's dived into side control! Good work there from Haverford !
Haverford thinks about going for a far side armbar but bails out and retains the dominant position instead.

That's two minutes gone in the round.
Haverford trying to control the action but Sosa is working from the bottom.
Haverford sitting in side control, looking to soften his opponent up with elbows and hammerfists but Sosa is avoiding damage well and looking to escape the position.
Haverford tries for a kimura. Not really close to a finish though.
Sosa is trying to control Haverford 's posture but Haverford avoids it.

That's three minutes gone in the round.
Haverford laying and praying for a moment but Sosa takes advantage and regains half guard.
Haverford missing with some ground and pound from the half guard.
Sosa is pressing down on Haverford 's left leg trying to get back to full guard. He's managed it.
Sosa trying to keep a closed guard but Haverford is proving a slippery customer.
Sosa working for a triangle but Haverford defends it easily.
Sosa keeping moving, preventing Haverford from controlling successfully.

That's four minutes gone in the round.
Sosa escapes his hips to the side and looks to be working for an armbar. Haverford gives him a little smile and shakes his head. No chance.
Sosa can't do much from the bottom at the moment, as Haverford controls the pace.
Haverford looking to sit in guard and control but Sosa gets the butterfly guard and sweeps. He's now in the guard on the top.
Haverford keeping moving, preventing Sosa from controlling successfully.
As the round comes to an end the crowd are showing their appreciation for a great round of action.
Sosa with a flurry of punches that miss.
And thats the end of the round the fighters go back to their corners.
That was a close round but I would say that Tom Haverford will probably get the nod.
That's time! Haverford 's corner gives him a slap on the ass as he gets ready to fight.

Sosa misses with a jab, cross combination.
Wow, both these guys are really going for it!
Sosa works over Haverford 's head and body with a nice combination.

It looks like Tom Haverford has been cut.
Sosa has a nice red mark on his side after a thudding body kick by Haverford .
Sosa dodges the punch combination from Haverford .
Sosa closes the distance and lands a one-two.
Sosa ducks down and throws a hook to the body.
The crowd are loving this. Great action here.
Haverford tries to clinch up but Sosa circles away and keeps his distance.
Haverford delivers a nice body kick.
Tom Haverford seems to be the more aggressive standup fighter in this bout.
A head kick from Haverford lands but Sosa takes it in his stride.
Haverford throws a body kick that misses.
Haverford keeps Sosa at a distance using the push kick.
Sosa swats away the attempt to clinch by Haverford .
Sosa throws a head kick that misses.
Haverford misses with a head kick.
Tom Haverford is looking to throw some combinations by the looks of things.
Haverford moves away from the strike by Sosa.
Haverford misses with a body kick.
Haverford wants to clinch up but Sosa keeps it at a distance.
Haverford tries to clinch but Sosa moves out of range.
Sosa is looking to score with low kicks.
That's one minute gone in the round.
Sosa lands three nice shots there - that looked like it hurt!
Well, he's not going to score with shots like that. A lazy body kick attempt from Haverford .
A solid leg kick lands there for Haverford .
Sosa shoots for a double leg takedown but Haverford sprawls well. He's pushed Sosa's face into the mat and manages to get back to his feet relatively easily.
Sosa swings away but doesn't land with a series of punches.
Sosa throws the left hand but Haverford avoids the punch easily.
Sosa has developed a nice purple lump on his ribcage, as a result of some heavy body kicks from Haverford .
Sosa throws a hook but Haverford avoids it easily.
Haverford wants to clinch.
Tom Haverford is looking to keep the fight on the feet at all costs.
A slapping body kick lands there for Haverford .
This has been an exciting period of action!
Sosa cracks Haverford with a hook to the jaw. Both fighters smile at eachother and high-five before getting back down to business.
Tom Haverford 's cut is getting worse.
Haverford lands with a thumping leg kick.
Sosa takes a step back and watches a body kick go sailing past his mid section.
Haverford throws a combination but it was largely blocked by Sosa.
Haverford tries to clinch but Sosa is having none of it.
Haverford darts in trying to clinch
and Sosa counters with a one-two to the body.
Haverford misses with a jab and misses with a cross straight after too.
That's two minutes gone in the round.
Sosa shoots in for a takedown - he's clinched up with Haverford but Haverford pushes him off and we're back to square one.
Haverford defending well as Sosa loads up on a big left hand.
No luck with that takedown attempt from Sosa.
Tom Haverford has stuffed three takedown attempts in the round now. That's going to take a lot out of Kiser Sosa.
Sosa is breathing heavily.
Sosa avoids the clinch attempt nicely.
Haverford looking to throw a kick but he's pulled out of it.
No joy there for Haverford , who threw a few shots but didn't land.
Sosa misses with a half-hearted attempt at a head kick.
A telegraphed takedown attempt from Sosa is defended easily by Haverford .
Haverford tries to clinch but Sosa moves out of range.
Sosa misses with the combination.
Haverford avoids the head kick by Sosa.
Sosa has a nice red mark on his side after a thudding body kick by Haverford .
Danga de danga de dang - Haverford scores with a four punch combination!
Haverford lands a leg kick. The shin dug right into the meat of the thigh.
That's three minutes gone in the round.
Haverford smiles there as he lands a nice right hand right on the button.
Haverford misses with a jab and misses with a cross straight after too.
Sosa moves out of range as Haverford throws a body kick.
Haverford takes a shot to the eye socket. That's gotta hurt.
Haverford throws a head kick that looked like it stung.
Haverford thows a body kick. Sosa tries to catch it but that hurt him.
Haverford throws a body kick that digs right into the meat.
Haverford throws a leg kick which misses Sosa's front leg but catches the back leg as Sosa tries to avoid it.
A head kick misses from Haverford .
Haverford avoids the head kick by Sosa.
Haverford throws a one two combo.
Sosa throws a combination but comes up with nothing but fresh air.
Sloppy strikes from Haverford . Those never looked like landing.
Tom Haverford is winning the standup battle so far.
Haverford throws a nice outside leg kick.
Haverford lands a nice looking body kick.
The crowd cheering loudly, showing their appreciation for the quality fight we're seeing here.
Haverford dances in quickly and lands a nice inside leg kick on Sosa. That did some damage!
Haverford uses good footwork to avoid the strikes from Sosa.
Nice jab there from Haverford .
Sosa avoids the head kick by Haverford .
That's four minutes gone in the round.
Haverford avoids the head kick by Sosa.
Haverford lands a leg kick and bounces back out of range.
Haverford lands a head kick. Sosa smiles back at him and beckons him forward.
Sosa moves out of range as Haverford throws a body kick.
A head kick misses from Haverford .
Haverford throws a head kick but Sosa moves out of range.
Haverford lunges at Sosa with a hook that half lands and is half blocked by Sosa's hand.
Haverford throws a nice inside leg kick.
Sosa's leg has a nasty welt from taking a succession of leg kicks. That must be slowing him down.
Sosa throws a head kick that looked like it stung.
Tom Haverford 's cut is bleeding quite badly. He's got to try and protect it.
Haverford throws a nice looking combination but Sosa bobs and weaves to avoid any damage.
Haverford tries a switch kick but it misses it's target.
Haverford goes for a spinning back kick but it misses.
Sosa uses good head movement to avoid the hook from Haverford .
Sosa tries to bum rush Haverford with a series of wild strikes but Haverford uses good footwork to avoid the assault.
The crowd are going absolutely nuts as the round comes to an end - what a fantastic round of action!
Haverford swinging wildly here.
Sosa has a takedown stuffed.
Haverford tries a switch kick but it misses it's target.
And thats the end of the round the fighters go back to their corners.
That was a close second round but I would say that Tom Haverford will probably get the nod.
The cut man is working on Tom Haverford 's cut.
That's the end of the round. The referee orders the cornermen out of the cage so we can get back down to business. Let's get this one finished - here comes the final round!

Haverford goes for a spinning back kick but it misses.
Sosa misses with a head kick.
Sosa misses with a takedown attempt - Haverford sprawls well and throws a nice strike on the way out which just misses.
Haverford blocks a head kick by Sosa.
The sound of bone on bone echoes around the arena as Sosa checks a leg kick.
Sosa looks to land a combination but Haverford avoids it well.
Haverford tries to clinch but is not successful on this occasion.
Haverford tries to clinch there but Sosa circles away.
Haverford throws a body kick but he wasn't in range.
Haverford showing good head movement there, avoiding the strikes from Sosa.
Sosa blocks a head kick by Haverford .
Thud! ouch! good body kick from Haverford - that will leave a mark!

Haverford rushes Sosa and presses him up against the cage.
Haverford throws a knee to the head but misses.

Haverford manages to break the clinch.
Sosa shoots in for a takedown. "I don't think so" says Haverford as he avoids it easily.
Haverford scores with a slapping inside leg kick.
Sosa takes a big intake of breath there - he's definitely tired.
Haverford tries to clinch up against the cage, rushing in the close the distance. Sosa manages to break the clinch and circles back to the middle of the mat.
That's one minute gone in the round.
Haverford avoids a punch combination nicely.
Haverford closes the distance and pushes Sosa back into the cage.
Sosa has Haverford pressed up against the cage and is working for takedown. Haverford manages to improve position though and keeps the fight standing.
Tom Haverford has stuffed three takedown attempts in the round now. That's going to take a lot out of Kiser Sosa.
Sosa managing to block the knees to the body from Haverford .
Haverford pushes Sosa back against the cage and unloads with a body punch.
Haverford throws a knee to the head but misses.
Haverford trying to land knees to the body.
A nice left hand lands by Haverford .
Haverford gets double underhooks to prevent a takedown attempt from Sosa.
Sosa on the defensive, avoiding the knees to the body.
Haverford lands a nice knee to the body.
Sosa looking for a takedown.
Kneeeeees! The crowd are calling for knees to the body. Haverford obliges.
Sosa on the defensive, avoiding the knees to the body.
Haverford unloads a knee to the mid-section.
That's two minutes gone in the round.
Haverford is trying to wear down his opponent with knees to the body.
Wooooo! Give it up for these two warriors! They are putting on a show!
Haverford breaks the clinch and we return to the middle of the mat.
Sosa will have to do better than that with his takedown attempts.
Nice body kick there by Haverford .
Sosa stumbles momentarily as he takes a strong leg kick from Haverford .
Haverford wants to clinch up but Sosa keeps it at a distance.
Sosa takes a body kick right on the floating rib. Ouchie.
Haverford lands a head kick. Sosa smiles back at him and beckons him forward.
Haverford throws a head kick that misses.
Sosa feints and then dives in with a takedown. That was a long way out but the feint bought him enough time to close the distance and complete the takedown. Now we'll play guard for a bit and see who can get the better of that position.
Haverford keeping moving, preventing Sosa from controlling successfully.
Sosa working some ground and pound from guard but it's not doing any damage.
Sosa has gone for a leg lock! Haverford slips out almost immediately though and dives into Sosa's guard.
Kiser Sosa has stepped it up - he knows he needs a finish here!
That's three minutes gone in the round.
Sosa throwing his legs up looking for a triangle.
Sosa is working actively off his back, looking to secure an arm or perhaps work for a triangle.
Sosa keeping moving, preventing Haverford from controlling successfully.
Haverford is going to have to think about doing something other than just controlling because Sosa is managing to avoid having the position dictated to him.
That's four minutes gone in the round.

The ref stands the fighters back up. Tom Haverford wasn't doing enough on the ground.
Haverford throws a head kick that misses and slips in the process. He scrambles back to his feet and the fighters circle.
Haverford throws a wild combination but nothing lands.
Haverford walks into a left hand.
Sosa will need to tighten up his combinations if he doesn't want to gas himself out, swinging at thin air.
Tom Haverford is fighting for a decision here - he's started to take the cautious approach.
As the round comes to an end the crowd are showing their appreciation for a great round of action.
Sosa shoots in and drives through. Haverford sprawls well.
Haverford gets caught napping as Sosa dives in and scores a takedown. Haverford manages to retain guard.
Fantastic stuff here - a very entertaining period of action, which has drawn cheers from the crowd.
Sosa is looking to work some ground and pound but Haverford has wrist control.
And that's the end of the fight!
Tom Haverford showed his dominance in that final round.
Well I reckon that's a shut out for Haverford , winning every round. Will the judges agree? They are the ones who matter, even if they are often depressingly incompetent. Over to the ring announcer for the scorecards.
Ladies and gentlemen, after 3 rounds of action, we go to the scorecards for a decision.
Judge Robert Twigg scores the fight 30:27
Judge Chris Downing scores the fight 29:28
Judge Frank Dennis scores the fight 30:27
In favor of your winner, by unanimous decision... Tom Haverford !
A very excited looking Tom Haverford made sure he remembered to thank all the fans both in the arena and on the internet. He said all the coolest people spend all day on MMA websites, which got a big reaction.
|
|
|
|
|
|
|
|
|
|
|
|
|
|
|
|
|
|
|
|
|
|
|
| S |
C
A |
G |
S |
C
B |
G |
|
S |
C |
G |
|
energy
A | B |
|
hype
A | B |
|
pop
A | B |
|
mgr
A | B |
|
FIGHT
RATING
100% |
|
|
|
|
|
|

