|
|
PBP Commentary |
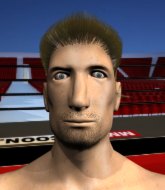
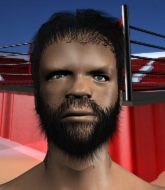
Coming up we have a featherweight MMA rules bout between James Jolley (ranked 0 p4p, 0 weight class) and Haji Muakbar (ranked 0 p4p, 0 weight class). Muakbar has chosen That Punjabi Jay-Z song as his entrance music. Both fighters look fresh as a daisy as they make their way towards the cage.
 |
|
 |
| 170 cm
30
154 lbs
17 - 9 - 0 |
|
171 cm
26
159 lbs
15 - 5 - 0 |
Abu Dhabi Champ
Excellent boxer
Granite chin |
|
Good wrestler
Excellent boxer
Good gas tank |
|
| |
|
Ladies and gentlemen. This fight is 5 rounds, for the featherweight championship of the world!
Introducing the champion to my left, fighting out of the red corner.
With a record of
17 - 9 - 0, fighting out of Montreal, James Jolley!
And introducing the challenger to my right, fighting out of the blue corner.
With a record of
15 - 5 - 0, fighting out of Montreal, Haji Muakbar!
The judges for this bout are Steve Smith, Robert Douchet and Trevor Gratis.

The bell rings for round one and we are underway!
Jolley throws a hook to the body but it doesn't connect.
Jolley shoots in looking for a double leg takedown. Muakbar defends it nicely.
Jolley avoids the body shot from Muakbar.
Jolley takes a swing at Muakbar's ribcage but misses.
Muakbar shoots in for a takedown. "Ole!" shouts Jolley as he jumps to the side.
Muakbar just misses with a punch to the body.
Jolley fails with the takedown

and Muakbar moves into the clinch.

Muakbar escapes the clinch and we're back to striking.
Muakbar throws a hard body shot but it just misses.
Muakbar throws a body kick but he wasn't in range.
Muakbar throws a hook to the body but it doesn't connect.
Jolley throws a monster uppercut resembling something out of street fighter but it doesn't land.
Jolley shoots in for a takedown - he's clinched up with Muakbar but Muakbar pushes him off and we're back to square one.
That's three failed takedown attempts in the round for James Jolley. That's going to take a lot out of him.
Muakbar has closed the distance and engaged Jolley in a clinch.
The fighters are pressed against the cage, as the pace of the fight slows.

That's one minute gone in the round.
Muakbar lands a right hand that snaps the head of Jolley backwards.
Muakbar lands a hook to the side of the head.
Muakbar breaks the clinch and we return to the middle of the mat.
Muakbar avoids the body shot from Jolley.
Jolley fails with a rather predictable takedown attempt.
Muakbar gets his head snapped back by a nice shot there.

Jolley shoots in for a takedown and gets it.
The referee wants the fighters to be more active or he's going to reset them on the feet.
Muakbar trying to control from the bottom.
Jolley is keen to just control but Muakbar is a slippery customer.

That's two minutes gone in the round.

Jolley seems to be working for a kimura but Muakbar defends the submission attempt.
Jolley is trying to work for a kimura. This could be trouble! No, Muakbar has managed to free his arm - good work.
Muakbar keeping control of the position.
Muakbar is looking for a sweep. Jolley is wise to his cunning plan and keeps the top position.
Jolley is looking for a kimura but he's never going to get it from there.
The crowd cheering loudly, showing their appreciation for the quality fight we're seeing here.
Muakbar is trying to stand back up but Jolley is controlling him

That's three minutes gone in the round.
Jolley passes to side control.
Muakbar manages to get one leg in to regain half guard.
Jolley is trying to work for a kimura but Muakbar is defending well.
Muakbar tries to get to full guard but Jolley has control of the leg.
Jolley is looking for a kimura. It's going to be difficult to finish that from half guard though and Muakbar defends it well.
The fighters are going at a pretty good pace and they're both starting to sweat now.
Jolley is trying to work for a kimura. This could be trouble! No, Muakbar has managed to free his arm - good work.
Jolley seems to be working for a kimura but Muakbar defends the submission attempt.

That's four minutes gone in the round.
Jolley is thwarting Muakbar's attempts to control the position.
Jolley trying to control the action but Muakbar is working from the bottom.
Jolley is really struggling to control Muakbar but he's trying to hold on to the position.
The ref warns both fighters not to hold the cage as they work up against the meshing.
Muakbar desperately trying to maintain half guard.
Muakbar is staying active underneath Jolley, who seems content to just control the action from this position.
The crowd applaud the fighters efforts here as the round comes to an end.

It looks like we're going to have a standup here. Neither fighter is doing enough on the ground.
Jolley looks to throw the jab but Muakbar is out of range.
And thats the end of the round the fighters go back to their corners.
That was a close round but I would say that James Jolley will probably get the nod.
That's the end of the round. The referee orders the cornermen out of the cage so we can get back down to business.

Jolley wings a very wild body shot but it does the job and lands to the midsection.
Muakbar moves into the clinch.
Muakbar stalling.
Jolley is trying to break the clinch but Muakbar is controlling him.
Jolley goes for a takedown attempt but Muakbar pushes him away and we're back to fighting at a distance.
Muakbar keeping a good distance there, avoiding the body shot.
Jolley looks to score with a jab to the body but Muakbar is just out of range.
Jolley avoids the body shot from Muakbar.
Muakbar loads up on a big right hand but Jolley slips the punch.
Muakbar rushes forward with a series of wild hooks but Jolley moves out of range and avoids them all easily.
Muakbar keeping a good distance there, avoiding the body shot.
Jolley lunges in with swinging rights and lefts but Muakbar circles away quickly and effectively.
Jolley shoots in but Muakbar avoids the takedown attempt easily.
Jolley misses the shot to the body.
That's one minute gone in the round.
A shot to the liver by Jolley. Beautiful body shot.
Jolley missing with a left hand there. Muakbar was out of range so wasted energy throwing that one.
Jolley ducks down and throws a hook to the body but Muakbar moves away.
Jolley throws a combination but comes up with nothing but fresh air.
The fight moves into the clinch position.
Muakbar lands a right uppercut that snaps the head of Jolley backwards.
Jolley wants to take the fight to the mat but Muakbar manages to get underhooks and keep the fight in the clinch.
That's three failed takedown attempts in the round for James Jolley. That's going to take a lot out of him.
Muakbar breaks the clinch and we're back to striking at distance.
Muakbar keeping his hands up high there, blocking the jab from Jolley.
Jolley misses with a jab to the body
and Muakbar counters with a nice uppercut.
A jab from Muakbar misses.
Muakbar throws a hard body shot but it just misses.
Jolley throws a monster uppercut resembling something out of street fighter but it doesn't land.
Jolley shoots in for a takedown from distance. He catches Muakbar napping and manages to drive through into side control!
The fighters are pressed up against the cage, both looking to find a bit of space to work.
This has been an exciting period of action!
Muakbar is not content to let Jolley control the position.
That's two minutes gone in the round.
Jolley goes for an armbar here - this could be all over! But no, Muakbar has escaped beautifully and is now on top in side control! Oh, that's unlucky for Jolley but great work by Muakbar.
Muakbar working away.
Jolley is trying to improve his position.
Jolley tries to slip a leg under to move to half guard but Muakbar presses down on the leg and jumps into full mount!
Jolley working to try and regain half guard.
Muakbar content just to control the position here.
Muakbar lands a shot to the body, followed up by a shot to the exposed head of his trapped opponent.
Muakbar cracks Jolley with a nasty head shot there - the crowd let out an audible gasp there, as the noise reverberated around the arena.
Muakbar looking to control but Jolley is working nicely, looking to advance position himself.
That's three minutes gone in the round.
Jolley is in all sorts of trouble here.
Muakbar breaks from Jolley's wrist control and lands an elbow.
The referee warns Jolley that he has to improve his position here as he takes two more clean shots to the head.
A nice elbow there by Muakbar.
Muakbar looking to finish Jolley with some ground and pound. This is bad for Jolley!
Jolley tries to reverse the position but Muakbar maintains control.
Muakbar has his opponent pinned against the cage, landing some nasty ground and pound that is really making a bit of a mess out of Jolley's face.
Fantastic stuff here - a very entertaining period of action, which has drawn cheers from the crowd.
Muakbar controlling his opponent.
Muakbar breaks from Jolley's wrist control and lands an elbow.
Jolley is trying to escape the mount.
Muakbar in mount throwing good strikes here, bouncing his opponent's head off the canvas.
That's four minutes gone in the round.
Jolley keeping his composure momentarily, calmly looking to get back to half guard.
Muakbar lands a heavy elbow.
Jolley is trying to escape the mount.
Muakbar scoring with some good ground and pound from mount here. Will he manage to finish Jolley?
Muakbar lands a big elbow.
Jolley wants to hold on but Muakbar pushes him away.
Muakbar with shots to the head and body - Jolley looks very uncomfortable down there.
Muakbar avoids the attempt from Jolley to control.
Jolley keeping his composure momentarily, calmly looking to get back to half guard.
The crowd are going absolutely nuts as the round comes to an end - what a fantastic round of action!
Muakbar landing strikes from the mount and Jolley is in trouble!
Jolley tries to lock up and control but Muakbar gives him a forearm to the face and pushes him away.
And thats the end of the round the fighters go back to their corners.
Haji Muakbar showed his class in that round. I'd imagine he'll take it on all the scorecards.
The referee calls time. The cornermen exit stage left and we're back to business.

Muakbar displays good takedown defense there as he swats away a double leg from Jolley.
Muakbar loads up on a big right hand but Jolley slips the punch.
Jolley lands with a cross.
Jolley dodges the punch combination from Muakbar.
Muakbar ducks down and throws a hook to the body but Jolley moves away.
Jolley misses with a jab and misses with a cross straight after too.
Muakbar instigates a clinch.
The pace slowing considerably in the clinch, as Muakbar takes a break from that fighting nonsense to think about the finer things in life.
Muakbar breaks the clinch and we're back to striking at distance.
Muakbar keeping a good distance there, avoiding the body shot.
A big right from Jolley misses.
Jolley throws a hard body shot but it just misses.
Jolley swings and misses with a hook to the body.
That's one minute gone in the round.
Jolley thows a left - swing and a miss!
A telegraphed right hand from Jolley misses the target.
Jolley throws a monster uppercut resembling something out of street fighter but it doesn't land.
Muakbar ducks down and throws a hook to the body but Jolley moves away.
Jolley misses with a body shot. Nice footwork from Muakbar.
Jolley misses with a hook
and Muakbar counters with a good right hand that lands right on the jaw.
Muakbar throws a jab but it's blocked by Jolley.
Jolley thows a body shot but no joy.
Muakbar cracks Jolley with a good shot that sees him stumbling back into the cage.
Jolley misses with a jab and misses with a cross straight after too.
A big left from Jolley misses.
Jolley misses with a series of wild punches.
Jolley swings and misses with a shot to the body
letting Muakbar counter with a right hand.
This has been an exciting period of action!
Jolley jabs Muakbar to the body, keeping him at a distance.
Muakbar scores with the left hand. Jolley knows he should have avoided that one.
Muakbar keeps the fight standing with a nice sprawl.
Both fighters are breathing heavily.
Muakbar throws a shot from downtown. Jolley moves away and avoids it.
That's two minutes gone in the round.
Jolley shoots in and gets a takedown into half guard. Jolley showed some decent athleticism there.
Muakbar wants to control but Jolley is keeping busy.
Jolley is trying to work for a kimura. This could be trouble! No, Muakbar has managed to free his arm - good work.
Muakbar is looking for a sweep. Jolley is wise to his cunning plan and keeps the top position.
Muakbar works his way to full guard. Good work.
Jolley trying to control but Muakbar is working from the bottom.
Jolley pressing down on his opponent's thigh, looking to pass guard. Muakbar is keeping the position for now.
Jolley pushes down on Muakbar's leg and manages to get into half guard.
That's three minutes gone in the round.
Jolley is looking for a kimura but he's never going to get it from there.

Muakbar pushes Jolley off and gets back to his feet.
Muakbar swinging wildly here.
Muakbar throws a hard body shot but it just misses.
Haji Muakbar seems to be getting the better of the standup.
Muakbar walks into a jab.
A looping hook to the body misses from Jolley. Muakbar does a little dance to reset his feet.
Jolley misses with a body shot. Nice footwork from Muakbar.
Muakbar gets a clinch.
Muakbar digs a right hand into Jolley's ribs. Those have got to be taking their toll on Jolley's gas tank.
Muakbar tries a body shot but Jolley blocks it.
That's four minutes gone in the round.
Muakbar effectively controlling the action here.
A short left from Muakbar.
Muakbar keeps control of Jolley as he tries to wriggle out of the double underhooks.
Muakbar misses with the head strike.
Muakbar prevents a takedown attempt there.
That's three failed takedown attempts in the round for James Jolley. That's going to take a lot out of him.
Muakbar lands a hook to the side of the head.
As the round comes to an end the crowd are showing their appreciation for a great round of action.
Jolley tries to break free but Muakbar pushes him back against the cage.
The referee is keeping an eye on Muakbar - much more stalling and he will separate the fighters.
And thats the end of the round the fighters go back to their corners.
Haji Muakbar really dominated that round.
The corners get their ten second warning. Both fighters stand from their stools and stare eachother down, ready to get back to the action.

Muakbar swings wildly with a right hand that was never going to find it's target.
Left hook, right uppercut from Jolley.
Muakbar tries for a takedown but Jolley sees it coming a mile off and avoids it easily.
Muakbar swings wildly with a right hand that was never going to find it's target.
Jolley scores with a nice right hand.
Jolley ducks down and throws a hook to the body but Muakbar moves away.
Jolley shoots in for a takedown. "Ole!" shouts Muakbar as he jumps to the side.
Jab, cross, leg kick. Nice combination by Jolley!
Jolley misses with a body shot.
Jolley ducks under an overhand right and circles away with a smile on his face.
Muakbar misses with a straight left.
Muakbar will have to do better than that with his takedown attempts.
Jolley scores with a sloppy right hand. Muakbar should have avoided that one.
A big left from Muakbar misses.
Muakbar stuffs the takedown attempt from Jolley. Jolley gets slowly back to his feet.
Jolley misses the shot to the body.
That's one minute gone in the round.
Muakbar pushes Jolley up against the cage in a clinch.
Jolley looks like he'd prefer to be striking at range right now.
Jolley jumps guard but Muakbar turns him against the cage and keeps the fight standing.
That's three failed takedown attempts in the round for James Jolley. That's going to take a lot out of him.
Muakbar throws a blind hook that connects with the side of Jolleys head.
Muakbar lands a nice uppercut.
Muakbar tries to land a knee to the body but he is off balance and Jolley avoids it.
Muakbar is pushing Jolley up against the cage, for a bit of lean and pray action. Action being used the in the loosest possible sense of the word.
Muakbar tries to land knees in the clinch but Jolley avoids the damage to the body.
That's two minutes gone in the round.
Muakbar's corner calls for him to break the clinch, which he does.
Jolley takes a swing at Muakbar's ribcage but misses.
Jolley ducks down and throws a hook to the body but Muakbar moves away.
Muakbar misses with a takedown attempt. He shot from a bit too far out.
Jolley moves out of range of the body kick.
A jab from Muakbar misses.
Jolley tries to land with a swinging hook to the body but Muakbar was well out of range. Poor timing from Jolley.
Muakbar throws a jab when Jolley was well out of range.
Jolley closes the distance and gets a trip takedown into side control. Muakbar quickly recovers to half guard.
Muakbar is refusing to be controlled, as Jolley sits in half guard.
Muakbar is defending against the submission attempts here by Jolley.
This has been an exciting period of action!
Muakbar moves into full guard.
That's three minutes gone in the round.
Jolley looking to sit in guard and control but Muakbar gets the butterfly guard and sweeps. He's now in the guard on the top.
Jolley is looking for a guillotine. You can't force these things though and Muakbar defends well.
Jolley looking for submissions from the bottom here. Moving his hips around, possibly looking for an armbar.
It's got to the stage where if one of these guys blows hard enough, the other might fall over.
Muakbar passes easily into side control. Nice work.
Jolley takes a couple of big shots there - the referee warns him that he has to defend himself better.
That's four minutes gone in the round.
Jolley is looking to regain half guard here but Muakbar keeps moving and retains side control.
Jolley is trying to get back to half guard. He's pushing on Muakbar's leg. He's managed it. Nice work.
Muakbar is trying to control the action in half guard but Jolley is working away on the bottom, looking perhaps to get back to full guard.
Jolley is looking to control Muakbar's leg but it's slowly edging free. Can Jolley avoid being mounted?
Jolley has hold of Muakbar's hands but Muakbar slips his arm to the side and lands an elbow.
Jolley is trying to defend against the ground and pound but Muakbar scores with a couple of nice shots.
Fantastic stuff here - a very entertaining period of action, which has drawn cheers from the crowd.
Muakbar passes the guard and advances to mount!
Muakbar scoring with some good ground and pound from mount here. Will he manage to finish Jolley?
As the round comes to an end the crowd are showing their appreciation for a great round of action.
Jolley is squirming around, avoiding Muakbar's attempts to control the action.
Muakbar punishing his opponent with strikes.
And thats the end of the round the fighters go back to their corners.
A close fourth round but Haji Muakbar will probably get the nod - 10:9.
That's time! Back to the action! Let's get this one finished - here comes the final round!

Muakbar throws the left hand but Jolley avoids the punch easily.
Nice body punch from Jolley.
Jolley moves away from the strike by Muakbar.
Jolley ducks low and lands a nice hook to the body of his opponent.
Muakbar slips a straight right by Jolley.
A swing and a miss from Muakbar.
Jolley throws a nice hook to the body that draws an oooh from the crowd.
Jolley throws a hard body shot but it just misses.
Jolley shoots in looking for a takedown but Muakbar manages to keep the fight standing, pushing Jolley's face into the canvas for good measure before circling away.
Muakbar throws a shot from downtown. Jolley moves away and avoids it.
Jolley ducks down and throws a hook to the body but Muakbar moves away.
Jolley swings and misses with a hook to the body.
Jolley fails to land with the punch combination there - jab, cross, hook, miss, miss, miss.
Jolley looks to score with a jab to the body but Muakbar is just out of range.

Muakbar feints and then dives in with a takedown. That was a long way out but the feint bought him enough time to close the distance and complete the takedown. Now we'll play guard for a bit and see who can get the better of that position.
Both of our modern day gladiators look out of it here - an gruelling 5 rounds of action taking it's toll on them, no doubt.
Jolley trying to control the position.
Muakbar lands a nice shot whilst sitting in his opponent's guard.
That's one minute gone in the round.
Muakbar trying to control but Jolley is working from the bottom.
Muakbar cracks Jolley with a solid left hand.
Jolley isolates an arm and boxes in a triangle. Muakbar stacks Jolley on his neck as he steps over and passes to the side. He's now in a much more dominant position where he can look to do some serious damage. Nice move by Muakbar!
Jolley manages to work his way to half guard, despite Muakbar's best efforts.
Jolley tries to roll over but Muakbar keeps him under control.
Jolley looking for submissions from an awkward position here.
Jolley looking to work for a kimura from the bottom.
That's two minutes gone in the round.
Jolley is looking for a sweep. Muakbar is wise to his cunning plan and keeps the top position.
Nice strikes from Muakbar there.
Muakbar lands with an elbow from half guard - that looked like it hurt.
Jolley tries to get to full guard but Muakbar has control of the leg.
Jolley slips a foot under and gets full guard. Nice work.
The crowd are loving this. Great action here.
Jolley has momentary wrist control but Muakbar slips an elbow through the middle.
Muakbar trying to control but Jolley is working from the bottom.
Muakbar preventing the sweep.
Jolley escapes his hips to the side and looks to be working for an armbar. Muakbar gives him a little smile and shakes his head. No chance.
That's three minutes gone in the round.
Jolley working for a triangle but Muakbar defends it easily.
Muakbar with a couple of shots to the head there. Not particularly brutal.
Muakbar trying to control the position from guard on top but Jolley is wriggling around, looking for whatever he can.
Muakbar missing there with some ground and pound from the guard.
Muakbar wants to control from the top but Jolley keeps moving.
Jolley working for a triangle but Muakbar defends it easily.
Muakbar is pushing down on Jolley's leg trying to pass to half guard. Jolley is fighting to maintain full guard but Muakbar has managed to sneak the leg through.
Haji Muakbar is fighting for a decision - hopefully he's judged it right and he's actually winning the fight.
That's four minutes gone in the round.
Jolley wants to get back to full guard.
Muakbar controlling the action here.
Jolley trying to control here.
James Jolley has stepped it up - he knows he needs a finish here!
Muakbar content to control rather than advance.
As the round comes to an end the crowd are showing their appreciation for a great round of action.
Jolley flails away from the bottom but he's not doing any damage.
If this pace continues, the referee will definitely step in and force a standup.
Jolley missing with punches from the bottom.
And that's the end of the fight!
I would just about give that final round to Haji Muakbar.
I think Muakbar has won this one but let's see whether the judges agree with me. Over to the ring announcer for the scorecards.
Ladies and gentlemen, after 5 rounds of action, we go to the scorecards for a decision.
Judge Steve Smith scores the fight 46:49
Judge Robert Douchet scores the fight 47:49
Judge Trevor Gratis scores the fight 47:48
In favor of your winner, by unanimous decision... Haji Muakbar! Haji Muakbar retains his featherweight title!
Haji Muakbar bigged himself up after the win. The crowd seemed to love it.
|
|
|
|
|
|
|
|
|
|
|
|
|
|
|
|
|
|
|
|
|
|
|
| S |
C
A |
G |
S |
C
B |
G |
|
S |
C |
G |
|
energy
A | B |
|
hype
A | B |
|
pop
A | B |
|
mgr
A | B |
|
FIGHT
RATING
100% |
|
|
|
|
|
|
