|
|
PBP Commentary |
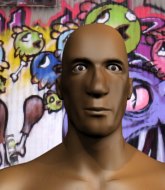
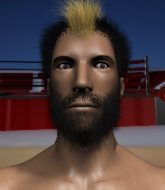
Coming up we have a welterweight MMA rules bout between Marcus Baldridge (ranked 0 p4p, 0 weight class) and Phil Mcracken (ranked 0 p4p, 0 weight class). Mcracken has chosen 10cc - Dreadlock Holiday as his entrance music. Marcus Baldridge has the edge in experience - let's see if he can make that count tonight.
 |
|
 |
| 182 cm
29
180 lbs
10 - 4 - 0 |
|
187 cm
26
182 lbs
6 - 0 - 0 |
Good wrestling
Basic striking
Cardio machine |
|
Good wrestler
Counter striker
Granite chin |
|
| |
|
Ladies and gentlemen. This fight is 3 rounds, in the welterweight division.
Introducing the fighter to my left, fighting out of the red corner.
With a record of
10 - 4 - 0, fighting out of Tokyo, Marcus Baldridge!
And introducing the fighter to my right, fighting out of the blue corner.
With a record of
6 - 0 - 0, fighting out of Tokyo, Phil Mcracken!
The judges for this bout are Hirohito Nitta, Tatsuya Matsuyama and Yukihiro Yamamoto.

The bell rings for round one and we are underway!
Mcracken uses decent footwork to sidestep a right hand from Baldridge.
A telegraphed right hand from Baldridge misses the target.
Baldridge lands with a hook. Mcracken tried to avoid it but it clipped the top of his head.

Baldridge throws the overhand right but ducks down into a quick takedown attempt. Mcracken was covering up waiting for the punch and Baldridge finishes the takedown easily into guard.
The fighters are trapped in the ropes so we're going to have a reposition here. The ref calls for a break and repositions the fighters in the center of the ring.
Baldridge is looking to work some ground and pound but Mcracken has wrist control.
Baldridge throws a big elbow that misses.
Baldridge looking to pass the guard.
Mcracken pulls Baldridge in to control the position.
Baldridge loading up with the ground and pound but he's missing more than he's landing in this flurry.
Baldridge throwing strikes from guard but Mcracken blocks nicely.
Mcracken working the defensive guard well to avoid strikes from Baldridge.

That's one minute gone in the round.
Baldridge working some ground and pound from guard but it's not doing any damage.
Baldridge trying to move into half guard but instead Mcracken has managed to sweep!
Baldridge controls Mcracken momentarily but Mcracken frees himself.
Baldridge keeping moving, preventing Mcracken from controlling successfully.
Baldridge looking to sweep here. No luck so far.
Mcracken postures up.

That's two minutes gone in the round.

The referee decides to stand the fighters back up, due to lack of activity on the part of Marcus Baldridge.
Baldridge throws out a loose jab but Mcracken uses good head movement to avoid it.
Mcracken tries to clinch up.
Baldridge swings for the body but Mcracken moves out of range.
Mcracken drops his hands momentarily and Baldridge takes advantage with a crisp shot to the head.
Baldridge misses with a wild body shot.
Mcracken doesn't manage to clinch there - Baldridge circles away.
Baldridge looking to score a takedown here. Mcracken is defending well but Baldridge drives through and ends up in Mcracken's guard.
Baldridge trying to land body shots but he keeps hitting the mat.
The crowd cheering loudly, showing their appreciation for the quality fight we're seeing here.
Baldridge cracks Mcracken with a solid left hand.
Baldridge postures up to throw the ground and pound strikes but they don't connect.
Baldridge with a flurry of punches that miss.
Mcracken working the defensive guard well to avoid strikes from Baldridge.
Baldridge with a flurry of punches that miss.

That's three minutes gone in the round.
Baldridge postures up to throw the ground and pound strikes but they don't connect.
Mcracken avoiding any damage from the ground and pound.
Baldridge postures up in Mcracken's guard and throws a big left but Mcracken blocks it.
Baldridge postures up to throw the ground and pound strikes but they don't connect.
Mcracken is trying to control the position but Baldridge postures up.
Baldridge postures up in Mcracken's guard and throws a big left but Mcracken blocks it.
Baldridge missing there with some ground and pound from the guard.
Baldridge is looking to work some ground and pound but Mcracken has wrist control.
Baldridge stands up over Mcracken, holding his feet. He dives back in and lands a decent shot to the head.
Mcracken working a defensive guard here.
Baldridge in full guard, throwing the ground and pound. No damage this time.

That's four minutes gone in the round.
Baldridge missing there with some ground and pound from the guard.
Baldridge throwing strikes from guard but Mcracken blocks nicely.
Baldridge throwing strikes but missing.
The fighters are tangled up in the ropes here. We might need a restart if the fighters can't break free themselves.
Baldridge with a flurry of punches that miss.
Baldridge has to be careful here, sitting in the guard of a superior BJJ player.
Baldridge stands and throws Mcracken's legs to the side, diving into side control.
Baldridge tries to score with some ground and pound. Mcracken controls his posture well this time though and the shots don't do any damage.
As the round comes to an end the crowd are showing their appreciation for a great round of action.
Mcracken regains half guard, as Baldridge was trying to land strikes.
This has been an exciting period of action!
Mcracken is trying to control but can't.
And thats the end of the round the fighters go back to their corners.
Marcus Baldridge dominated that round.
Well, the break between rounds is over. Let's get back to the scrappin!

Mcracken is looking to clinch but Baldridge is avoiding it.
A looping hook to the body misses from Baldridge. Mcracken does a little dance to reset his feet.
Baldridge swings for the body but Mcracken moves out of range.
Baldridge looks to land a left hand but Mcracken moved out of range nicely.
Baldridge pushing out the jab but it's not landing.
Baldridge pushing out the jab but it's not landing.
Baldridge is the aggressor but that punch slipped nicely by Mcracken.
A big right from Baldridge misses.
Mcracken tries to close the distance and clinch up but Baldridge swats him away and circles back towards the center.
Mcracken uses decent footwork to sidestep a right hand from Baldridge.
Mcracken ducks under a wild hook from Baldridge.
Mcracken is looking to clinch but Baldridge is avoiding it.
That's one minute gone in the round.
Mcracken moves out of range as Baldridge strikes.
Mcracken wants to clinch up but Baldridge keeps it at a distance.
Baldridge tries to land with a swinging hook to the body but Mcracken was well out of range. Poor timing from Baldridge.
Baldridge with a body punch. A glancing blow.
Baldridge misses with a left hand

and Mcracken moves into the clinch.
Mcracken tries a knee to the head but Baldridge blocks it.

Mcracken escapes the clinch and we're back to striking.
Baldridge keeps the fight standing with a nice sprawl.
Baldridge misses with a body shot. Nice footwork from Mcracken.
Baldridge loads up on a big right hand but Mcracken slips the punch.
Baldridge fakes high and swings low for a body shot but Mcracken manages to avoid it.
That's two minutes gone in the round.
Baldridge throws a hook to the body but it doesn't connect.
Marcus Baldridge seems to be the more aggressive standup fighter in this bout.
Baldridge looks to land a right hand but Mcracken moved out of range.
Baldridge has a takedown stuffed.
A jab from Baldridge misses.
Mcracken fails with the takedown.
Mcracken moves in looking to clinch but Baldridge pushes him off.
Mcracken tries to close the distance and clinch up against the ropes but Baldridge paws at him with a jab and circles away.
Baldridge avoids the clinch attempt nicely.
Baldridge misses with a wild body shot.
That's three minutes gone in the round.
Mcracken tries to clinch up.
Mcracken is looking to clinch but Baldridge is avoiding it.
Mcracken shoots in for a takedown. "Ole!" shouts Baldridge as he jumps to the side.
Marcus Baldridge has stuffed three takedown attempts in the round now. That's going to take a lot out of Phil Mcracken.
Mcracken wants to clinch.
Baldridge closes the distance, clinches up and gets a nice trip takedown into side control. Very smooth.
Baldridge tries to advance to mount but Mcracken denies him.
Baldridge with the ground and pound but Mcracken regains half guard under the barage of strikes.
Baldridge is looking to take a break and control but Mcracken is keeping him honest, looking to work from the bottom.
That's four minutes gone in the round.
Baldridge not landing any meaningful shots this time.
Baldridge working Mcracken over with strikes.
Baldridge sitting in half guard, looking to land shots. Mcracken defending well though.
Mcracken blocking the ground and pound attempt from Baldridge.
Baldridge winds up and cracks Mcracken with a swinging punch to the side of the head.
The crowd cheering loudly, showing their appreciation for the quality fight we're seeing here.
Baldridge is thwarting Mcracken's attempts to control the position.
Baldridge throwing shots but they're hitting the canvas more than the man.
The crowd applaud the fighters efforts here as the round comes to an end.
Mcracken tries to get to full guard but Baldridge has control of the leg.
Baldridge sitting in half guard, looking to land shots. Mcracken defending well though.
And thats the end of the round the fighters go back to their corners.
Marcus Baldridge dominated that second round.
The fighters get back to their feet, the hooter sounds and we're back to the action! Let's hear some noise people - this is the final round!

Mcracken moves in looking to clinch but Baldridge pushes him off.
Baldridge waving his hands out in front of him, looking to distract Mcracken.
Baldridge throws a poor cross that misses

and Mcracken counters with a takedown into side control.

Mcracken is looking to finish here, going for an Americana. Baldridge knows the correct defense though, so he's OK.

Mcracken stands up and we're back to a striking position.
Baldridge swats away the attempt to clinch by Mcracken.
Baldridge swings wildly with a right hand that was never going to find it's target.
That's one minute gone in the round.
Mcracken stuffs the takedown attempt from Baldridge. Baldridge gets slowly back to his feet.
Mcracken tries to close the distance and clinch but Baldridge swats him to one side with an open hand palm strike and circles away.
Mcracken shoots in with a lovely double leg takedown. Baldridge manages to land in full guard to minimise the damage.
Mcracken won't allow Baldridge to sweep him here.
Mcracken throws a strike but Baldridge rolls with it and manages to sweep. Now he's in guard on top.
Baldridge wants to control from the top but Mcracken keeps moving.
Mcracken utilising some decent striking defenses from the guard, preventing the ground and pound.
That's two minutes gone in the round.
Mcracken looking to sweep here. No luck so far.
Baldridge postures up.
Mcracken working the defensive guard well to avoid strikes from Baldridge.
Mcracken preventing the ground and pound from doing any damage.
Baldridge looking to sit in guard and control but Mcracken gets the butterfly guard and sweeps. He's now in the guard on the top.
Mcracken won't allow Baldridge to sweep him here.
Mcracken trying to control but Baldridge is working from the bottom.
Baldridge is doing well to control the posture of his opponent and prevent any damage.
Marcus Baldridge is fighting for a decision here - he's started to take the cautious approach.
That's three minutes gone in the round.
Mcracken in full guard, throwing the ground and pound. No damage this time.
Baldridge is looking to get back to his feet but can't, whilst Mcracken is controlling him.
Mcracken landing some decent shots from guard.
Baldridge is looking to stand up but Mcracken isn't so interested in that idea.
Mcracken connects with a couple of short punches.
Mcracken throwing shots from guard but he's hitting more mat than opponent.
Mcracken missing there with some ground and pound from the guard.
Baldridge keeping moving, preventing Mcracken from controlling successfully.
That's four minutes gone in the round.
Mcracken wants to stand but Baldridge has a closed guard, so he can't escape.
Baldridge keeping moving, preventing Mcracken from controlling successfully.
Baldridge wants to get back to his feet but Mcracken is in a dominant position and won't allow it.
If this pace continues, the referee will definitely step in and force a standup.
Baldridge keeping moving, preventing Mcracken from controlling successfully.

The ref calls for a clean break and stands the fighters back up. Phil Mcracken wasn't active enough on the ground.
Mcracken tries to clinch there but Baldridge circles away.
As the round comes to an end the crowd are showing their appreciation for a great round of action.
Baldridge with a nice cross.
Phil Mcracken has stepped it up - he knows he needs a finish here!
Baldridge moves away from the strike by Mcracken.
And that's the end of the fight!
Phil Mcracken comfortably won the final round on my scorecard.
I think Baldridge has won this one but let's see what the judges have to say. Over to the ring announcer for the scorecards.
Ladies and gentlemen, after 3 rounds of action, we go to the scorecards for a decision.
Judge Hirohito Nitta scores the fight 29:28
Judge Tatsuya Matsuyama scores the fight 29:28
Judge Yukihiro Yamamoto scores the fight 29:28
In favor of your winner, by unanimous decision... Marcus Baldridge!
Marcus Baldridge was full of energy after the big win and talked about how he thinks he can do big things in this sport. The crowd were appreciative of his determination to succeed.
|
|
|
|
|
|
|
|
|
|
|
|
|
|
|
|
|
|
|
|
|
|
|
| S |
C
A |
G |
S |
C
B |
G |
|
S |
C |
G |
|
energy
A | B |
|
hype
A | B |
|
pop
A | B |
|
mgr
A | B |
|
FIGHT
RATING
46% |
|
|
|
|
|
|

