|
|
PBP Commentary |
Coming up we have a heavyweight MMA rules bout between Douglas Quaid (ranked 0 p4p, 0 weight class) and John The Bone Breaker (ranked 0 p4p, 0 weight class). Chooooooooon! I think Quaid might be my favorite fighter, now he's come out to Total Recall. Rumors backstage are that the fighters have been paid to keep it standing but we know that would never happen in MMA!
 |
|
 |
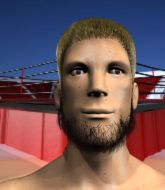
| 186 cm
20
260 lbs
5 - 1 - 0 |
|
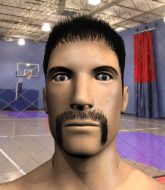
190 cm
22
265 lbs
6 - 4 - 0 |
Good wrestling
Brawler
Cardio machine |
|
BJJ Purple Belt
Counter striker
Heavy handed |
|
| |
|
Ladies and gentlemen. This fight is 3 rounds, in the heavyweight division.
Introducing the fighter to my left, fighting out of the red corner.
With a record of
5 - 1 - 0, fighting out of Helsinki, Douglas Quaid!
And introducing the fighter to my right, fighting out of the blue corner.
With a record of
6 - 4 - 0, fighting out of Helsinki, John The Bone Breaker!
The judges for this bout are Tarja Halkonen, Ben Zyskovitsi and Matti Vanhoillinen.

The bell rings for round one and we are underway!
Quaid throws a wild body kick that The Bone Breaker sees coming a mile off.
The Bone Breaker checks a low kick from Quaid.
Quaid rushes in with a sloppy looking punch

and The Bone Breaker counters with a nice double leg into half guard.
The Bone Breaker is looking to pass the guard... He's managed it - he's now in full mount!

The Bone Breaker working for a guillotine from mount but Quaid is in no mood to give up.
The Bone Breaker fails to advance to Quaid's back.
The Bone Breaker swings around for an armbar but it's a sloppy attempt and Quaid is now in The Bone Breaker's guard. A big mistake from The Bone Breaker there, giving up the dominant position!
Quaid works over The Bone Breaker with some ground and pound from guard.
Wooooo! Give it up for these two warriors! They are putting on a show!
Quaid is frustrating his opponent with some stalling tactics from top position.
Quaid has been looking to land a fair amount of strikes on the ground. He might be looking to soften his opponent up in order to work for a submission.
Quaid is pushing down on The Bone Breaker's leg trying to pass to half guard. The Bone Breaker is fighting to maintain full guard but Quaid has managed to sneak the leg through.

That's one minute gone in the round.
Quaid wants to pass the guard but The Bone Breaker is defending well.
Both fighters really going for it on the ground here!
Quaid wants to control but The Bone Breaker is keeping him busy.
The Bone Breaker is looking to improve his position.
The Bone Breaker is trying to defend against the ground and pound but Quaid scores with a couple of nice shots.
The fighters are pressed up against the cage, both looking to find a bit of space to work.
Quaid is keeping good posture, landing some ground and pound.
The ref warns both fighters not to hold the cage as they work up against the meshing.
The Bone Breaker moves his hips nicely and gets into full guard.
Quaid avoids a guillotine attempt easily.
The crowd cheering loudly, showing their appreciation for the quality fight we're seeing here.
The Bone Breaker manages to land a sweep and now he's in mount on top!
Quaid is desperately trying to get back to half guard.

That's two minutes gone in the round.
The Bone Breaker tries to push Quaid's head away but Quaid is holding on tight.
Quaid tries to hold on but The Bone Breaker postures up.
The Bone Breaker moves into side control, trying to work for a kimura. That looks painful! Will he finish!!?? No, Quaid has worked his arm free - good work by Quaid!
The Bone Breaker wants to work for a kimura but he's foiled early by Quaid, who protects the arm well.
Quaid is sneaking out the side here. He's bucked The Bone Breaker off and has taken his back!
Quaid has the hooks sunk in and you can see the will to fight slowly draining out of The Bone Breaker's body.

Quaid is working hard for the rear naked choke here.

That's three minutes gone in the round.
Quaid is trying to stick to The Bone Breaker's back but The Bone Breaker is turning into Quaid. He's managed to reverse the position - now he's in Quaid's guard. Polite applause from the crowd in appreciation of some nice Jiu Jitsu by The Bone Breaker.
Quaid is controlling The Bone Breaker's posture.
The Bone Breaker stands up and looks to throw the legs aside to pass to side control. Quaid swivels though and keeps the full guard.
Quaid wants to sweep but no luck.
Quaid is pulling down on The Bone Breaker's head to control his posture.
Quaid not looking particularly offensive just at the moment.
The Bone Breaker passes easily into side control. Nice work.
The Bone Breaker tries for a kimura but Quaid is defending well.
Quaid is trying to control The Bone Breaker's posture but The Bone Breaker avoids it.

That's four minutes gone in the round.
The Bone Breaker goes for an armbar! This could be all over! Wait, no, Quaid rolls with the submission and now he's on top in The Bone Breaker's guard! Nice work there by Quaid!
The Bone Breaker escapes his hips to the side and looks to be working for an armbar. Quaid gives him a little smile and shakes his head. No chance.
Quaid lands a couple of digs.
The crowd cheering loudly, showing their appreciation for the quality fight we're seeing here.
Quaid is frustrating his opponent with some stalling tactics from top position.
Quaid working in close now, lands a nice elbow to the side of The Bone Breaker's head.
The crowd are going absolutely nuts as the round comes to an end - what a fantastic round of action!
The Bone Breaker working from the bottom, still in full guard. He's managed to get a loose triangle. Quaid doesn't seem to be doing much to defend here, obviously he feels comfortable in the position. Quaid manages to throw the legs off his shoulder and he's back into guard - no problem.
The Bone Breaker looks winded!
Quaid content to stall in guard here.
And thats the end of the round the fighters go back to their corners.
Douglas Quaid dominated that round.
That's time! Back to the action!

The Bone Breaker has a takedown stuffed.
The Bone Breaker has his head snapped back a nice jab. A little nod from The Bone Breaker there as he acknowledges the shot.

Quaid waves his right hand out in front of him, looking to distract The Bone Breaker. Oh, he's unloaded a beast of a left hand - it worked! He's dropped The Bone Breaker to the canvas! Can he finish him!?
The fans in attendance giving it up for the two fighters, who have really let it all hang out in the last minute or so!
Quaid content to strike from guard, landing some decent shots.

The Bone Breaker is rocked!
Quaid trying to control but The Bone Breaker is working from the bottom.
Quaid scoring with some ground and pound.
The Bone Breaker is still in real trouble! Can Quaid finish him?
Quaid sneaks a leg through and gets to half guard. That was like a knife through butter how easily he passed The Bone Breaker's guard.
The Bone Breaker seems to have recovered his senses.
Quaid wants to take a breather but The Bone Breaker is having none of it.
The Bone Breaker tries to roll over but Quaid keeps him under control.
Quaid winds up and cracks The Bone Breaker with a swinging punch to the side of the head.
Still in half guard, Quaid seems content to control.
That's one minute gone in the round.
Quaid wants to take a breather but The Bone Breaker is having none of it.
Douglas Quaid overall seems to be getting the better of the ground position in the fight so far.
Quaid keeping composed on the top, looking to control the action.
We may be looking at a referee standup if the pace doesn't pick up soon.
The Bone Breaker wants to improve his position but Quaid is controlling well.
The Bone Breaker slips a foot under and gets full guard. Nice work.
The Bone Breaker is breathing heavily.
Quaid showing good wrestling skills to control the position.

We're going to have a standup here because Douglas Quaid wasn't active enough for the referee's liking.

Quaid shoots in for a takedown and gets it.
The Bone Breaker is refusing to be controlled, as Quaid sits in half guard.
Quaid content to sit in half guard and control for a moment.
That's two minutes gone in the round.
Quaid slips a nice elbow through The Bone Breaker's hands, connecting with The Bone Breaker's forehead.
This has been an exciting period of action!
The Bone Breaker is looking to regain full guard. Not this time though.
Quaid seems to be taking a bit of a break to think of his next move. He lands a short punch in the meantime.
The Bone Breaker tries to get to full guard but Quaid has control of the leg.
Quaid performing his best blanket impression for a moment.
Quaid trying to control from half guard but The Bone Breaker is working away.
The Bone Breaker actively working from the bottom here.
Quaid is looking to take a break and control but The Bone Breaker is keeping him honest, looking to work from the bottom.
The Bone Breaker is looking to improve his position.
That's three minutes gone in the round.
Quaid wants to work for an arm triangle but The Bone Breaker is really keeping half guard well and defending the submission attempt.
Still in half guard, Quaid seems content to control.
The Bone Breaker is trying to defend against the ground and pound but Quaid scores with a couple of nice shots.
Quaid is controlling the pace.
Quaid wants to lay and pray for a moment but The Bone Breaker keeps working.
Quaid is really struggling to control The Bone Breaker but he's trying to hold on to the position.
The referee decides to stand the fighters back up, due to lack of activity on the part of Douglas Quaid.
Quaid decides to change it up a bit and drives through with a nice takedown into half guard.
Quaid trying to control from half guard but The Bone Breaker is working away.
This is a great period of action - very entertaining stuff!
The Bone Breaker has guillotine here! It looks pretty tight! Could this be all over! No, Quaid escapes and passes into side control at the same time. Nice work there by Quaid!
That's four minutes gone in the round.
Quaid trying to control the action but The Bone Breaker is working from the bottom.
Quaid is trying to get an arm triangle but The Bone Breaker is defending well.
The Bone Breaker is looking for a sweep.
The Bone Breaker is persisting with the attempt to improve his position.
The crowd are going absolutely nuts as the round comes to an end - what a fantastic round of action!
Quaid wants to control but The Bone Breaker is keeping him busy.
Quaid working the ground and pound.
And thats the end of the round the fighters go back to their corners.
Douglas Quaid dominated that second round.
The fighters get back to their feet, the hooter sounds and we're back to the action! This is the final round!

The Bone Breaker tries for a takedown but Quaid circles away easily
and Quaid counters with a shoot takedown into half guard.
The Bone Breaker tries to roll over but Quaid keeps him under control.
Quaid is trying a forearm choke
I don't think that's going to do much at this level of the game.
The Bone Breaker on the receiving end of some nice ground and pound.
The Bone Breaker manages to get to full guard.
The crowd cheering loudly, showing their appreciation for the quality fight we're seeing here.
Quaid is in close to The Bone Breaker's body, working some short punches and elbows.
The Bone Breaker takes a big intake of breath there - he's definitely tired.
Quaid got a little sloppy there for a moment and The Bone Breaker has worked his way into a loose triangle - can he finish it?! No, Quaid has managed to get both his arms back between The Bone Breaker's legs - danger averted.
Quaid scores with a decent looking elbow strike.
The Bone Breaker can't do much from the bottom at the moment, as Quaid controls the pace.
That's one minute gone in the round.
Quaid wants to control from the top but The Bone Breaker keeps moving.
Quaid is pushing down on The Bone Breaker's leg trying to pass to half guard. The Bone Breaker is fighting to maintain full guard but Quaid has managed to sneak the leg through.
The Bone Breaker looking to work for a kimura from the bottom.
Quaid wants to lay and pray for a moment but The Bone Breaker keeps working.
Quaid working the head and body with strikes.
Quaid with a momentary lay and pray from half guard.
Quaid slips a nice elbow through The Bone Breaker's hands, connecting with The Bone Breaker's forehead.
Quaid is working for submissions here but there's nothing on.
Quaid trying to pass the guard but The Bone Breaker defending well.
Quaid landing with strikes to the body and head, softening up his opponent.
That's two minutes gone in the round.
The Bone Breaker actively working from the bottom here.
Quaid works his foot free and advances to mount.
We've seen a great period of action over the last minute or so - credit to both fighters for going all out!
Quaid working The Bone Breaker over with strikes here.
Quaid loads up with a big shot that hurts The Bone Breaker! He's pulled Quaid in close but Quaid has postured up and lands more strikes. Can The Bone Breaker survive? More strikes from Quaid and The Bone Breaker is out! The ref jumps in to save him! Brutal ground and pound!
Ladies and gentlemen, after 2:42 of round 3, we have a winner by way of KO (Strikes). Douglas Quaid!
Douglas Quaid made sure to mention his sponsor, Untouchable Fight Nutrition in his post fight interview.
|
|
|
|
|
|
|
|
|
|
|
|
|
|
|
|
|
|
|
|
|
|
|
| S |
C
A |
G |
S |
C
B |
G |
|
S |
C |
G |
|
energy
A | B |
|
hype
A | B |
|
pop
A | B |
|
mgr
A | B |
|
FIGHT
RATING
100% |
|
|
|
|
|
|
