|
|
PBP Commentary |
Coming up we have a bantamweight MMA rules bout between John Simons III (ranked 0 p4p, 0 weight class) and Yonsil Clanger (ranked 0 p4p, 0 weight class). Clanger has chosen Youth Blood as his entrance music, which hasn't gone down very well with the crowd. This should be fireworks!
 |
|
 |
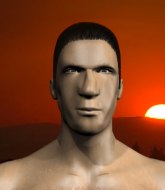
| 172 cm
36
143 lbs
33 - 20 - 2 |
|
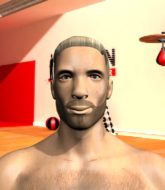
160 cm
31
141 lbs
23 - 11 - 0 |
Abu Dhabi Champ
World class boxer
Insanely flexible |
|
ADCC Champion
World class boxer
Good gas tank |
|
| |
|
Ladies and gentlemen. This fight is 5 rounds, in the bantamweight division.
Introducing the fighter to my left, fighting out of the red corner.
With a record of
33 - 20 - 2, fighting out of Rio de Janeiro, John Simons III!
And introducing the fighter to my right, fighting out of the blue corner.
With a record of
23 - 11 - 0, fighting out of Rio de Janeiro, Yonsil Clanger!
The judges for this bout are Alexandre Firmino, Mauricio Rocha and Daniel Cesar.

The bell rings for round one and we are underway!
Clanger changes levels and scores with a jab to the body.
Simons III checks the leg kick.
Simons III takes a shot to the body in his stride.
Clanger misses with the combination.
Clanger with a body punch. A glancing blow.
Clanger throws a low kick but Simons III moves out of range easily.
Simons III misses with a takedown

and Clanger counters into the clinch. Nicely done.
Good anti-grappling being displayed by Simons III as Clanger tries to tie him up.
Clanger swings away with an uppercut that misses.
Clanger throws a punch but it's blocked by Simons III.
Clanger tries to land a knee to the head but Simons III blocks with his arms.
Simons III is looking for a takedown.
Clanger lands with a short punch from the clinch.
Clanger has a couple of punches blocked by Simons III.

That's one minute gone in the round.
Clanger misses with a hook to the ribs.
Both guys are working to get underhooks.
Simons III goes for a takedown in the clinch but Clanger prevents it.
That's three failed takedown attempts in the round for John Simons III. That's going to take a lot out of him.
Simons III struggles to land a body shot inside as Clanger controls his hands.
A head punch blocked on the inside by Simons III.
Clanger working aggressively here.
Clanger lands punches inside but they're not really causing much damage.
Clanger lands a nice uppercut.
Clanger misses with a knee strike.
Clanger makes some space for himself and lands an uppercut.
Clanger is trying to maintain a safe position but Simons III gets an underhook and turns Clanger into the cage.
Clanger lands on the inside with an uppercut.
Clanger makes some space for himself and lands an uppercut.
Clanger fails to land with a short punch on the inside.
Clanger is pushing Simons III up against the cage, for a bit of lean and pray action. Action being used the in the loosest possible sense of the word.
Clanger looks to throw an elbow but misses.

That's two minutes gone in the round.
Simons III blocks a knee to the body. He'll have a nicely bruised forearm in the morning.
Clanger has a couple of punches blocked by Simons III.

Simons III wants the takedown. Clanger is fighting it off but Simons III persists and manages to bring the fight to the ground, ending up in Clanger's guard against the cage.
Simons III stands up and looks to throw the legs aside to pass to side control. Clanger swivels though and keeps the full guard.
This is a great period of action - very entertaining stuff!
Clanger is pulling down on Simons III's head to control his posture.
Clanger keeping moving, preventing Simons III from controlling successfully.

Simons III drops back looking for a leg! Clanger is in trouble here! The fighters roll with the hold and Clanger manages to kick Simons III off! Simons III jumps back into Clanger's guard.
Simons III throwing strikes from guard but Clanger blocks nicely.
Simons III slips nicely into half guard.
Simons III is working for submissions here but there's nothing on.

That's three minutes gone in the round.
Clanger trying to get back to full guard but Simons III takes advantage of the position and moves to full mount!
Clanger wants to control but Simons III is having none of it.
Simons III jumps to the side looking to secure the arm triangle
. Ooooh, that looks tight
Clanger is gargling but he's managed to escape! Nice work there by Clanger and Simons III has given up the dominant position trying to land that submission.
Clanger is positioning himself to get back to half guard.
Simons III tries to cartwheel into mount but he doesn't manage it.
The ref warns both fighters not to hold the cage as they work up against the meshing.
Simons III is looking for a kimura. He might have it! No, Clanger has escaped the position, nice work there.

That's four minutes gone in the round.
Clanger is moving his hips around well on the bottom and has managed to get back to half guard.
Simons III is looking for a kimura. It's going to be difficult to finish that from half guard though and Clanger defends it well.
Clanger gets full guard.
Clanger is doing well to control the posture of his opponent and prevent any damage.
Clanger keeping moving, preventing Simons III from controlling successfully.
Simons III advances to half guard.
As the round comes to an end the crowd are showing their appreciation for a great round of action.
Clanger has no desire to be mounted, so is trying to control. Simons III is working away from the top position though.
The fighters are pressed up against the cage, both looking to find a bit of space to work.
We've seen a great period of action over the last minute or so - credit to both fighters for going all out!
Clanger is concentrating on defense, preventing Simons III from advancing position.
And thats the end of the round the fighters go back to their corners.
Yonsil Clanger dominated that round.
That's the end of the round. The referee orders the cornermen out of the cage so we can get back down to business.

Clanger is looking to slow Simons III down with leg kicks.
Clanger lands a straight punch to the body, keeping Simons III at a distance.
Clanger tries to land with a swinging hook to the body but Simons III was well out of range. Poor timing from Clanger.
Clanger throws a half hearted mid kick.
Clanger pivots, looking for a leg kick but Simons III is out of range and Clanger settles back down.
Clanger misses the shot to the body.
Clanger throws a quick inside leg kick.
Yonsil Clanger seems to be the more aggressive standup fighter in this bout.
Clanger throws a body punch but Simons III moves out of range.
An inside leg kick from Clanger misses.
Clanger leaves Simons III with his face pressed against the mat as he sprawls beautifully, defending against a solid takedown attempt.
Clanger swings for the body but Simons III moves out of range.
Clanger lands with a thumping leg kick.
That's one minute gone in the round.
Clanger throws a body kick but he was well out of range there.
Yonsil Clanger is looking to keep the fight on the feet at all costs.
Simons III gets cracked with a nice right hand there by Clanger.
Simons III has his takedown stuffed
and Clanger counters with an inside leg kick.
Simons III takes a push kick to the midsection and stumbles backwards.
Clanger throws a quick inside leg kick.

Simons III gets to the clinch - let's see what his plan is here.
Simons III tries to land knees in the clinch but Clanger avoids the damage to the body.
Clanger leaning his opponent against the cage.
Simons III blocks a punch to the side of the head.
Simons III pulls guard effortlessly.
Simons III keeping full guard, as Clanger tries to pass.
That's two minutes gone in the round.
Simons III is working from a closed guard but he's struggling to control his opponent.
Simons III had isolated an arm as going for a kimura. Clanger defends it easily.
John Simons III overall seems to be getting the better of the ground position in the fight so far.
Clanger trying to control but Simons III is working from the bottom.
Simons III looks to be working for a triangle here. Oh, it looks like he might have it! Clanger has picked Simons III up and slammed him! Simons III can't keep hold of the triangle and Clanger manages to pass to side control!
Wooooo! Give it up for these two warriors! They are putting on a show!
Clanger trying to control the position but Simons III is working away.
Clanger takes a little break here. Simons III wants to take advantage but he is being controlled well.
Simons III is not content to let Clanger control the position.

Clanger is looking for a kimura. He might have it! No, Simons III has escaped the position, nice work there.
That's three minutes gone in the round.
Simons III is trying to improve his position.
Clanger is trying to land an Americana. He has the arm isolated but Simons III is keeping cool and he's avoided the danger for now.
Simons III manages to land a sweep and he's now on top! Lovely Jiu Jitsu!
Clanger is trying to get back to full guard.
Clanger wants to control but Simons III is keeping busy and won't allow it.
That's four minutes gone in the round.
Simons III wants to work for an arm triangle but Clanger is really keeping half guard well and defending the submission attempt.
Clanger trying to hold on to Simons III's head to control him but Simons III postures up.
Simons III trying to control the action but Clanger is working from the bottom.
The fighters are battling for position here. Clanger manages to regain full guard. Nice work.
Clanger looking to sweep here. No luck so far.
Simons III tries to free his leg and advance position but Clanger is retaining full guard.
The crowd applaud the fighters efforts here as the round comes to an end.
Simons III works a leg free and moves into half guard.
Simons III prevents Clanger from improving his position.
The fans in attendance giving it up for the two fighters, who have really let it all hang out in the last minute or so!
Simons III looking for a kimura but he'll have to free his other leg if he wants to finish that. Perhaps he's just using it as a distraction technique.
And thats the end of the round the fighters go back to their corners.
Yonsil Clanger showed his class in that round. I'd imagine he'll take it on all the scorecards.
The fighters' corners scream their final instructions, as the referee calls time. Here we go, back to the action!

Simons III tries to land a body kick
and Clanger counters with a low kick, right behind Simons III 's knee.
Simons III throws a leg kick but Clanger sees it coming and moves out of range.
An inside leg kick lands from Clanger.
Clanger chopping away at his opponent's legs.
Clanger misses with a few strikes there.
Simons III on the wrong end of a nice low kick. He's acting like it's no big deal but he doesn't want to take many more of those.
John Simons III is looking to throw some combinations by the looks of things.
Good leg kick by Clanger there. It's the ones that make that thud noise that hurt and that was an almighty thud.
Simons III fails with a takedown attempt.
Clanger is looking to score with low kicks.
Simons III will have to do better than that with his takedown attempts.
That's one minute gone in the round.
Simons III tries a switch kick but it misses it's target.
Clanger lands a leg kick. The shin dug right into the meat of the thigh.
Simons III is hobbling a little on that front leg after taking quite a few leg kicks so far in this fight.
Clanger throws a jab to the body, straight down the pipe. Boom. That sent Simons III stumbling backwards but he manages to regain his composure quickly.
A nice inside leg kick there by Clanger. That's going to slow Simons III down.
Simons III chopped to the floor by a nice leg kick but he springs right back up before Clanger can pounce on him.
Clanger misses with a lunging right hand
and Simons III counters with a series of strikes. Clanger will be more careful next time no doubt.
Clanger throws a nice outside leg kick.
Simons III fails with a takedown attempt from distance.
That's three failed takedown attempts in the round for John Simons III. That's going to take a lot out of him.
Simons III with a poor takedown
and Clanger counters with a low kick, right behind Simons III 's knee.
Both fighters are breathing heavily.
Simons III takes a thudding leg kick, right into the meat of the thigh.
Clanger connects with a leg kick. He turned his hip over nicely there.
Clanger lands with a nice body kick.
That's two minutes gone in the round.
Simons III pulls out of a head kick attempt.
Yonsil Clanger seems to be getting the better of the standup.
Clanger lands an overhand right.
The crowd are loving this. Great action here.
Clanger looking to take his opponent's legs away with the low kicks.
Clanger just misses with a punch to the body.
Good standup being displayed there by Clanger as he connects with a hook.
Clanger throws a leg kick which misses Simons III's front leg but catches the back leg as Simons III tries to avoid it.
Clanger slaps away a takedown attempt from Simons III, before circling back to the center of the mat.
Good leg kick by Clanger there. It's the ones that make that thud noise that hurt and that was an almighty thud.
Simons III misses with a takedown attempt

and Clanger counters with a takedown into side control! That could mean trouble for Simons III!
Clanger moving around in side mount but really he's just happy to control for now.
Clanger is looking to take a break and control but Simons III is keeping him honest, looking to work from the bottom.
That's three minutes gone in the round.
Simons III tries to get back to half guard but can't.
Simons III is moving his hips around well on the bottom and has managed to get back to half guard.
Simons III gets back to full guard.
Simons III wants to sweep here but Clanger controlling him for the moment.
Simons III keeping moving, preventing Clanger from controlling successfully.
Simons III escapes his hips to the side and looks to be working for an armbar. Clanger gives him a little smile and shakes his head. No chance.
That's four minutes gone in the round.
Simons III wants to improve his position but instead Clanger has moved into half guard.
Clanger controlling the action here.
Clanger wants to take a breather but Simons III is having none of it.
As the round comes to an end the crowd are showing their appreciation for a great round of action.

The ref stands the fighters back up, due to lack of action by Yonsil Clanger.
Simons III closes the distance and gets a trip takedown into side control. Clanger quickly recovers to half guard.
And thats the end of the round the fighters go back to their corners.
Yonsil Clanger really dominated that round.
The corners get their ten second warning. Both fighters stand from their stools and stare eachother down, ready to get back to the action.

Clanger is looking to slow Simons III down with leg kicks.
Simons III takes a jab right on the nose. That must have hurt but he shrugs his shoulders and looks to return the favor.
Clanger tries to land with a swinging hook to the body but Simons III was well out of range. Poor timing from Clanger.
Simons III checks a low kick from Clanger.
Clanger lands with a shot to the body.
Clanger throws a jab to the body, straight down the pipe. Boom. That sent Simons III stumbling backwards but he manages to regain his composure quickly.
Simons III swings for the body but Clanger moves out of range.
Clanger tries a low kick but Simons III avoids it.
Simons III misses with a low kick as Clanger jumps back.
Clanger misses with a wild body shot.
Simons III with a lazy takedown attempt
and Clanger counters with a nice body kick.
Clanger lands with a nice low kick. That'll leave a bruise.
That's one minute gone in the round.
Clanger lands a really nice looking cross but Simons III seems unphased.
Simons III misses with a jab to the body
and Clanger holds on and brings the fighters into a clinch.
Simons III misses with some punches.
Simons III's head jolts backwards as he takes an uppercut right on the button!
A real battle for position is taking place between these two warriors.
Simons III blocks a punch to the side of the head.
Simons III is looking for a takedown up against the cage. Clanger gets underhooks though and prevents the takedown attempt.
Clanger lands a nice uppercut.
Clanger dictating the pace here, as the fighters clinch against the cage.
Simons III wants a takedown.
That's three failed takedown attempts in the round for John Simons III. That's going to take a lot out of him.
Clanger lands a left hand that snaps the head of Simons III backwards.
Simons III tries to throw a body punch but Clanger avoids it by throwing Simons III back against the cage.
Clanger scores with a shoulder strike.
Clanger tries for a takedown. No joy.
Clanger lands a nice uppercut.
That's two minutes gone in the round.
Simons III drops to a knee looking for a takedown but Clanger gets the underhooks and prevents it.
Simons III tries to jump guard but he falls flat on his backside. Clanger smiles and moves away.
It's got to the stage where if one of these guys blows hard enough, the other might fall over.
A good leg kick by Clanger.
Clanger comes forward and lands a shot to the body, then darts back out of range.
This is a great period of action - very entertaining stuff!
Clanger misses with a wild body shot.
Clanger cracks a nice hook into Simons III's ribs.
Simons III tries to clinch but is not successful on this occasion.
Simons III slips a straight right by Clanger.
That's three minutes gone in the round.
An inside leg kick lands from Clanger.
Simons III fails with a takedown attempt from distance.
Clanger fakes a head punch and goes low to the body. Nicely done.
Clanger looking to take his opponent's legs away with the low kicks.
Nice defenses there by Clanger.
Clanger is throwing a lot of body shots here, looking to wear down Simons III rather than just go for the knockout.
Good leg kick by Clanger there. It's the ones that make that thud noise that hurt and that was an almighty thud.
Clanger jabs at Simons III's body.
Simons III avoids the body shot from Clanger.
A good leg kick by Clanger.
Clanger looking to take his opponent's legs away with the low kicks.
Clanger with a nice looking leg kick. You could hear that one land in a back row.
That's four minutes gone in the round.
Clanger throws a leg kick which misses Simons III's front leg but catches the back leg as Simons III tries to avoid it.
Clanger tries a head kick but it misses.
Simons III fails to land with a series of punches.
Clanger takes a swing at Simons III's ribcage but misses.
Clanger swings and misses with a hook to the body.
Clanger throws a shot to the body.
Clanger comes forward and lands a shot to the body, then darts back out of range.
This is a great period of action - very entertaining stuff!
Simons III gets his takedown attempt stuffed easily
and Clanger counters with a takedown into side control! That could mean trouble for Simons III!
As the round comes to an end the crowd are showing their appreciation for a great round of action.
Simons III is looking to slip a leg under and get half guard but Clanger is one step ahead and moves to full mount!
Clanger takes a little breather and maintains the position. The referee will be looking for him to stay active from such a dominant position though.
Simons III is trying to escape the mount.
And thats the end of the round the fighters go back to their corners.
Yonsil Clanger dominated that fourth round.
Well, the break between rounds is over. Let's get back to the scrappin! This is the final round!

Clanger scores with a leg kick.
Clanger throws a nice outside leg kick.
Clanger slaps away a takedown attempt from Simons III, before circling back to the center of the mat.
Clanger chopping away at his opponent's legs.
A chopping leg kick lands by Clanger.
Clanger lands with a nice low kick. That'll leave a bruise.
Simons III moves away from the strike by Clanger.
Clanger tries to land with a swinging hook to the body but Simons III was well out of range. Poor timing from Clanger.
Simons III shoots in for a double leg but Clanger sprawls well. That's going to sap some energy.
Clanger lands a leg kick that knocks Simons III off balance momentarily.
That's one minute gone in the round.
Simons III throws a low kick but Clanger avoids it.
Clanger connects with a slap. Keep your fist closed son.
Simons III with a poor takedown
and Clanger counters with a nice single leg takedown and he's in Simons III's guard now.
That's three failed takedown attempts in the round for John Simons III. That's going to take a lot out of him.
Both of our modern day gladiators look out of it here - an gruelling 5 rounds of action taking it's toll on them, no doubt.
Simons III bucks up whilst keeping hold of a body lock, managing to reverse the position. Now he's in top in Clanger's guard.
Clanger not looking particularly offensive just at the moment.
Simons III looking to pass the guard.
Simons III stopping the sweep attempt from Clanger.
Simons III postures up as if he's going to throw some strikes but drops back for an ankle! Clanger is in big trouble! He looks ready to tap! But no, he's escaped and dives on top of Simons III, into his guard.
Clanger's corner is telling him to maintain position.
That's two minutes gone in the round.
The crowd are loving this. Great action here.
Simons III is working the butterfly guard. He manages to land a nice scissor sweep and is now in half guard on the top. Nice move.
Clanger manages to get to full guard.
Clanger is trying to hold Simons III in close to prevent damage but Simons III has managed to pass into half guard.
Clanger desperately trying to maintain half guard.
Clanger is in trouble now - Simons III has advanced to mount!
That's three minutes gone in the round.
Clanger is desperately trying to improve his position but Simons III has a good base and remains in mount.
Simons III is working for a guillotine from mount but Clanger frees his head quite easily.
Simons III has hold of Clanger's left arm, perhaps looking for a submission. The two fighters tussle over control of the isolated limb and Clanger manages to get his arm back to his side and away from danger.
Poor strikes thrown by Simons III there. More accuracy and less frantic strikes would help!
John Simons III has stepped it up - he knows he needs a finish here!
Clanger is trying to escape the mount.
That's four minutes gone in the round.
Simons III throwing sloppy strikes, which aren't doing any damage.
Simons III punching from mount but Clanger doing a good job of avoiding damage.
Clanger tries to get back to half guard but can't.
Clanger tries to hold on but Simons III pushes him away.
Simons III is thinking about an arm triangle here, looking to tighten it up before moving to side control. Clanger can see it coming though and defends well with a couple of strikes to the head and some good arm positioning.
Simons III quickly switches position and commits to an armbar! It's a big risk for Simons III but it's paid off an Clanger is forced to tap! Nice work by Simons III.
Ladies and gentlemen, after 4:51 of round 5, we have a winner by way of Submission (Armbar). John Simons III!
Our winner, John Simons III, made sure he spent some time buttering up the crowd during his post fight interview, which will no doubt bring him a few more fans.
|
|
|
|
|
|
|
|
|
|
|
|
|
|
|
|
|
|
|
|
|
|
|
| S |
C
A |
G |
S |
C
B |
G |
|
S |
C |
G |
|
energy
A | B |
|
hype
A | B |
|
pop
A | B |
|
mgr
A | B |
|
FIGHT
RATING
100% |
|
|
|
|
|
|

