|
|
PBP Commentary |
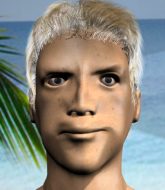
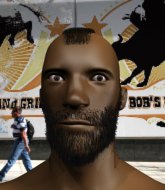
Coming up we have a welterweight MMA rules bout between Phoenix Miyamoto (ranked 0 p4p, 0 weight class) and Haryy Houdini (ranked 0 p4p, 0 weight class). These two fighters really are very evenly matched on the feet - it will be fascinating to see who can assert themselves in that aspect of the fight.
 |
|
 |
| 180 cm
31
185 lbs
10 - 11 - 0 |
|
179 cm
26
179 lbs
7 - 3 - 0 |
Good wrestling
Excellent MT
Cardio machine |
|
Good wrestler
Decent boxing
Powerful |
|
| |
|
Ladies and gentlemen. This fight is 3 rounds, in the welterweight division.
Introducing the fighter to my left, fighting out of the red corner.
With a record of
10 - 11 - 0, fighting out of Tokyo, Phoenix Miyamoto!
And introducing the fighter to my right, fighting out of the blue corner.
With a record of
7 - 3 - 0, fighting out of Tokyo, Haryy Houdini!
The judges for this bout are Shirou Masuda, Hirohito Nitta and Yasuomi Hirokawa.

The bell rings for round one and we are underway!
Miyamoto throws a combination that misses

and Houdini counters with a nice double leg into guard.
Houdini cracks Miyamoto with a solid left hand.
A big thud reverberates around the arena there as Houdini accidentally thumps the mat. Hopefully he's not broken his hand.
Miyamoto knows he needs to get back to his feet asap. He's simply no match for Houdini on the ground.
Miyamoto is looking to stand up but Houdini isn't so interested in that idea.
Houdini postures up.
Both fighters really going for it on the ground here!
Miyamoto utilising some decent striking defenses from the guard, preventing the ground and pound.
Houdini with a nice head shot there.
Wooooo! Give it up for these two warriors! They are putting on a show!
Houdini is working the ground and pound from guard. He might want to try advancing position though to get more of an impact.

Houdini drops back looking for a leg! Miyamoto is in trouble here! The fighters roll with the hold and Miyamoto manages to kick Houdini off! Houdini jumps back into Miyamoto's guard.
Houdini makes a bit of distance and scores with some ground and pound, still in guard.
Miyamoto manages to land a sweep and now he's in mount on top!
Miyamoto avoids the attempt from Houdini to control.

That's one minute gone in the round.
Miyamoto working some short elbows here. He postures up to throw some more ground and pound but Houdini slips a leg through to get back to half guard. Nice work.
Miyamoto wants to stand up but Houdini is controlling the position.

Miyamoto postures up and decides to stand up, from the half guard. The ref calls for Houdini to stand up.

Miyamoto drives through and clinches with Houdini against the cage.
Miyamoto missing with knees to the body.
Houdini misses with a shot to the kidneys.
Houdini jumps into guard, dragging Miyamoto to the mat.
Miyamoto throws a big right hand that misses.
Miyamoto trying to pass the guard but can't manage it just yet.
Miyamoto has decided he wants to stand but the closed guard of Houdini is proving hard to escape from.

That's two minutes gone in the round.
Houdini is doing well to control the posture of his opponent and prevent any damage.
Miyamoto wants to pass the guard but Houdini is keeping the position.
Miyamoto postures up to throw the ground and pound strikes but they don't connect.
Houdini looking for a guillotine here but Miyamoto defends easily.
We've seen a great period of action over the last minute or so - credit to both fighters for going all out!
The fighters are starting to perspire pretty heavily.
Miyamoto throws a big right hand that misses.
Houdini is trying to keep Miyamoto in close.

That's three minutes gone in the round.
Houdini working the defensive guard well to avoid strikes from Miyamoto.
Miyamoto stands up from guard. Let's bang!
Miyamoto cracks Houdini with a good shot that sees him stumbling back into the cage.
Miyamoto darts in and clinches Houdini up against the cage.
Houdini lands a nice shot to the body.
Both fighters working to control the clinch.
Houdini tried to land a shot to the body but connects with Miyamoto's elbow.
Houdini tried to land a shot to the body but connects with Miyamoto's elbow.
Miyamoto tries to land knees in the clinch but Houdini avoids the damage to the body.
Miyamoto misses the knee to the body. Nice hip positioning from Houdini.
Houdini tries to pull guard but Miyamoto forces him back to his feet, against the cage.
Miyamoto taking a breather.
Miyamoto trying to land knees to the body.
Houdini blocks a knee to the body. He'll have a nicely bruised forearm in the morning.
Houdini lands a body punch - he's looking to wear down Miyamoto.
Wooooo! Give it up for these two warriors! They are putting on a show!
Houdini is working on a single leg takedown against the cage. Miyamoto can't fight it off and eventually Houdini manages to take the fight to the floor. Miyamoto looks annoyed but at least he's managed to land in guard.
Miyamoto wants to get back to his feet but Houdini is in a dominant position and won't allow it.

That's four minutes gone in the round.
Houdini lands a couple of decent looking shots.

Houdini decides he's had enough of playing guard and decides to stand. Come on Miyamoto, up you get!
Phoenix Miyamoto seems to be the more aggressive standup fighter in this bout.
Miyamoto falls off balance throwing a combination

and Houdini counters by moving into the clinch.
Houdini tries to pull guard but Miyamoto holds him up against the cage and eventually Houdini drops back down to his feet.
Houdini tries to land a shot to the body but it's blocked.
Miyamoto misses the knee to the body. Nice hip positioning from Houdini.
Houdini pulls guard successfully.
The ref warns both fighters not to hold the cage as they work up against the meshing.
Miyamoto with a flurry of punches that miss.
The crowd are going absolutely nuts as the round comes to an end - what a fantastic round of action!
Houdini controlling Miyamoto's posture.
Houdini is trying to keep Miyamoto in close.
And thats the end of the round the fighters go back to their corners.
Haryy Houdini dominated that round.
The corners get their ten second warning. Both fighters stand from their stools and stare eachother down, ready to get back to the action.

Houdini shoots in for a takedown - he's clinched up with Miyamoto but Miyamoto pushes him off and we're back to square one.
Miyamoto lands a jab followed by a nice looking cross.
Houdini shoots for a double leg takedown but Miyamoto sprawls well. He's pushed Houdini's face into the mat and manages to get back to his feet relatively easily.
Miyamoto misses the shot to the body.
Miyamoto moves into range and clinches up with Houdini.
Miyamoto lands an elbow inside.
Houdini is trying to pull guard but Miyamoto turns him against the cage and we stay in the clinch.
Phoenix Miyamoto has stuffed three takedown attempts in the round now. That's going to take a lot out of Haryy Houdini.
Houdini tries to take the fight to the ground by pulling guard but can't manage it.
Houdini wants a takedown but no success here.
A quick uppercut on the inside from Houdini.
Miyamoto cracks Houdini with a nice body shot.
Houdini is breathing heavily.
The crowd are loving this. Great action here.
Both fighters working to control the clinch.
Miyamoto is looking to score with knees to the body. Maybe he'll change it up and go body then head. Houdini is defending well for now.
A right hook to the body lands for Miyamoto.
A body shot lands from Miyamoto.
That's one minute gone in the round.
Miyamoto gets an overhook and lands an elbow to the side of the head.
Miyamoto lands a glancing elbow in the clinch.
Houdini is working on a leg, looking for a takedown but Miyamoto is defending well.
Miyamoto missing with knees to the body.
Houdini takes an elbow to the forehead.

It looks like Haryy Houdini has been cut.
Miyamoto tries to land a knee to the body but he is off balance and Houdini avoids it.
Houdini tries to pull guard but Miyamoto forces him back to his feet, against the cage.
Miyamoto prevents a body shot from Houdini.
Houdini is trying to pull guard but being pressed up against the cage enables Miyamoto to keep the fight standing.
Miyamoto lands a nice shot to the body.
A short body shot lands from Miyamoto as the two fighters clinch.
Miyamoto gets an overhook and lands an elbow to the side of the head.
Phoenix Miyamoto has scored more points in the clinch so far.
A left hand lands to the body for Miyamoto.
Miyamoto gets an overhook and lands an elbow to the side of the head.
Wooooo! Give it up for these two warriors! They are putting on a show!
Miyamoto scores with an uppercut up the middle.
Houdini takes a shot to the head.
Houdini managing to block the knees to the body from Miyamoto.
Miyamoto trying to control the position but instead, Houdini has worked for underhooks and has pushed Miyamoto into the cage.
Miyamoto gets through Houdini's defenses to land a nice punch to the side of the head.
That's two minutes gone in the round.
A body shot lands from Miyamoto.
Miyamoto lands a nice elbow from the clinch.
Miyamoto lands a damaging elbow.
Houdini drags the fight down to the ground.
Houdini being controlled here, momentarily.
Houdini working the defensive guard well to avoid strikes from Miyamoto.
Miyamoto is looking to work some ground and pound but Houdini has wrist control.
Miyamoto would like to get this fight back to the feet but can't get free from the closed guard.
Houdini wants to stand and escape but Miyamoto is having none of it.
That's three minutes gone in the round.
Miyamoto postures up in Houdini's guard and throws a big left but Houdini blocks it.
Miyamoto working some ground and pound from guard but it's not doing any damage.
Miyamoto in full guard, throwing the ground and pound. No damage this time.
Miyamoto is looking to stand up but Houdini won't let him.
Miyamoto throws a big elbow that misses.
Miyamoto wanted to stand there but Houdini had control of the position.
Miyamoto has to be careful here, sitting in the guard of a superior BJJ player.
That's four minutes gone in the round.
Houdini uses the cage to get back to his feet.
Miyamoto forces Houdini back against the cage and clinches.
Miyamoto is stalling here. The referee will be looking to step in if he doesn't pick up the pace.
Houdini goes for a takedown in the clinch but Miyamoto prevents it.
Good body shot from Houdini.
Houdini tries to throw a body punch but Miyamoto avoids it by throwing Houdini back against the cage.
Miyamoto lands a body punch in the clinch.
The crowd cheering loudly, showing their appreciation for the quality fight we're seeing here.
The crowd are going absolutely nuts as the round comes to an end - what a fantastic round of action!
Miyamoto trying to stall but Houdini improves his position.
Houdini misses with a body punch.
Miyamoto throws a blind hook that connects with the side of Houdinis head.
Miyamoto lands a nice elbow from the clinch.
And thats the end of the round the fighters go back to their corners.
Phoenix Miyamoto dominated that second round.
The cut man is working on Haryy Houdini's cut.
That's the end of the interval. I'm sure that seemed a lot quicker than a minute for our two fighters! Back to the action. This is the final round!

Miyamoto listening to his corner there, landing a nice uppercut.
Miyamoto throws a jab, cross combination which is slipped
and Houdini counters with a nice double leg into side control. Miyamoto won't be happy with that.
Miyamoto wants to control but Houdini postures up.
Houdini looking for an arm triangle but it's way too loose to do anything.
Houdini thinks about going for a far side armbar but bails out and retains the dominant position instead.
Miyamoto gets back to half guard.
The crowd cheering loudly, showing their appreciation for the quality fight we're seeing here.
Houdini throwing shots but they're hitting the canvas more than the man.
Houdini prevents Miyamoto from standing back up.
Houdini is thinking about going for an arm triangle but he can't free his leg.
Miyamoto is controlling Houdini's position as best he can from this difficult position.
That's one minute gone in the round.
Houdini stops Miyamoto from getting back to his feet.
Miyamoto has one foot on Houdini's thigh - he pushes off and manages to get back to his feet.
Both fighters are breathing heavily.
Houdini moves into range and throws a combination. A nice jab followed by a hook to the body.
Miyamoto misses with a body shot. Nice footwork from Houdini.
Miyamoto moves into range and clinches up with Houdini.
Miyamoto has a couple of punches blocked by Houdini.
Miyamoto lands with a right to the head.
Miyamoto looks to throw an elbow but misses.
Miyamoto tries to work over Houdini's body with a swooping hook but it only glances the target.
Houdini blocks a body shot from Miyamoto.
Miyamoto lands a nice uppercut.
Houdini tried to land a shot to the body but connects with Miyamoto's elbow.
Houdini tried to land a shot to the body but connects with Miyamoto's elbow.
Houdini jumps guard but Miyamoto stands there with Houdini around his waist. Houdini gives up and drops back to his feet. We remain in the clinch.
That's two minutes gone in the round.
This is a great period of action - very entertaining stuff!
Houdini is trying to pull guard but Miyamoto has him pressed against the cage.
Miyamoto can't find room to land a body shot as Houdini controls the action.
Miyamoto tries to land a knee to the body but he is off balance and Houdini avoids it.
Houdini wants to take the fight to the mat but Miyamoto manages to get underhooks and keep the fight in the clinch.
Phoenix Miyamoto has stuffed three takedown attempts in the round now. That's going to take a lot out of Haryy Houdini.
Houdini has had enough of the clinch but Miyamoto keeps him there for the moment.
Miyamoto misses with a shot to the kidneys.
Miyamoto trying to land knees to the body.
Miyamoto works for underhooks and lands a body shot in the process.
Miyamoto lands a body shot in the clinch.
Miyamoto lands a shoulder strike that jolts his opponent's head backwards.
Houdini is trying to work out of this bad position, with his back against the cage.
Houdini is trying to pull guard but Miyamoto has him pressed against the cage.
Miyamoto lands a right uppercut that snaps the head of Houdini backwards.
Houdini tries to pull guard but can't drag his opponent to the mat. Miyamoto just stands there and leans against the cage.
Miyamoto lands an elbow inside.
Miyamoto lands a right hand that snaps the head of Houdini backwards.
Miyamoto is working hard here but doesn't seem to be able to control effectively, up against the cage.
That's three minutes gone in the round.
Houdini blocks a knee to the body. He'll have a nicely bruised forearm in the morning.
Miyamoto looking to slow down the pace here.
Miyamoto lands a body punch - he's looking to wear down Houdini.
Miyamoto lands a nice elbow from the clinch.
Miyamoto gets through Houdini's defenses to land a nice punch to the side of the head.
Houdini blocks a knee to the body. He'll have a nicely bruised forearm in the morning.
A battle for position here, against the cage.
Houdini lands a shot to the body.
Miyamoto tries to land a knee to the body but he is off balance and Houdini avoids it.
A quick uppercut on the inside from Miyamoto.
Houdini tries a body shot but Miyamoto blocks it.
Miyamoto misses the knee to the body. Nice hip positioning from Houdini.
Miyamoto tries to land a knee to the body but he is off balance and Houdini avoids it.
Houdini fails to pull guard.
Miyamoto prevents a body shot from Houdini.
Miyamoto controlling the action here for a moment.
That's four minutes gone in the round.
The crowd are loving this. Great action here.
Houdini wants a takedown but no success here.
Miyamoto goes for a body shot but it's blocked.
Miyamoto is working hard here but doesn't seem to be able to control effectively, up against the cage.
A short body shot lands from Miyamoto as the two fighters clinch.
Miyamoto is trying to maintain a safe position but Houdini gets an underhook and turns Miyamoto into the cage.
Miyamoto creates a bit of space for himself and sneaks an elbow through Houdini's defenses.
Miyamoto goes for a body shot but it's blocked.
Miyamoto lands a body shot in the clinch.
Miyamoto lands a hook that snaps the head of Houdini backwards.
Miyamoto stalling here - the referee won't stand for too much of that.
The crowd are going absolutely nuts as the round comes to an end - what a fantastic round of action!
Houdini is looking to break free of the clinch but Miyamoto has double underhooks.
Miyamoto lands a short shot on the inside that snaps the head of Houdini backwards.
Haryy Houdini has stepped it up - he knows he needs a finish here!
Houdini tries to work over Miyamoto's body with a swooping hook but it only glances the target.
Miyamoto creates a bit of space for himself and sneaks an elbow through Houdini's defenses.
And that's the end of the fight!
Phoenix Miyamoto showed his dominance in that final round.
I think Miyamoto has won this one but let's see what the judges have to say. Over to the ring announcer for the scorecards.
Ladies and gentlemen, after 3 rounds of action, we go to the scorecards for a decision.
Judge Shirou Masuda scores the fight for Phoenix Miyamoto!
Judge Hirohito Nitta scores the fight for Phoenix Miyamoto!
Judge Yasuomi Hirokawa scores the fight for Phoenix Miyamoto!
Phoenix Miyamoto wins by unanimous decision!
A relieved looking Phoenix Miyamoto thanked the fans for their support and gave the usual line about them being amazing. They seemed to believe that he actually meant it.
|
|
|
|
|
|
|
|
|
|
|
|
|
|
|
|
|
|
|
|
|
|
|
| S |
C
A |
G |
S |
C
B |
G |
|
S |
C |
G |
|
energy
A | B |
|
hype
A | B |
|
pop
A | B |
|
mgr
A | B |
|
FIGHT
RATING
97% |
|
|
|
|
|
|
