|
|
PBP Commentary |
Coming up we have a bantamweight MMA rules bout between Josiah Bartlet (ranked 0 p4p, 0 weight class) and Peelay Shelding (ranked 0 p4p, 0 weight class). Both fighters look fresh as a daisy as they make their way towards the cage.
 |
|
 |
| 170 cm
19
145 lbs
1 - 1 - 0 |
|
170 cm
25
144 lbs
2 - 0 - 0 |
Good wrestling
Decent elbows
KO power |
|
BJJ White Belt
Excellent boxer
Granite chin |
|
| |
|
Ladies and gentlemen. This fight is 3 rounds, in the bantamweight division.
Introducing the fighter to my left, fighting out of the red corner.
With a record of
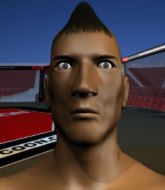
1 - 1 - 0, fighting out of Hilo, Josiah Bartlet!
And introducing the fighter to my right, fighting out of the blue corner.
With a record of
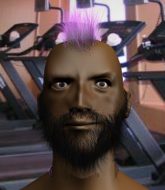
2 - 0 - 0, fighting out of Hilo, Peelay Shelding!
The judges for this bout are Micheangelo Fripello, Roger Salmon and Colin Fray.

The bell rings for round one and we are underway!
Bartlet shoots in for a takedown. "I don't think so" says Shelding as he avoids it easily.

Bartlet tries to keep at a distance but Shelding has taken the fight into the clinch.
Bartlet is looking to take this one to the mat.
Bartlet wants a takedown but no success here.
That's three failed takedown attempts in the round for Josiah Bartlet. That's going to take a lot out of him.
Bartlet throws an elbow that misses.
Bartlet tries to score a body lock takedown but Shelding shows good agility there to stay on his feet.
Shelding takes an elbow to the temple.
Bartlet throws a nice elbow but it doesn't land.
Bartlet lands a nice elbow from the clinch.
Bartlet creates a bit of distance and throws an elbow that only just misses.
Shelding lands a body punch in the clinch.

Bartlet escapes the clinch and we're back to striking.
Bartlet shoots in for a takedown. "I don't think so" says Shelding as he avoids it easily.
Wow, both these guys are really going for it!
Shelding wants to clinch.
Shelding tries to close the distance and clinch up against the cage but Bartlet paws at him with a jab and circles away.

Bartlet moves into the clinch successfully.
Wooooo! Give it up for these two warriors! They are putting on a show!
A short uppercut from Shelding.
Shelding tries a knee to the head but Bartlet blocks it.
Shelding lands with a right to the head.
Shelding lands a hook to the side of the head.
Bartlet is trying to drag Shelding to the mat but Shelding just about manages to keep his footing. He used the cage to his advantage there.
Bartlet blocking some punches.

That's one minute gone in the round.
A shot in the inside from Shelding.
A nice right hand lands inside from Shelding.
Shelding pushes Bartlet back against the cage and lands a hook to the side of the head.
Shelding has a couple of punches blocked by Bartlet.
Bartlet gets underhooks to prevent Shelding's takedown attempt.
Shelding tries to land a knee to the head but misses.
Bartlet pushes off and fires off an elbow that misses, before clinching up again, against the cage.
Bartlet throws an elbow but it's blocked.
Shelding gets through Bartlet's defenses to land a nice punch to the side of the head.
Shelding using the Thai plumb to throw knees but Bartlet has his back arched nicely, preventing the strike.
With the two fighters working up against the cage, Bartlet just misses with a elbow thrown towards Shelding's brow.
Shelding is trying to break the clinch but Bartlet is controlling him.
Shelding lands with a right to the head.
With the fighters up against the cage, Bartlet throws an elbow but misses.
Shelding avoids a wild elbow strike from Bartlet.
A shot in the inside from Shelding.
Shelding tries a knee to the head but Bartlet blocks it.
Bartlet pushes off an throws an elbow but Shelding leans to the side and avoids it. We're back to clinching against the cage.
Shelding lands on the inside with an uppercut.
Bartlet wants a takedown.
Shelding scores with a shot to the side of Bartlet's head.

That's two minutes gone in the round.
Shelding misses the knee to the body. Nice hip positioning from Bartlet.
Shelding lands an uppercut.
Shelding avoids a wild elbow strike from Bartlet.
Fantastic stuff here - a very entertaining period of action, which has drawn cheers from the crowd.
Shelding lands with a light punch inside.
Bartlet pushes off an throws an elbow but Shelding leans to the side and avoids it. We're back to clinching against the cage.
Bartlet lands an elbow just above Shelding 's eye.

Bartlet has Shelding pressed up against the cage. He's trying to work for a single leg takedown. Bartlet pulls back from the cage and twists to the side, sending Shelding tumbling to the mat - Bartlet dives into Shelding's guard.
If this pace continues, the referee will definitely step in and force a standup.
Shelding preventing the ground and pound from doing any damage.
Bartlet working some ground and pound from guard but it's not doing any damage.
Bartlet connects with a couple of short punches.
The fighters are pressed up against the cage, both looking to find a bit of space to work.
Bartlet postures up to throw the ground and pound strikes but they don't connect.
Bartlet lands a couple of decent looking shots.
Bartlet is looking to work some ground and pound but Shelding has wrist control.
Shelding really doesn't want to stay on the ground with Bartlet. If he can't get it back to his feet, it's only a matter of time before he'll be tapping out.

That's three minutes gone in the round.
Bartlet working from the guard for now, landing some ground and pound.
Bartlet throwing strikes from guard but Shelding blocks nicely.
Bartlet postures up and lands some nice ground and pound.
Bartlet working in close now, lands a nice elbow to the side of Shelding's head.
Shelding working the defensive guard well to avoid strikes from Bartlet.
Bartlet is sitting in guard, working some ground and pound.
Hammerfist, elbow! yells Bartlet's corner. There ya go! There ya go!
Shelding preventing the ground and pound from doing any damage.
Bartlet is in close to Shelding's body, working some short punches and elbows.
The fans in attendance giving it up for the two fighters, who have really let it all hang out in the last minute or so!
Shelding preventing the ground and pound from doing any damage.

That's four minutes gone in the round.
Bartlet throwing strikes but missing.
Shelding avoiding any damage from the ground and pound.
Shelding working the defensive guard well to avoid strikes from Bartlet.
Bartlet throws a big elbow that misses.
Bartlet cracks Shelding with a solid left hand.
Bartlet makes a bit of distance and scores with some ground and pound, still in guard.
Bartlet with a nice head shot there.
Bartlet scores with a decent looking elbow strike.
The crowd are going absolutely nuts as the round comes to an end - what a fantastic round of action!
Bartlet is working the ground and pound from guard. He might want to try advancing position though to get more of an impact.
Bartlet lands a couple of digs.
Bartlet landing with the ground and pound.
And thats the end of the round the fighters go back to their corners.
Josiah Bartlet dominated that round.
OK. That's time! The bell goes and we're back to the action.

Shelding wants to clinch.
Shelding stalks Bartlet and leaps in with a furious combination of punches. Uppercuts and crosses smash into Bartlet's face. Bartlet staggers backwards, shaken.
Bartlet tries to close the distance and clinch up against the cage but Shelding paws at him with a jab and circles away.
Shelding misses with a body shot.
Shelding lunges in with swinging rights and lefts but Bartlet circles away quickly and effectively.
Shelding paws at his opponent with the jab and then lunges in with a straight, right on the button.
Shelding dips down and scores with a jab to the body.
Bartlet moves into range and clinches up with Shelding.
Shelding misses with a punch on the inside.
Bartlet throws an elbow that misses.
Bartlet goes for a takedown in the clinch but Shelding prevents it.
The crowd cheering loudly, showing their appreciation for the quality fight we're seeing here.
Bartlet throws an elbow that misses.
Bartlet is working on a leg, looking for a takedown but Shelding is defending well.
Shelding softening up his opponent with strikes, against the cage.
Shelding lands an uppercut.
Bartlet creates a bit of distance and throws an elbow that only just misses.
Shelding lands a nice uppercut.
A shot in the inside from Shelding.
That's one minute gone in the round.
Nice body punch from Shelding - that landed with a thud.
With the fighters clinched against the cage, Shelding creates a bit of distance for himself and scores with a nice uppercut.
Bartlet comes over the top with an elbow. That landed flush.
Shelding avoids the elbow strike from Bartlet, against the cage.
Shelding lands a hook that snaps the head of Bartlet backwards.
Bartlet lands a glancing elbow in the clinch.
Bartlet lands an elbow just above Shelding 's eye.
Shelding is working Bartlet over against the cage.
With the two fighters working up against the cage, Bartlet just misses with a elbow thrown towards Shelding's brow.
Bartlet lands a glancing elbow in the clinch.
Shelding lands punches inside but they're not really causing much damage.
Bartlet pushes off and fires off an elbow that misses, before clinching up again, against the cage.
Bartlet pushes off and fires off an elbow that misses, before clinching up again, against the cage.
Shelding tries to land a shot to the body but it's blocked.
Bartlet pushes off and fires off an elbow that misses, before clinching up again, against the cage.
Shelding tries a knee to the head but Bartlet blocks it.
Shelding scores with a nice hook to the head.
Shelding blocks the elbow strike.
A short uppercut from Shelding.
Bartlet is looking for a takedown up against the cage. Shelding gets underhooks though and prevents the takedown attempt.
That's three failed takedown attempts in the round for Josiah Bartlet. That's going to take a lot out of him.
Bartlet lands a nice trip takedown into half guard.
Both fighters are absolutely exhausted here.
That's two minutes gone in the round.
Fantastic stuff here - a very entertaining period of action, which has drawn cheers from the crowd.
Shelding keeping his head moving to avoid the ground and pound.
Bartlet working some ground and pound from close in. He's looking to maintain this position and strike for a while by the looks of things... although he'll probably advance to full mount in a minute now I've said that.
Bartlet missing with the ground and pound from half guard.
Bartlet prevents Shelding from improving his position.
The ref warns both fighters not to hold the cage as they work up against the meshing.
Bartlet working Shelding over with strikes.
Bartlet is scoring with some nice ground and pound from the dominant position.
Bartlet seems to be taking a bit of a break to think of his next move. He lands a short punch in the meantime.
Shelding avoiding damage under a succession of punches from Bartlet.
Bartlet looks to score some points with some ground and pound.
We get told so often about how wrestlers don't like to be on their backs. Let's see if Shelding can do anything to dispel that myth.
That's three minutes gone in the round.
Bartlet sitting in half guard, looking to land shots. Shelding defending well though.
Bartlet missing with some ground and pound from the half guard.
Bartlet thumps the canvas. Not on purpose obviously - he just missed Shelding's head.
Bartlet throwing punches and elbows but they're not doing any damage.
Bartlet not landing any meaningful shots this time.
Bartlet missing with the ground and pound from half guard.
Shelding avoiding damage under a succession of punches from Bartlet.
Shelding is trying to defend against the ground and pound but Bartlet scores with a couple of nice shots.
Bartlet thows a wild elbow that connects with the canvas.
Shelding is trying to defend against the ground and pound but Bartlet scores with a couple of nice shots.
Bartlet sitting in half guard, looking to land shots. Shelding defending well though.
That's four minutes gone in the round.
Bartlet scores with a couple of good hammerfists.
Bartlet thows a wild elbow that connects with the canvas.
Bartlet lands with a punch from half guard.
We've seen a great period of action over the last minute or so - credit to both fighters for going all out!
Shelding is trying to get back to full guard.
Bartlet thows a wild elbow that connects with the canvas.
Bartlet throwing punches and elbows but they're not doing any damage.
Bartlet working Shelding over with strikes.
The crowd are going absolutely nuts as the round comes to an end - what a fantastic round of action!
Bartlet thows a huge punch but Shelding dodges it nicely.
Bartlet lands with a punch from half guard.
Bartlet slips a nice elbow through Shelding's hands, connecting with Shelding's forehead.
And thats the end of the round the fighters go back to their corners.
Josiah Bartlet dominated that second round.
That's time! Bartlet's corner gives him a slap on the ass as he gets ready to fight. This is the final round!

Shelding fails with an attempt to clinch.
Shelding gets to the clinch - let's see what his plan is here.
With the two fighters working up against the cage, Bartlet just misses with a elbow thrown towards Shelding's brow.
With the two fighters working up against the cage, Bartlet just misses with a elbow thrown towards Shelding's brow.
Bartlet lands an elbow just above Shelding 's eye.
Bartlet lands a nice elbow from the clinch.
A nice glancing elbow lands by Bartlet.
Shelding lands on the inside with an uppercut.
Bartlet lands an elbow inside.
Bartlet has Shelding pressed up against the cage and is working for takedown. Shelding manages to improve position though and keeps the fight standing.
Bartlet pushes off an throws an elbow but Shelding leans to the side and avoids it. We're back to clinching against the cage.
Bartlet throws an elbow but it's blocked.
Bartlet blocks a punch to the side of the head.
Shelding is looking for a takedown up against the cage. Bartlet gets underhooks though and prevents the takedown attempt.
Shelding lands with a short head shot on the inside.
Bartlet turns his back and goes for a hip toss. It's a bit messy but it gets the job done and Bartlet manages to end up in side control.
This is a great period of action - very entertaining stuff!
An elbow from Bartlet crashes against the mat.
Bartlet scores with a couple of nice shots to the head there. The referee takes a look at Shelding to see if he's OK.
Bartlet in side control, trying to ground and pound but not landing this time.
That's one minute gone in the round.
Bartlet creates a bit of distance and throws down some hard shots.
Sloppy strikes there by Bartlet.
Bartlet advances to full mount.
Bartlet scoring with some good ground and pound from mount here. Will he manage to finish Shelding?
Bartlet postures up and cracks his opponent a couple of times before moving back into close ground control. Shelding looks a forlorn figure.
Bartlet lands a couple of nice shots there from mount.
Shelding takes a big intake of breath there - he's definitely tired.
Bartlet lands a big shot to the head and Shelding winces in pain. He's tapped out due to strikes!
Ladies and gentlemen, after 2:57 of round 3, we have a winner by way of Submission (Strikes). Josiah Bartlet!
|
|
|
|
|
|
|
|
|
|
|
|
|
|
|
|
|
|
|
|
|
|
|
| S |
C
A |
G |
S |
C
B |
G |
|
S |
C |
G |
|
energy
A | B |
|
hype
A | B |
|
pop
A | B |
|
mgr
A | B |
|
FIGHT
RATING
100% |
|
|
|
|
|
|
