|
|
PBP Commentary |
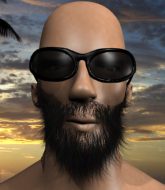
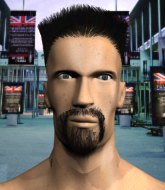
Coming up we have a welterweight MMA rules bout between Tony Jaa (ranked 0 p4p, 0 weight class) and Chopper Harley (ranked 0 p4p, 0 weight class). Tony Jaa could well score a knockout today. He has the power to get to Chopper Harley's chin.
 |
|
 |
| 180 cm
33
180 lbs
11 - 17 - 0 |
|
184 cm
25
180 lbs
5 - 3 - 1 |
BJJ Purple Belt
Dangerous knees
KO power |
|
Good wrestler
World class boxer
Heavy handed |
|
| |
|
Ladies and gentlemen. This fight is 3 rounds, in the welterweight division.
Introducing the fighter to my left, fighting out of the red corner.
With a record of
11 - 17 - 0, fighting out of St Petersburg, Tony Jaa!
And introducing the fighter to my right, fighting out of the blue corner.
With a record of
5 - 3 - 1, fighting out of St Petersburg, Chopper Harley!
The judges for this bout are Konstantin Menshow, Fedor Mirinova and Vladimir Khabensky.

The bell rings for round one and we are underway!
Jaa dodges the punch combination from Harley.
Chopper Harley seems to be the more aggressive standup fighter in this bout.
Jaa will have to do better than that with his takedown attempts.
Jaa fails to land the takedown.

Harley pushes Jaa up against the ropes in a clinch.
Harley presses Jaa against the ropes and delivers a mid-strength body shot.
Harley goes for a takedown attempt but Jaa pushes him away and we're back to fighting at a distance.
Jaa shoots in for a takedown - he's clinched up with Harley but Harley pushes him off and we're back to square one.
That's three failed takedown attempts in the round for Tony Jaa. That's going to take a lot out of him.

Jaa clinches with his opponent.
Harley avoiding damage as Jaa throws knees to the body.
Harley gets double underhooks to prevent a takedown attempt from Jaa.
The pace really dropping off here, momentarily.
Harley lands on the inside with an uppercut.

That's one minute gone in the round.
Harley avoiding damage as Jaa throws knees to the body.
Harley lands a nice looking hook to the body, against the ropes.

Jaa manages to pull guard. Let's see whether he can land a sub off his back.
The fighters are trapped in the ropes so we're going to have a reposition here. The ref calls for a break and repositions the fighters in the center of the ring.
The referee wants the fighters to be more active or he's going to reset them on the feet.
Harley is just sitting in guard, looking to avoid any submissions.
Jaa is working an open guard here, looking to improve his position. No doubt that will leave him open to counters but at least he's being more offensive.

Jaa throwing his legs up looking for a triangle.

That's two minutes gone in the round.
Harley stays in close to Jaa's body and controls the position.
Harley pressing down on his opponent's thigh, looking to pass guard. Jaa is keeping the position for now.

The ref calls for a clean break and stands the fighters back up. Chopper Harley wasn't active enough on the ground.
Jaa tries to keep at a distance but Harley has taken the fight into the clinch.
The referee is keeping an eye on Harley - much more stalling and he will separate the fighters.
A knee to the head by Harley.

It looks like Tony Jaa has been cut.
The fans in attendance giving it up for the two fighters, who have really let it all hang out in the last minute or so!
Jaa with the Thai clinch. He's looking to land a big knee but he's not managed it this time.
Harley lands a body punch in the clinch.

Harley turns his hips and lands a very nice judo throw into side control!
Jaa is breathing heavily.
Harley controls the position.

That's three minutes gone in the round.
Jaa sneaks back into half guard.
Jaa is looking to sinch up a guillotine here but Harley pulls his head out easily.
Harley passes to full mount!
Jaa can't escape the position.
The fighters are tangled up in the ropes here. We might need a restart if the fighters can't break free themselves.
Jaa is working hard here to advance position.

That's four minutes gone in the round.
Harley controlling his opponent.
Jaa tries to get back to half guard but can't.
Harley controlling the position easily from mount.
Jaa is looking to get to half guard.
As the round comes to an end the crowd are showing their appreciation for a great round of action.
Jaa wants to control but Harley is having none of it.
And thats the end of the round the fighters go back to their corners.
Chopper Harley dominated that round.
The cut man is working on Tony Jaa's cut.
That's the end of the interval. I'm sure that seemed a lot quicker than a minute for our two fighters! Back to the action.

Harley drives through and clinches with Jaa against the ropes.
Harley scores with a shoulder strike.
A shot in the inside from Harley.
Harley lands a hook to the side of the head.
Jaa scores with a knee to the head.

Harley escapes the clinch and we're back to striking.
Jaa looks frustrated there after his takedown attempt is stuffed easily.
Harley has Jaa up against the ropes in a clinch.
Wooooo! Give it up for these two warriors! They are putting on a show!
Harley stalling here - the referee won't stand for too much of that.
Jaa goes for a takedown in the clinch but Harley prevents it.
Harley lands a hook to the side of the head.
Harley lands a left hand.
Harley lands a right hand.
Good body shot from Harley.
That's one minute gone in the round.
Harley lands an uppercut.
Harley lands a body punch - he's looking to wear down Jaa.
Both fighters are absolutely exhausted here.
Harley lands a shoulder strike.

Jaa is rocked!
Harley lands punches inside but they're not really causing much damage.
Oh Jaa is still all over the place! His legs are completely gone! Will he be able to recover?!!
Jaa is trying to pull guard but Harley turns him against the ropes and we stay in the clinch.
That's three failed takedown attempts in the round for Tony Jaa. That's going to take a lot out of him.
Harley lands a shot to the body.
Jaa seems to have got his legs back now.
Nice body punch from Harley - that landed with a thud.
With the two fighters working up against the ropes, Harley just misses with a elbow thrown towards Jaa's brow.

Harley drops Jaa onto one knee with a big uppercut from the clinch! Jaa is propped up by the ropes and works his way back to his feet!
The crowd cheering loudly, showing their appreciation for the quality fight we're seeing here.
Harley escapes the clinch and we're back to striking.
Harley gets a clinch.
A left hand lands to the body for Harley.
Harley throws a blind hook that connects with the side of Jaas head.
A quick uppercut on the inside from Harley.
Harley stays in close to his opponent and throws a right hand to the body.
Harley stalling the fight.
Harley lands an uppercut.
That's two minutes gone in the round.
Nice body punch from Harley - that landed with a thud.
Harley lands a body shot in the clinch.
Harley throws a hook to the body. More of an arm punch but it's all scoring with the judges.
Harley cracks Jaa with a nice body shot.
Harley leaning against his opponent.
Harley tries to score a body lock takedown but Jaa shows good agility there to stay on his feet.
Harley pushes Jaa back against the ropes and lands a hook to the side of the head.
Harley gets through Jaa's defenses to land a nice punch to the side of the head.
Harley managing to block the knees to the body from Jaa.
Harley slows down the pace here.
Harley breaks the clinch and we return to the middle of the mat.
Harley has taken the fight to the clinch.
Jaa tries to land a knee to the head but misses.
Harley's corner are urging him to control the action in the clinch for a moment, rather than mount any serious offense. I'm sure the crowd appreciate those instructions... not.
A body shot lands from Harley.
That's three minutes gone in the round.
Harley displaying some good clinch control by pressing Jaa up against the ropes.
Harley scores with a nice hook to the head.
Harley working some nice short punches in the clinch.
Jaa is working for takedown but Harley is calmly controlling the position for now.
Harley wants the takedown. Jaa is fighting it off but Harley persists and manages to bring the fight to the ground, ending up in Jaa's guard against the ropes.
Harley works a leg free and moves into half guard.
Harley sitting in half guard, looking to land shots. Jaa defending well though.
Jaa is looking to regain full guard. Not this time though.

Harley is looking for a kimura but he's never going to get it from there.
That's four minutes gone in the round.
Harley works his way into side control.
Harley has been the more effective fighter overall so far.
Harley staying calm.
The fans in attendance giving it up for the two fighters, who have really let it all hang out in the last minute or so!
The crowd are going absolutely nuts as the round comes to an end - what a fantastic round of action!
Jaa is trying to improve his position.
And thats the end of the round the fighters go back to their corners.
Chopper Harley showed his class in that round. I'd imagine he'll take it on all the scorecards.
The cut man is working on Tony Jaa's cut.
The minute break is over - no more time for sponges and pep talks - back to the action! This is the final round!

Harley comes forward and lands a shot to the body, then darts back out of range.
Harley shoots in and scores a nice double leg takedown into half guard.
Harley looks over to his corner - he wants some instructions but his corner are not responding.
Jaa controlling the leg, holding on to half guard.
Jaa is looking for a sweep. Harley is wise to his cunning plan and keeps the top position.
Harley content to sit in half guard and control for a moment.
That's one minute gone in the round.
Harley passes to full mount!
Harley content just to control the position here.
That's two minutes gone in the round.
Jaa is in all sorts of trouble here.
Harley controlling the position easily from mount.
Chopper Harley has forced the referee to step in and restart the fight on the feet.
Harley moves into range and throws a combination. A nice jab followed by a hook to the body.
That's three minutes gone in the round.
Harley pulls out of a head kick attempt.
Jaa gets his takedown attempt stuffed easily
and Harley counters with a stiff right hand.
Jaa shoots in for a takedown but Harley shows good takedown defense.
Both fighters are breathing heavily.
Harley lands a powerful looking uppercut that connected with his opponent's jaw.
Jaa fails with a takedown attempt.
That's three failed takedown attempts in the round for Tony Jaa. That's going to take a lot out of him.
Harley throws a chopping leg kick but Jaa manages to avoid taking any serious damage.
Harley ducks down into range and throws a picture perfect right hook that connects with Jaa's jaw. Jaa's eyes stare off into space as he falls to the mat, out cold! Harley does the decent thing and steps back, rather than landing any shots to his unconscious opponent.
Ladies and gentlemen, after 3:48 of round 3, we have a winner by way of KO (Punch). Chopper Harley!
After winning the bout, Chopper Harley thanked all his fans and promised he'd do even better in his next fight. The crowd seemed to love his humility.
|
|
|
|
|
|
|
|
|
|
|
|
|
|
|
|
|
|
|
|
|
|
|
| S |
C
A |
G |
S |
C
B |
G |
|
S |
C |
G |
|
energy
A | B |
|
hype
A | B |
|
pop
A | B |
|
mgr
A | B |
|
FIGHT
RATING
100% |
|
|
|
|
|
|
