|
|
PBP Commentary |
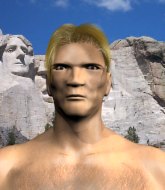
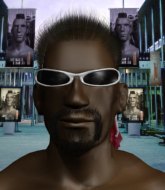
Coming up we have a middleweight MMA rules bout between Matt Freeman (ranked 0 p4p, 0 weight class) and Chicken Beef (ranked 0 p4p, 0 weight class). Chooooooooon! I think Freeman might be my favorite fighter, now he's come out to Real American. These two fighters really are very evenly matched on the feet - it will be fascinating to see who can assert themselves in that aspect of the fight.
 |
|
 |
| 178 cm
28
195 lbs
13 - 7 - 0 |
|
182 cm
32
200 lbs
26 - 15 - 0 |
Great wrestler
Lethal high kicks
Cardio machine |
|
TWGC Champion
World class boxer
Granite chin |
|
| |
|
Ladies and gentlemen. This fight is 3 rounds, in the middleweight division.
Introducing the fighter to my left, fighting out of the red corner.
With a record of
13 - 7 - 0, fighting out of Hilo, Matt Freeman!
And introducing the fighter to my right, fighting out of the blue corner.
With a record of
26 - 15 - 0, fighting out of Las Vegas, Chicken Beef!
The judges for this bout are Timothy Bukovac, Jack Bonds and .

The bell rings for round one and we are underway!
Beef ducks down and throws a hook to the body but Freeman moves away.
Freeman stumbles momentarily as he takes a strong leg kick from Beef.
Beef stuns Freeman with a nice body shot, before stepping back out of range.
Beef moves forwards but Freeman connects with a nice, crisp jab.
Beef throws a body punch but Freeman moves out of range.
Freeman throws a looping left and ducks down for a takedown. He's got his arms around Beef's waist but Beef gets an underhook and avoids the takedown by throwing Freeman off to one side.
Beef swings wildly with a hook that is half blocked by Freeman.
Beef dodges the punch combination from Freeman.
Freeman swings and misses with a shot to the body
and Beef counters with a good low kick that Freeman was not able to check.
Freeman gets his takedown attempt stuffed easily
and Beef counters with a solid body kick.
Wooooo! Give it up for these two warriors! They are putting on a show!
Freeman digs a good body shot into Beef's ribs.
Freeman circles away from the clinch attempt.

That's one minute gone in the round.
Beef lands a right hook to the body.
Beef connects with a crisp jab.
Freeman looks frustrated there after his takedown attempt is stuffed easily.
That's three failed takedown attempts in the round for Matt Freeman. That's going to take a lot out of him.
Beef throws a sloppy head kick and Freeman moves out of range easily.
Freeman with a lazy takedown attempt
enabling Beef to counter with a crisp jab.
Chicken Beef is looking to keep the fight on the feet at all costs.
No luck for Freeman with that takedown attempt.
Freeman tries for a takedown but Beef sees it coming a mile off and avoids it easily.
Freeman ducks down and throws a hook to the body but Beef moves away.
Beef tries to clinch but Freeman moves out of range.

That's two minutes gone in the round.
Freeman is the aggressor but that punch slipped nicely by Beef.
Freeman throws a sloppy head kick and Beef moves out of range easily.
Freeman misses the shot to the body.
Beef throws an off balance right hand

so Freeman counters with a double leg into guard. Good agility.
The crowd cheering loudly, showing their appreciation for the quality fight we're seeing here.
Beef keeping moving, preventing Freeman from controlling successfully.
Beef managing to control the position.
Freeman wants to control from the top but Beef keeps moving.
Beef keeping full guard, as Freeman tries to pass.
Beef is working from a closed guard but he's struggling to control his opponent.

That's three minutes gone in the round.

The referee decides to stand the fighters back up.
Freeman swings wildly with a hook that is half blocked by Beef.
Beef misses with a low kick.
Freeman tries to check the leg kick but that clearly hurt him.
A head kick from Freeman lands but Beef takes it in his stride.

It looks like Chicken Beef has been cut.
Beef finds nothing but air with that leg kick attempt.
Beef throws a leg kick but he was too far away and it doesn't land.
Freeman misses with an uppercut. Beef saw that one coming.
Freeman defending well as Beef loads up on a big left hand.
Freeman has a takedown stuffed.

That's four minutes gone in the round.
Freeman shoots in for a double leg but Beef sprawls well. That's going to sap some energy.
Freeman swings and misses with a hook to the body.
Some bone on bone action there as Freeman checks a low kick. Luckily it wasn't a particularly hard one.

Beef closes the distance and presses his opponent up against the cage.
Freeman blocks a couple of punches on the inside.
The fans in attendance giving it up for the two fighters, who have really let it all hang out in the last minute or so!
Beef misses with a hook from the clinch.
Beef throws a head punch that misses.
An uppercut on the inside fails to land for Beef.
The crowd are going absolutely nuts as the round comes to an end - what a fantastic round of action!
Beef throws a head punch that misses.
Beef gets double underhooks to prevent a takedown attempt from Freeman.
Beef misses with the head strike.
And thats the end of the round the fighters go back to their corners.
A close round but Chicken Beef will probably get the nod.
The cut man is working on Chicken Beef's cut.
The corners get their ten second warning. Both fighters stand from their stools and stare eachother down, ready to get back to the action.

Freeman fails with a rather predictable takedown attempt.
Freeman cracks Beef with a hook to the jaw. Both fighters smile at eachother and high-five before getting back down to business.
Freeman shoots in and drives through. Beef sprawls well.
Beef throws a right hand that Freeman ducks under and follows up with a left that Freeman also avoids with ease.
Freeman waving his hands out in front of him, looking to distract Beef.
Freeman shoots in and gets a takedown into half guard. Freeman showed some decent athleticism there.
Freeman is looking to advance position but Beef won't allow it.
Beef trying to get back to full guard but Freeman takes advantage of the position and moves to full mount!
The fighters are pressed up against the cage, both looking to find a bit of space to work.
That's one minute gone in the round.
Freeman trying to control but he's not successful this time.
Beef is looking to get to half guard.
Freeman with shots to the head and body - Beef looks very uncomfortable down there.
Freeman thowing shots but they're missing.
Freeman looking to control and managing it successfully.
Freeman trying to control but he's not successful this time.
Freeman is really struggling to control Beef but he's trying to hold on to the position.
That's two minutes gone in the round.
Freeman throwing sloppy strikes here. Perhaps if he tightened up his striking from such a dominant position, he'd be able to finish easier.
Beef taking shots to the head.
Beef is squirming around, avoiding Freeman's attempts to control the action.
Freeman throwing strikes here but Beef is writhing around nicely and avoiding any serious damage.
Beef is looking to improve his position but Freeman isn't that keen on the idea.
The ref warns both fighters not to hold the cage as they work up against the meshing.
Wooooo! Give it up for these two warriors! They are putting on a show!
Freeman looking to ground and pound his opponent to a finish here.
Freeman connects with a couple of good shots from mount.
Freeman thowing strikes but they're hitting the gloves, not doing any damage.
Freeman unloads with some shots from mount but Beef bucks and avoids them well.
Freeman has been looking to land a fair amount of strikes on the ground. He might be looking to soften his opponent up in order to work for a submission.
That's three minutes gone in the round.
Freeman throwing sloppy strikes, which aren't doing any damage.
Beef is in a horrible position here, under a barrage of strikes, he's managing to avoid any damage.
Beef is in a horrible position here, under a barrage of strikes, he's managing to avoid any damage.
Beef tries to hold on but Freeman pushes him away.
Freeman with a couple of short strikes.
Beef is trying to escape but when you're mounted that's not too easy.
Freeman throws some wild stikes that Beef manages to avoid easily.
Freeman thowing strikes but they're hitting the gloves, not doing any damage.
Freeman tries to control but Beef wriggling away.
Beef really trying hard to get back to half guard here.
That's four minutes gone in the round.
Beef wants to hold on but Freeman pushes him away.
Matt Freeman overall seems to be getting the better of the ground position in the fight so far.
Beef holding onto his opponent's waist for dear life, as Freeman tries to land some strikes to get him to release his grip.
Freeman can't quite control the action as he would like just now, as Beef is looking to escape.
Beef is trying to escape the mount.
Freeman sends his fist crashing into the mat - the crowd let out a collective ooooooh. Let's hope he's not broken it!
As the round comes to an end the crowd are showing their appreciation for a great round of action.
Freeman landing punches.
Wooooo! Give it up for these two warriors! They are putting on a show!
Freeman punishing his opponent with strikes.
And thats the end of the round the fighters go back to their corners.
Matt Freeman dominated that second round.
The cut man is working on Chicken Beef's cut.
The minute break is over - no more time for sponges and pep talks - back to the action! This is the final round!

Freeman fails with a rather predictable takedown attempt.
That has opened up Chicken Beef's cut even more.
A jab from Freeman misses.
Freeman scores with a nice strike.
Beef tries to clinch up but Freeman circles away and keeps his distance.
Chicken Beef seems to be getting the better of the standup.
Freeman walks forward, straight into a front kick from Beef.
Beef takes a shot right to the bread basket.
Freeman throws out a token jab with nothing on it.
Beef misses with a kick to the body.
Freeman fails to land with the punch combination there - jab, cross, hook, miss, miss, miss.
Freeman takes a shot to the eye socket. That's gotta hurt.
That's one minute gone in the round.
Nice uppercut there from Beef.
Freeman with a lazy takedown attempt
letting Beef counter with a right hand.
Freeman throws an uppercut from half a mile away. Beef sees it coming and avoids it easily.
Freeman throws a shot to the body.
Freeman throws a shot from downtown. Beef moves away and avoids it.
Beef stuffs a takedown. It's all about dictating where the fight takes place and Beef wants it to stay on the feet.
That's three failed takedown attempts in the round for Matt Freeman. That's going to take a lot out of him.
Beef misses with a wild body shot.
Beef leaves Freeman with his face pressed against the mat as he sprawls beautifully, defending against a solid takedown attempt.
Freeman fakes high and swings low for a body shot but Beef manages to avoid it.
Beef stuffs a takedown. It's all about dictating where the fight takes place and Beef wants it to stay on the feet.
That's two minutes gone in the round.
Beef throws a body kick, spinning off balance
and Freeman connects with a straight left hand counter down the middle.
Beef connects with a looping right hand.
This has been an exciting period of action!
Beef uses good footwork to get in and out, landing a nice hook.
Freeman throws a lazy uppercut
and Beef counters with a series of strikes that really hurt Freeman! The ref looks into his eyes and sees nobody home - he's called the fight! This one is all over!
Ladies and gentlemen, after 2:28 of round 3, we have a winner by way of TKO (Strikes). Chicken Beef!
|
|
|
|
|
|
|
|
|
|
|
|
|
|
|
|
|
|
|
|
|
|
|
| S |
C
A |
G |
S |
C
B |
G |
|
S |
C |
G |
|
energy
A | B |
|
hype
A | B |
|
pop
A | B |
|
mgr
A | B |
|
FIGHT
RATING
99% |
|
|
|
|
|
|
