|
|
PBP Commentary |
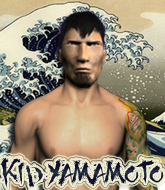
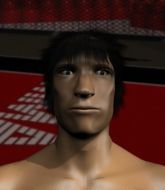
Coming up we have a bantamweight MMA rules bout between Kenshin Yamamoto (ranked 0 p4p, 0 weight class) and Bagong Buhay (ranked 0 p4p, 0 weight class). Buhay comes into a darkened arena with his song building. Tatsulok kicks in, the lights come on and the crowd goes wild! What a showman! There are an array of beautiful celebrities at ringside tonight! I wonder if any of them paid for their tickets.
 |
|
 |
| 169 cm
28
147 lbs
7 - 1 - 0 |
|
164 cm
20
146 lbs
6 - 2 - 0 |
Good wrestling
Counter fighter
Cardio machine |
|
Good takedowns
Basic striking
Good gas tank |
|
| |
|
Ladies and gentlemen. This fight is 5 rounds, for the bantamweight championship of the world!
Introducing the champion to my left, fighting out of the red corner.
With a record of
7 - 1 - 0, fighting out of Tokyo, Kenshin Yamamoto!
And introducing the challenger to my right, fighting out of the blue corner.
With a record of
6 - 2 - 0, fighting out of Tokyo, Bagong Buhay!
The judges for this bout are Shigeki Fujiwara, Yasuomi Hirokawa and Yuuki Gou.

The bell rings for round one and we are underway!
Buhay shoots in and drives through. Yamamoto sprawls well.
Yamamoto stuffs a takedown. It's all about dictating where the fight takes place and Yamamoto wants it to stay on the feet.
A swing and a miss from Yamamoto.
Buhay shoots in for a takedown. "Ole!" shouts Yamamoto as he jumps to the side.
Kenshin Yamamoto has stuffed three takedown attempts in the round now. That's going to take a lot out of Bagong Buhay.
Yamamoto misses with a straight left.
Buhay uses some good footwork to avoid the body shot by Yamamoto.
No luck for Buhay with that takedown attempt.
Buhay misses with a takedown attempt

and Yamamoto counters with a takedown into side control.
Buhay is not in a great position here, taking some shots.
Yamamoto landing a few strikes.
Buhay is trying to get back to half guard.
The fighters are pressed up against the cage, both looking to find a bit of space to work.
The fans in attendance giving it up for the two fighters, who have really let it all hang out in the last minute or so!
Yamamoto working away.

That's one minute gone in the round.
The referee tells the fighters to keep busy.
Buhay takes a big shot right to the temple there but he's taken it well.
Buhay has found himself in a tricky position here. He's been working his transitions in training so let's see if he can work his way out of it.
Buhay takes a big shot right to the temple there but he's taken it well.
You can see the frustration on Buhay's face as Yamamoto controls the position.
Yamamoto fails to land a wild elbow strike.
Buhay tries to work a leg under to get back to half guard but Yamamoto wriggles his own leg back out and remains in side control.
Yamamoto lands some shots froms side control.

That's two minutes gone in the round.
Buhay regains half guard.
We've been hearing that Yamamoto has been drilling a lot of ground and pound in training, so let's see if he get the finish.
Buhay tries to roll over but Yamamoto keeps him under control.
Yamamoto keeping composed on the top, looking to control the action.
The fans in attendance giving it up for the two fighters, who have really let it all hang out in the last minute or so!

We're going to have a standup here because Kenshin Yamamoto wasn't active enough for the referee's liking.
Buhay doesn't succeed with the takedown
and Yamamoto counters with a nice double leg into half guard.

That's three minutes gone in the round.
Yamamoto controlling the action here.
Yamamoto's ground tactics aren't going to win him many fans. Let's hope he's got fireworks for us if he gets back to his feet because he's not doing much on the ground.
Buhay moves his hips nicely and gets into full guard.

That's four minutes gone in the round.
Yamamoto controlling from the top position.
The referee is asking the fighters to pick up the pace.
Yamamoto seems to have a rather negative gameplan on the ground. He seems keen to just score the takedown and hold down Buhay for as long as he can get away with.
We're going to have a standup here because Kenshin Yamamoto wasn't active enough for the referee's liking.

Yamamoto closes the distance and presses his opponent up against the cage.

Buhay manages to pull guard.
As the round comes to an end the crowd are showing their appreciation for a great round of action.
Yamamoto passes Buhay's right leg, so he's now in half guard.
Yamamoto wants to lay and pray for a moment but Buhay keeps working.

Buhay actively working from the bottom here.
And thats the end of the round the fighters go back to their corners.
Kenshin Yamamoto dominated that round.
That's time! Yamamoto's corner gives him a slap on the ass as he gets ready to fight.

A telegraphed takedown attempt from Buhay is defended easily by Yamamoto.
Yamamoto thows a left - swing and a miss!
A telegraphed right hand from Buhay misses the target.
Yamamoto looks to throw the jab but Buhay is out of range.
Buhay darts in looking for a takedown but Yamamoto gets double underhooks and turns Buhay into the cage.
Buhay tries to take the fight to the ground by pulling guard but can't manage it.
Kenshin Yamamoto has stuffed three takedown attempts in the round now. That's going to take a lot out of Bagong Buhay.
Buhay jumps guard but his hands slip and he falls flat on his back. Well, he's made himself look a right mug there, as Yamamoto walks away with a smile on his face. Buhay gets slowly back to his feet and shakes his head.
Buhay closes this distance looking for a takedown but Yamamoto circles away.
A really sloppy takedown attempt there from Buhay.
A big left from Yamamoto misses.
That's one minute gone in the round.
Buhay takes a swing at Yamamoto's ribcage but misses.
Buhay shoots and misses
so Yamamoto counters with a double leg into guard. Good agility.
Kenshin Yamamoto overall seems to be getting the better of the ground position in the fight so far.
Yamamoto controlling from the guard. I say controlling but really, he's stalling.
Yamamoto has to be careful here, sitting in the guard of a superior BJJ player.
Yamamoto preventing the sweep.
Yamamoto is stalling in the full guard.
Yamamoto throwing strikes but missing.
That's two minutes gone in the round.
Yamamoto pushes down on Buhay's leg and manages to get into half guard.
Yamamoto perhaps working for something from half guard, or maybe not. It looks like he's just sitting there.
Buhay is trying to get back to full guard.
This is a great period of action - very entertaining stuff!
Yamamoto keeping composed on the top, looking to control the action.
We're going to have a standup here because Kenshin Yamamoto wasn't active enough for the referee's liking.
Yamamoto avoids the head kick by Buhay.
That's three minutes gone in the round.
Nice sprawl there from Yamamoto as Buhay shoots in.
Buhay throws a looping left and ducks down for a takedown. He's got his arms around Yamamoto's waist but Yamamoto gets an underhook and avoids the takedown by throwing Buhay off to one side.
Yamamoto stuffs the takedown.
Buhay doesn't succeed with the takedown
and Yamamoto counters with a nice double leg into half guard.
Buhay looking to work for a kimura from the bottom.
Yamamoto performing his best blanket impression for a moment.
That's four minutes gone in the round.
Yamamoto takes advantage of the dominant position to land a couple of big hammer fists.
Yamamoto trying to control the pace.
Buhay moves into full guard.
The fans in attendance giving it up for the two fighters, who have really let it all hang out in the last minute or so!
As the round comes to an end the crowd are showing their appreciation for a great round of action.
Yamamoto slows down the pace of the fight, as he sits in guard.
And thats the end of the round the fighters go back to their corners.
Kenshin Yamamoto dominated that second round.
OK. That's time! The bell goes and we're back to the action.

Yamamoto stuffs a takedown. It's all about dictating where the fight takes place and Yamamoto wants it to stay on the feet.
Yamamoto missing with a left hand there. Buhay was out of range so wasted energy throwing that one.
Yamamoto misses with a head kick.
Yamamoto throws a jab when Buhay was well out of range.
Buhay blocks a jab.
Buhay looks to land a right hand but Yamamoto moved out of range.
Buhay misses with a takedown
and Yamamoto counters with a shoot takedown into half guard.
Buhay wants to control but Yamamoto is keeping busy and won't allow it.
Yamamoto sitting and controlling from the half guard.
That's one minute gone in the round.
The ref stands the fighters back up because Kenshin Yamamoto just wasn't active enough.
Buhay tries to drive through with a takedown attempt but Yamamoto defends well and Buhay ends up having to push Yamamoto into the cage where they will battle it out in the clinch.
Kenshin Yamamoto has stuffed three takedown attempts in the round now. That's going to take a lot out of Bagong Buhay.
Buhay is trying to pull guard but Yamamoto turns him against the cage and we stay in the clinch.
Buhay tries to pull guard but Yamamoto forces him back to his feet, against the cage.
Yamamoto doesn't land with the attempted body shot.
Yamamoto stalls.
Buhay jumps guard but Yamamoto stands there with Buhay around his waist. Buhay gives up and drops back to his feet. We remain in the clinch.
That's two minutes gone in the round.
Buhay jumps guard but his hands slip and he falls flat on his back. Well, he's made himself look a right mug there, as Yamamoto walks away with a smile on his face. Buhay gets slowly back to his feet and shakes his head.
Yamamoto is the aggressor but that punch slipped nicely by Buhay.
Buhay throws a leg kick that misses.
Yamamoto missing with a left hand there. Buhay was out of range so wasted energy throwing that one.
Buhay avoids a punch combination nicely.
Buhay has his takedown stuffed
and Yamamoto counters with a shoot takedown. Buhay fights it but they end up in guard.
We've seen a great period of action over the last minute or so - credit to both fighters for going all out!
Yamamoto content to stall in guard here.
Yamamoto avoids a guillotine attempt easily.
That's three minutes gone in the round.
Yamamoto slows down the pace of the fight for a moment. He'll need to remain active if he doesn't want to see the fight stood back up.
Yamamoto trying to control the position from guard on top but Buhay is wriggling around, looking for whatever he can.
Yamamoto seems content to control from guard here. He's going to have to remain active though if he doesn't want to get stood back up.
The ref stands the fighters back up because Kenshin Yamamoto just wasn't active enough.
Buhay has his takedown stuffed
so Yamamoto counters with a double leg into guard. Good agility.
The ref warns both fighters not to hold the cage as they work up against the meshing.
Yamamoto is taking a break and basically stalling. The referee will not allow him to do that for long.
That's four minutes gone in the round.
Buhay is trying to keep Yamamoto in close.
Buhay being controlled here, momentarily.
Buhay working from the bottom, still in full guard. He's managed to get a loose triangle. Yamamoto doesn't seem to be doing much to defend here, obviously he feels comfortable in the position. Yamamoto manages to throw the legs off his shoulder and he's back into guard - no problem.
As the round comes to an end the crowd are showing their appreciation for a great round of action.
Yamamoto pushes down on Buhay's leg and manages to get into half guard.
And thats the end of the round the fighters go back to their corners.
Kenshin Yamamoto clearly takes that round.
OK. That's time! The bell goes and we're back to the action.

Buhay shoots and misses
and Yamamoto counters with a nice double leg into guard.
Yamamoto is working Buhay over from the guard. He should look to pass the guard and do a little more damage with these strikes.
Buhay looking for submissions off his back, moving his hips, looking for an opening.
Yamamoto stands up and looks to throw the legs aside to pass to side control. Buhay swivels though and keeps the full guard.
Yamamoto cracks Buhay with a solid left hand.
Yamamoto won't allow Buhay to sweep him here.
Yamamoto is frustrating his opponent with some stalling tactics from top position.
That's one minute gone in the round.
Buhay is working an open guard here, looking to improve his position. No doubt that will leave him open to counters but at least he's being more offensive.
Yamamoto's corner is telling him to maintain position.
The referee decides to stand the fighters back up, due to lack of activity on the part of Kenshin Yamamoto.
Nice defenses there by Buhay.
Buhay gets caught on his heels momentarily as he allows Yamamoto to score an easy takedown into full guard.
Yamamoto with a couple of shots to the head there. Not particularly brutal.
That's two minutes gone in the round.
Yamamoto is intent on slowing down the pace of the fight, simply looking to control.
Yamamoto avoids a guillotine attempt easily.
Yamamoto is taking a break and basically stalling. The referee will not allow him to do that for long.
Yamamoto postures up in Buhay's guard and throws a big left but Buhay blocks it.
Yamamoto engaging in some classic timewasting tactics.
That's three minutes gone in the round.
The referee looks like he's ready to step in and stand the fighters back up.
The ref stands the fighters back up because Kenshin Yamamoto just wasn't active enough.
Buhay slips under a jab from Yamamoto.
Buhay keeping his hands up high there, blocking the jab from Yamamoto.
Yamamoto clinches with his opponent.
The two fighters are working to gain dominance in the clinch.
Buhay jumps guard but his hands slip and he falls flat on his back. Well, he's made himself look a right mug there, as Yamamoto walks away with a smile on his face. Buhay gets slowly back to his feet and shakes his head.
Buhay is looking to land body kicks.
Yamamoto misses with a body shot. Nice footwork from Buhay.
That's four minutes gone in the round.
Buhay shoots in for a takedown but Yamamoto shows good takedown defense there and keeps this one on the feet.
Kenshin Yamamoto has stuffed three takedown attempts in the round now. That's going to take a lot out of Bagong Buhay.
Buhay keeping his hands up high there, blocking the jab from Yamamoto.
Buhay doesn't succeed with the takedown
and Yamamoto counters with a takedown into side control.
Yamamoto works a knee to the body and follows up with a nice elbow to the head.
Buhay prevents Yamamoto from moving into mount.
This has been an exciting period of action!
Buhay taking punishment in the form of punches.
Buhay is looking to slip a leg under and get half guard but Yamamoto is one step ahead and moves to full mount!
As the round comes to an end the crowd are showing their appreciation for a great round of action.
Yamamoto controlling the position easily from mount.
Yamamoto is really dominating this fight. Is there anything that Buhay can do to turn this around?
And thats the end of the round the fighters go back to their corners.
Kenshin Yamamoto had his way with Bagong Buhay in that round.
That's time! Back to the action! This is the final round!

Yamamoto looking to shoot here. He's gone for it and he's landed a takedown into side control! Oh, that's bad for Buhay!
Yamamoto working the ground and pound.
Yamamoto wants to control but Buhay is keeping him busy.
Yamamoto scoring with punches and elbows.
Yamamoto trying to control the action but Buhay is working from the bottom.
Yamamoto has knee on belly and moves into mount.
That's one minute gone in the round.
Yamamoto trying to control but Buhay is having none of it.
Yamamoto content just to control the position here.
Yamamoto working the ground and pound effectively.
Kenshin Yamamoto is fighting for a decision here - he's started to take the cautious approach.
That's two minutes gone in the round.
Yamamoto looking to control and managing it successfully.
Yamamoto unloading with bombs!
Buhay can't escape the position.
Buhay tries to hold on but Yamamoto pushes him away.
Buhay bucks up and manages to get a nice reversal! He's in guard on the top - nicely done!
That's three minutes gone in the round.
Buhay trying to control but Yamamoto is working from the bottom.
Buhay pressing down on his opponent's thigh, looking to pass guard. Yamamoto is keeping the position for now.
Yamamoto pulls Buhay in close to his closed guard and prevents Buhay from doing any damage or advancing position.
The referee is asking the fighters to pick up the pace.

The referee has ruled that neither fighter is active enough on the ground and has stood them back up.
Yamamoto decides to change it up a bit and drives through with a nice takedown into half guard.
Buhay wants to get back to full guard.
That's four minutes gone in the round.
Yamamoto is just sitting in half guard, waiting for something to happen.
Buhay looking for submissions off his back.
Yamamoto perhaps working for something from half guard, or maybe not. It looks like he's just sitting there.
The crowd applaud the fighters efforts here as the round comes to an end.
Buhay wants to improve his position but Yamamoto is controlling well.
And that's the end of the fight!
Kenshin Yamamoto showed his dominance in that final round.
Well Yamamoto has outscored his opponent in every aspect of the fight today. Only a scarily incompetent judge or two will keep him from a well deserved win... Over to the ring announcer for the scorecards.
Ladies and gentlemen, after 5 rounds of action, we go to the scorecards for a decision.
Judge Shigeki Fujiwara scores the fight 50:45
Judge Yasuomi Hirokawa scores the fight 50:45
Judge Yuuki Gou scores the fight 50:45
In favor of your winner, by unanimous decision... Kenshin Yamamoto!
Kenshin Yamamoto retains his bantamweight title!
Kenshin Yamamoto made sure to mention his sponsor, //buriedALIVE// Fight Gear in his post fight interview.
|
|
|
|
|
|
|
|
|
|
|
|
|
|
|
|
|
|
|
|
|
|
|
| S |
C
A |
G |
S |
C
B |
G |
|
S |
C |
G |
|
energy
A | B |
|
hype
A | B |
|
pop
A | B |
|
mgr
A | B |
|
FIGHT
RATING
75% |
|
|
|
|
|
|
