|
|
PBP Commentary |
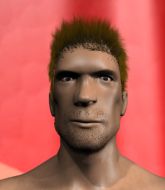
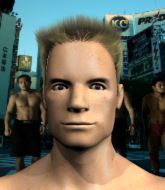
Coming up we have a featherweight MMA rules bout between Martin Gillmore (ranked 0 p4p, 0 weight class) and Jose Mera (ranked 0 p4p, 0 weight class). There are an array of beautiful celebrities at ringside tonight! I wonder if any of them paid for their tickets.
 |
|
 |
| 170 cm
28
152 lbs
7 - 6 - 0 |
|
168 cm
27
150 lbs
7 - 5 - 0 |
BJJ Blue Belt
Great elbows
Cardio machine |
|
Powerful takedowns
Basic striking
Good gas tank |
|
| |
|
Ladies and gentlemen. This fight is 3 rounds, in the featherweight division.
Introducing the fighter to my left, fighting out of the red corner.
With a record of
7 - 6 - 0, fighting out of Amsterdam, Martin Gillmore!
And introducing the fighter to my right, fighting out of the blue corner.
With a record of
7 - 5 - 0, fighting out of London, Jose Mera!
The judges for this bout are Radbod Blank, Daniel Blasius and Paulsen Ambrosius.

The bell rings for round one and we are underway!
Gillmore moves out of range of the strikes.

Gillmore clinches up against the cage.
I was talking to Gillmore's coach per-fight and he was telling me that they'd been working on the clinch in the runup to this fight.
Mera misses with the head strike.

Gillmore manages to break the clinch.
A jab from Mera misses.
Gillmore pushes Mera up against the cage in a clinch.
Mera tries to pull guard but can't drag his opponent to the mat. Gillmore just stands there and leans against the cage.
Mera tries a shoulder strike but it doesn't do any damage.
Mera misses with a short punch on the inside.
Mera swings away with an uppercut that misses.
Gillmore breaks from the clinch.
Gillmore misses with a series of wild punches.
Gillmore clinches with his opponent.
Gillmore is defending well against a takedown attempt.
Gillmore lands punches inside but they're not really causing much damage.
Gillmore wants to push off and get back to the center of the mat but Mera has him pressed against the cage.
Mera jumps guard but Gillmore turns him against the cage and keeps the fight standing.
Martin Gillmore has stuffed three takedown attempts in the round now. That's going to take a lot out of Jose Mera.
Gillmore is trying to push Mera away but Mera has him pressed against the cage, so he's going nowhere.

That's one minute gone in the round.
Mera misses with some punches.
Mera misses with a short punch on the inside.
Gillmore gets double underhooks to prevent a takedown attempt from Mera.
Gillmore blocks a punch to the side of the head.
Gillmore breaks the clinch and we return to the middle of the mat.
Gillmore pushes Mera up against the cage in a clinch.
Gillmore trying to control the position but instead, Mera has worked for underhooks and has pushed Gillmore into the cage.
Mera tries to score a body lock takedown but Gillmore shows good agility there to stay on his feet.
Mera tries to pull guard but Gillmore holds him up against the cage and eventually Mera drops back down to his feet.
Gillmore is trying to slow down the pace in the clinch, to catch his breath.
Gillmore's corner calls for him to break the clinch, which he does.

That's two minutes gone in the round.
Gillmore pushes Mera up against the cage in a clinch.
Mera is trying to work for a single leg takedown but Gillmore pulls him back up using the underhooks.
Mera is working for takedown but Gillmore is calmly controlling the position for now.
Gillmore tries to break the clinch but Mera is controlling the position.
Gillmore breaks the clinch and we're back to striking at distance.

Mera closes the distance and pushes Gillmore back into the cage.
Gillmore working hard to break the clinch.
Gillmore letting Mera take a breather here.
We've seen a great period of action over the last minute or so - credit to both fighters for going all out!
Mera tries to pull guard but Gillmore won't allow it.
Mera misses with a punch on the inside.
Gillmore manages to break the clinch.
Gillmore gets in close and instigates a clinch.
Mera changes levels and goes for a takedown here. Gillmore fights it off and pushes away nicely.
Martin Gillmore is looking to keep the fight on the feet at all costs.
Gillmore circles away from the clinch attempt.

That's three minutes gone in the round.
Gillmore closes the distance and clinches.
Gillmore holding his opponent close, against the cage.
Mera has been looking to improve his clinch game in recent weeks. Gillmore seems to have the measure of him in the clinch so far, so let's see if Mera can turn it around.
Mera keeps control of Gillmore as he tries to wriggle out of the double underhooks.
Gillmore is trying to break free.
Gillmore blocks a punch to the side of the head.
A frustrated look appears on Gillmore's face as he tries to break the clinch.
Mera tries to pull guard but can't drag his opponent to the mat. Gillmore just stands there and leans against the cage.
Mera has a couple of punches blocked by Gillmore.
Gillmore breaks the clinch and we return to the middle of the mat.
Gillmore cracks Mera with a nice right hand that draws applause from the crowd.
Mera gets tackled into the cage by Gillmore. Gillmore maintains the clinch.
Gillmore blocks a couple of punches on the inside.

Mera jumps guard.

Gillmore avoids a guillotine attempt easily.
Fantastic stuff here - a very entertaining period of action, which has drawn cheers from the crowd.
Mera looking to control.
Both fighters really going for it on the ground here!

That's four minutes gone in the round.
Gillmore would like to get this fight back to the feet but can't get free from the closed guard.
Mera seems keen to control Gillmore's posture.
Gillmore won't allow Mera to sweep him here.
Mera keeping moving, preventing Gillmore from controlling successfully.
There's a bit of a scramble here and now Mera is on top in guard.
Mera slips nicely into half guard.
As the round comes to an end the crowd are showing their appreciation for a great round of action.
Mera passes to side control.
Mera trying to control the position but Gillmore is working away.
And thats the end of the round the fighters go back to their corners.
That was a close round but I would say that Martin Gillmore will probably get the nod.
OK. That's time! The bell goes and we're back to the action.

Gillmore rushes Mera and pushes him back against the cage in a clinch.
Gillmore slows down the pace here.
Gillmore scores with a hook to the body.
Mera wants to take the fight to the mat but Gillmore manages to get underhooks and keep the fight in the clinch.
Mera jumps guard but his hands slip and he falls flat on his back. Well, he's made himself look a right mug there, as Gillmore walks away with a smile on his face. Mera gets slowly back to his feet and shakes his head.
Mera will have to do better than that with his takedown attempts.
Martin Gillmore has stuffed three takedown attempts in the round now. That's going to take a lot out of Jose Mera.
Gillmore forces Mera back against the cage and clinches.
Gillmore is trying to wear down his opponent with knees to the body.
Mera swings wildly with an uppercut but Gillmore uses good head movement to avoid it.
Gillmore wants to break free but Mera has control.
Mera goes for a takedown attempt but Gillmore pushes him away and we're back to fighting at a distance.
Mera tries to keep at a distance but Gillmore has taken the fight into the clinch.
That's one minute gone in the round.
Mera is working on a leg, looking for a takedown but Gillmore is defending well.
Gillmore breaks the clinch and we return to the middle of the mat.
The fight moves into the clinch position.
Gillmore breaks from the clinch.
Mera feints and as Gillmore raises his hands in defense, Mera changes levels and drives through with a takedown into guard.
Mera sitting in guard, not really doing much.
Gillmore is looking to get back to his feet but can't, whilst Mera is controlling him.
Gillmore lands a beautiful switch and he's in full mount! That could spell trouble for Mera!
That's two minutes gone in the round.
Mera regains half guard.
Mera is looking to sinch up a guillotine here but Gillmore pulls his head out easily.
Mera is looking to regain full guard. Not this time though.
The fighters are battling for position here. Mera manages to regain full guard. Nice work.
We've seen a great period of action over the last minute or so - credit to both fighters for going all out!
Gillmore looking to pass the guard.
Gillmore trying to control the position from guard on top but Mera is wriggling around, looking for whatever he can.
Mera throws some sloppy strikes off his back.
Gillmore content to stall in guard here.
We must be close to a standup if these guys don't pick up the pace.
Gillmore wants to get up but he can't break Mera's closed guard. He needs to be careful trying to break the legs open, as he's open to submissions here.
That's three minutes gone in the round.
Jose Mera has got the better of the ground game so far.

The ref stands the fighters back up. Martin Gillmore wasn't doing enough on the ground.
Gillmore closes the distance and clinches.
Gillmore breaks the clinch.
Gillmore closes the distance and pushes Mera back into the cage.
A battle for position here, against the cage.
Martin Gillmore has scored more points in the clinch so far.
Gillmore lands a glancing elbow in the clinch.
Gillmore looks like he'd prefer to be striking at range right now.
Gillmore is looking to score with knees to the body. Maybe he'll change it up and go body then head. Mera is defending well for now.
Gillmore working hard to break the clinch.
Gillmore is pressed up against the cage. Mera has hold of a leg and is looking to drag Gillmore down to the mat. Gillmore avoids the attempt though and has circled away. We're back to striking at a distance.
Gillmore moves into the clinch successfully.
Mera is trying to pull guard but Gillmore turns him against the cage and we stay in the clinch.
Mera is working on a leg, looking for a takedown but Gillmore is defending well.
Mera tries to jump guard but he falls flat on his backside. Gillmore smiles and moves away.
That's four minutes gone in the round.
Mera avoids a kick to the body.
Gillmore closes the distance and presses his opponent up against the cage.
Mera keeps the fight in the clinch, despite Gillmore's efforts to push away.
Gillmore's corner calls for him to break the clinch, which he does.
The crowd are loving this. Great action here.
Gillmore moves into the clinch successfully.
Mera tries to jump guard but he falls flat on his backside. Gillmore smiles and moves away.
Gillmore clinches up with Mera and pushes him back against the cage.
As the round comes to an end the crowd are showing their appreciation for a great round of action.
Gillmore breaks from the clinch.
Mera tries to clinch but Gillmore moves out of range.
Gillmore closes the distance and clinches.
Mera takes an elbow to the forehead.
Gillmore lands a body punch.
And thats the end of the round the fighters go back to their corners.
Martin Gillmore dominated that second round.
The fighters get back to their feet, the hooter sounds and we're back to the action! Let's get this one finished - here comes the final round!

Gillmore has closed the distance and engaged Mera in a clinch.
Good anti-grappling being displayed by Mera as Gillmore tries to tie him up.
Mera has dropped down and is looking to force the takedown but it's defended by Gillmore after a bit of a struggle.
Gillmore is trying to slow down the pace of the fight but Mera is keeping busy.
Gillmore wants to get back to striking at distance but Mera won't allow it.
Mera jumps guard but his hands slip and he falls flat on his back. Well, he's made himself look a right mug there, as Gillmore walks away with a smile on his face. Mera gets slowly back to his feet and shakes his head.
Mera darts in and lands a nice takedown into half guard.
Gillmore tries to kick Mera off but Mera keeps his base steady and stays in half guard.
Gillmore is trying to get back to full guard.
Mera seems to be looking for submissions.
That's one minute gone in the round.
Mera seems like he's working for an arm triangle here. He's freed his trapped foot and he's rotating nicely. Gillmore is in big trouble! He's tapping out! This one is aaaaaaaaaaaall over!
Ladies and gentlemen, after 1:25 of round 3, we have a winner by way of Submission (Arm Triangle). Jose Mera!
Jose Mera gave a mention to Zipp Zapp in his post fight interview. That will please them (and hopefully generate some sales).
|
|
|
|
|
|
|
|
|
|
|
|
|
|
|
|
|
|
|
|
|
|
|
| S |
C
A |
G |
S |
C
B |
G |
|
S |
C |
G |
|
energy
A | B |
|
hype
A | B |
|
pop
A | B |
|
mgr
A | B |
|
FIGHT
RATING
100% |
|
|
|
|
|
|

