|
|
PBP Commentary |
Coming up we have a lightweight MMA rules bout between Brelis Farring (ranked 0 p4p, 0 weight class) and Akiro Sata (ranked 0 p4p, 0 weight class). Sata has chosen Onward to Victory! as his entrance music, which hasn't gone down very well with the crowd. These two fighters really are very evenly matched on the feet - it will be fascinating to see who can assert themselves in that aspect of the fight.
 |
|
 |
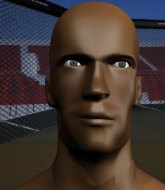
| 183 cm
20
168 lbs
3 - 3 - 0 |
|
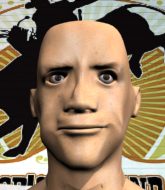
171 cm
23
143 lbs
8 - 9 - 0 |
BJJ Brown Belt
Solid boxing
Cardio machine |
|
BJJ Brown Belt
Decent boxing
Fast |
|
| |
|
Ladies and gentlemen. This fight is 3 rounds, in the lightweight division.
Introducing the fighter to my left, fighting out of the red corner.
With a record of
3 - 3 - 0, fighting out of Helsinki, Brelis Farring!
And introducing the fighter to my right, fighting out of the blue corner.
With a record of
8 - 9 - 0, fighting out of New York, Akiro Sata!
The judges for this bout are Roosa Järviläinen, Matti Vanhoillinen and Johanna Lukiainen.

The bell rings for round one and we are underway!
Sata uses some good footwork to avoid the body shot by Farring.
Farring misses with a straight right.
Farring swats away the attempt to clinch by Sata.
Sata connects with a right hand. Farring shakes it off.
Sata punishes Farring's body with a nice straight punch.
Farring walks straight into a jab right on the nose. That one stung - he's blinking and trying to clear his head.
Sata throws a couple of head shots and lands with the final one - a decent hook, which struck Farring on the side of the head.

Sata drives through with a takedown into Farring's guard. Let's see what he can do from the top position.
Sata looking to control the position here, rather than advance.
Sata throwing strikes from guard but Farring blocks nicely.

That's one minute gone in the round.
Sata trying to control the position from guard on top but Farring is wriggling around, looking for whatever he can.
The fighters are pressed up against the cage, both looking to find a bit of space to work.
Sata pressing down on his opponent's thigh, looking to pass guard. Farring is keeping the position for now.
A big thud reverberates around the arena there as Sata accidentally thumps the mat. Hopefully he's not broken his hand.
Sata missing there with some ground and pound from the guard.

That's two minutes gone in the round.
Sata pushing down on Farring's thigh, trying to pass to half guard. He's managed it... Nice work.

Sata is looking for a kimura but he's never going to get it from there.
Sata seems very keen to just sit and control from half guard but Farring does not like that idea so much and is remaining active off his back.
Sata not throwing his punches with enough precision this time.

Farring looking for submissions off his back.
Sata seems to be looking for submissions.

That's three minutes gone in the round.
Sata thows a huge punch but Farring dodges it nicely.
Sata tries to pass the half guard into mount. Farring knows what he's doing though and prevents the attempt.
Sata trying to control the action but Farring is working from the bottom.
Sata is trying for a guillotine from the top but the pressure isn't in the right place so Farring is just riding it out for now. Sata eventually gives up the hold.
Farring looking for submissions from an awkward position here.

That's four minutes gone in the round.
Sata sitting in half guard, looking to land shots. Farring defending well though.
Sata is trying to work for a kimura but Farring is defending well.
Sata is trying to control the action in half guard but Farring is working away on the bottom, looking perhaps to get back to full guard.
And thats the end of the round the fighters go back to their corners.
Akiro Sata dominated that round.
Well, the break between rounds is over. Let's get back to the scrappin!

Sata bobs and weaves well there to avoid the strikes.
Sata looking to shoot here. He's gone for it and he's landed a takedown into side control! Oh, that's bad for Farring!
Farring is looking for a sweep.
Sata working the ground and pound but Farring is defending the strikes.
Sata throwing strikes but Farring manages to buck up and roll into a nice reversal - now he's on top in side control!
Farring has knee on belly and now moves to full mount! Trouble for Sata!
Sata is squirming around, avoiding Farring's attempts to control the action.
Farring jumps to side control looking for an arm triangle but Sata manages to avoid the submission attempt.
Sata is trying to get back to half guard.
That's one minute gone in the round.
Farring remains in side control and seems content to stay there. It's a versatile position from which he can work both strikes and submissions, whilst maintaining that control, so maybe he'll sit here for a while.
Sata tries to bench press Farring off him but Farring keeps the position.
Farring works to advance to full mount. Sata defends for a few seconds but eventually he succumbs.
Farring is working for a guillotine from mount but Sata frees his head quite easily.
Farring wants to take Sata's back here but Sata is holding on to an arm, himself looking to escape.
Farring tries to control but Sata wriggling away.
Farring controlling the pace for now.
Sata is flailing around like a fish out of water, trying to land strikes.
That's two minutes gone in the round.
Sata has given up his back.
Sata is trying to break free.
Sata is keeping busy.
Farring keeps control of the position as Sata tries to break free.
Fantastic stuff here - a very entertaining period of action, which has drawn cheers from the crowd.
Farring is staying calm and holding on to the back position, whilst working on a rear naked choke. Sata is defending well though. Farring let's go of the attempt for now.
Farring not allowing Sata to control his hands.
Sata tries to escape the position.
That's three minutes gone in the round.
Farring tries to get the hooks in deep but Sata pushed the leg off.
Sata is really stuck here.
Sata is still trying to improve position.
Farring is looking to control Sata but Sata is wriggling around and keeping busy.
Farring really has the hooks in deep now - there seems like no escape for Sata.
Sata rolls, trying to escape but Farring keeps control of the position.
Farring biding his time, controlling Sata.
That's four minutes gone in the round.
Farring has the hooks in. Sata is trying to push off one leg but he has to do so cautiously to avoid being submitted.
Farring has his hand under the chin of his opponent looking for the choke. He's nearly got it! This one could be all over! But no, Sata has freed his hand and lives to survive another
well, another couple of seconds at least!
Sata is in bad spot here.
Farring is looking cool and calm here, just waiting for a good opportunity to attack and finish the fight from this dominant position.
Farring looking for the choke but no joy.
Fantastic stuff here - a very entertaining period of action, which has drawn cheers from the crowd.
Sata prevents Farring from getting a body triangle.
As the round comes to an end the crowd are showing their appreciation for a great round of action.
I would not like to be Sata right now.
And thats the end of the round the fighters go back to their corners.
Brelis Farring dominated that second round.
The minute break is over - no more time for sponges and pep talks - back to the action! This is the final round!

A combination from Sata does no damage.
Farring takes a shot to the nose. Hopefully that hasn't broken it.
Farring keeping a good distance there, avoiding the body shot.
Sata shoots in for a takedown. "I don't think so" says Farring as he avoids it easily.
The step up in weight doesn't seem to be a problem for Sata. He's performing admirably here against the bigger man.
Sloppy strikes from Sata. Those never looked like landing.
Sata throws a right and a left that both miss.
Sata shoots in for a takedown but Farring shows good takedown defense there and keeps this one on the feet.

Sata clinches.
A body shot lands from Farring.
Farring jumps guard but Sata turns him against the cage and keeps the fight standing.
Farring tries for a takedown but Sata manages to get underhooks.
Farring lands a right hand that snaps the head of Sata backwards.
That's one minute gone in the round.
Farring can't find room to land a body shot as Sata controls the action.
Farring lands a nice shot to the body.

Farring pulls Sata into guard.
Farring working from the bottom, still in full guard. He's managed to get a loose triangle. Sata doesn't seem to be doing much to defend here, obviously he feels comfortable in the position. Sata manages to throw the legs off his shoulder and he's back into guard - no problem.
Farring avoiding any damage from the ground and pound.
Sata tries to free his leg and advance position but Farring is retaining full guard.
Farring preventing the ground and pound from doing any damage.
Sata trying to control but Farring is working from the bottom.
That's two minutes gone in the round.
Sata trying to pass the guard but can't manage it just yet.
Farring has an active guard here but Sata has managed to pass into half guard.
The ref warns both fighters not to hold the cage as they work up against the meshing.
Sata is looking for a kimura but Farring is holding onto that half guard position, so it's hard for Sata to get the leverage.
Sata controlling the action here.
Farring actively working from the bottom here.
That's three minutes gone in the round.
Sata prevents Farring from improving his position.
Sata looks to land a strike but Farring avoids it nicely and regains full guard.
Sata wants to control from the top but Farring keeps moving.
Farring being controlled here, momentarily.
That's four minutes gone in the round.
Sata loading up with the ground and pound but he's missing more than he's landing in this flurry.
Sata keeps in close for a moment and lands a decent shot to the side of Farring's head.
Sata throwing strikes from guard but Farring blocks nicely.
The crowd applaud the fighters efforts here as the round comes to an end.
Sata thinks about going for a leg but decides against it, in order to maintain the position.
And that's the end of the fight!
Akiro Sata comfortably won the final round on my scorecard.
I think Sata has won this one but let's see whether the judges agree with me. Over to the ring announcer for the scorecards.
Ladies and gentlemen, after 3 rounds of action, we go to the scorecards for a decision.
Judge Roosa Järviläinen scores the fight 28:29
Judge Matti Vanhoillinen scores the fight 28:29
Judge Johanna Lukiainen scores the fight 28:29
In favor of your winner, by unanimous decision... Akiro Sata!
After winning the bout, Akiro Sata thanked all his fans and promised he'd do even better in his next fight. The crowd seemed to love his humility.
|
|
|
|
|
|
|
|
|
|
|
|
|
|
|
|
|
|
|
|
|
|
|
| S |
C
A |
G |
S |
C
B |
G |
|
S |
C |
G |
|
energy
A | B |
|
hype
A | B |
|
pop
A | B |
|
mgr
A | B |
|
FIGHT
RATING
50% |
|
|
|
|
|
|
