|
|
PBP Commentary |
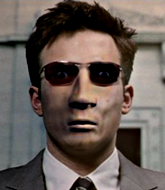
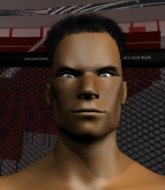
Coming up we have a middleweight MMA rules bout between Matt Murdock (ranked 0 p4p, 0 weight class) and Katsuro Sato (ranked 0 p4p, 0 weight class). Murdock comes to the cage accompanied by You're Blind. Rumors backstage are that the fighters have been paid to keep it standing but we know that would never happen in MMA!
 |
|
 |
| 183 cm
34
189 lbs
36 - 6 - 0 |
|
187 cm
33
196 lbs
31 - 15 - 0 |
Great wrestler
World class boxer
Insanely flexible |
|
Excellent grappler
Lethal high kicks
Granite chin |
|
| |
|
Ladies and gentlemen. This fight is 5 rounds, for the middleweight championship of the world!
Introducing the champion to my left, fighting out of the red corner.
With a record of
36 - 6 - 0, fighting out of Las Vegas, Matt Murdock!
And introducing the challenger to my right, fighting out of the blue corner.
With a record of
31 - 15 - 0, fighting out of London, Katsuro Sato!
The judges for this bout are Phil Schofield, James Atkins and William Gold.

The bell rings for round one and we are underway!
Murdock throws a head kick that Sato semi-blocks.

It looks like Katsuro Sato has been cut.
Murdock connects with an inside leg kick.
A clash of legs there as Murdock blocks the low kick.
Sato ducks down and throws a hook to the body but Murdock moves away.
Sato chopping away at his opponent's legs.
Murdock misses with a combination

and Sato counters with a takedown into side control! That could mean trouble for Murdock!
This is a great period of action - very entertaining stuff!
Sato cracks Murdock with a big elbow.
Murdock can't do much from the bottom here.
Murdock tries to work a leg under to get back to half guard but Sato wriggles his own leg back out and remains in side control.
Sato is looking to take a break and control but Murdock is keeping him honest, looking to work from the bottom.
The fighters are pressed up against the cage, both looking to find a bit of space to work.
Murdock tries to bench press Sato off him but Sato keeps the position.
Murdock wants to control but Sato postures up.
Murdock parries the strikes from Sato easily there. Sato is wary of posturing up too much because it might enable Murdock to escape.

That's one minute gone in the round.
Murdock is trying to improve his position.
Sato lands a knee to the body and a forearm to the face.
Murdock tries to improve position but can't.
Murdock is not content to let Sato control the position.
Sato throws a strike aimed at the side of Murdock's head but Murdock avoids it well.
Sato trying to control the position but Murdock is working away.
Murdock tries to buck Sato off but Sato is having none of it.
Sato creates some space and throws a big elbow, but Murdock sees it coming and moves his head just enough to avoid the strike.
Sato is working Murdock over with some ground and pound from side control.
Murdock tries to bench press Sato off him but Sato keeps the position.

That's two minutes gone in the round.

Sato tries for a kimura. Not really close to a finish though.
Murdock tries to work a leg under to get back to half guard but Sato wriggles his own leg back out and remains in side control.
The ground and pound from Sato seems to be hitting the mat more than his opponent.
The crowd cheering loudly, showing their appreciation for the quality fight we're seeing here.
You can see the frustration on Murdock's face, being in this tough position on the bottom.
Murdock is trying to get back to half guard. He's pushing on Sato's leg. He's managed it. Nice work.
Sato has the superior BJJ but he's also working some ground strikes into his gameplan.
Murdock is trying to get back to full guard.
Sato wants to free his trapped foot but Murdock is holding on for dear life with his legs.
Murdock wants to get back to full guard.

That's three minutes gone in the round.
Sato throwing shots but Murdock is blocking nicely.
Sato is looking for a kimura here.
Murdock tries to roll over but Sato keeps him under control.
Murdock trying to hold on to Sato's head to control him but Sato postures up.
Sato slips a nice elbow through Murdock's hands, connecting with Murdock's forehead.
Sato thows a huge punch but Murdock dodges it nicely.
Murdock gets back to full guard.
Murdock definitely looks more muscular than last time we saw him fight.
Murdock is trying to keep Sato in close.

That's four minutes gone in the round.
Murdock is controlling Sato's posture.
Murdock is working from a closed guard but he's struggling to control his opponent.
Murdock is going to have to think about doing something other than just controlling because Sato is managing to avoid having the position dictated to him.
Sato is in close to Murdock's body, working some short punches and elbows.
Murdock working a defensive guard here.
This has been an exciting period of action!
The crowd are going absolutely nuts as the round comes to an end - what a fantastic round of action!

We're going to have a standup here because Matt Murdock wasn't active enough for the referee's liking.
Murdock gets off balance looking for a body kick
and Sato counters with a nice double leg into half guard.
Murdock keeps control of the position for the meantime.
Sato throwing punches and elbows but they're not doing any damage.
And thats the end of the round the fighters go back to their corners.
Katsuro Sato dominated that round.
The cut man is working on Katsuro Sato's cut.
The referee calls time. The cornermen exit stage left and we're back to business.

Sato ducks under a wild hook from Murdock.
Murdock jabs Sato right on the nose. Sato blinks but takes it well.
Sato takes an uppercut right on the jaw but it doesn't phase him.
Murdock misses the shot to the body.
Murdock tries to clinch but is not successful on this occasion.
Murdock misses with a body shot
and Sato counters with a driving takedown into guard. Nice work there by Sato.
Sato postures up.
Murdock is avoiding any damage by keeping wrist control.
Sato loading up with the ground and pound but he's missing more than he's landing in this flurry.
The fans in attendance giving it up for the two fighters, who have really let it all hang out in the last minute or so!
Sato scores with a decent looking elbow strike.
Sato being controlled here momentarily.
Murdock's ground tactics aren't going to win him many fans. Let's hope he's got fireworks for us if he gets back to his feet because he's not doing much on the ground.
That's one minute gone in the round.
The referee looks like he's ready to step in and stand the fighters back up.
Sato throwing shots from guard but he's hitting more mat than opponent.
Murdock keeping full guard, as Sato tries to pass.
Murdock is avoiding any damage by keeping wrist control.
The ref stands the fighters back up. Matt Murdock wasn't doing enough on the ground.
Sato takes a big uppercut there. He seems a bit wobbly but no, he's OK.
Sato swings for the body but Murdock moves out of range.
Sato lands a nice looking body shot.
Sato cracks Murdock with a right hand to the side of the head.
The crowd cheers as Murdock lands an impressive looking overhand right. Sato doesn't seem phased though.
Murdock throws a jab to the body, straight down the pipe. Boom. That sent Sato stumbling backwards but he manages to regain his composure quickly.
Murdock lands a kick to the ribs of his opponent. Nice work there - in and out in a flash.
Matt Murdock is looking to keep the fight on the feet at all costs.
This is a great period of action - very entertaining stuff!
Sato tries to land a leg kick but Murdock saw it coming and moves away.
Matt Murdock is winning the standup battle so far.
That's two minutes gone in the round.
Sato slips a straight right by Murdock.
Sato thumps Murdock with a low kick.
Murdock missing with a left hand there. Sato was out of range so wasted energy throwing that one.
Sato throws a nice outside leg kick.
Murdock checks a leg kick nicely.
Sato misses with a hook. Murdock ducked under it nicely.
Murdock paws at his opponent with the jab and then lunges in with a straight, right on the button.
Murdock connects with a looping right hand.
Sato throws a hook to the body but it doesn't connect.
Sato throws a head kick that misses and slips in the process. He scrambles back to his feet and the fighters circle.
Sato takes one on the chin but keeps coming.
Sato avoids the clinch attempt nicely.
Murdock looks to land a body kick but Sato moved away.
Murdock uses good footwork to get in and out and land a nice right hand before Sato has time to react.
That's three minutes gone in the round.
Sato tries to score with a low kick but Murdock moves his leg out of the way.
Murdock throws a body kick but he was well out of range there.
Murdock tries to close the distance and clinch up but Sato swats him away and circles back towards the center.
Sato missing with a left hand there. Murdock was out of range so wasted energy throwing that one.
Good work by Murdock as he checks the leg kick.
Murdock goes for a spinning back kick but it misses.
Sato throws a body kick but he was well out of range there.
Sato moves out of range of the body kick from Murdock.
Murdock misses with a few strikes there.
Sato lands the left hand.
Sato lands a leg kick that knocks Murdock off balance momentarily.
Murdock keeps the fight standing with a nice sprawl.
Sato looks to throw the jab but Murdock is out of range.
Murdock looking to take his opponent's legs away with the low kicks.
That's four minutes gone in the round.

Murdock moves into the clinch.
Sato lands with a short punch from the clinch.

It looks like Matt Murdock has been cut.
Murdock keeps control of Sato as he tries to wriggle out of the double underhooks.
Sato lands with a left to the head.
An uppercut on the inside fails to land for Murdock.
Wooooo! Give it up for these two warriors! They are putting on a show!
Sato is working hard here but doesn't seem to be able to control effectively, up against the cage.
Murdock softening up his opponent with strikes, against the cage.
A short left from Murdock.
A frustrated look appears on Sato's face as he tries to break the clinch.
Murdock lands a body punch - he's looking to wear down Sato.
Murdock gets underhooks to prevent Sato's takedown attempt.
Sato is breathing heavily.
Sato drops to a knee looking for a takedown but Murdock gets the underhooks and prevents it.
Matt Murdock has stuffed three takedown attempts in the round now. That's going to take a lot out of Katsuro Sato.
The crowd are going absolutely nuts as the round comes to an end - what a fantastic round of action!
Murdock scores with a hook to the body.
Sato takes a shot to the head.

Sato breaks the clinch and we return to the middle of the mat.
And thats the end of the round the fighters go back to their corners.
Matt Murdock dominated that second round.
Both fighters have cut men working on them during the interval.
That's time! Back to the action!

Murdock thows a left - swing and a miss!
Murdock lands with an uppercut that bounces Sato off the cage and back into range.
Matt Murdock seems to be the more aggressive standup fighter in this bout.
Murdock throws a leg kick which misses Sato's front leg but catches the back leg as Sato tries to avoid it.
Sato pulls out of a head kick attempt.
Murdock checks a leg kick nicely.
Good leg kick by Murdock there. It's the ones that make that thud noise that hurt and that was an almighty thud.
Murdock just misses with a punch to the body.
Murdock moves into range and lands a nice leg kick.
Murdock throws a lazy right hand but Sato sees it coming a mile off and sidesteps it easily.
Sato takes a jab right on the nose. That must have hurt but he shrugs his shoulders and looks to return the favor.
Murdock lands with an overhand left.
Sato loads up on a big right hand but Murdock slips the punch.
Murdock throws a low kick but Sato avoids it.
Thud! ouch! good body kick from Sato - that will leave a mark!
The crowd are loving this. Great action here.
A looping hook to the body misses from Murdock. Sato does a little dance to reset his feet.
That's one minute gone in the round.
Sato misses with a hook. Murdock ducked under it nicely.
Sato moves away from the strike by Murdock.
Sato throws a leg kick but Murdock checks it.
Sato connects with a solid leg kick.
Murdock takes a solid shot to the body. That one hurt him but he's trying not to show it.
Murdock looks to land a combination but Sato avoids it well.
Like a baseball bat into the meat of his leg there - nice leg kick by Murdock.
A chopping leg kick lands by Sato.
This fight brought to you by 5M nutrition - it's mmmmm tasty. Nice jab by Murdock.
Murdock thuds his shin into the meat of Sato's side.
Murdock tries to score with an inside leg kick but telegraphs it and Sato is able to avoid easily.
Sato ducks under a wild hook from Murdock.
Sato throws a shot from downtown. Murdock moves away and avoids it.
Murdock throws a body kick but he wasn't in range.
That's two minutes gone in the round.
Sato misses with a head kick.
Sato cracks Murdock with a hook to the jaw. Both fighters smile at eachother and high-five before getting back down to business.
The crowd are loving this. Great action here.
Sato takes a shot to the eye socket. That's gotta hurt.
Sato checks a leg kick nicely.
Sato tries a switch kick but it misses it's target.
Murdock wants to slow Sato down by chopping away at his legs.
Sato turns his hip over beautifully as he lands a nice leg kick.
Murdock is looking to land body kicks.
Murdock is looking to chop away at Sato's legs.
Sato scores with a jab to the head.
Murdock swings wildly with a hook that is half blocked by Sato.
Murdock thuds his right hand into Sato's forehead from close range. That could be painful for both fighters.
Murdock takes a thudding leg kick, right into the meat of the thigh.
Murdock works the jab nicely.
That's three minutes gone in the round.
Murdock's corner calls for a 1-2. Murdock obliges with the 1 part as he scores the single shot and moves back out of range.
Murdock slaps away a takedown attempt from Sato, before circling back to the center of the mat.
Sato tries to move into range but Murdock moves to the side and lands with a nice right hand.
Murdock moves out of range as Sato throws a body kick.
Sato pivots, looking for a leg kick but Murdock is out of range and Sato settles back down.
Sato misses with a leg kick.
Murdock throws a nice head kick!
Sato shoots in and gets a takedown into half guard. Sato showed some decent athleticism there.
The fans in attendance giving it up for the two fighters, who have really let it all hang out in the last minute or so!
Murdock wants to get back to full guard.
Murdock wants to control but Sato is keeping busy.
That's four minutes gone in the round.
Murdock manages to get to full guard.
Murdock is trying to control the position from the bottom.
Murdock controlling the position.
Sato trying to land body shots but he keeps hitting the mat.
Murdock trying to keep a closed guard but Sato is proving a slippery customer.
The crowd are going absolutely nuts as the round comes to an end - what a fantastic round of action!
Murdock is pulling down on Sato's head to control his posture.
Sato trying to land body shots but he keeps hitting the mat.
And thats the end of the round the fighters go back to their corners.
Matt Murdock clearly takes that round.
Both fighters have cut men working on them during the interval.
The referee calls time. The cornermen exit stage left and we're back to business.

Murdock tries to clinch up against the cage, rushing in to close the distance. Sato manages to break the clinch and circles back to the middle of the mat.
Murdock throws a body kick but he wasn't in range.
Sato looking to throw a kick but he's pulled out of it.
Sato lands a nice looking kick to the body. Murdock takes a step back to recover.
Sato misses with a takedown attempt
and Murdock makes him pay by landing a nice hook to the body before moving out of range.
Murdock misses with a straight left.
Murdock throws an off balance right hand
and Sato counters with a shoot takedown into half guard.
Murdock gets full guard.
Murdock is trying to keep Sato in close.
Murdock has a closed guard, preventing anything of note from happening. Perhaps he's looking to stall.
Sato wants to control from the top but Murdock keeps moving.
That's one minute gone in the round.
Murdock not looking particularly offensive just at the moment.
The ref stands the fighters back up. Matt Murdock wasn't doing enough on the ground.
Murdock scores with a nice right hand.
A looping hook to the body misses from Sato. Murdock does a little dance to reset his feet.
Sato misses with an attempted mid kick.
Sato throws a quick head kick that skims the top of Murdock's head.
Murdock takes one on the chin but keeps coming.
Sato misses with a leg kick.
Sato fakes with a right hand and throws a good leg kick, right into the thigh. That had to hurt Murdock.
Murdock doesn't manage to clinch there - Sato circles away.
That's two minutes gone in the round.
Murdock tries to close the distance and clinch but Sato swats him to one side with an open hand palm strike and circles away.
Sato fakes high and swings low for a body shot but Murdock manages to avoid it.
Sato uses some good footwork to avoid the body shot by Murdock.
Murdock thuds his right hand into Sato's forehead from close range. That could be painful for both fighters.
Sato connects with a nice looking jab.
Murdock misses with a body kick.
A telegraphed right hand from Sato misses the target.
Sato looks to score with a jab to the body but Murdock is just out of range.
Murdock tries to land with a swinging hook to the body but Sato was well out of range. Poor timing from Murdock.
The fans in attendance giving it up for the two fighters, who have really let it all hang out in the last minute or so!
Sato fakes a jab and throws a low kick but Murdock checks it well.
Sato buckles his opponent's knee momentarily with a nice leg kick.
Sato uses some good footwork to avoid the body shot by Murdock.
This fight brought to you by 5M nutrition - it's mmmmm tasty. Nice jab by Sato.
That's three minutes gone in the round.
Sato moves out of range of the strikes.
That kick from Murdock tenderised Sato's leg. Sato is trying to keep his angry face on.
Murdock gets cracked with a nice right hand there by Sato.
Murdock blocks a head kick by Sato.
Sato checks the leg kick nicely there.
Sato getting the better of the striking in that exchange.
That's a knee to de groin and it's over and out! Murdock crumples to the ground after an illegal strike from Sato - the referee stops the clock and Murdock gets 5 minutes to recover from that one. "I'm sorry" says Sato. Murdock manages to get back to his feet and the fight resumes.
Sato's corner calls for a 1-2. Sato obliges with the 1 part as he scores the single shot and moves back out of range.
Murdock looks to score with a jab to the body but Sato is just out of range.
Murdock tried to score with a low kick but Sato checks it.
Murdock throws a hook but Sato avoids it easily.
Murdock explodes with a nice body kick and back out of range. Nice work.
Sato blocks a low kick nicely.
That's four minutes gone in the round.
Sato scores with a sloppy right hand. Murdock should have avoided that one.
Sato scores with a leg kick.
Nice cross by Murdock.
Sato has a pretty nasty looking mouse under his right eye.
Wooooo! Give it up for these two warriors! They are putting on a show!
Murdock misses with a wild body shot.
Sato moves out of range as Murdock strikes.
Sato jabbing away but nothing is landing.
Sato just misses with a punch to the body.
Murdock checks a low kick from Sato.
Murdock walks straight into a jab right on the nose. That one stung - he's blinking and trying to clear his head.
Sato takes a really solid shot there but just smiles back and shrugs his shoulders.
As the round comes to an end the crowd are showing their appreciation for a great round of action.
Murdock throws a low kick, looking for Sato's leg but Sato calmly moves out of range.
Murdock swings away but doesn't land with a series of punches.
Sato finds nothing but air with that leg kick attempt.
Murdock takes an uppercut right on the button but keeps his composure.
And thats the end of the round the fighters go back to their corners.
Katsuro Sato dominated that fourth round.
Both fighters have cut men working on them during the interval.
Well, the break between rounds is over. Let's get back to the scrappin! Let's get this one finished - here comes the final round!

A low kick from Murdock misses
and Sato decides to take the opportunity to score a takedown. He's landed in Murdock's guard.
Murdock keeping moving, preventing Sato from controlling successfully.
Murdock working the defensive guard well to avoid strikes from Sato.
Sato keeps in close for a moment and lands a decent shot to the side of Murdock's head.
Sato drops back looking for a leg! Murdock is in trouble here! The fighters roll with the hold and Murdock manages to kick Sato off! Sato jumps back into Murdock's guard.
Sato stands up and looks to throw the legs aside to pass to side control. Murdock swivels though and keeps the full guard.
Sato is looking to work some ground and pound but Murdock has wrist control.
The ref warns both fighters not to hold the cage as they work up against the meshing.
Murdock has control of Sato's left arm, preventing Sato from doing any damage.
That's one minute gone in the round.
Murdock is trying to control the position from the bottom.
Sato throws a big right hand that misses.
Katsuro Sato has got the better of the ground game so far.
Sato tries to free his leg and advance position but Murdock is retaining full guard.
Murdock seems keen to control Sato's posture.
Murdock is trying to control the position but Sato postures up.
The ref stands the fighters back up because Matt Murdock just wasn't active enough.
Murdock throws out a loose jab but Sato uses good head movement to avoid it.
Murdock looking to take his opponent's legs away with the low kicks.
Murdock looks to throw the jab but Sato is out of range.
Murdock doesn't manage to clinch there - Sato circles away.
Sato lands with a cross.
That's two minutes gone in the round.
A jab from Sato finds it's way through Murdock's defenses.
Sato lands a slapping body shot.
Murdock gets cracked there but stands up to it.
Sato defending well as Murdock loads up on a big left hand.
Murdock takes a swing at Sato's ribcage but misses.
Murdock jabs Sato to the body, keeping him at a distance.
Murdock stuffs the takedown attempt from Sato. Sato gets slowly back to his feet.
Wooooo! Give it up for these two warriors! They are putting on a show!
Murdock throws the kick towards the body but Sato avoids it.
Good work by Murdock as he checks the leg kick.
Sato avoids a kick to the body.
Good work by Sato as he checks the leg kick.
Murdock cracks a nice hook into Sato's ribs.
That's three minutes gone in the round.
Sato throws out a loose jab but Murdock uses good head movement to avoid it.
Sato blocks a head kick by Murdock.
Well, he's not going to score with shots like that. A lazy body kick attempt from Sato.
Murdock connects with an inside leg kick.
Sato looks to score with a jab to the body but Murdock is just out of range.
Murdock throws a big shot that misses.
Sato tries to keep at a distance but Murdock has taken the fight into the clinch.
Murdock swings away with an uppercut that misses.
Murdock prevents a takedown attempt there.
Murdock swings wildly with an uppercut but Sato uses good head movement to avoid it.
Murdock lands a right hand that snaps the head of Sato backwards.
A head punch on the inside from Murdock fails to land.
That's four minutes gone in the round.
Murdock misses with a hook from the clinch.
Sato is looking to control Murdock's arms but Murdock gets an underhook and turns him. Now Sato has his back to the cage.
Sato wants to take the fight to the mat but Murdock manages to get underhooks and keep the fight in the clinch.
Matt Murdock has stuffed three takedown attempts in the round now. That's going to take a lot out of Katsuro Sato.
Sato tries for a takedown but Murdock manages to get underhooks.
A shot in the inside from Murdock.
The crowd are loving this. Great action here.
Murdock cracks Sato with a nice body shot.
Sato is wobbling all over the place through exhaustion. Will he make it to the final bell?
A nice right hand lands inside from Murdock.
Murdock has a couple of punches blocked by Sato.
Murdock lands a body punch in the clinch.
Murdock lands with a short punch from the clinch.
Murdock digs a right hand into Sato's ribs. Those have got to be taking their toll on Sato's gas tank.
Murdock lands a shoulder strike that jolts his opponent's head backwards.
Sato has been looking to improve his clinch game in recent weeks. Murdock seems to have the measure of him in the clinch so far, so let's see if Sato can turn it around.
The crowd are going absolutely nuts as the round comes to an end - what a fantastic round of action!
Murdock lands punches inside but they're not really causing much damage.
Murdock scores with an uppercut up the middle.
Murdock throws a punch but it's blocked by Sato.
Matt Murdock has scored more points in the clinch so far.
Sato is trying to force a seperation but Murdock has the dominant position.
And that's the end of the fight!
Matt Murdock showed his dominance in that final round.
I think Murdock has won this one but let's see what the judges have to say. Over to the ring announcer for the scorecards.
Ladies and gentlemen, after 5 rounds of action, we go to the scorecards for a decision.
Judge Phil Schofield scores the fight 48:47
Judge James Atkins scores the fight 48:47
Judge William Gold scores the fight 48:47
In favor of your winner, by unanimous decision... Matt Murdock!
Matt Murdock retains his middleweight title!
An intense looking Matt Murdock took to the microphone post fight and gave a little speech: 'Good fight Donnie.'.
Katsuro Sato spoke after the fight, saying 'Dang! You got me again man.'.
|
|
|
|
|
|
|
|
|
|
|
|
|
|
|
|
|
|
|
|
|
|
|
| S |
C
A |
G |
S |
C
B |
G |
|
S |
C |
G |
|
energy
A | B |
|
hype
A | B |
|
pop
A | B |
|
mgr
A | B |
|
FIGHT
RATING
100% |
|
|
|
|
|
|

