|
|
PBP Commentary |
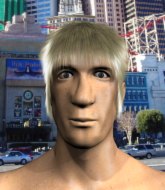
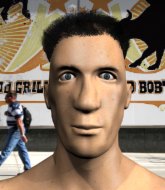
Coming up we have a super heavyweight MMA rules bout between Jack Stirling (ranked 0 p4p, 0 weight class) and Aribert Heim (ranked 0 p4p, 0 weight class). Jack Stirling could well score a knockout today. He has the power to get to Aribert Heim's chin.
 |
|
 |
| 186 cm
26
181 lbs
9 - 6 - 0 |
|
175 cm
23
132 lbs
4 - 3 - 0 |
Good wrestling
World class boxer
Cardio machine |
|
Good wrestler
World class boxer
Good gas tank |
|
| |
|
Ladies and gentlemen. This fight is 3 rounds, in the super heavyweight division.
Introducing the fighter to my left, fighting out of the red corner.
With a record of
9 - 6 - 0, fighting out of Helsinki, Jack Stirling!
And introducing the fighter to my right, fighting out of the blue corner.
With a record of
4 - 3 - 0, fighting out of Helsinki, Aribert Heim!
The judges for this bout are Anni Minnemäki, Johanna Lukiainen and Tarja Halkonen.

The bell rings for round one and we are underway!
Jab, jab by Heim - just one landing.
Stirling doesn't react quick enough there as he takes a shot to the body.
Heim walks straight into a jab right on the nose. That one stung - he's blinking and trying to clear his head.
Stirling leaves Heim with his face pressed against the mat as he sprawls beautifully, defending against a solid takedown attempt.

Heim dives in and scores a takedown into Stirling's guard.
The referee wants the fighters to be more active or he's going to reset them on the feet.
Heim is fighting to break Stirling's control of his arms but Stirling is doing a good job of controlling the position at the moment.
The fighters are pressed up against the cage, both looking to find a bit of space to work.
Heim loading up with the ground and pound but he's missing more than he's landing in this flurry.
Heim loading up with the ground and pound but he's missing more than he's landing in this flurry.
A big thud reverberates around the arena there as Heim accidentally thumps the mat. Hopefully he's not broken his hand.
Heim stands up and looks to throw the legs aside to pass to side control. Stirling swivels though and keeps the full guard.
Heim engaging in some classic timewasting tactics.

That's one minute gone in the round.
Heim trying to control the position from guard on top but Stirling is wriggling around, looking for whatever he can.
Stirling is trying to control the position from the bottom.

It looks like we're going to have a standup here. Neither fighter is doing enough on the ground.
Heim is looking to take this fight into the clinch.
Stirling steps to the side to avoid the strikes from Heim.

That's two minutes gone in the round.
A few boos can be heard. I'm sure they will multiply if the fighters don't pick up the pace.
Heim shoots in for a takedown. He's persisting with it as Stirling sprawls well. Stirling wins this battle and keeps the fight standing. Heim gets slowly back to his feet.
A nice combination there by Heim.
Stirling uses decent footwork to sidestep a right hand from Heim.
Stirling thows a body shot but no joy.
Heim keeping his hands up high there, blocking the jab from Stirling.
Stirling tries to score with a leg kick but it misses it's target.
Heim shoots in and drives through. Stirling sprawls well.
Jack Stirling has stuffed three takedown attempts in the round now. That's going to take a lot out of Aribert Heim.
Stirling throws a nice inside leg kick.
Heim throws a big shot that misses.
Heim tries to check the leg kick but that clearly hurt him.
Heim looks for a takedown here. Will he get it? Stirling is fending him off so far but Heim persists. Nope, Stirling circles away and we're back to standing.
Stirling dances in quickly and lands a nice inside leg kick on Heim. That did some damage!
Heim throws a monster uppercut resembling something out of street fighter but it doesn't land.
Heim tries to close the distance and clinch up but Stirling swats him away and circles back towards the center.

That's three minutes gone in the round.
Heim pushing out the jab but it's not landing.
Stirling throws a hook to the body but it doesn't connect.
Heim is a painfully thin specimen of a man. You do wonder whether a good body kick would snap him clean in two.
Heim uses decent footwork to sidestep a right hand from Stirling.
Stirling ducks low and lands a nice hook to the body of his opponent.
Stirling throws a nice looking combination but Heim bobs and weaves to avoid any damage.
Heim uses some good footwork to avoid the body shot by Stirling.
Heim throws an uppercut from half a mile away. Stirling sees it coming and avoids it easily.
Stirling walks straight into an uppercut. Luckily it didn't land flush.
Stirling moves out of range as Heim strikes.
Stirling ducks under a wild hook from Heim.
Stirling thows a body shot but no joy.
Stirling digs a good hook to Heim's body.
Heim scores with a shot to the body.
Heim takes a shot to the body in his stride.
Heim takes one on the button.

That's four minutes gone in the round.
Heim walks forward, straight into a front kick from Stirling.
The fans in attendance giving it up for the two fighters, who have really let it all hang out in the last minute or so!
Heim throws a loose over hand right and dives in with a double leg takedown. Stirling tries to sprawl but it's too late and the fighters hit the mat. Heim is in Stirling's guard.
Heim working some ground and pound from guard but it's not doing any damage.
Heim is fighting to break Stirling's control of his arms but Stirling is doing a good job of controlling the position at the moment.
Stirling will need to keep those long limbs tucked in whilst he's on the ground, to prevent any submissions.
Stirling is working an open guard here, looking to improve his position. No doubt that will leave him open to counters but at least he's being more offensive.
As the round comes to an end the crowd are showing their appreciation for a great round of action.
Heim is looking to work some ground and pound but Stirling has wrist control.
And thats the end of the round the fighters go back to their corners.
A close round but Aribert Heim will probably get the nod.
That's the end of the interval. I'm sure that seemed a lot quicker than a minute for our two fighters! Back to the action.

Stirling swings and misses with a hook to the body.
Heim misses the shot to the body.
Jack Stirling is winning the standup battle so far.
Nice uppercut lands for Stirling. That snapped Heim's head back.
Heim keeping a good distance there, avoiding the body shot.
A left lands for Heim.
Heim throws a nice hook to the body that draws an oooh from the crowd.
Heim cracks Stirling with an open hand slap.
Stirling throws a hook to the body but it doesn't connect.
Heim goes for a double leg but Stirling avoids the attempt and the two fighters end up clinched against the cage as Stirling continues to drive forward.
Our sources have told us that Stirling has been working on his knees in the buildup to the fight.
Stirling softening up his opponent with strikes, against the cage.
Heim doesn't land with the attempted body shot.
Heim working on landing some head shots here - that one got through nicely.

Stirling manages to break the clinch.
Stirling is looking to chop away at Heim's legs.
Fantastic stuff here - a very entertaining period of action, which has drawn cheers from the crowd.
Stirling looks to score with a jab to the body but Heim is just out of range.
Stirling throws an overhand right that lands on Heim's shoulder, as Heim tries to avoid the shot.
That's one minute gone in the round.
Nice defenses there by Stirling.
Stirling throws a sloppy body shot
and Heim counters with a quick right hand to the jaw.
Stirling lands a jab. Then a cross. Then finally a nice hook to the body. Good work there by Stirling.
Stirling throws a leg kick but Heim sees it coming and checks it nicely.

Heim gets a clinch.
Heim misses with a punch on the inside.
Heim takes a knee to the side of the body.
Heim blocking some punches.
Stirling prevents a takedown attempt there.
Stirling lands a right uppercut that snaps the head of Heim backwards.
Heim blocking some punches.
Good body shot from Heim.
Wooooo! Give it up for these two warriors! They are putting on a show!
Heim lands a nice uppercut.
Heim digs a right hand underneath Stirling's ribcage. Stirling let out a lung full of air as it connected.
Heim tries to throw a body punch but Stirling avoids it by throwing Heim back against the cage.
Stirling takes a shot to the head.
That's two minutes gone in the round.
Stirling misses with a body punch.
Heim blocks a body shot from Stirling.
Stirling misses with the head strike.
Heim misses with some punches.
Heim looking for a takedown.
Jack Stirling has stuffed three takedown attempts in the round now. That's going to take a lot out of Aribert Heim.
Stirling blocks a couple of punches on the inside.
Stirling has a couple of punches blocked by Heim.
Heim lands a right hand.
Heim tries to circle away but Stirling has him pinned against the cage.
Heim lands with a good tight uppercut to the head.
Heim is trying to maintain a safe position but Stirling gets an underhook and turns Heim into the cage.
Stirling tries a body shot but Heim blocks it.
Heim effectively controlling the action here.
Stirling throws a punch but it's blocked by Heim.
Heim avoids the elbow strike from Stirling, against the cage.
A nice right hand lands inside from Heim.
Stirling misses with a punch on the inside.
That's three minutes gone in the round.
Stirling struggles to land a body shot inside as Heim controls his hands.
Heim throws a punch but it's blocked by Stirling.
Stirling lands a left hand.
Aribert Heim seems to be working more effectively in the clinch in the fight so far.
A head punch on the inside from Heim fails to land.
Stirling misses with the head strike.
A head punch on the inside from Heim fails to land.
Stirling working some nice short punches in the clinch.
Heim tries to land a shot to the body but it's blocked.
Heim takes a shot to the head.
Heim lands a hook to the body. It's hard to tell if that hurt Stirling or not.
Heim swings away with an uppercut that misses.
Stirling misses with a short punch on the inside.
Heim has a couple of punches blocked by Stirling.
Heim fails to land with a short punch on the inside.
Stirling tries a shoulder strike but it doesn't do any damage.
Heim blocks an uppercut.
Stirling lands a nice uppercut.
Stirling blocks a punch to the side of the head.
That's four minutes gone in the round.
Stirling doesn't land with the attempted body shot.
Stirling has a couple of punches blocked by Heim.
Stirling working aggressively here.
A short right from Heim on the inside.
We've seen a great period of action over the last minute or so - credit to both fighters for going all out!
Heim fails to land with a short punch on the inside.

Heim breaks from the clinch.
Stirling throws a hard body shot but it just misses.
Stirling does a little shimmy and throws a leg kick. The leg kick missed by a considerable margin though, making him look a little bit silly for doing the shimmy.
Heim blocks a jab.
A jab from Stirling misses.
Heim lands with a nice body punch.
Heim lands a vicious shot with the stealth of a sniper and the strength of a viper. Are vipers that strong? I can think of lots of things that are stronger than a viper - not many rhyme with sniper though.
The crowd are going absolutely nuts as the round comes to an end - what a fantastic round of action!
Heim takes a step back and watches a body kick go sailing past his mid section.
Stirling throws a leg kick but Heim sees it coming and moves out of range.
Heim throws out a loose jab but Stirling uses good head movement to avoid it.
And thats the end of the round the fighters go back to their corners.
A close second round but Aribert Heim will probably get the nod - 10:9.
The minute break is over - no more time for sponges and pep talks - back to the action! This is the final round!

Stirling throws out a leg kick but Heim moves out of range and Stirling only half commits.
A slow jab from Stirling misses its intended target.
Heim misses with a hook. Stirling ducked under it nicely.
Heim misses with a looping right.
A jab from Stirling misses.
Stirling throws out a token jab with nothing on it.
Sloppy strikes from Heim. Those never looked like landing.
Heim misses with a straight left.
Stirling walks straight into an uppercut. Luckily it didn't land flush.
Heim shoots for a takedown but Stirling saw that one coming a mile off and avoided it easily.
Heim checks a leg kick nicely.
Stirling ducks down and throws a hook to the body but Heim moves away.
Stirling uses some good footwork to avoid the body shot by Heim.
Heim fails with an attempt to clinch.
Stirling misses with a body shot.
That's one minute gone in the round.
Stirling scores with a kick to the body.
Stirling waving his hands out in front of him, looking to distract Heim.
Jack Stirling is looking to keep the fight on the feet at all costs.
A swing and a miss from Stirling.
Heim takes a body punch but keeps moving.
Aribert Heim seems to be the more aggressive standup fighter in this bout.
Stirling avoids the clinch attempt nicely.
That kick from Stirling tenderised Heim's leg. Heim is trying to keep his angry face on.
Stirling will need to close the distance a bit before he attacks - that leg kick was thrown from too far away.
Stirling tries to land with a swinging hook to the body but Heim was well out of range. Poor timing from Stirling.
Heim blocks a head kick by Stirling.
Stirling misses with a kick to the body.
Stirling throws a jab when Heim was well out of range.
Heim with a jab.
Heim fakes a head punch and goes low to the body. Nicely done.
Stirling on the wrong end of an overhand right that came out of nowhere.
That's two minutes gone in the round.
A telegraphed right hand from Heim misses the target.
The crowd are loving this. Great action here.
Stirling moves out of range as Heim strikes.
Heim tests Stirling's chin there with a solid looking shot.
Stirling lands with a nice body kick.
Stirling bobs and weaves and then throws a good body kick.
Stirling avoids the body shot from Heim.
Stirling throws a big shot that misses.
A slow jab from Heim misses its intended target.
Heim bobs and weaves well there to avoid the strikes.
Stirling takes a jab right on the kisser.
Heim looks to throw the jab but Stirling is out of range.
The fighters circling - Heim throws out the jab but it was never going to land.
Stirling is looking to wear down Heim with body shots, infact he's throwing more body shots than head shots at the moment.
The fighters circling - Stirling throws out the jab but it was never going to land.
Jack Stirling has stepped it up - he knows he needs a finish here!
Aribert Heim is fighting for a decision - hopefully he's judged it right and he's actually winning the fight.
That's three minutes gone in the round.
Stirling lands a jab.
Stirling fakes with a right hand and throws a good leg kick, right into the thigh. That had to hurt Heim.
Heim scores with a hook.
Stirling misses with a looping right.
Heim throws out a token jab with nothing on it.
A solid body kick from Stirling.
Some bone on bone action there as Heim checks a low kick. Luckily it wasn't a particularly hard one.
Stirling ducks down and throws a hook to the body but Heim moves away.
Heim misses with a few strikes there.
Stirling fakes a head shot and lands one to the body.
Heim takes a big intake of breath there - he's definitely tired.
Heim tries to clinch there but Stirling circles away.
Heim swings widly with a right hand
and Stirling counters with a thumping low kick.
The fans in attendance giving it up for the two fighters, who have really let it all hang out in the last minute or so!
Stirling misses with a low kick as Heim jumps back.
That's four minutes gone in the round.
Stirling moves his head to the side to avoid a jab but walks straight into a cross.
Stirling bobs and weaves well there to avoid the strikes.
No joy there for Stirling, who threw a few shots but didn't land.
Stirling tries to land with a swinging hook to the body but Heim was well out of range. Poor timing from Stirling.
Heim tries to clinch but Stirling is having none of it.
A jab lands there for Heim.
Heim wings a very wild body shot but it does the job and lands to the midsection.
Heim jabbing away but nothing is landing.
Stirling throws a decent looking leg kick but it doesn't land clean.
Stirling looking to take his opponent's legs away with the low kicks.
As the round comes to an end the crowd are showing their appreciation for a great round of action.
Heim blocks a low kick nicely.
Heim throws a jab but it's blocked by Stirling.
Stirling takes one on the button.
Heim takes a kick to the body and keeps moving.
And that's the end of the fight!
Jack Stirling showed his dominance in that final round.
I think Heim has won this one but let's see whether the judges agree with me. Over to the ring announcer for the scorecards.
Ladies and gentlemen, after 3 rounds of action, we go to the scorecards for a decision.
Judge Anni Minnemäki scores the fight 29:29
Judge Johanna Lukiainen scores the fight 28:29
Judge Tarja Halkonen scores the fight 28:29
In favor of your winner, by majority decision... Aribert Heim!
A very excited looking Aribert Heim made sure he remembered to thank all the fans both in the arena and on the internet. He said all the coolest people spend all day on MMA websites, which got a big reaction.
|
|
|
|
|
|
|
|
|
|
|
|
|
|
|
|
|
|
|
|
|
|
|
| S |
C
A |
G |
S |
C
B |
G |
|
S |
C |
G |
|
energy
A | B |
|
hype
A | B |
|
pop
A | B |
|
mgr
A | B |
|
FIGHT
RATING
87% |
|
|
|
|
|
|

