|
|
PBP Commentary |
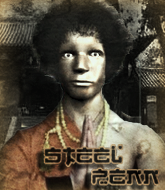
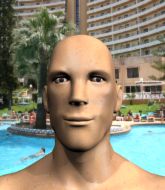
Coming up we have a middleweight MMA rules bout between The Steel Penn Alliance (ranked 0 p4p, 0 weight class) and Cletus White (ranked 0 p4p, 0 weight class). White has chosen Thunderhorse as his entrance music. I don't know about you partner, but I'm pumped for this one!
 |
|
 |
| 189 cm
24
201 lbs
5 - 10 - 0 |
|
175 cm
31
200 lbs
15 - 16 - 0 |
Great wrestler
Great low kicks
Cardio machine |
|
Good wrestler
World class boxer
Good gas tank |
|
| |
|
Ladies and gentlemen. This fight is 3 rounds, in the middleweight division.
Introducing the fighter to my left, fighting out of the red corner.
With a record of
5 - 10 - 0, fighting out of Hilo, The Steel Penn Alliance!
And introducing the fighter to my right, fighting out of the blue corner.
With a record of
15 - 16 - 0, fighting out of Los Angeles, Cletus White!
The judges for this bout are Daniel Franklin, Wesley Smith and Chris Downing.

The bell rings for round one and we are underway!
A slapping leg kick lands for Steel Penn Alliance.
Steel Penn Alliance avoids a lazy jab quite easily.

White looks for a takedown. He's got it. We're now in half guard.
We must be close to a standup if these guys don't pick up the pace.

White decides to stand up and try his luck on the feet.
White misses with an uppercut. Steel Penn Alliance saw that one coming.
Steel Penn Alliance slips under a jab from White.
White looks to land a right hand but Steel Penn Alliance moved out of range.
Steel Penn Alliance changes levels and looks for a double leg takedown. White tries to avoid it but Steel Penn Alliance manages to keep hold of a leg and drag White to the ground. White escapes though and pops straight back up to his feet.
White swings wildly with a right hand that was never going to find it's target.
White throws a jab but it's blocked by Steel Penn Alliance.
White throws a couple of head shots and lands with the final one - a decent hook, which struck Steel Penn Alliance on the side of the head.
White throws a looping overhand right but Steel Penn Alliance ducks down to avoid it.
White swings and misses with a hook to the body.
White has his front leg slapped to the side - a nice low kick landing there from Steel Penn Alliance.
The fans in attendance giving it up for the two fighters, who have really let it all hang out in the last minute or so!
White misses with a straight right.
White misses with an uppercut. Steel Penn Alliance saw that one coming.
Steel Penn Alliance shoots in for a takedown but White shows good takedown defense there and keeps this one on the feet.
Steel Penn Alliance has been talking about how he's improved his wrestling in the run up to the fight so let's see if that's enough to sway the balance.
White is really struggling to land any decent head shots against his taller opponent.
White bobs and weaves and throws out a fast jab that snaps Steel Penn Alliance's head backwards.

That's one minute gone in the round.
Steel Penn Alliance throws a looping left and ducks down for a takedown. He's got his arms around White's waist but White gets an underhook and avoids the takedown by throwing Steel Penn Alliance off to one side.
That's three failed takedown attempts in the round for The Steel Penn Alliance. That's going to take a lot out of him.
White looks to land a right hand but Steel Penn Alliance moved out of range.
A jab from Steel Penn Alliance misses.
Steel Penn Alliance misses with the combination.
White closes the distance, clinches up and gets a nice trip takedown into side control. Very smooth.
White stands up and beckons Steel Penn Alliance to his feet.
White looks to land a right hand but Steel Penn Alliance moved out of range.
Cletus White seems to be the more aggressive standup fighter in this bout.
Steel Penn Alliance steps to the side to avoid the strikes from White.
Steel Penn Alliance moves out of range of the strikes.
White jabbing away but nothing is landing.
Steel Penn Alliance shoots in for a takedown. He's persisting with it as White sprawls well. White wins this battle and keeps the fight standing. Steel Penn Alliance gets slowly back to his feet.
Steel Penn Alliance keeps White at a distance using the push kick.

That's two minutes gone in the round.
A low kick from White misses
and Steel Penn Alliance counters with a good right hand that lands right on the jaw.
Steel Penn Alliance moves out of range as White strikes.
We've seen a great period of action over the last minute or so - credit to both fighters for going all out!
White stuns Steel Penn Alliance with a nice body shot, before stepping back out of range.
Steel Penn Alliance misses with an attempted mid kick.
White takes a swing at Steel Penn Alliance's ribcage but misses.
White rushes in with a sloppy looking punch
and Steel Penn Alliance makes him pay by landing a thudding low kick.
White gets the takedown into side control.
Steel Penn Alliance is trying to improve his position.
White has had enough of the ground for now and decides to stand.
White lands with a cross to side of his opponent's head.
White stuffs a takedown. It's all about dictating where the fight takes place and White wants it to stay on the feet.
White throws a big shot that misses.
A jab from White misses.
White moves out of range of the body kick from Steel Penn Alliance.

That's three minutes gone in the round.
Steel Penn Alliance slips under a jab.
Decent striking displayed by White there.
A jab from White misses.
White misses with an uppercut. Steel Penn Alliance saw that one coming.
White connects with a lovely jab that went straight through the gap between Steel Penn Alliance's hands.
White misses with an uppercut.
White looks to land a right hand but Steel Penn Alliance moved out of range.
This is turning into a torrid day at the office for Steel Penn Alliance. He's trying desperately to land a takedown but he's failing miserably and getting slapped silly on the feet to compound his misery.
White misses with a straight left.
White is looking to clinch.
Steel Penn Alliance fails with a rather predictable takedown attempt.
White moves out of range of the body kick.
Steel Penn Alliance uses good footwork to avoid the strikes from White.
Steel Penn Alliance tries a switch kick but it misses it's target.
White moves out of range of the body kick from Steel Penn Alliance.
White throws a big shot that misses.
White misses with a straight right.

That's four minutes gone in the round.
Steel Penn Alliance throws a combination but it was largely blocked by White.
White is the aggressor but that punch slipped nicely by Steel Penn Alliance.
White throws a poor cross that misses
and Steel Penn Alliance counters with a body kick that stops White in his tracks momentarily.
We've seen a great period of action over the last minute or so - credit to both fighters for going all out!
Nice body punch from White.
The fight stays on the outside here - White looks like he's thinking about clinching though.
Steel Penn Alliance shoots in with a takedown attempt and he has White pinned against the cage. White gets the underhooks and manages to circle away.
Steel Penn Alliance takes a thudding leg kick, right into the meat of the thigh.
White lands with a thumping leg kick.
White misses with an uppercut. Steel Penn Alliance saw that one coming.
The crowd are going absolutely nuts as the round comes to an end - what a fantastic round of action!
Steel Penn Alliance throws a head kick but White moves out of range.
White throws a series of punches but Steel Penn Alliance avoids them all with ease.
A swing and a miss from White.
White looks to throw the jab but Steel Penn Alliance is out of range.
And thats the end of the round the fighters go back to their corners.
Cletus White dominated that round.
That's time! Back to the action!

White tries to close the distance and clinch but Steel Penn Alliance swats him to one side with an open hand palm strike and circles away.
Steel Penn Alliance lands with a head kick! That's gotta hurt.
Steel Penn Alliance looking to throw a kick but he's pulled out of it.
Steel Penn Alliance ducks under a wild hook from White.
Steel Penn Alliance fails miserably with a takedown attempt.
A jab from White misses.
White lands a beauty of a right hand that gets the crowd cheering.

Steel Penn Alliance throws the overhand right but ducks down into a quick takedown attempt. White was covering up waiting for the punch and Steel Penn Alliance finishes the takedown easily into guard.
Steel Penn Alliance stands up and looks to throw the legs aside to pass to side control. White swivels though and keeps the full guard.
White is trying to stand up but he's not managed so far.
White wants to get back to his feet but he's too absorbed in his own little project and Steel Penn Alliance manages to pass to side control.

Steel Penn Alliance seems to be working for a kimura but White defends the submission attempt.
That's one minute gone in the round.
White is trying to stand back up but Steel Penn Alliance is controlling him
Steel Penn Alliance is trying a forearm choke
I don't think that's going to do much at this level of the game.
Steel Penn Alliance looking for a kimura but he'll have to free his other leg if he wants to finish that. Perhaps he's just using it as a distraction technique.
White is trying to stand back up but Steel Penn Alliance is controlling him
That's two minutes gone in the round.
White is using up a lot of energy trying to get back to his feet. Perhaps he should improve his position first.
Steel Penn Alliance is looking for a kimura here.
Steel Penn Alliance wants to pass the guard but White is defending well.
Steel Penn Alliance is working hard here to advance position.
White is trying to stand back up but Steel Penn Alliance is controlling him
White makes some distance and scrambles quickly back to his feet. Nice work!
Steel Penn Alliance lands a nice leg kick that just misses White's sensitive parts.
Steel Penn Alliance uses good head movement to avoid the hook from White.
Steel Penn Alliance tries to drive through with a takedown attempt but White defends well and Steel Penn Alliance ends up having to push White into the cage where they will battle it out in the clinch.
White lands a hook to the side of the head.
Steel Penn Alliance is working for a takedown up against the cage. He can't get it on this occasion though.
That's three failed takedown attempts in the round for The Steel Penn Alliance. That's going to take a lot out of him.
That's three minutes gone in the round.
Steel Penn Alliance has managed to pull guard. Let's see whether he can work an aggressive guard. It will also be interesting to see what tactics White uses from the top position.
Steel Penn Alliance looking to hit a scissor sweep but White is one step ahead there.
White trying to stand up but can't free himself from Steel Penn Alliance's guard.
Steel Penn Alliance looking for submissions from the bottom here. Moving his hips around, possibly looking for an armbar.
White stands up and waves to Steel Penn Alliance to follow him.
White misses with a looping right.
White connects with a crisp jab.
Cletus White seems to be getting the better of the standup.
Steel Penn Alliance shoots in for a takedown. He's persisting with it as White sprawls well. White wins this battle and keeps the fight standing. Steel Penn Alliance gets slowly back to his feet.
That's four minutes gone in the round.
White drops down and drives through with a powerful takedown into guard.
The fighters are pressed up against the cage, both looking to find a bit of space to work.
This has been an exciting period of action!
Steel Penn Alliance wants to sweep but no luck.
White wanted to stand there but Steel Penn Alliance had control of the position.
Steel Penn Alliance will need to keep those long limbs tucked in whilst he's on the ground, to prevent any submissions.
Steel Penn Alliance lands a beautiful switch and he's in full mount! That could spell trouble for White!
White is trying to escape but when you're mounted that's not too easy.
As the round comes to an end the crowd are showing their appreciation for a great round of action.
BOOM! Steel Penn Alliance connects with a massive shot to the dome!
And thats the end of the round the fighters go back to their corners.
A close second round but Cletus White will probably get the nod - 10:9.
The fighters' corners scream their final instructions, as the referee calls time. Here we go, back to the action! This is the final round!

White delivers a nice body kick.
White throws a hook but Steel Penn Alliance blocks it.
White works over Steel Penn Alliance's head and body with a nice combination.
Steel Penn Alliance shoots in and scores a nice double leg takedown into half guard.
White wants to get back to his feet.
Ground and pound from Steel Penn Alliance.
Cletus White has got the better of the ground game so far.
White tries to kick Steel Penn Alliance off but Steel Penn Alliance keeps his base steady and stays in half guard.
Steel Penn Alliance looking for a kimura but he'll have to free his other leg if he wants to finish that. Perhaps he's just using it as a distraction technique.
The ref warns both fighters not to hold the cage as they work up against the meshing.
Steel Penn Alliance stops White from getting back to his feet.
White takes a big intake of breath there - he's definitely tired.
That's one minute gone in the round.
Steel Penn Alliance is looking for a kimura but he's never going to get it from there.
Steel Penn Alliance is working for submissions here but there's nothing on.
White kicks off Steel Penn Alliance and gets to his feet.
White looks to land a left hand but Steel Penn Alliance moved out of range nicely.
White misses with a hook
and Steel Penn Alliance counters with a body kick.
White misses with an uppercut.
White defends well against a solid takedown attempt from Steel Penn Alliance.
Steel Penn Alliance feints and then dives in with a takedown. That was a long way out but the feint bought him enough time to close the distance and complete the takedown. Now we'll play guard for a bit and see who can get the better of that position.
White wants to stand and escape but Steel Penn Alliance is having none of it.
White is looking to stand back up... there's a bit of a scramble and Steel Penn Alliance dives into side control.
Steel Penn Alliance is looking to finish here, going for an Americana. White knows the correct defense though, so he's OK.
That's two minutes gone in the round.
White is trying to get back to his feet.
This has been an exciting period of action!
Steel Penn Alliance thinks about going for a far side armbar but bails out and retains the dominant position instead.
White is trying to get back to his feet.
Steel Penn Alliance connects with a decent looking elbow from side control that caused White some visible discomfort.
White is looking to work his way out of this bad position but Steel Penn Alliance is controlling him well.
Steel Penn Alliance wants to lay and pray for a moment but White keeps working.
Steel Penn Alliance is trying to land an Americana. He has the arm isolated but White is keeping cool and he's avoided the danger for now.
White is trying to stand back up. He's worked his way up against the cage but Steel Penn Alliance has just dragged him back down to the mat.
That's three minutes gone in the round.
Steel Penn Alliance wants to work for a kimura but he's foiled early by White, who protects the arm well.
White pushes Steel Penn Alliance away and creates a bit of space to escape. He's almost out here... but no, Steel Penn Alliance gets a good hold of his legs and remains firmly in side control.
The Steel Penn Alliance has stepped it up - he knows he needs a finish here!
Steel Penn Alliance looking for an arm triangle but it's way too loose to do anything.
White wants to get back to his feet.
Steel Penn Alliance is looking for a kimura. He might have it! No, White has escaped the position, nice work there.
That's four minutes gone in the round.
White wants to get back to his feet but Steel Penn Alliance drags him back down.
Steel Penn Alliance in side control lands a nice looking series of punches and elbows.
White is trying to get back to his feet.
White throws Steel Penn Alliance to one side and escapes!
White throws a big shot that misses.
Cletus White is fighting for a decision - hopefully he's judged it right and he's actually winning the fight.
The fans in attendance giving it up for the two fighters, who have really let it all hang out in the last minute or so!
Steel Penn Alliance misses with a body kick.
White wants to land a leg kick but Steel Penn Alliance is out of range.
White misses with a straight left.
Steel Penn Alliance defending well as White loads up on a big left hand.
As the round comes to an end the crowd are showing their appreciation for a great round of action.
White throws an off balance right hand
and Steel Penn Alliance counters with a head kick.
A really sloppy takedown attempt there from Steel Penn Alliance.
Sloppy strikes from White. Those never looked like landing.
And that's the end of the fight!
That was a close round. You could make an argument for either fighter but I would give it to The Steel Penn Alliance.
Well White has outworked and out performed his opponent in all aspects of the game today. He was simply too good and the decision should be no more than a formality. Over to the ring announcer for the scorecards.
Ladies and gentlemen, after 3 rounds of action, we go to the scorecards for a decision.
Judge Daniel Franklin scores the fight 29:29
Judge Wesley Smith scores the fight 29:29
Judge Chris Downing scores the fight 28:29
The fight is ruled a majority draw!
|
|
|
|
|
|
|
|
|
|
|
|
|
|
|
|
|
|
|
|
|
|
|
| S |
C
A |
G |
S |
C
B |
G |
|
S |
C |
G |
|
energy
A | B |
|
hype
A | B |
|
pop
A | B |
|
mgr
A | B |
|
FIGHT
RATING
99% |
|
|
|
|
|
|
