|
|
PBP Commentary |
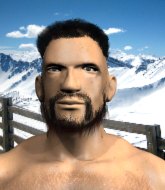
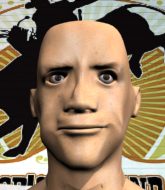
Coming up we have a bantamweight MMA rules bout between Hideo Kono (ranked 0 p4p, 0 weight class) and Akiro Sata (ranked 0 p4p, 0 weight class). Sata is bobbing his head along to his entrance song: Onward to Victory!. Hideo Kono could well score a knockout today. He has the power to get to Akiro Sata's chin.
 |
|
 |
| 168 cm
23
149 lbs
12 - 5 - 0 |
|
171 cm
24
143 lbs
10 - 10 - 0 |
Good wrestling
Lethal high kicks
Cardio machine |
|
BJJ Brown Belt
Decent boxing
Good gas tank |
|
| |
|
Ladies and gentlemen. This fight is 3 rounds, in the bantamweight division.
Introducing the fighter to my left, fighting out of the red corner.
With a record of
12 - 5 - 0, fighting out of New York, Hideo Kono!
And introducing the fighter to my right, fighting out of the blue corner.
With a record of
10 - 10 - 0, fighting out of New York, Akiro Sata!
The judges for this bout are Wagner Zegers, Albert Achterberg and Radbod Blank.

The bell rings for round one and we are underway!

Kono has managed to clinch.

Sata breaks from the clinch.
Kono tries to clinch but Sata is having none of it.
Sata misses with a takedown attempt. He shot from a bit too far out.
Kono lands with a kick to the temple. Sata shrugs as if to say "is that all you've got?"
Kono moves out of range of the leg kick from Sata.
Sata scores with a hook.
Kono tries to clinch up against the cage, rushing in to close the distance. Sata manages to break the clinch and circles back to the middle of the mat.
Sata lands with a hook. Kono tried to avoid it but it clipped the top of his head.
Kono looks to have improved his striking defense since last time we saw him fight.
Kono comes forward and lands a shot to the body, then darts back out of range.

Excellent takedown into side control there by Sata.
This is a great period of action - very entertaining stuff!
Kono is trying to stand back up. He's worked his way up against the cage but Sata has just dragged him back down to the mat.
Kono is not content to let Sata control the position.
Kono is trying to escape and get back to his feet.

That's one minute gone in the round.
Sata in side control, trying to ground and pound but not landing this time.
Kono is looking to work his way out of this bad position but Sata is controlling him well.
Sata is looking to take a break and control but Kono is keeping him honest, looking to work from the bottom.
Kono is trying to stand back up. He's worked his way up against the cage but Sata has just dragged him back down to the mat.

Sata thinks about going for a far side armbar but bails out and retains the dominant position instead.
Kono is putting a lot of effort into getting back to his feet here.

That's two minutes gone in the round.
Sata tries to move to full mount but Kono actually manages to regain half guard.
Sata is looking to take a break and control but Kono is keeping him honest, looking to work from the bottom.
Sata stops Kono from getting back to his feet.
Sata seems to be working for a kimura but Kono defends the submission attempt.
Kono tries to kick Sata off in order to stand up. Sata Avoids the leg push though and dives into side control.
Sata is looking to take a break and control but Kono is keeping him honest, looking to work from the bottom.
Kono is trying to escape and get back to his feet.

That's three minutes gone in the round.
An elbow from Sata crashes against the mat.
Kono tries to escape but Sata is in control.
Sata tries to score with some ground and pound. Kono controls his posture well this time though and the shots don't do any damage.
Sata tries for an arm triangle. That looks pretty tight to me. Is this one over!?! Possibly, maybe, no Sata has let go of the choke. Obviously it wasn't as tight as we thought!
The fighters are starting to get a bit slippery now, which will make submissions a bit more difficult.
Sata working hard here to secure a kimura but he's not really in the right position for it.
The referee tells the fighters to keep busy.

That's four minutes gone in the round.
Kono is pushing Sata's head away, looking to escape. Sata manages to hold on to the position though.
Kono managing to avoid any damage from the strikes thrown by Sata.
Sata working hard here to secure a kimura but he's not really in the right position for it.
Sata trying to control the action but Kono is working from the bottom.
And thats the end of the round the fighters go back to their corners.
A close round but Akiro Sata will probably get the nod.
Well, the break between rounds is over. Let's get back to the scrappin!


Sata closes the distance and clinches.
Sata's head jolts backwards as he takes an uppercut right on the button!
Kono misses with a hook to the ribs.

Kono breaks the clinch and we return to the middle of the mat.
Sata takes a shot to the body in his stride.
Sata avoids the clinch attempt nicely.
Kono thows a body shot but no joy.
Sata throws out a loose jab but Kono uses good head movement to avoid it.
Kono misses with a half-hearted attempt at a head kick.
Kono fails in his attempt to clinch.
Sata throws out a loose jab but Kono uses good head movement to avoid it.
Sata misses with a takedown attempt. He shot from a bit too far out.
Sata has closed the distance and engaged Kono in a clinch.
That's one minute gone in the round.
Sata blocks a body shot from Kono.
Sata tries to circle away but Kono has him pinned against the cage.
Kono stalling here - the referee won't stand for too much of that.
Sata breaks the clinch and we return to the middle of the mat.
Kono does a little shimmy and throws a leg kick. The leg kick missed by a considerable margin though, making him look a little bit silly for doing the shimmy.
Sata closes the distance and clinches up with Kono, looking for a takedown. Sata pushes Kono against the cage but Kono circles to the side and manages to break the clinch.
Sata connects with the punch.
Sata throws an off balance right hand
and Kono counters with a stiff right hand.
Hideo Kono is looking to keep the fight on the feet at all costs.
Kono is moving around nicely and scores here with a single head shot.
The fight stays on the outside here - Kono looks like he's thinking about clinching though.
Kono tries to close the distance and clinch up but Sata swats him away and circles back towards the center.
Sata misses with a body punch
and Kono counters with a nice uppercut.
Akiro Sata seems to be the more aggressive standup fighter in this bout.
That's two minutes gone in the round.
Sata tries to bum rush Kono with a series of wild strikes but Kono uses good footwork to avoid the assault.
Sata misses the shot to the body.
Kono cracks the inside of Sata's front leg.
Kono ducks down and throws a hook to the body but Sata moves away.
Sata keeps the fight on the outside.
Wooooo! Give it up for these two warriors! They are putting on a show!
Sata wings a very wild body shot but it does the job and lands to the midsection.
Kono lunges at Sata with a hook that half lands and is half blocked by Sata's hand.
Kono looks to score with a jab to the body but Sata is just out of range.
Sata misses with a wild body shot.
Horrible takedown by Sata or perhaps it was just good defense by Kono which made him look bad.
Hideo Kono has stuffed three takedown attempts in the round now. That's going to take a lot out of Akiro Sata.
Sata throws a hook to the body but it doesn't connect.
Kono connects with a solid leg kick.
Sata throws a big shot that misses.
That's three minutes gone in the round.
Sata closes the distance and presses his opponent up against the cage.
Kono blocks a punch to the side of the head.
Sata is trying to slow down the pace of the fight but Kono is keeping busy.
Sata prevents a body shot from Kono.
Both fighters working to control the clinch.
Kono manages to break the clinch.
Akiro Sata is looking to throw some combinations by the looks of things.
Nice defenses there by Sata.
An inside leg kick lands from Kono.
Sata fakes with an overhand right and moves in to clinch with Kono, pushing him back against the cage.
Sata is trying to pull guard but being pressed up against the cage enables Kono to keep the fight standing.
Kono cracks Sata with a nice body shot.
Sata tries a shoulder strike but it doesn't do any damage.
Sata blocks a body shot from Kono.
Kono lands a shoulder strike.
That's four minutes gone in the round.
Kono is leaning against Sata and scores with a nice uppercut to the body.
Kono can't find room to land a body shot as Sata controls the action.
Kono is struggling to control the position.
Sata has been looking to improve his clinch game in recent weeks. Kono seems to have the measure of him in the clinch so far, so let's see if Sata can turn it around.
The crowd are loving this. Great action here.
Kono tries a body shot but Sata blocks it.
Sata's head jolts backwards as he takes an uppercut right on the button!
Kono looking to slow down the pace here.
With the fighters clinched against the cage, Kono creates a bit of distance for himself and scores with a nice uppercut.
Kono works on Sata's body with a couple of short punches.
Good anti-grappling being displayed by Sata as Kono tries to tie him up.
Sata jumps guard but Kono turns him against the cage and keeps the fight standing.
As the round comes to an end the crowd are showing their appreciation for a great round of action.
Kono prevents a takedown attempt there.
Kono wants to stall.
Kono is pushing Sata up against the cage, for a bit of lean and pray action. Action being used the in the loosest possible sense of the word.
And thats the end of the round the fighters go back to their corners.
Hideo Kono dominated that second round.
The referee calls time. The cornermen exit stage left and we're back to business. This is the final round!

A head kick misses from Sata.
Kono pulls out of a head kick attempt.
Sata circles away from the clinch attempt.
Sata throws a wild combination but nothing lands.
Kono darts in and out, connecting with a jab.
Good leg kick by Kono there. It's the ones that make that thud noise that hurt and that was an almighty thud.
Kono moves into range and clinches up with Sata.
Kono misses with a shot to the kidneys.
Sata is looking for a takedown up against the cage. Kono gets underhooks though and prevents the takedown attempt.
Kono trying to control the position but instead, Sata has worked for underhooks and has pushed Kono into the cage.
Sata lands an uppercut.
That's one minute gone in the round.
Kono breaks from the clinch.
Sata has taken the fight to the clinch.
Kono struggles to land a body shot inside as Sata controls his hands.
Kono lands a body shot.
Kono leaning his opponent against the cage.
Sata lands with a left to the head.
Sata tries a shoulder strike but it doesn't do any damage.
A short left from Kono.
Sata goes for a takedown attempt but Kono pushes him away and we're back to fighting at a distance.
Sata takes a kick to the side of the head.

Sata is rocked!
Sata's hands are dropping dangerously low here and Kono connects clean with a right hook that sends him down to one knee! Sata scrambles back to his feet.
Sata is still on wobbly legs! Can Kono finish him?
That's two minutes gone in the round.
Kono tries to clinch but Sata moves out of range.
Kono gets tackled into the cage by Sata. Sata maintains the clinch.
Sata seems to have recovered his senses.
Fantastic stuff here - a very entertaining period of action, which has drawn cheers from the crowd.
Kono misses with a hook from the clinch.
A real battle for position is taking place between these two warriors.
Kono throws a punch but it's blocked by Sata.
Kono tries to stall but Sata uses the opportunity to gain a better position.
Sata is trying to stall.
Kono tries to land a shot to the body but it's blocked.
Kono breaks from the clinch.
Hideo Kono is winning the standup battle so far.
Sata wants to slow Kono down by chopping away at his legs.
Sata shoots in and gets a takedown into Kono's guard.
Sata pressing down on his opponent's thigh, looking to pass guard. Kono is keeping the position for now.
Sata trying to control but Kono is working from the bottom.
That's three minutes gone in the round.
Sata connects with a couple of short punches.
Sata is looking to work some ground and pound but Kono has wrist control.
Kono wants to stand but Sata is controlling the position.
Sata trying to control the position from guard on top but Kono is wriggling around, looking for whatever he can.
Sata with a flurry of punches that miss.
That's four minutes gone in the round.
Sata is frustrating his opponent with some stalling tactics from top position.

Akiro Sata has forced the referee to step in and restart the fight on the feet.
Kono thows a body shot but no joy.
Kono tries to close the distance and clinch but Sata swats him to one side with an open hand palm strike and circles away.
Kono cracks Sata with a good jab.
Sata throws a body kick, spinning off balance
and Kono counters with a nice uppercut.
Kono throws a hard body shot but it just misses.
Sata goes for a double leg but Kono avoids the attempt and the two fighters end up clinched against the cage as Kono continues to drive forward.
Hideo Kono has stuffed three takedown attempts in the round now. That's going to take a lot out of Akiro Sata.
As the round comes to an end the crowd are showing their appreciation for a great round of action.
Sata is trying to work for a single leg takedown but Kono pulls him back up using the underhooks.
Kono manages to break the clinch.
Sata slips a jab from Kono.
We've seen a great period of action over the last minute or so - credit to both fighters for going all out!
Kono fails with an attempt to clinch.
And that's the end of the fight!
Hideo Kono showed his dominance in that final round.
I think Kono has won this one but let's see what the judges have to say. Over to the ring announcer for the scorecards.
Ladies and gentlemen, after 3 rounds of action, we go to the scorecards for a decision.
Judge Wagner Zegers scores the fight 30:28
Judge Albert Achterberg scores the fight 29:28
Judge Radbod Blank scores the fight 29:28
In favor of your winner, by unanimous decision... Hideo Kono!
A victorious Hideo Kono thanked his army of followers in his post fight interview, telling people to make sure they follow him on Twitter.
|
|
|
|
|
|
|
|
|
|
|
|
|
|
|
|
|
|
|
|
|
|
|
| S |
C
A |
G |
S |
C
B |
G |
|
S |
C |
G |
|
energy
A | B |
|
hype
A | B |
|
pop
A | B |
|
mgr
A | B |
|
FIGHT
RATING
76% |
|
|
|
|
|
|

