|
|
PBP Commentary |
Coming up we have a middleweight MMA rules bout between Kimroy Hoo (ranked 0 p4p, 0 weight class) and Hideyoshi Toyotomi (ranked 0 p4p, 0 weight class). These two fighters really are very evenly matched on the feet - it will be fascinating to see who can assert themselves in that aspect of the fight.
 |
|
 |
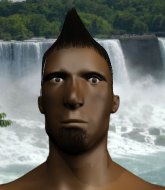
| 190 cm
19
190 lbs
0 - 2 - 0 |
|
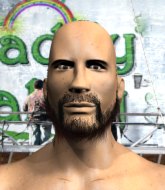
180 cm
21
190 lbs
0 - 2 - 0 |
BJJ Purple Belt
Great elbows
Granite chin |
|
Good takedowns
Excellent MT
Determined |
|
| |
|
Ladies and gentlemen. This fight is 3 rounds, in the middleweight division.
Introducing the fighter to my left, fighting out of the red corner.
With a record of
0 - 2 - 0, fighting out of New York, Kimroy Hoo!
And introducing the fighter to my right, fighting out of the blue corner.
With a record of
0 - 2 - 0, fighting out of Rio de Janeiro, Hideyoshi Toyotomi!
The judges for this bout are Saam Ante, Paulsen Ambrosius and Patrick Alders.

The bell rings for round one and we are underway!
Toyotomi shoots in looking for a takedown. Hoo tries to sprawl out of it but Toyotomi keeps driving through. The fighters are pinned against the cage. Hoo manages to get underhooks and after a bit of a struggle, circles away and we're back to standing.
Hoo misses with a left hand
and Toyotomi counters with a big head kick but Hoo shrugs it off.
Hoo misses with a looping right.
Toyotomi moves away from the strike by Hoo.
A slow jab from Hoo misses its intended target.
Hoo scores with a crisp jab that stopped Toyotomi in his tracks.
Hoo moves out of range as Toyotomi throws a body kick.
A telegraphed takedown attempt from Toyotomi is defended easily by Hoo.
Toyotomi tries to work over Hoo's front leg with a kick but Hoo checks it.
Hoo tries a head kick but it misses.

That's one minute gone in the round.
Toyotomi on the wrong end of a nice low kick. He's acting like it's no big deal but he doesn't want to take many more of those.
Hoo connects nicely with a jab. Noted by the judges no doubt.
Toyotomi is pinned up against the cage taking some big shots here. The referee is looking closely deciding whether he should stop the fight.
Toyotomi throws a solid leg kick but Hoo takes the impact on his shin and smiles at Toyotomi.
Toyotomi throws a leg kick but he was too far away and it doesn't land.
Toyotomi staying out of range there.
Hoo throws a right hand that Toyotomi ducks under and follows up with a left that Toyotomi also avoids with ease.
Some bone on bone action there as Hoo checks a low kick. Luckily it wasn't a particularly hard one.
Hoo misses with the body kick
and Toyotomi counters with a nice kick to the body.
Kimroy Hoo is looking to keep the fight on the feet at all costs.
Hoo thows a leg kick but Toyotomi checks it
and Toyotomi counters with a nice kick to the body.

That's two minutes gone in the round.
Wooooo! Give it up for these two warriors! They are putting on a show!
Hoo throws a monster uppercut resembling something out of street fighter but it doesn't land.
Hoo misses with an uppercut
and Toyotomi finishes the little exchange by landing a big kick to the body.
Toyotomi tries a low kick but Hoo avoids it.
Hoo sees a low kick coming and goes to check it, but it's actually a body kick and it thuds into his unprotected ribs.
Toyotomi misses with an attempted mid kick.

Toyotomi closes the distance and gets a trip takedown into side control. Hoo quickly recovers to half guard.
The ref warns both fighters not to hold the cage as they work up against the meshing.
Toyotomi winds up and cracks Hoo with a swinging punch to the side of the head.
Hoo trying to control here.
Toyotomi landing with strikes to the body and head, softening up his opponent.
Toyotomi looking to pass the half guard. Not this time.

That's three minutes gone in the round.
Toyotomi throwing shots but they're hitting the canvas more than the man.
Toyotomi thows a huge punch but Hoo dodges it nicely.
Hoo is looking for a sweep. Toyotomi is wise to his cunning plan and keeps the top position.
Hoo keeping his head moving to avoid the ground and pound.
Hoo is looking for a sweep. Toyotomi is wise to his cunning plan and keeps the top position.
Toyotomi trying to pass the guard but Hoo defending well.

Toyotomi is working for a submission of some sort.
Toyotomi has the superior BJJ but he's also working some ground strikes into his gameplan.
Toyotomi not landing any meaningful shots this time.
The referee walks around the fighters to get a better view of the action. Toyotomi lands a nice short elbow.

That's four minutes gone in the round.
Toyotomi throwing punches and elbows but they're not doing any damage.
Hoo is trying to defend against the ground and pound but Toyotomi scores with a couple of nice shots.
Hoo taking some punishment here, with Toyotomi in his half guard.
Toyotomi with the ground and pound but Hoo uses the opportunity to regain guard.
We've seen a great period of action over the last minute or so - credit to both fighters for going all out!
Toyotomi wants to pass the guard but Hoo is keeping the position.
Toyotomi postures up and lands a big shot to Hoo's brow.
Hoo trying to control the position here.
Toyotomi scoring with some ground and pound.
The crowd are going absolutely nuts as the round comes to an end - what a fantastic round of action!
Toyotomi postures up.
Toyotomi works a leg free and moves into half guard.
Hoo won't allow Toyotomi to pass to mount.
And thats the end of the round the fighters go back to their corners.
Hideyoshi Toyotomi dominated that round.
The fighters' corners scream their final instructions, as the referee calls time. Here we go, back to the action!

Hoo wants to slow Toyotomi down by chopping away at his legs.
Toyotomi tries a head kick but it misses.
Toyotomi staying out of range there.
Toyotomi fakes a couple of low kicks, before throwing one on the third attempt. It connects and Hoo has to reset his feet before getting ready to engage.
Nice takedown defense from Hoo. No joy for Toyotomi on that attempt.
Toyotomi misses with a takedown attempt. He shot from a bit too far out.
Hoo tries to land a front kick but Toyotomi steps back. That was a bit too telegraphed.
Toyotomi feints with a shoulder and throws a nice leg kick to Hoo's calf.
Nice uppercut there from Hoo.
That's one minute gone in the round.
A head kick misses from Hoo.
Toyotomi on the wrong end of a decent looking cross there.
Hoo tries to sprawl but Toyotomi drives through with a takedown into half guard.
Toyotomi thows a wild elbow that connects with the canvas.
Hoo is trying to control but can't.
The fighters are starting to get a bit slippery now, which will make submissions a bit more difficult.
Hoo tries to get to full guard but Toyotomi has control of the leg.
Toyotomi is working for a kimura but Hoo is defending it quite comfortably.
Toyotomi is looking for a kimura but he's never going to get it from there.
That's two minutes gone in the round.
Toyotomi takes advantage of the dominant position to land a couple of big hammer fists.
Toyotomi missing with some ground and pound from the half guard.
Toyotomi is looking for a kimura but Hoo is holding onto that half guard position, so it's hard for Toyotomi to get the leverage.
Fantastic stuff here - a very entertaining period of action, which has drawn cheers from the crowd.
Hoo is looking to regain full guard. Not this time though.
Hoo avoiding damage under a succession of punches from Toyotomi.
Toyotomi throwing shots but Hoo is blocking nicely.
Ground and pound from Toyotomi.
Toyotomi missing with the ground and pound from half guard.
Hoo wants to improve his position but Toyotomi is controlling well.
Toyotomi thows a wild elbow that connects with the canvas.
That's three minutes gone in the round.
Toyotomi throwing shots but Hoo is blocking nicely.
Toyotomi scores with a couple of good hammerfists.
Hoo is positioning himself well to prevent Toyotomi advancing to mount.
Toyotomi is sneakily working for an arm triangle but Hoo sees it coming and defends easily.
Hoo has no desire to be mounted, so is trying to control. Toyotomi is working away from the top position though.
Toyotomi thumps the canvas. Not on purpose obviously - he just missed Hoo's head.
Toyotomi is trying a forearm choke
I don't think that's going to do much at this level of the game.
Hoo works his way to full guard. Good work.
That's four minutes gone in the round.
Hoo is trying to keep Toyotomi in close.
Hoo has his hands on Toyotomi's head, controlling the position.
Hoo is trying to keep Toyotomi in close.
Toyotomi scoring with some ground and pound.
Hoo avoiding any damage from the ground and pound.
We've seen a great period of action over the last minute or so - credit to both fighters for going all out!
Toyotomi with a flurry of punches that miss.
As the round comes to an end the crowd are showing their appreciation for a great round of action.
Hoo looking to control.
Toyotomi working from the guard for now, landing some ground and pound.
Hoo is avoiding any damage by keeping wrist control.
Hoo keeping full guard, as Toyotomi tries to pass.
And thats the end of the round the fighters go back to their corners.
Hideyoshi Toyotomi showed his class in that round. I'd imagine he'll take it on all the scorecards.
The corners get their ten second warning. Both fighters stand from their stools and stare eachother down, ready to get back to the action. This is the final round!

Toyotomi throws a wild body kick that Hoo sees coming a mile off.
Toyotomi with a nice looking leg kick. You could hear that one land in a back row.
Toyotomi looking to take his opponent's legs away with the low kicks.
A jab from Hoo finds it's way through Toyotomi's defenses.
Toyotomi tries to check the leg kick but that clearly hurt him.
Hoo tries to clinch but is not successful on this occasion.
Toyotomi scores a trip takedown into side control. Nice.
Hoo struggling a bit here.
Sloppy strikes there by Toyotomi.
That's one minute gone in the round.
Toyotomi is looking for a kimura. He might have it! No, Hoo has escaped the position, nice work there.
Hoo is trying to improve his position.
Toyotomi tries to land with some ground and pound but misses.
Toyotomi passes to full mount! That's big trouble for Hoo!
The referee warns Hoo that he has to improve his position here as he takes two more clean shots to the head.
Toyotomi working the ground and pound effectively.
Hoo is in all sorts of trouble here.
Toyotomi pausing momentarily but resumes with a couple of decent strikes that do a bit of damage.
Wooooo! Give it up for these two warriors! They are putting on a show!
Hoo really trying hard to get back to half guard here.
That's two minutes gone in the round.
Toyotomi is still in mount, landing shots to his trapped opponent. Hoo can't stay in a position like this for much longer.
Toyotomi connects with a couple of good shots from mount.
Hoo really trying hard to get back to half guard here.
Hoo tries to hold on but Toyotomi postures up.
Toyotomi lands a couple of good shots and Hoo has given up his back, trying to escape the position!
Hoo preventing the rear naked choke attempt from Toyotomi.
Hoo trying to control the action but Toyotomi just sinks the hooks in.
Toyotomi somehow managing to miss with a strike from the back.
That's three minutes gone in the round.
Hoo is trapped and Toyotomi is scoring with shots to the head and body.
Toyotomi is remaining active here, looking for the choke. The more discerning members of the crowd will appreciate his efforts.
Toyotomi looking for the choke but no joy.
Hoo tries to escape the position - he's now mounted. Is that better or worse? Hard to tell!
Hoo wriggling around on the bottom manages to avoid the strikes thrown by Toyotomi.
Toyotomi connects with a couple of good shots from mount.

It looks like Kimroy Hoo has been cut.
This is a great period of action - very entertaining stuff!
Toyotomi is working on an americana here. Ooh, that looks pretty nasty! Nope, Hoo has managed to escape the submission attempt.
That's four minutes gone in the round.
Toyotomi throwing shots from mount but they're not landing.
Hoo tries to lock up and control but Toyotomi gives him a forearm to the face and pushes him away.
Hoo is going to have to think about doing something other than just controlling because Toyotomi is managing to avoid having the position dictated to him.
Hoo is trying to escape the mount.
Toyotomi unloading with bombs!
Toyotomi lands a big elbow.
Toyotomi looking to finish Hoo with some ground and pound. This is bad for Hoo!
In the pre-fight buildup videos we saw Toyotomi working his ground and pound in the gym.
The crowd are going absolutely nuts as the round comes to an end - what a fantastic round of action!
Toyotomi lands a couple of nice shots there from mount.
Hoo wants to control but Toyotomi is having none of it.
Kimroy Hoo has stepped it up - he knows he needs a finish here!
The fighters are pressed up against the cage, both looking to find a bit of space to work.
Toyotomi scores with a couple of good head shots there.
And that's the end of the fight!
Hideyoshi Toyotomi comfortably won the final round on my scorecard.
I've got Toyotomi winning every round here. Surely the decision will go his way and he'll pick up a well deserved decision victory. Over to the ring announcer for the scorecards.
Ladies and gentlemen, after 3 rounds of action, we go to the scorecards for a decision.
Judge Saam Ante scores the fight 27:30
Judge Paulsen Ambrosius scores the fight 27:30
Judge Patrick Alders scores the fight 27:30
In favor of your winner, by unanimous decision... Hideyoshi Toyotomi!
|
|
|
|
|
|
|
|
|
|
|
|
|
|
|
|
|
|
|
|
|
|
|
| S |
C
A |
G |
S |
C
B |
G |
|
S |
C |
G |
|
energy
A | B |
|
hype
A | B |
|
pop
A | B |
|
mgr
A | B |
|
FIGHT
RATING
90% |
|
|
|
|
|
|
