|
|
PBP Commentary |
Coming up we have a welterweight MMA rules bout between Jarvis Sosa (ranked 0 p4p, 0 weight class) and Sam Mitchell (ranked 0 p4p, 0 weight class). Sam Mitchell will no doubt be looking to use his reach advantage to good effect.
 |
|
 |
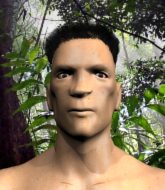
| 160 cm
24
178 lbs
1 - 2 - 0 |
|
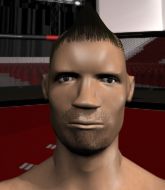
179 cm
25
180 lbs
0 - 0 - 0 |
BJJ Blue Belt
Counter fighter
Cuts easily |
|
BJJ Blue Belt
Great elbows
Powerful |
|
| |
|
Ladies and gentlemen. This fight is 3 rounds, in the welterweight division.
Introducing the fighter to my left, fighting out of the red corner.
With a record of
1 - 2 - 0, fighting out of London, Jarvis Sosa!
And introducing the fighter to my right, fighting out of the blue corner.
With a record of
0 - 0 - 0, fighting out of London, Sam Mitchell!
The judges for this bout are Richard Clark, Chris Edwards and James Atkins.

The bell rings for round one and we are underway!

Sosa has taken the fight to the clinch.
Mitchell is working hard here but doesn't seem to be able to control effectively, up against the cage.

Mitchell escapes the clinch and we're back to striking.

Mitchell looks for a takedown. He's got it. We're now in half guard.
The referee is asking the fighters to pick up the pace.
Sosa trying to control from the bottom.
Mitchell wants to control but Sosa is keeping him busy.
Sosa avoiding damage under a succession of punches from Mitchell.
The ref warns both fighters not to hold the cage as they work up against the meshing.

Mitchell is working for a submission of some sort.
Mitchell wants to lay and pray for a moment but Sosa keeps working.

That's one minute gone in the round.
Mitchell is looking to advance position but Sosa won't allow it.
Sosa tries to roll over but Mitchell keeps him under control.
Mitchell sitting in half guard, looking to land shots. Sosa defending well though.
Sosa has no desire to be mounted, so is trying to control. Mitchell is working away from the top position though.
Mitchell thumps the canvas. Not on purpose obviously - he just missed Sosa's head.
Sosa gets back to full guard.
The fighters are pressed up against the cage, both looking to find a bit of space to work.
Sosa wants to sweep here but Mitchell controlling him for the moment.
Mitchell really doesn't want to stay on the ground with Sosa. If he can't get it back to his feet, it's only a matter of time before he'll be tapping out.

That's two minutes gone in the round.
Sosa lands with a heel strike from the guard.
Sosa throwing short punches from the bottom.
Mitchell tries to free his leg and advance position but Sosa is retaining full guard.
Mitchell trying to land body shots but he keeps hitting the mat.

Sosa uses the cage to get back to his feet.

That's three minutes gone in the round.
Mitchell misses with the combination.
Sosa keeps the fight on the outside.
Mitchell throws the overhand right but ducks down into a quick takedown attempt. Sosa was covering up waiting for the punch and Mitchell finishes the takedown easily into guard.

Sosa looking for submissions from the bottom but instead Mitchell passes into side control.
Sosa struggling a bit here.

That's four minutes gone in the round.
Mitchell tries for a kimura. Not really close to a finish though.
Mitchell wants to control but Sosa is keeping him busy.
Sosa wants to control but Mitchell postures up.
The crowd applaud the fighters efforts here as the round comes to an end.
Mitchell trying to control the position but Sosa is working away.
Mitchell creates some space and throws a big elbow, but Sosa sees it coming and moves his head just enough to avoid the strike.
And thats the end of the round the fighters go back to their corners.
Sam Mitchell dominated that round.
OK. That's time! The bell goes and we're back to the action.

Mitchell drives through with a really nice takedown into side control.
Sosa can't do much from the bottom here.
Mitchell thinks about going for a far side armbar but bails out and retains the dominant position instead.
Sosa is moving his hips around well on the bottom and has managed to get back to half guard.
Sosa wants to get back to full guard.
Sosa tries to strike from the bottom but it doesn't land.
Sosa manages to get to full guard.
Sosa could do with losing a few pounds - he looks very soft around the mid section, to put it politely.
That's one minute gone in the round.
Sosa has managed to work for a loose triangle. I think Mitchell should be able to defend this one pretty easily though. Oh, Sosa has tightened it up now! Mitchell should have reacted faster there - he's in big trouble and yes, he's tapped out! This one is all over!
Ladies and gentlemen, after 1:20 of round 2, we have a winner by way of Submission (Triangle). Jarvis Sosa!
|
|
|
|
|
|
|
|
|
|
|
|
|
|
|
|
|
|
|
|
|
|
|
| S |
C
A |
G |
S |
C
B |
G |
|
S |
C |
G |
|
energy
A | B |
|
hype
A | B |
|
pop
A | B |
|
mgr
A | B |
|
FIGHT
RATING
62% |
|
|
|
|
|
|
