|
|
PBP Commentary |
Coming up we have a middleweight MMA rules bout between Bowman Rook (ranked 0 p4p, 0 weight class) and Nick Game (ranked 0 p4p, 0 weight class). Both fighters look fresh as a daisy as they make their way towards the cage.
 |
|
 |
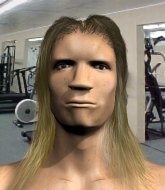
| 180 cm
29
190 lbs
16 - 11 - 0 |
|
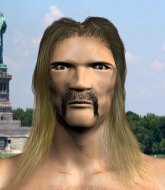
180 cm
28
195 lbs
10 - 5 - 0 |
Great wrestler
Excellent boxer
Cardio machine |
|
Good wrestler
World class MT
Good gas tank |
|
| |
|
Ladies and gentlemen. This fight is 3 rounds, in the middleweight division.
Introducing the fighter to my left, fighting out of the red corner.
With a record of
16 - 11 - 0, fighting out of Las Vegas, Bowman Rook!
And introducing the fighter to my right, fighting out of the blue corner.
With a record of
10 - 5 - 0, fighting out of Amsterdam, Nick Game!
The judges for this bout are James Ackerman, Phil Schofield and Sam Margolis.

The bell rings for round one and we are underway!
Rook tries to shoot in for a takedown. He's got hold of a leg but Game swivels and escapes.
Game checks a leg kick nicely.
The fight stays on the outside here - Rook looks like he's thinking about clinching though.
Game stuffs a takedown. It's all about dictating where the fight takes place and Game wants it to stay on the feet.
Rook shoots for a takedown but Game saw that one coming a mile off and avoided it easily.
That's three failed takedown attempts in the round for Bowman Rook. That's going to take a lot out of him.
Game misses with a series of wild punches.

Rook scores with a nice takedown into half guard. Let's see what he's got on the ground.
The referee is asking the fighters to pick up the pace.
Game trying to control here.
The fighters are pressed up against the cage, both looking to find a bit of space to work.
Rook not landing any meaningful shots this time.

That's one minute gone in the round.
Rook content to control rather than advance.
Game wants to improve his position but Rook is controlling well.
Rook wants to control but Game is keeping him busy.

Rook is thinking about going for an arm triangle but he can't free his leg.
Game is looking to control Rook's leg but it's slowly edging free. Can Game avoid being mounted?
Rook not throwing his punches with enough precision this time.
Game is positioning himself well to prevent Rook advancing to mount.
The ref warns both fighters not to hold the cage as they work up against the meshing.
Game gets full guard.

That's two minutes gone in the round.
Rook preventing the sweep.
Rook wants to control from the top but Game keeps moving.
Rook is in close to Game's body, working some short punches and elbows.
Rook postures up to throw the ground and pound strikes but they don't connect.
Game looking to control.

Game is looking for a guillotine. You can't force these things though and Rook defends well.
Game working a defensive guard here.

That's three minutes gone in the round.
Rook working some ground and pound from guard but it's not doing any damage.
Game is working actively off his back, looking to secure an arm or perhaps work for a triangle.
Game controls Rook momentarily but Rook frees himself.
There's a bit of a scramble here and now Game is on top in guard.
Game throwing strikes but missing.
Rook throwing his legs up looking for a triangle.
Rook working for a triangle but Game defends it easily.

That's four minutes gone in the round.
Rook throws his legs up looking for a submission but Game uses it to pass to side control.
Rook manages to get back to half guard.
Rook blocking the ground and pound attempt from Game.
The crowd applaud the fighters efforts here as the round comes to an end.
Game trying to control from half guard but Rook is working away.
Game is scoring with some nice ground and pound from the dominant position.
And thats the end of the round the fighters go back to their corners.
A close round but Nick Game will probably get the nod.
The fighters' corners scream their final instructions, as the referee calls time. Here we go, back to the action!

Rook lunges in with an uppercut that skims his opponent's chin.
Game misses with a looping right.
Game throws a nice hook to the body that draws an oooh from the crowd.
Game lunges at Rook with a hook that half lands and is half blocked by Rook's hand.
Game connects with a hook to the side of his opponent's head.
Game rushes forward with a series of wild hooks but Rook moves out of range and avoids them all easily.
Game thows a left - swing and a miss!
Rook throws a combination that misses

and Game counters with a head kick that drops Rook to the mat! Rook scrambles across the canvas and gets back to his feet, still wobbly!

Rook is rocked!
This is a great period of action - very entertaining stuff!
Game throws a hook but Rook avoids it easily.
Oh Rook is still all over the place! His legs are completely gone! Will he be able to recover?!!
Rook connects nicely with a jab. Noted by the judges no doubt.
Rook fails with the takedown
and Game counters with a leg kick that reverborates around the arena.
Rook seems to have got his legs back now.
That's one minute gone in the round.
Rook is trying hard to land a takedown here. Game sprawls well and keeps this one on the feet.
Rook throws a leg kick but Game checks it.
Rook is looking to clinch.
Boom, another hit is landed. "You're gunna get knocked out" taunts Game, as that shot connected.
We've been told by Rook's head coaches at Rancid Fight Club that he's been working on his takedown defense in preparation for this fight.
A leg kick checked by Game.
Rook fails with a takedown attempt.
That's three failed takedown attempts in the round for Bowman Rook. That's going to take a lot out of him.
Rook throws a shot from downtown. Game moves away and avoids it.
Rook fakes a couple of low kicks, before throwing one on the third attempt. It connects and Game has to reset his feet before getting ready to engage.
That's two minutes gone in the round.
Rook swings and misses with a hook to the body.
Bowman Rook seems to be the more aggressive standup fighter in this bout.
Rook tries to score with a leg kick but it misses it's target.
Game takes a kick to the body and keeps moving.
Game throws a hook to the body but it doesn't connect.
Nice defenses there by Game.
Game keeping his hands up high there, blocking the jab from Rook.
Rook wants to clinch.
Game misses with a kick to the body
and Rook counters with a slapping leg kick.
Game connects with a leg kick. He turned his hip over nicely there.

Rook closes the distance and pushes Game back into the cage.
The crowd are loving this. Great action here.
Game misses with a short punch on the inside.
That's three minutes gone in the round.
A body shot lands from Game.
Rook landing knees to the body. They look like they could hurt.
Rook is trying to trip Game. He has hold of a leg but Game is hopping around, keeping his balance for the moment. Rook persists though and gets the takedown into guard.
Rook postures up and lands a big shot to Game's brow.
Rook with a couple of shots to the head there. Not particularly brutal.
Game is trying to control the position from the bottom.
Game is working the butterfly guard. He manages to land a nice scissor sweep and is now in half guard on the top. Nice move.
Wooooo! Give it up for these two warriors! They are putting on a show!
Rook wants to control but Game is keeping busy.
Game landing with strikes to the body and head, softening up his opponent.
Rook regains full guard. Nicely done.
That's four minutes gone in the round.
Rook is trying to keep Game in close.
Game postures up and lands some nice ground and pound.
Game scoring with some ground and pound.
Game avoids a guillotine attempt easily.
Rook working for submissions but it's allowed Game to get to half guard.
Nick Game has got the better of the ground game so far.
The crowd are going absolutely nuts as the round comes to an end - what a fantastic round of action!
Game uses his free foot to push down on Rook's thigh. Eventually he works his other foot free and he's advanced to mount - this is trouble for Rook.
And thats the end of the round the fighters go back to their corners.
Nick Game showed his class in that round. I'd imagine he'll take it on all the scorecards.
That's the end of the interval. I'm sure that seemed a lot quicker than a minute for our two fighters! Back to the action. This is the final round!

Rook throws a lazy uppercut
and Game makes him pay by landing a nice hook to the body before moving out of range.
Rook tries to clinch there but Game circles away.
Rook throws a jab when Game was well out of range.
Rook lands a head shot.
Rook connects with a body shot that sends Game's belly button to the back.
Rook just misses with a punch to the body.
A jab from Game misses.
Rook wants to clinch.
Game keeping a good distance there, avoiding the body shot.
That's one minute gone in the round.
Rook ducks down and throws a hook to the body but Game moves away.
Game missing with a left hand there. Rook was out of range so wasted energy throwing that one.
Game takes a body punch but keeps moving.
Rook throws a leg kick but Game checks it.
Game uses some good footwork to avoid the body shot by Rook.
Rook throws out a leg kick but Game moves out of range and Rook only half commits.
Game slips a jab and a cross from Rook.
Rook shoots in for a takedown. "Ole!" shouts Game as he jumps to the side.
Rook thumps Game with a low kick.
Rook tries to clinch but Game is having none of it.
That's two minutes gone in the round.
No luck for Rook with that takedown attempt.
Rook throws a right hand that misses
and Game counters with a body kick that stops Rook in his tracks momentarily.
Game bobs and weaves well there to avoid the strikes.
Rook tries to clinch but is not successful on this occasion.
Rook is looking to take this fight into the clinch.
Rook throws a body kick despite being completely out of range
and Game counters with a nice uppercut.
Horrible takedown by Rook or perhaps it was just good defense by Game which made him look bad.
That's three failed takedown attempts in the round for Bowman Rook. That's going to take a lot out of him.
The crowd are loving this. Great action here.
Rook fails miserably with a takedown attempt.
Donk. Game catches Rook right on the button with a cross.
That's three minutes gone in the round.
A telegraphed right hand from Game misses the target.
Game misses with the combination.
Game avoids a lazy jab quite easily.
Nick Game is fighting for a decision - hopefully he's judged it right and he's actually winning the fight.
Game is trying hard to land a takedown here. Rook sprawls well and keeps this one on the feet.
Game moves out of range as Rook strikes.
Rook throws a body kick that misses.
Rook scores with a slapping inside leg kick.
A jab from Rook finds it's way through Game's defenses.
Game gets caught on his heels momentarily as he allows Rook to score an easy takedown into full guard.
That's four minutes gone in the round.
Game is trying to control the position from the bottom.
Rook trying to pass the guard but can't manage it just yet.
Game working the defensive guard well to avoid strikes from Rook.
Rook working some strikes from top position.
Rook cracks Game with a solid left hand.
Wooooo! Give it up for these two warriors! They are putting on a show!
Game wants to sweep here but Rook controlling him for the moment.
Game wants to control here, rather than go for any submissions from the bottom. At least for now.
As the round comes to an end the crowd are showing their appreciation for a great round of action.
Rook trying to pass the guard but can't manage it just yet.
And that's the end of the fight!
Bowman Rook showed his dominance in that final round.
I think Game has won this one but let's see whether the judges agree with me. Over to the ring announcer for the scorecards.
Ladies and gentlemen, after 3 rounds of action, we go to the scorecards for a decision.
Judge James Ackerman scores the fight 29:28
Judge Phil Schofield scores the fight 28:29
Judge Sam Margolis scores the fight 29:28
In favor of your winner, by split decision... Bowman Rook!
Bowman Rook really struggled to get his t-shirt on before his hand was raised. Making sure that Milwaukee's Best 160 logo gets some air time is pretty tricky when you're all sweaty.
|
|
|
|
|
|
|
|
|
|
|
|
|
|
|
|
|
|
|
|
|
|
|
| S |
C
A |
G |
S |
C
B |
G |
|
S |
C |
G |
|
energy
A | B |
|
hype
A | B |
|
pop
A | B |
|
mgr
A | B |
|
FIGHT
RATING
79% |
|
|
|
|
|
|

