|
|
PBP Commentary |
Coming up we have a middleweight MMA rules bout between Jimmy Caldwell (ranked 0 p4p, 0 weight class) and Tom Haverford (ranked 0 p4p, 0 weight class). Haverford has chosen Jay-Z & Kanye West - N** In Paris as his entrance music. Tom Haverford has the better chin. Will he look to stand and bang today?
 |
|
 |
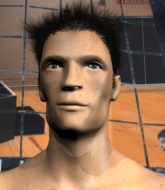
| 186 cm
37
200 lbs
26 - 27 - 0 |
|
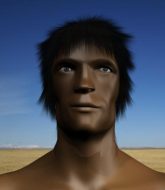
180 cm
34
190 lbs
14 - 12 - 0 |
Good wrestling
World class boxer
Insanely flexible |
|
Excellent grappler
Excellent MT
Good gas tank |
|
| |
|
Ladies and gentlemen. This fight is 3 rounds, in the middleweight division.
Introducing the fighter to my left, fighting out of the red corner.
With a record of
26 - 27 - 0, fighting out of London, Jimmy Caldwell!
And introducing the fighter to my right, fighting out of the blue corner.
With a record of
14 - 12 - 0, fighting out of London, Tom Haverford !
The judges for this bout are Andrew Berry, Donald Grub and James Glass.

The bell rings for round one and we are underway!
Caldwell misses with a few strikes there.
Caldwell slips a jab from Haverford .
We've been hearing reports that Caldwell has been drilling takedowns in recent sessions so let's see if that has an impact on the result of this fight.
Caldwell shoots in with a takedown attempt and he has Haverford pinned against the cage. Haverford gets the underhooks and manages to circle away.
Caldwell fails in his attempt to clinch.
Haverford fakes a couple of low kicks, before throwing one on the third attempt. It connects and Caldwell has to reset his feet before getting ready to engage.
Caldwell tries to close the distance and clinch but Haverford swats him to one side with an open hand palm strike and circles away.
Haverford moves forwards but Caldwell connects with a nice, crisp jab.

It looks like Tom Haverford has been cut.
Jimmy Caldwell seems to be the more aggressive standup fighter in this bout.
Haverford turns his hip over beautifully as he lands a nice leg kick.
Caldwell takes one to the side of the head.

Caldwell instigates a clinch.
Haverford prevents Caldwell from breaking the clinch.
The crowd cheering loudly, showing their appreciation for the quality fight we're seeing here.

Caldwell breaks the clinch.

Haverford clinches up with Caldwell and pushes him back against the cage.
Haverford lands with a light punch inside.
Haverford throws an elbow but it's blocked.
Haverford keeps the fight in the clinch, despite Caldwell's efforts to push away.
Caldwell tried to land a shot to the body but connects with Haverford 's elbow.

That's one minute gone in the round.
Caldwell working aggressively here.
Haverford lands a nice knee to the body.
A quick uppercut on the inside from Caldwell.
Caldwell misses with a hook to the ribs.
A frustrated look appears on Caldwell's face as he tries to break the clinch.
Haverford stalling against the cage.
Haverford connects with a nasty looking knee right to Caldwell's face.
Haverford keeps control of Caldwell as he tries to wriggle out of the double underhooks.
Caldwell wants to break free. God knows he wants to breaaaak freeee.
Haverford lands a left hand.
Caldwell avoiding damage as Haverford throws knees to the body.
Caldwell swings away with an uppercut that misses.
Wooooo! Give it up for these two warriors! They are putting on a show!
Haverford with the Thai clinch, lands a knee to the head.

Haverford works for the underhooks and manages to get a trip takedown into guard.
We could do with one of the fighters taking the initiative a bit more on the ground - they're both waiting to capitalize on a mistake.
We must be close to a standup if these guys don't pick up the pace.
Caldwell keeping moving, preventing Haverford from controlling successfully.
The fighters are pressed up against the cage, both looking to find a bit of space to work.
Haverford stands and throws Caldwell's legs to the side, diving into side control.

That's two minutes gone in the round.

Haverford tries for a kimura. Not really close to a finish though.
Caldwell wants to get back to his feet but Haverford drags him back down.
Caldwell is looking for a sweep.
Haverford tries for a kimura but Caldwell is defending well.
Haverford trying to control the position but Caldwell is working away.
Haverford might have to switch it up a bit here because his efforts to control Caldwell haven't been going to plan, at least at the current moment in time.
Caldwell tries to improve position but can't.

That's three minutes gone in the round.
Haverford is looking for a kimura. He might have it! No, Caldwell has escaped the position, nice work there.
Haverford is looking to finish here, going for an Americana. Caldwell knows the correct defense though, so he's OK.
Caldwell tries to get back to half guard but can't.
Haverford working away.
Caldwell regains half guard.
The ref warns both fighters not to hold the cage as they work up against the meshing.
Haverford trying to control the action but Caldwell is working from the bottom.
Caldwell wants to control but Haverford is keeping busy and won't allow it.

That's four minutes gone in the round.
Haverford wants to work for an arm triangle but Caldwell is really keeping half guard well and defending the submission attempt.
Haverford seems to be looking for submissions.

Caldwell is looking to sinch up a guillotine here but Haverford pulls his head out easily.
Haverford trying to mount his opponent but Caldwell defends it.
Haverford prevents Caldwell from improving his position.
Haverford seems to be looking for submissions.
The crowd are going absolutely nuts as the round comes to an end - what a fantastic round of action!
Haverford thows a wild elbow that connects with the canvas.
Haverford is looking for a kimura here.
And thats the end of the round the fighters go back to their corners.
Tom Haverford dominated that round.
The cut man is working on Tom Haverford 's cut.
The fighters' corners scream their final instructions, as the referee calls time. Here we go, back to the action!

Haverford walks forward and throws out a flicking leg kick. Caldwell checks it nicely though, as he moves to the side.
Caldwell darts in looking for a takedown but Haverford gets double underhooks and turns Caldwell into the cage.
Haverford keeps the fight in the clinch, despite Caldwell's efforts to push away.
A head punch on the inside from Caldwell fails to land.
A frustrated look appears on Caldwell's face as he tries to break the clinch.
Haverford blocks an uppercut.
Haverford taking a breather.
Haverford misses with an elbow over the top.
Haverford lands with a short head shot on the inside.
Haverford works for underhooks and lands a body shot in the process.
Caldwell is trying to stall.
Haverford misses the knee to the body. Nice hip positioning from Caldwell.
Caldwell tries to stall but Haverford uses the opportunity to gain a better position.
That's one minute gone in the round.
Haverford taking a break, stalling in the clinch.
Caldwell on the defensive, avoiding the knees to the body.
Haverford scores with a knee to the head.
Haverford tries to land knees in the clinch but Caldwell avoids the damage to the body.
Haverford looking to throw knees to the head but Caldwell is blocking nicely.
Haverford with an attempt at a knee that misses.
A nice left hand lands by Caldwell.
Caldwell escapes the clinch and we're back to striking.
Haverford wants to land a leg kick but Caldwell is out of range.
Haverford throws a nice looking combination but Caldwell bobs and weaves to avoid any damage.
A really sloppy takedown attempt there from Caldwell.
Caldwell shoots in looking for a takedown. Haverford tries to sprawl out of it but Caldwell keeps driving through. The fighters are pinned against the cage. Haverford manages to get underhooks and after a bit of a struggle, circles away and we're back to standing.
That's three failed takedown attempts in the round for Jimmy Caldwell. That's going to take a lot out of him.
Haverford scores with a leg kick.
That's two minutes gone in the round.
Caldwell changes levels and looks for a double leg takedown. Haverford tries to avoid it but Caldwell manages to keep hold of a leg and drag Haverford to the ground. Haverford escapes though and pops straight back up to his feet.
Caldwell is looking to clinch but Haverford is avoiding it.
A solid leg kick lands there for Haverford .
Haverford throws the left hand but Caldwell avoids the punch easily.
Haverford looks to score with a jab to the body but Caldwell is just out of range.
Caldwell moves out of range as Haverford strikes.
Caldwell dives in for a single leg takedown but Haverford sprawls and the fighters end up clinched against the cage.
Haverford can't find room to land a body shot as Caldwell controls the action.
This has been an exciting period of action!
Caldwell misses with a hook to the ribs.
A short right from Haverford .
An uppercut on the inside fails to land for Caldwell.
Haverford landing knees to the head.
Both fighters working to control the clinch.
Both guys are working to get underhooks.
Haverford doesn't land with the attempted body shot.
Caldwell swings away with an uppercut that misses.
Knees to the body from Haverford .
That's three minutes gone in the round.
Haverford has Caldwell pressed against the cage.
Still in the clinch, Caldwell scores with a nice short uppercut.
Haverford lands with a right to the head.
Caldwell scores with a shoulder strike.
Tom Haverford seems to be working more effectively in the clinch in the fight so far.
A body shot lands from Haverford .
Haverford stalling against the cage.
Haverford tries to land a knee to the head but misses.
Haverford misses with a punch to the body.
Haverford misses with a punch to the body.
A real battle for position is taking place between these two warriors.
Haverford misses with a body punch.
Caldwell is trying to break the clinch but Haverford is controlling him.
Haverford with the Thai clinch. He's looking to land a big knee but he's not managed it this time.
Haverford will no doubt start fighting again in a minute but for now he's just having a little rest, leaning Caldwell up against the cage.
Haverford tries to land a knee to the head but Caldwell blocks with his arms.
That's four minutes gone in the round.
The fans in attendance giving it up for the two fighters, who have really let it all hang out in the last minute or so!
Haverford has Caldwell pressed against the cage, preventing Caldwell from circling away and getting back to striking at range.
Caldwell looks like he'd prefer to be striking at range right now.
Caldwell lands a nice shot to the body.
Caldwell misses with some punches.
Haverford with an attempt at a knee that misses.
Haverford connects with a knee to the head.
A knee to the head by Haverford .
Haverford tries to land a knee to the head but misses.
Caldwell has a couple of punches blocked by Haverford .
Caldwell trying to control the position but instead, Haverford has worked for underhooks and has pushed Caldwell into the cage.
Caldwell fails to land with a short punch on the inside.
As the round comes to an end the crowd are showing their appreciation for a great round of action.
Caldwell swings away with an uppercut that misses.
Haverford lands an uppercut.
Haverford struggles to land a body shot inside as Caldwell controls his hands.
And thats the end of the round the fighters go back to their corners.
Tom Haverford showed his class in that round. I'd imagine he'll take it on all the scorecards.
The cut man is working on Tom Haverford 's cut.
The minute break is over - no more time for sponges and pep talks - back to the action! This is the final round!

No luck with that takedown attempt from Haverford .
Haverford takes a body punch but keeps moving.
Caldwell looks to land a combination but Haverford avoids it well.
Decent striking displayed by Haverford there.
Caldwell takes a shot right to the bread basket.
Caldwell moves in looking to clinch but Haverford pushes him off.
Caldwell looks to land a combination but Haverford avoids it well.
Haverford uses some good footwork to avoid the body shot by Caldwell.
A looping hook to the body misses from Haverford . Caldwell does a little dance to reset his feet.
Caldwell tries to clinch up against the cage, rushing in to close the distance. Haverford manages to break the clinch and circles back to the middle of the mat.
Haverford misses with an uppercut.
Caldwell stalks Haverford and leaps in with a furious combination of punches. Uppercuts and crosses smash into Haverford 's face. Haverford staggers backwards, shaken.
The crowd are loving this. Great action here.
Caldwell tries to clinch up against the cage, rushing in to close the distance. Haverford manages to break the clinch and circles back to the middle of the mat.
That's one minute gone in the round.
Caldwell shoots in for a takedown - he's clinched up with Haverford but Haverford pushes him off and we're back to square one.
A telegraphed takedown attempt from Caldwell is defended easily by Haverford .
Both fighters are breathing heavily.

Caldwell changes levels and drives through with a really nice takedown into side control. Haverford looks really pissed at himself for not defending that better.
Caldwell wants to stand but Haverford is controlling his arm.
Caldwell trying to control the position but Haverford is working away.
Caldwell is looking for a kimura. He might have it! No, Haverford has escaped the position, nice work there.
Haverford tries to buck Caldwell off but Caldwell is having none of it.
That's two minutes gone in the round.
Caldwell is looking to take a break and control but Haverford is keeping him honest, looking to work from the bottom.
Haverford tries to buck Caldwell off but Caldwell is having none of it.
Caldwell wants to stand but Haverford is controlling his arm.
Haverford is looking to regain half guard here but Caldwell keeps moving and retains side control.
Caldwell is trying to get an arm triangle but Haverford is defending well.
You can see the frustration on Haverford 's face, being in this tough position on the bottom.
That's three minutes gone in the round.
Caldwell laying and praying for a moment but Haverford takes advantage and regains half guard.
Caldwell wants to free his trapped foot but Haverford is holding on for dear life with his legs.
Haverford trying to hold on to Caldwell's head to control him but Caldwell postures up.
Caldwell is looking for a kimura but he's never going to get it from there.
Haverford wants to get back to full guard.
Jimmy Caldwell has stepped it up - he knows he needs a finish here!
That's four minutes gone in the round.
Caldwell is sneakily working for an arm triangle but Haverford sees it coming and defends easily.
Caldwell is trying to work for a kimura. This could be trouble! No, Haverford has managed to free his arm - good work.
Haverford trying to hold on to Caldwell's head to control him but Caldwell postures up.
Tom Haverford is fighting for a decision - hopefully he's judged it right and he's actually winning the fight.
The crowd applaud the fighters efforts here as the round comes to an end.
Caldwell is trying to work for a kimura. This could be trouble! No, Haverford has managed to free his arm - good work.
And that's the end of the fight!
Jimmy Caldwell showed his dominance in that final round.
I think Haverford has won this one but let's see whether the judges agree with me. Over to the ring announcer for the scorecards.
Ladies and gentlemen, after 3 rounds of action, we go to the scorecards for a decision.
Judge Andrew Berry scores the fight 28:29
Judge Donald Grub scores the fight 28:29
Judge James Glass scores the fight 28:29
In favor of your winner, by unanimous decision... Tom Haverford !
A relieved looking Tom Haverford thanked the fans for their support and gave the usual line about them being amazing. They seemed to believe that he actually meant it.
|
|
|
|
|
|
|
|
|
|
|
|
|
|
|
|
|
|
|
|
|
|
|
| S |
C
A |
G |
S |
C
B |
G |
|
S |
C |
G |
|
energy
A | B |
|
hype
A | B |
|
pop
A | B |
|
mgr
A | B |
|
FIGHT
RATING
80% |
|
|
|
|
|
|

