|
|
PBP Commentary |
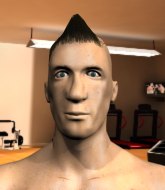
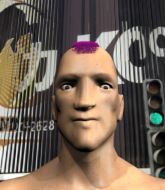
Coming up we have a super heavyweight MMA rules bout between Aha Dark (ranked 0 p4p, 0 weight class) and Keijiro Maeda (ranked 0 p4p, 0 weight class). Keijiro Maeda will no doubt be looking to use his reach advantage to good effect.
 |
|
 |
| 200 cm
24
250 lbs
2 - 0 - 0 |
|
225 cm
27
302 lbs
6 - 5 - 1 |
BJJ Blue Belt
Solid Muay Thai
Intelligent |
|
BJJ Blue Belt
Excellent MT
Powerful |
|
| |
|
Ladies and gentlemen. This fight is 3 rounds, in the super heavyweight division.
Introducing the fighter to my left, fighting out of the red corner.
With a record of
2 - 0 - 0, fighting out of Rio de Janeiro, Aha Dark!
And introducing the fighter to my right, fighting out of the blue corner.
With a record of
6 - 5 - 1, fighting out of Rio de Janeiro, Keijiro Maeda!
The judges for this bout are Emerson Jorge, Felipe Paraventi and Edson Gomes.

The bell rings for round one and we are underway!

Dark clinches up with Maeda and pushes him back against the cage.
Maeda tries to pull guard but Dark won't allow it.

Maeda's corner calls for him to break the clinch, which he does.
Dark avoids the head kick by Maeda.
Dark has Maeda up against the cage in a clinch.
With the two fighters working up against the cage, Dark just misses with a elbow thrown towards Maeda's brow.
Dark creates a bit of distance and throws an elbow that only just misses.
Dark throws an elbow but it's blocked.
A nice glancing elbow lands by Dark.

It looks like Keijiro Maeda has been cut.
Maeda dodges an elbow strike from Dark.
Maeda drops down looking for an ankle pick but Dark pulls his leg out and moves away.
Dark takes the fight into the clinch.

That's one minute gone in the round.
Maeda can't get the takedown.
Aha Dark has stuffed three takedown attempts in the round now. That's going to take a lot out of Keijiro Maeda.
Maeda pushes off and circles away, back to the middle of the mat.
Dark definitely looks more muscular than last time we saw him fight.
Maeda closes this distance looking for a takedown but Dark circles away.
Dark has closed the distance and engaged Maeda in a clinch.
With the two fighters working up against the cage, Dark just misses with a elbow thrown towards Maeda's brow.
Maeda dodges an elbow strike from Dark.
Maeda is trying to drag Dark to the mat but Dark just about manages to keep his footing. He used the cage to his advantage there.
Dark misses with an elbow strike.

That's two minutes gone in the round.
Dark creates a bit of distance and throws an elbow that only just misses.
Maeda looking for a takedown.
Maeda breaks from the clinch.
No luck for Maeda with that takedown attempt.
Dark fakes with an overhand right and moves in to clinch with Maeda, pushing him back against the cage.
A real battle for position is taking place between these two warriors.
Dark throws an elbow but it misses.
Maeda blocks the elbow strike.
Maeda jumps guard but Dark turns him against the cage and keeps the fight standing.
Maeda's corner calls for him to break the clinch, which he does.

That's three minutes gone in the round.
Dark clinches up against the cage.
Nice elbow from Dark.
Maeda blocks an elbow strike from Dark.
Dark pushes off and fires off an elbow that misses, before clinching up again, against the cage.
Maeda breaks the clinch.

Dark gets tackled into the cage by Maeda. Maeda maintains the clinch.
Maeda breaks the clinch.
Maeda tries to check a leg kick but that clearly hurt him.
Maeda closes this distance looking for a takedown but Dark circles away.
Dark closes the distance and pushes Maeda back into the cage.
Maeda blocks an elbow strike.
Dark misses with an elbow over the top.
Dark gets underhooks to prevent Maeda's takedown attempt.

That's four minutes gone in the round.
Maeda is working hard here but doesn't seem to be able to control effectively, up against the cage.
Dark lands an elbow that stopped Maeda in his tracks for a moment.
Dark lands a nice elbow from the clinch.
Maeda is trying to slow down the pace of the fight but Dark is keeping busy.
Maeda jumps guard but Dark stands there with Maeda around his waist. Maeda gives up and drops back to his feet. We remain in the clinch.
The crowd applaud the fighters efforts here as the round comes to an end.
Maeda breaks the clinch and we return to the middle of the mat.
We've seen a great period of action over the last minute or so - credit to both fighters for going all out!
Dark moves into the clinch.
And thats the end of the round the fighters go back to their corners.
Aha Dark dominated that round.
The cut man is working on Keijiro Maeda's cut.
Well, the break between rounds is over. Let's get back to the scrappin!

Maeda closes the distance and presses his opponent up against the cage.
Maeda wants to take the fight to the mat but Dark manages to get underhooks and keep the fight in the clinch.
Maeda goes for a takedown in the clinch but Dark prevents it.
Dark throws an elbow but it's blocked.
Maeda has dropped down and is looking to force the takedown but it's defended by Dark after a bit of a struggle.
Aha Dark has stuffed three takedown attempts in the round now. That's going to take a lot out of Keijiro Maeda.
Dark pushes off and fires off an elbow that misses, before clinching up again, against the cage.
Dark misses with an elbow over the top.
Maeda tries to stall but Dark uses the opportunity to gain a better position.
With the fighters up against the cage, Dark throws an elbow but misses.
Dark stops a takedown attempt from Maeda.
It really doesn't seem like the step up in weight is hurting Dark here at all. He's more than holding his own against the bigger man.
That's one minute gone in the round.
Maeda is trying to pull guard but being pressed up against the cage enables Dark to keep the fight standing.
Maeda blocks an elbow strike from Dark.
Maeda avoids the elbow strike from Dark, against the cage.
Maeda jumps guard but Dark turns him against the cage and keeps the fight standing.
Both guys are working to get underhooks.
Dark prevents a takedown attempt there.
Dark creates a bit of distance and throws an elbow that only just misses.
Dark pushes off an throws an elbow but Maeda leans to the side and avoids it. We're back to clinching against the cage.
Maeda is trying to maintain a safe position but Dark gets an underhook and turns Maeda into the cage.
Maeda dodges an elbow strike from Dark.
That's two minutes gone in the round.
Maeda avoids a wild elbow strike from Dark.
Dark creates a bit of distance and throws an elbow that only just misses.
Dark misses with an elbow strike.
Dark pushes off an throws an elbow but Maeda leans to the side and avoids it. We're back to clinching against the cage.
Maeda blocks the elbow strike.
Maeda misses the knee to the body. Nice hip positioning from Dark.
Dark managing to block the knees to the body from Maeda.
Maeda fails to pull guard.
Maeda is looking for a takedown.
Maeda dodges an elbow strike from Dark.
That's three minutes gone in the round.
Maeda avoids a wild elbow strike from Dark.
Dark gets underhooks to prevent Maeda's takedown attempt.
Dark throws an elbow that misses.
Maeda tries for a takedown. No joy.
Maeda lands punches inside but they're not really causing much damage.
Dark pushes off and fires off an elbow that misses, before clinching up again, against the cage.
Maeda stalls.
Dark pushes off an throws an elbow but Maeda leans to the side and avoids it. We're back to clinching against the cage.
That's four minutes gone in the round.
Good anti-grappling being displayed by Dark as Maeda tries to tie him up.
Maeda using the Thai clinch to land knees to the body.
Maeda misses with a short punch on the inside.
Dark lands a nice elbow.
Maeda jumps guard but his hands slip and he falls flat on his back. Well, he's made himself look a right mug there, as Dark walks away with a smile on his face. Maeda gets slowly back to his feet and shakes his head.
Maeda shoots in for a takedown. He's persisting with it as Dark sprawls well. Dark wins this battle and keeps the fight standing. Maeda gets slowly back to his feet.
Dark fakes with an overhand right and moves in to clinch with Maeda, pushing him back against the cage.
The crowd applaud the fighters efforts here as the round comes to an end.
Dark pushes off an throws an elbow but Maeda leans to the side and avoids it. We're back to clinching against the cage.
Fantastic stuff here - a very entertaining period of action, which has drawn cheers from the crowd.
Dark pushes off an throws an elbow but Maeda leans to the side and avoids it. We're back to clinching against the cage.
And thats the end of the round the fighters go back to their corners.
A close second round but Keijiro Maeda will probably get the nod - 10:9.
The cut man is working on Keijiro Maeda's cut.
The fighters' corners scream their final instructions, as the referee calls time. Here we go, back to the action! This is the final round!

Dark clinches up with Maeda and pushes him back against the cage.
Aha Dark has scored more points in the clinch so far.
Dark lands a damaging elbow.
Maeda is trying to drag Dark to the mat but Dark just about manages to keep his footing. He used the cage to his advantage there.
Maeda tries a body shot but Dark blocks it.
With the two fighters working up against the cage, Dark just misses with a elbow thrown towards Maeda's brow.
Dark misses with an elbow strike.
Maeda tries to throw a body punch but Dark avoids it by throwing Maeda back against the cage.
Maeda has hold of a leg and is looking for a trip takedown. Dark avoids it nicely though and we remain in the clinch.
Maeda looking for a takedown.
Aha Dark has stuffed three takedown attempts in the round now. That's going to take a lot out of Keijiro Maeda.
That's one minute gone in the round.
Maeda tries to score a body lock takedown but Dark shows good agility there to stay on his feet.
Maeda goes for a takedown in the clinch but Dark prevents it.
Dark throws a nice elbow but it doesn't land.
Maeda tries to land knees in the clinch but Dark avoids the damage to the body.
Maeda avoids the elbow strike from Dark, against the cage.
Maeda breaks the clinch and we're back to striking at distance.
Dark closes the distance and presses his opponent up against the cage.
Dark on the defensive, avoiding the knees to the body.
Maeda is working for takedown but Dark is calmly controlling the position for now.
Dark throws an elbow but it misses.
That's two minutes gone in the round.
Maeda escapes the clinch and we're back to striking.
Dark rushes Maeda and pushes him back against the cage in a clinch.
Maeda tries to pull guard but Dark holds him up against the cage and eventually Maeda drops back down to his feet.
Maeda tries to pull guard but Dark holds him up against the cage and eventually Maeda drops back down to his feet.
Maeda tries to pull guard but Dark won't allow it.
Dark throws an elbow but it misses.
Maeda dodges an elbow strike from Dark.
Maeda avoids a wild elbow strike from Dark.
That's three minutes gone in the round.
Maeda trying to control the position but instead, Dark has worked for underhooks and has pushed Maeda into the cage.
Dark throws an elbow but it's blocked.
Maeda is trying to work for a single leg takedown but Dark pulls him back up using the underhooks.
Maeda is trying to slow down the pace of the fight but Dark is keeping busy.
Dark gets an overhook and lands an elbow to the side of the head.
Dark throws an elbow but it's blocked.
Dark lands an elbow inside.
That's four minutes gone in the round.
Maeda is looking for a takedown.
Maeda takes an elbow to the forehead.
That has opened up Keijiro Maeda's cut even more.
Maeda escapes the clinch and we're back to striking.
Dark has taken the fight to the clinch.
Maeda blocks the elbow strike.
Maeda blocks the elbow strike.
Maeda is working hard here but doesn't seem to be able to control effectively, up against the cage.
Maeda with an attempt at a knee that misses.
With the fighters up against the cage, Dark throws an elbow but misses.
The crowd applaud the fighters efforts here as the round comes to an end.
Dark prevents the takedown attempt.
And that's the end of the fight!
Aha Dark showed his dominance in that final round.
Well Dark has outscored his opponent in every aspect of the fight today. Only a scarily incompetent judge or two will keep him from a well deserved win... Over to the ring announcer for the scorecards.
Ladies and gentlemen, after 3 rounds of action, we go to the scorecards for a decision.
Judge Emerson Jorge scores the fight 29:28
Judge Felipe Paraventi scores the fight 29:28
Judge Edson Gomes scores the fight 30:27
In favor of your winner, by unanimous decision... Aha Dark!
After winning the bout, Aha Dark thanked all his fans and promised he'd do even better in his next fight. The crowd seemed to love his humility.
|
|
|
|
|
|
|
|
|
|
|
|
|
|
|
|
|
|
|
|
|
|
|
| S |
C
A |
G |
S |
C
B |
G |
|
S |
C |
G |
|
energy
A | B |
|
hype
A | B |
|
pop
A | B |
|
mgr
A | B |
|
FIGHT
RATING
45% |
|
|
|
|
|
|

