|
|
PBP Commentary |
Coming up we have a welterweight MMA rules bout between Yuki Kondo (ranked 0 p4p, 0 weight class) and Stuart Stardust (ranked 0 p4p, 0 weight class). Stardust comes into a darkened arena with his song building. Hate Being Sober kicks in, the lights come on and the crowd goes wild! What a showman! Both fighters look fresh as a daisy as they make their way towards the cage.
 |
|
 |
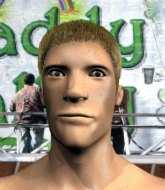
| 180 cm
21
174 lbs
1 - 0 - 0 |
|
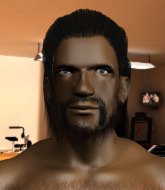
182 cm
20
181 lbs
5 - 2 - 1 |
BJJ Purple Belt
Solid boxing
Very quick |
|
BJJ Blue Belt
Excellent boxer
Solid chin |
|
| |
|
Ladies and gentlemen. This fight is 3 rounds, in the welterweight division.
Introducing the fighter to my left, fighting out of the red corner.
With a record of
1 - 0 - 0, fighting out of St Petersburg, Yuki Kondo!
And introducing the fighter to my right, fighting out of the blue corner.
With a record of
5 - 2 - 1, fighting out of New York, Stuart Stardust!
The judges for this bout are Jorge Garcia, Lou da Vinci and Russell Pearce.

The bell rings for round one and we are underway!
Stardust misses with a body shot.
We've been hearing reports that Kondo has been drilling takedowns in recent sessions so let's see if that has an impact on the result of this fight.
Kondo has a takedown stuffed.
Stuart Stardust seems to be the more aggressive standup fighter in this bout.
Kondo dodges the punch combination from Stardust.
A shot to the liver by Kondo. Beautiful body shot.
Stardust paws at his opponent with the jab and then lunges in with a straight, right on the button.
Stardust just misses with a punch to the body.
Kondo fakes a head shot and lands one to the body.
Stardust tries a head kick but it misses.
We've had a slow start to the round here - hopefully the action picks up.
Stardust walks straight into a jab right on the nose. That one stung - he's blinking and trying to clear his head.
Stardust swings wildly with a right hand that was never going to find it's target.
Stardust fails to land with a series of punches.
Stardust throws a wild combination but nothing lands.
Kondo scores with a hook to the body. Stardust takes a step back and tries to catch his breath.

That's one minute gone in the round.
Stardust throws a hard body shot but it just misses.
Kondo tries to counter with a takedown but Stardust is quick to defend against it.
Stardust drops his hands momentarily and Kondo takes advantage with a crisp shot to the head.
Stardust takes one on the chin but seems OK.
Stardust scores with a reasonable looking shot to the body. Kondo doesn't seem bothered though.

Kondo pushes Stardust up against the cage in a clinch.
Kondo lands a hook that snaps the head of Stardust backwards.
Kondo lands on the inside with an uppercut.

It looks like Stuart Stardust has been cut.
Kondo will no doubt start fighting again in a minute but for now he's just having a little rest, leaning Stardust up against the cage.
Stardust tries to work over Kondo's body with a swooping hook but it only glances the target.
Stardust lands punches inside but they're not really causing much damage.
Kondo scores with an uppercut up the middle.
Kondo stalling against the cage.
Stardust doesn't land with the attempted body shot.

That's two minutes gone in the round.
The crowd cheering loudly, showing their appreciation for the quality fight we're seeing here.
Stardust misses with a punch to the body.
Stardust wants to break free but Kondo has control.
Good body shot from Kondo.
Stardust's coach down at Midnight MMA was telling us pre-fight that they have been working on Stardust's balance. Obviously they view that as a key factor in the outcome of this fight.
Kondo doesn't land with the attempted body shot.
A shot in the inside from Stardust.
An uppercut on the inside fails to land for Stardust.
Kondo has a body lock and is looking for a takedown. Stardust is bouncing around trying to prevent the takedown and somehow he has indeed managed to stay on his feet.
Kondo gets through Stardust's defenses to land a nice punch to the side of the head.
Kondo tries for a takedown. No joy.
That's three failed takedown attempts in the round for Yuki Kondo. That's going to take a lot out of him.
Kondo stalls.
Stalling in the clinch from Kondo.
Stardust is trying to maintain a safe position but Kondo gets an underhook and turns Stardust into the cage.
The two fighters are working to gain dominance in the clinch.
Kondo slows down the pace here.

That's three minutes gone in the round.
Stardust misses with a shot to the kidneys.
Stardust has had enough of the clinch but Kondo keeps him there for the moment.
An uppercut to the body lands inside from Kondo.
Stardust misses with the head strike.
A left hand lands to the body for Kondo.
Stardust is trying to break free.
Kondo lands a nice shot to the body.

Stardust is fighting off a takedown attempt but Kondo is just too persistent for him and manages to trip Stardust to the mat. Stardust regains guard as soon as the fighters hit the mat.
Kondo controls from within his opponent's guard.
Kondo advances to half guard.

That's four minutes gone in the round.
Kondo stalling.
Kondo wants to free his trapped foot but Stardust is holding on for dear life with his legs.
The fighters are pressed up against the cage, both looking to find a bit of space to work.
Kondo controlling the action here.
Kondo not landing any meaningful shots this time.
And thats the end of the round the fighters go back to their corners.
Yuki Kondo dominated that round.
The cut man is working on Stuart Stardust's cut.
OK. That's time! The bell goes and we're back to the action.

Excellent takedown into side control there by Kondo.
Stardust really doesn't want to stay on the ground with Kondo. If he can't get it back to his feet, it's only a matter of time before he'll be tapping out.
The fighters are starting to perspire pretty heavily.
Stardust being controlled for a moment.
The ref warns both fighters not to hold the cage as they work up against the meshing.
Kondo has controlled the position for a good 20 seconds, which will no doubt be starting to frustrate his opponent.
We've had a slow start to the round here - hopefully the action picks up.
That's one minute gone in the round.
Kondo sitting in side control, looking to soften his opponent up with elbows and hammerfists but Stardust is avoiding damage well and looking to escape the position.
Kondo content to control the pace. The referee will try and keep them active though.
Stardust managing to avoid any damage from the strikes thrown by Kondo.
Stardust is being controlled here.

The referee has motioned to the fighters to stand back up. He just wasn't happy with the level of activity.
Stuart Stardust is looking to throw some combinations by the looks of things.
That's two minutes gone in the round.
A few boos can be heard. I'm sure they will multiply if the fighters don't pick up the pace.
Stardust throws a sloppy head kick and Kondo moves out of range easily.
Stardust misses with a few strikes there.
Kondo closes the distance and clinches.
Kondo lands with a short punch from the clinch.
The two fighters are working to gain dominance in the clinch.
Kondo avoiding damage as Stardust throws knees to the body.
The referee calls for Kondo to work.
Stardust being controlled against the cage.
Kondo gets a warning from the ref for wasting time.
Stardust misses with a knee strike.
Kondo is looking to control Stardust's arms but Stardust gets an underhook and turns him. Now Kondo has his back to the cage.
Stardust gets double underhooks to prevent a takedown attempt from Kondo.
Kondo blocks an uppercut.
That's three minutes gone in the round.
Stardust swings away with an uppercut that misses.
Stardust lands a hook to the body. It's hard to tell if that hurt Kondo or not.
Stardust tries to land a shot to the body but it's blocked.

Stardust pushes off and circles away, back to the middle of the mat.
Stardust throws a body shot but no joy.
Stardust moves his head to the side to avoid a jab but walks straight into a cross.
Stardust looks to land a combination but Kondo avoids it well.
Stardust throws a wild combination but nothing lands.
Stardust looks to land a combination but Kondo avoids it well.
Kondo is trying to close the distance and clinch up, after that failed offence from Stardust.
Stardust misses with a two punch combination.
A counter left hand to the body from Kondo misses its target.
Stardust falls off balance throwing a combination
and Kondo counters nicely by changing levels and landing a hook to the body.
Stardust swings wildly with a couple of big hooks
and Kondo counters with a nice jab to the body that keeps Stardust thinking.
That's four minutes gone in the round.
Jab from Stardust.
Kondo misses with a double jab.
The crowd are loving this. Great action here.
No luck for Kondo with that takedown attempt.
Stardust walks straight into an uppercut. Luckily it didn't land flush.
Stardust throws a right and a left that both miss.
Stardust rushes in with a sloppy looking punch
and Kondo counters with a crisp hook to the side of the head.
Stardust throws a right hand that misses
and Kondo counters with a quick right hand to the jaw.
Kondo lands a nice shot that snaps Stardust's head back.
Stardust throws a lazy right hand but Kondo sees it coming a mile off and sidesteps it easily.
Kondo scores with a jab to the body.
Kondo avoids a punch combination nicely.
Kondo tries to counter by moving into the clinch but Stardust manages to circle out of the way.
And thats the end of the round the fighters go back to their corners.
Yuki Kondo dominated that second round.
The cut man is working on Stuart Stardust's cut.
The minute break is over - no more time for sponges and pep talks - back to the action! This is the final round!

A telegraphed takedown attempt from Kondo is defended easily by Stardust.
Kondo moving in and out of range nicely, whilst landing the scoring shot.
Stardust lands the left hand.
Decent striking displayed by Kondo there.
Stardust lands with a shot to the body.
Stardust throws a series of punches but Kondo avoids them all with ease.
We've had a slow start to the round here - hopefully the action picks up.
Stardust fakes high and swings low for a body shot but Kondo manages to avoid it.
Stuart Stardust seems to be getting the better of the standup.
Stardust takes a body punch that cleary hurt but he's trying not to show any weakness.
Kondo dips down and scores with a jab to the body.
Kondo fakes a head punch and goes low to the body. Nicely done.
Stardust throws a combination that misses
and Kondo counters nicely by changing levels and landing a hook to the body.
That's one minute gone in the round.
Excellent takedown into side control there by Kondo.
Stardust takes a big intake of breath there - he's definitely tired.
Kondo tries to score with some ground and pound. Stardust controls his posture well this time though and the shots don't do any damage.
Kondo misses with the ground and pound.
Kondo in side control, just content to control the action for now.
Kondo in side control, trying to ground and pound but not landing this time.
That's two minutes gone in the round.
Stardust defending against the ground and pound.
Kondo taking a breather here.
The referee claps his hands together and tells the fighters to work.
Kondo working the ground and pound but Stardust is defending the strikes.
Kondo creates some space and throws a big elbow, but Stardust sees it coming and moves his head just enough to avoid the strike.
Kondo is really dominating this fight. Is there anything that Stardust can do to turn this around?
A lull in the action here as Kondo stalls from top position.
The ref stands the fighters back up due to a lack of activity.
That's three minutes gone in the round.
Stardust takes one on the button.
Stuart Stardust is looking to keep the fight on the feet at all costs.
Stardust misses with a combination
enabling Kondo to counter with a crisp jab.
Stardust ducks down and throws a hook to the body but Kondo moves away.
Kondo lands a jab-cross combination.
Yuki Kondo is fighting for a decision here - he's started to take the cautious approach.
Stardust connects with a good right hand that stumbles Kondo. Kondo circles away out of range and recomposes himself.
Kondo fakes high and swings low for a body shot but Stardust manages to avoid it.
Stardust throws a jab, cross combination which is slipped
and Kondo cracks him with a counter punch right on the button.
Stardust fakes a jab and throws a low kick but Kondo checks it well.
Kondo lands with a nice combination. Stardust backs away looking to recover.
This has been an exciting period of action!
Kondo shoots in looking for a double leg takedown. Stardust defends it nicely.
That's four minutes gone in the round.
Kondo throws a hook to the body but it doesn't connect.
Stardust lunges in with swinging rights and lefts but Kondo circles away quickly and effectively.
Kondo throwing a counter right hand but Stardust manages to avoid it.
Stardust misses with a wild combination.
Kondo avoids a punch combination nicely.
Kondo is looking for a takedown here. He's shot in and has managed to get it, finishing up in Stardust's half guard.
Kondo is controlling the pace.
And that's the end of the fight!
Yuki Kondo showed his dominance in that final round.
Well Kondo has outscored his opponent in every aspect of the fight today. Only a scarily incompetent judge or two will keep him from a well deserved win... Over to the ring announcer for the scorecards.
Ladies and gentlemen, after 3 rounds of action, we go to the scorecards for a decision.
Judge Jorge Garcia scores the fight 30:27
Judge Lou da Vinci scores the fight 30:27
Judge Russell Pearce scores the fight 30:27
In favor of your winner, by unanimous decision... Yuki Kondo!
|
|
|
|
|
|
|
|
|
|
|
|
|
|
|
|
|
|
|
|
|
|
|
| S |
C
A |
G |
S |
C
B |
G |
|
S |
C |
G |
|
energy
A | B |
|
hype
A | B |
|
pop
A | B |
|
mgr
A | B |
|
FIGHT
RATING
47% |
|
|
|
|
|
|

