|
|
PBP Commentary |
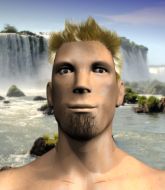
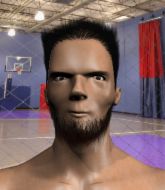
Coming up we have a welterweight MMA rules bout between Connor McGuinness (ranked 0 p4p, 0 weight class) and Edward Durden (ranked 0 p4p, 0 weight class). McGuinness's entrance music is Ain't a party without me . A fine choice. Durden has chosen Monster as his entrance music, which hasn't gone down very well with the crowd. Connor McGuinness is staring across the cage at his opponent, tweaking his nipples... Tweaking his own nipples that is.
 |
|
 |
| 183 cm
24
185 lbs
7 - 5 - 0 |
|
183 cm
28
178 lbs
8 - 5 - 0 |
BJJ Brown Belt
World class boxer
Granite chin |
|
Good wrestler
Counter fighter
Solid chin |
|
| |
|
Ladies and gentlemen. This fight is 3 rounds, in the welterweight division.
Introducing the fighter to my left, fighting out of the red corner.
With a record of
7 - 5 - 0, fighting out of Los Angeles, Connor McGuinness!
And introducing the fighter to my right, fighting out of the blue corner.
With a record of
8 - 5 - 0, fighting out of Los Angeles, Edward Durden!
The judges for this bout are Frank Antenori, Jack Bonds and Don Winkell.

The bell rings for round one and we are underway!
McGuinness misses with an uppercut. Durden saw that one coming.
Durden fails with the takedown.
McGuinness went nuts there looking for a big combo counter but none of the flurry connected.

McGuinness moves into the clinch.
Durden has dropped down and is looking to force the takedown but it's defended by McGuinness after a bit of a struggle.
McGuinness stalling the fight.

Durden has clasped his hands together around McGuinness's back... aaand, he's got a takedown into side control. Nicely done.
We've had a slow start to the round here - hopefully the action picks up.
Durden is looking to take a break and control but McGuinness is keeping him honest, looking to work from the bottom.

Durden is looking to finish here, going for an Americana. McGuinness knows the correct defense though, so he's OK.
The ref warns both fighters not to hold the cage as they work up against the meshing.
You can see the frustration on McGuinness's face, being in this tough position on the bottom.

That's one minute gone in the round.
McGuinness trying to control but Durden flips him over like a cheap hooker and has his back!
Durden working for a choke but McGuinness is defending well.
The fighters are pressed up against the cage, both looking to find a bit of space to work.
McGuinness tries to break free.
Durden gets his hooks in and is throwing strikes.
Durden is not going to allow McGuinness to sit and survive in this position.
Durden has got his arm under McGuinness's chin working for the choke
has he got it? It looks pretty tight! Oh! McGuinness has spun round into Durden's guard beautifully! Well done that man!

That's two minutes gone in the round.
McGuinness stands up over Durden, holding his feet. He dives back in and lands a decent shot to the head.
Durden looking for submissions from the bottom but instead McGuinness passes into side control.
Durden tries to work a leg under to get back to half guard but McGuinness wriggles his own leg back out and remains in side control.
You can see the frustration on Durden's face, being in this tough position on the bottom.
McGuinness sitting in side control, looking to soften his opponent up with elbows and hammerfists but Durden is avoiding damage well and looking to escape the position.
An elbow from McGuinness crashes against the mat.
The fighters are going at a pretty good pace and they're both starting to sweat now.
McGuinness is looking to take a break and control but Durden is keeping him honest, looking to work from the bottom.
Durden sneaks a leg under to get back to half guard.

That's three minutes gone in the round.
Durden tries to roll over but McGuinness keeps him under control.
McGuinness trying to pass the guard but Durden defending well.
Nice strikes from McGuinness there.
Durden is doing well to control the position and prevent McGuinness from advancing to side control.
Durden is looking to sinch up a guillotine here but McGuinness pulls his head out easily.
McGuinness is looking to pass the guard... He's managed it - he's now in full mount!
McGuinness breaks from Durden's wrist control and lands an elbow.

That's four minutes gone in the round.
Durden working to try and regain half guard.
McGuinness content just to control the position here.
Durden is looking to improve his position but McGuinness isn't that keen on the idea.
McGuinness scores with a couple of good head shots there.
The crowd thankful this round is nearly over.
McGuinness is trying to take his opponent's back.
Durden really trying hard to get back to half guard here.
And thats the end of the round the fighters go back to their corners.
Connor McGuinness dominated that round.
The referee calls time. The cornermen exit stage left and we're back to business.

Durden doesn't react quick enough there as he takes a shot to the body.
Durden keeping a good distance there, avoiding the body shot.
McGuinness tests Durden's chin there with a solid looking shot.
McGuinness lands a glancing blow to the side of Durden's head.

Durden clinches up against the cage.
McGuinness has Durden pushed against the cage.
We've had a slow start to the round here - hopefully the action picks up.
McGuinness tries a body shot but Durden blocks it.
McGuinness is pushing Durden up against the cage, for a bit of lean and pray action. Action being used the in the loosest possible sense of the word.
That's one minute gone in the round.
McGuinness is defending well against a takedown attempt.

McGuinness escapes the clinch and we're back to striking.
Durden shoots for a double leg takedown but McGuinness sprawls well. He's pushed Durden's face into the mat and manages to get back to his feet relatively easily.
McGuinness closes the distance and clinches.
McGuinness is really dominating this fight. Is there anything that Durden can do to turn this around?
McGuinness taking a breather.
Durden drops to a knee looking for a takedown but McGuinness gets the underhooks and prevents it.
Connor McGuinness has stuffed three takedown attempts in the round now. That's going to take a lot out of Edward Durden.
That's two minutes gone in the round.
McGuinness presses Durden against the cage and delivers a mid-strength body shot.
Durden goes for a takedown attempt but McGuinness pushes him away and we're back to fighting at a distance.
Durden circles away from the clinch attempt
so Durden counters with a double leg into guard. Good agility.

McGuinness is looking for a triangle but Durden pushes his legs off easily.
McGuinness is throwing his legs up, looking for submissions. Durden is aware though and is defending well.
That's three minutes gone in the round.
Durden trying to control but McGuinness is working from the bottom.
Durden showing good wrestling skills to control the position.
McGuinness looking to control.
Durden drops back, looking for a kneebar! McGuinness looks panicked! The fighters roll across the mat, one looking to finish, one looking to escape. McGuinness looks to have wriggled free... Yes, he's got his leg free and he's dived into side control! Good work there from McGuinness!

McGuinness landing with strikes to the head and body from side control.
Durden can't do much from the bottom here.
Durden is trying to get back to half guard. He's pushing on McGuinness's leg. He's managed it. Nice work.
That's four minutes gone in the round.
McGuinness wants to control but Durden is keeping him busy.
Durden trying to control from the bottom.
Durden is looking to get back to full guard here but McGuinness has managed to pass to side control instead.
Durden manages to get one leg in to regain half guard.
Durden misses with some strikes from the bottom.
Durden looking for submissions off his back.
Durden missing with punches from the bottom.
Boooooooooooooooooooo!!! God, this has been a terrible round. Come on you two, sort yourselves out!
McGuinness wants to pass to mount but Durden is defending the position.
And thats the end of the round the fighters go back to their corners.
Connor McGuinness dominated that second round.
The fighters' corners scream their final instructions, as the referee calls time. Here we go, back to the action! And we move into the final round!

Durden takes a solid shot to the body. That one hurt him but he's trying not to show it.
A slow jab from McGuinness misses its intended target.
Durden feints the counter takedown.
McGuinness scores with a straight right hand, right through his opponent's guard.
Durden ducks right into an uppercut from McGuinness.
McGuinness lands a pitter patter jab to the forehead of his opponent.
Durden takes a big uppercut there. He seems a bit wobbly but no, he's OK.
Durden is looking for a takedown here. He's shot in and has managed to get it, finishing up in McGuinness's half guard.
Edward Durden has got the better of the ground game so far.
Durden is looking for a kimura but McGuinness is holding onto that half guard position, so it's hard for Durden to get the leverage.
The crowd cheering loudly, showing their appreciation for the quality fight we're seeing here.
The fighters are battling for position here. McGuinness manages to regain full guard. Nice work.
Durden got a little sloppy there for a moment and McGuinness has worked his way into a loose triangle - can he finish it?! No, Durden has managed to get both his arms back between McGuinness's legs - danger averted.
McGuinness keeping full guard, as Durden tries to pass.
That's one minute gone in the round.
McGuinness looking for submissions off his back, moving his hips, looking for an opening.
Durden got a little sloppy there for a moment and McGuinness has worked his way into a loose triangle - can he finish it?! No, Durden has managed to get both his arms back between McGuinness's legs - danger averted.
Durden trying to control but McGuinness is working from the bottom.
Durden content to stall in guard here.
McGuinness looking for submissions off his back, moving his hips, looking for an opening.
Durden distracts McGuinness with his right hand and drops a big elbow with his other arm.
That's two minutes gone in the round.
The crowd are starting to boo a lack of action.
Durden trying to control but McGuinness is working from the bottom.
Durden working in close now, lands a nice elbow to the side of McGuinness's head.
There's a bit of a scramble here and now McGuinness is on top in guard.
McGuinness trying to control the position from guard on top but Durden is wriggling around, looking for whatever he can.
McGuinness wants to pass the guard but Durden is keeping the position.
Durden looking to control.
McGuinness wants to pass the guard but Durden is keeping the position.
That's three minutes gone in the round.
Durden looking to sweep here. No luck so far.
McGuinness trying to control but Durden is working from the bottom.
Durden working for a triangle but McGuinness defends it easily.
McGuinness looking to pass the guard.
Durden looking for a guillotine here but McGuinness defends easily.
McGuinness throws a big right hand that misses.
That's four minutes gone in the round.
A few boos can be heard. I'm sure they will multiply if the fighters don't pick up the pace.
McGuinness is just sitting in guard, looking to avoid any submissions.
McGuinness slips nicely into half guard.
McGuinness wants to take a breather but Durden is having none of it.
McGuinness is really struggling to control Durden but he's trying to hold on to the position.

The referee has motioned to the fighters to stand back up. He just wasn't happy with the level of activity.
The crowd thankful this round is nearly over.
McGuinness slips in close and lands a nice hook before moving back out of range.
Edward Durden has stepped it up - he knows he needs a finish here!
Connor McGuinness is fighting for a decision here - he's started to take the cautious approach.
Nice sprawl there from McGuinness as Durden shoots in.
A little feinted left hand from McGuinness on the counter but he doesn't commit to it.
And that's the end of the fight!
Connor McGuinness showed his dominance in that final round.
Well McGuinness has outscored his opponent in every aspect of the fight today. Only a scarily incompetent judge or two will keep him from a well deserved win... Over to the ring announcer for the scorecards.
Ladies and gentlemen, after 3 rounds of action, we go to the scorecards for a decision.
Judge Frank Antenori scores the fight 30:27
Judge Jack Bonds scores the fight 30:27
Judge Don Winkell scores the fight 30:27
In favor of your winner, by unanimous decision... Connor McGuinness!
After winning the bout, Connor McGuinness thanked all his fans and promised he'd do even better in his next fight. The crowd seemed to love his humility.
|
|
|
|
|
|
|
|
|
|
|
|
|
|
|
|
|
|
|
|
|
|
|
| S |
C
A |
G |
S |
C
B |
G |
|
S |
C |
G |
|
energy
A | B |
|
hype
A | B |
|
pop
A | B |
|
mgr
A | B |
|
FIGHT
RATING
32% |
|
|
|
|
|
|
