|
|
PBP Commentary |
Coming up we have a light heavyweight MMA rules bout between Randy Alcatraz (ranked 0 p4p, 0 weight class) and Brad May (ranked 0 p4p, 0 weight class). May is bouncing up and down as he enters the arena, backed by For Whom The Bell Tolls - Metallica. There are an array of beautiful celebrities at ringside tonight! I wonder if any of them paid for their tickets.
 |
|
 |
| 195 cm
25
206 lbs
8 - 4 - 0 |
|
188 cm
22
215 lbs
7 - 1 - 0 |
Abu Dhabi Champ
Solid boxing
Cardio machine |
|
BJJ Brown Belt
Excellent MT
Good gas tank |
|
| |
|
Ladies and gentlemen. This fight is 3 rounds, in the light heavyweight division.
Introducing the fighter to my left, fighting out of the red corner.
With a record of
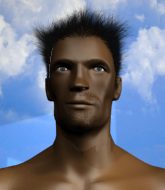
8 - 4 - 0, fighting out of Tokyo, Randy Alcatraz!
And introducing the fighter to my right, fighting out of the blue corner.
With a record of
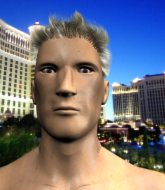
7 - 1 - 0, fighting out of Helsinki, Brad May!
The judges for this bout are Hirohito Nitta, Shirou Masuda and Taro Takaoka.

The bell rings for round one and we are underway!
Alcatraz connects nicely with a jab. Noted by the judges no doubt.
May with poor footwork there. He got himself in a bit of a tangle, enabling Alcatraz to score with a decent uppercut.
May is looking to chop away at Alcatraz's legs.
May misses with a low kick.
We've been hearing reports that Alcatraz has been drilling takedowns in recent sessions so let's see if that has an impact on the result of this fight.
May throws a couple of head shots and lands with the final one - a decent hook, which struck Alcatraz on the side of the head.

It looks like Randy Alcatraz has been cut.
May scores with a leg kick.
May uses some good footwork to avoid the body shot by Alcatraz.
A countering left hand to the body from May misses.
May throws a wild body kick that Alcatraz sees coming a mile off.
May takes one to the side of the head.
May is the aggressor but that punch slipped nicely by Alcatraz.
Alcatraz connects with a nice looking jab.
A big left from Alcatraz misses.
Alcatraz swings for the body but May moves out of range.

Alcatraz takes the fight into the clinch.

That's one minute gone in the round.
Alcatraz has dropped down and is looking to force the takedown but it's defended by May after a bit of a struggle.
With the fighters clinched against the cage, May creates a bit of distance for himself and scores with a nice uppercut.
Alcatraz has hold of a leg and is looking for a trip takedown. May avoids it nicely though and we remain in the clinch.
May can't break the clinch.
A head punch on the inside from Alcatraz fails to land.
May scores with a shoulder strike.
May misses with a hook from the clinch.
Alcatraz throws a head punch that misses.
Alcatraz swings away with an uppercut that misses.

May breaks the clinch and we're back to striking at distance.
May misses with an uppercut. Alcatraz saw that one coming.
Alcatraz half commits to a counter takedown before pushing away, out of range.
A leg kick checked by Alcatraz.
Alcatraz pushing out the jab but it's not landing.

That's two minutes gone in the round.
May ducks under a wild hook from Alcatraz.
Alcatraz shoots in looking for a double leg takedown. May defends it nicely.
That's three failed takedown attempts in the round for Randy Alcatraz. That's going to take a lot out of him.
Alcatraz throws a jab when May was well out of range.
May feints a counter leg kick.
May pivots as if he's going to throw a leg kick but stops half way.
May tries to bum rush Alcatraz with a series of wild strikes but Alcatraz uses good footwork to avoid the assault.
May scores with a leg kick.
May slips a straight right by Alcatraz.
May throws out a counter right but Alcatraz avoids it with no problem.
May uses some good footwork to avoid the body shot by Alcatraz.
May catches Alcatraz with a nice straight right. He seems pissed - ooooh, it's on now! On like donkey kong!
The crowd are loving this. Great action here.
May misses with a low kick.
Alcatraz feinted with a counter takedown.

That's three minutes gone in the round.
Decent striking displayed by May there.

Alcatraz closes the distance, clinches up and gets a nice trip takedown into side control. Very smooth.
May tries to bench press Alcatraz off him but Alcatraz keeps the position.
Alcatraz trying to control the action but May is working from the bottom.

Alcatraz tries for a kimura but May is defending well.
May is trying to improve his position.
May is trying to control Alcatraz's posture but Alcatraz avoids it.
Alcatraz in side control, trying to ground and pound but not landing this time.

That's four minutes gone in the round.
May isn't going anywhere.
May tries to bench press Alcatraz off him but Alcatraz keeps the position.
Alcatraz misses with a strike but at least he's keeping busy, looking to cause some damage - that will still help him when it comes to the judges scorecards.
The referee asks Alcatraz politely if he wouldn't mind getting on with it and actually doing something. Alcatraz prefers to stall for the moment though.
Alcatraz wants to control but May is keeping him busy.
The ref warns both fighters not to hold the cage as they work up against the meshing.
May is trying to get back to half guard.
May has found himself in a tricky position here. He's been working his transitions in training so let's see if he can work his way out of it.
Alcatraz wants to control but May is keeping him busy.
And thats the end of the round the fighters go back to their corners.
That was a close round but I would say that Randy Alcatraz will probably get the nod.
The cut man is working on Randy Alcatraz's cut.
That's the end of the round. The referee orders the cornermen out of the cage so we can get back down to business.

Alcatraz throws a looping left and ducks down for a takedown. He's got his arms around May's waist but May gets an underhook and avoids the takedown by throwing Alcatraz off to one side.
May thinks about the counter body kick.
Alcatraz takes a head kick and shrugs it off.
May slaps away a takedown attempt from Alcatraz, before circling back to the center of the mat.
Alcatraz moves out of range as May throws a body kick.
A looping hook to the body misses from May. Alcatraz does a little dance to reset his feet.
Alcatraz lands a straight punch to the body, keeping May at a distance.
May throws a sloppy head kick and Alcatraz moves out of range easily.
We've had a slow start to the round here - hopefully the action picks up.
May staying out of range there.
Alcatraz doesn't succeed with the takedown
and Alcatraz takes a counter punch right on the button for his troubles.
That's three failed takedown attempts in the round for Randy Alcatraz. That's going to take a lot out of him.
Danga de danga de dang - May scores with a four punch combination!

Alcatraz is rocked!
That's one minute gone in the round.
May motions for Alcatraz to come forward. May throws a leg kick but it misses it's target.
Alcatraz lands a vicious shot with the stealth of a sniper and the strength of a viper. Are vipers that strong? I can think of lots of things that are stronger than a viper - not many rhyme with sniper though.
May keeps the fight standing with a nice sprawl.
May stuffs a takedown. It's all about dictating where the fight takes place and May wants it to stay on the feet.
May slips under a jab.
Horrible takedown attempt by Alcatraz or perhaps it was just good defense by May, which made it look bad.
Alcatraz checks the leg kick nicely there.
Alcatraz wants to clinch up but May keeps it at a distance.
May throws a body kick but he was well out of range there.
Alcatraz changes levels looking for a counter takedown but doesn't commit.
That's two minutes gone in the round.
Alcatraz on the receiving end of a decent leg kick there by May. May obviously looking to wear him down.
Alcatraz throws a hook to the body but it doesn't connect.
May steps to the side to avoid the strikes from Alcatraz.
May dances in quickly and lands a nice inside leg kick on Alcatraz. That did some damage!
Ooooh, nice body kick lands from May. Alcatraz shrugs it off though.
Alcatraz scores with the left hand. May knows he should have avoided that one.
Alcatraz throws a lazy right hand but May sees it coming a mile off and sidesteps it easily.

May lands a big head kick that sends Alcatraz tumbling to the mat! May takes a step backwards and waves Alcatraz back to his feet - he wants the finish!
Oh Alcatraz is still all over the place! His legs are completely gone! Will he be able to recover?!!
The crowd are loving this. Great action here.
Alcatraz blocks a low kick nicely.
May stuffs the takedown.
May misses with an attempted mid kick.
Alcatraz half commits to a counter takedown before pushing away, out of range.
May avoids the body shot from Alcatraz.
May only half commits to the counter leg kick.
Alcatraz seems to have got his legs back now.
That's three minutes gone in the round.
Alcatraz misses the jab.
May feints a counter leg kick.
Alcatraz fails miserably with a takedown attempt.
May lands a nice looking body kick.
May fakes a head punch and goes low to the body. Nicely done.
The fighters circling - May throws out the jab but it was never going to land.
Alcatraz goes for a double leg but May avoids the attempt and the two fighters end up clinched against the cage as May continues to drive forward.
May only half commits to the counter leg kick.
Alcatraz misses with a body shot. Nice footwork from May.
Alcatraz closes this distance looking for a takedown but May circles away.
Alcatraz misses with a looping left.
That's four minutes gone in the round.
Alcatraz sees a low kick coming and goes to check it, but it's actually a body kick and it thuds into his unprotected ribs.
May lunges at Alcatraz with a hook that half lands and is half blocked by Alcatraz's hand.
Alcatraz loads up on a big right hand but May slips the punch.
May throws a body punch but Alcatraz moves out of range.
Alcatraz misses with a hook to the body
and May counters with a nice leg kick.
A big left from May misses.
Alcatraz goes for a double leg but May avoids the attempt and the two fighters end up clinched against the cage as May continues to drive forward.
This is a great period of action - very entertaining stuff!
May lands a nice looking body kick.
Both fighters are absolutely exhausted here.
A looping hook to the body misses from Alcatraz. May does a little dance to reset his feet.
May only half commits to the counter leg kick.
Alcatraz moves away from the strike by May.
Alcatraz misses with a hook.
Alcatraz backing away here, and May unleashes a leg kick that just misses.
And thats the end of the round the fighters go back to their corners.
Brad May showed his class in that round. I'd imagine he'll take it on all the scorecards.
The cut man is working on Randy Alcatraz's cut.
The referee calls time. The cornermen exit stage left and we're back to business. This is the final round!

Alcatraz walks into a left hand.
Alcatraz throws an overhand right that lands on May's shoulder, as May tries to avoid the shot.
A really sloppy takedown attempt there from Alcatraz.
Brad May seems to be getting the better of the standup.
May motions for Alcatraz to come forward. May throws a leg kick but it misses it's target.
Alcatraz moves out of range of the body kick from May.
Alcatraz feinted with a counter takedown.
May takes a big uppercut there. He seems a bit wobbly but no, he's OK.
Alcatraz fakes a strike and closes the distance, dragging May to the ground. Alcatraz is now in May's guard.
We've had a slow start to the round here - hopefully the action picks up.
Alcatraz postures up and lands some nice ground and pound.
May has Alcatraz pulled in close to control his posture.
Alcatraz drops back for a leg but he's not going to get it - he lets go and May dives on top into guard.

That's one minute gone in the round.
May stands up and looks to throw the legs aside to pass to side control. Alcatraz swivels though and keeps the full guard.
May must be cautious of submissions here, given that his opponent has the superior Jiu Jitsu.
Alcatraz has a butterfly guard looking to sweep but May has passed into side control.
Alcatraz is letting May control him for a moment.
Alcatraz tries to improve position but can't.
May remains in side control and seems content to stay there. It's a versatile position from which he can work both strikes and submissions, whilst maintaining that control, so maybe he'll sit here for a while.
That's two minutes gone in the round.
There's not a lot going on here and the crowd are letting the fighters know they're not willing to tolerate a lack of action.
Alcatraz manages to get back to half guard.
Alcatraz is trying to control but can't.
Randy Alcatraz overall seems to be getting the better of the ground position in the fight so far.
May controlling the action here.
Alcatraz is staying active underneath May, who seems content to just control the action from this position.
May keeping composed on the top, looking to control the action.
Alcatraz is concentrating on defense, preventing May from advancing position.
May passes to side control.
That's three minutes gone in the round.
May wants to control but Alcatraz is keeping him busy.
May is staying tight to Alcatraz's torso, preventing him from escaping.
Alcatraz is not content to let May control the position.

The referee has decided to stand the fighters back up, so we'll restart on the feet.
May slips under a jab from Alcatraz.
Alcatraz fails in his attempt to clinch.
May looking to take his opponent's legs away with the low kicks.
A looping hook to the body misses from Alcatraz. May does a little dance to reset his feet.
May is trying to counter with his kicks.
Brad May is looking to keep the fight on the feet at all costs.
Alcatraz closes the distance and clinches.
That's four minutes gone in the round.
Alcatraz misses with a short punch on the inside.
May is trying to slow down the pace in the clinch, to catch his breath.
May tries to stall but Alcatraz uses the opportunity to gain a better position.
Alcatraz tries to jump guard but he falls flat on his backside. May smiles and moves away.
Alcatraz closes this distance looking for a takedown but May circles away.
That's three failed takedown attempts in the round for Randy Alcatraz. That's going to take a lot out of him.
May tries to land a front kick but Alcatraz steps back. That was a bit too telegraphed.
Alcatraz fakes low and throws an overhand right that catches May on the side of the head.
May delivers a nice body kick.
The crowd thankful this round is nearly over.
May throws a leg kick which misses Alcatraz's front leg but catches the back leg as Alcatraz tries to avoid it.
May lands a front kick.
May tries to score with a leg kick but it misses it's target.
And that's the end of the fight!
Brad May comfortably won the final round on my scorecard.
I think May has won this one but let's see whether the judges agree with me. Over to the ring announcer for the scorecards.
Ladies and gentlemen, after 3 rounds of action, we go to the scorecards for a decision.
Judge Hirohito Nitta scores the fight 28:29
Judge Shirou Masuda scores the fight 28:29
Judge Taro Takaoka scores the fight 28:29
In favor of your winner, by unanimous decision... Brad May!
A victorious Brad May thanked his army of followers in his post fight interview, telling people to make sure they follow him on Twitter.
|
|
|
|
|
|
|
|
|
|
|
|
|
|
|
|
|
|
|
|
|
|
|
| S |
C
A |
G |
S |
C
B |
G |
|
S |
C |
G |
|
energy
A | B |
|
hype
A | B |
|
pop
A | B |
|
mgr
A | B |
|
FIGHT
RATING
45% |
|
|
|
|
|
|

